Table of Contents
Advertisement
Quick Links
Advertisement
Table of Contents

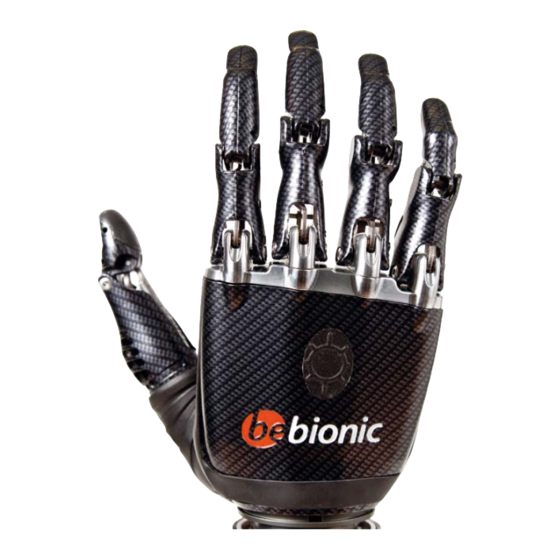
Summary of Contents for be bionic BBHLG
- Page 1 Technical Manual BBHMD* BBHLG*...
-
Page 3: Table Of Contents
Contents 1.0 Introduction 04-05 1.1 In the Case 1.2 Principal Dimensions 2.0 bebionic Grips 06-11 2.1 Factory Settings 2.2 Program Switch 2.3 Thumb Adjustment 2.4 Opposed Grips 2.5 Non-Opposed Grips 3.0 bebionic Glove 13-15 3.1 Care Instructions 3.2 Fitting the bebionic glove 3.3 Removing the bebionic glove 4.0 Connections &... -
Page 4: Introduction
1.0 Introduction This document contains important information for the correct use and set up of the bebionic hand. Read this document thoroughly before fitting a bebionic hand. These manual has been updated last on: 2017-04-03. A bebionic system is completed by adding from a selection of compatible system components including electrodes (or other input devices), battery systems, wrists and cables. -
Page 5: Principal Dimensions
691g bebionic medium hand with Multi-Flex Wrist BBHMD*QD-F 149mm + 25mm 661g bebionic medium hand with Flex Wrist Large Hand BBHLG*QD 125mm + 25mm 598g bebionic large hand with EQD Wrist BBHLG*SW 125mm + 25mm 577g bebionic large hand with Short Wrist... -
Page 6: Bebionic Grips
2.0 bebionic Grips The bebionic hand provides 14 different grip patterns, allowing the user to have a more complete device to assist them in their day to day life. The hand has two selectable thumb positions: opposed and non-opposed. Opposed places the thumb in opposition to the fingers on the hand, allowing grips like Tripod and Power. Non-Opposed places the thumb parallel with the fingers of the hand and allows grips like Key and Finger Point. -
Page 7: Program Switch
2.2 Program Switch A Program Switch is provided on the back of the hand. This has four functions; 1. Switch the hand ON and OFF A single press for approximately three seconds will switch the hand OFF. A single press for more than two seconds will switch the hand ON. 2. - Page 8 Grips 2.4 Opposed - Thumb in opposition to the fingers Tripod When the thumb is opposed, the hand closes into Tripod Grip with index and middle fingers meeting the thumb. Ring and little fingers continue to close until they meet resistance or the close signal stops. This type of grip allows users to pick up, hold and manipulate a variety of everyday objects such as car keys, coins, jar lids and pens.
- Page 9 SERIOUS WARNING The bebionic hand MUST NOT be used to operate a firearm. Active Index With the thumb opposed Active Index Grip will grasp the handle of an object with the middle, ring and little fingers and secure the grip with the thumb. The index finger will then close –...
- Page 10 Grips 2.5 Non-Opposed - Thumb is parallel with the fingers In the non-opposed thumb position, the four fingers partially close. The thumb then closes onto the side of the index finger. The thumb position may be raised and lowered without moving the other four fingers allowing for release, capture or reposition of the object being gripped.
- Page 11 Column This grip moves the thumb into the palm from a non-opposed position. The fingers then close over the thumb to provide a fixed column that can be used as a way to push heavier objects or larger buttons and switches.
- Page 13 3.0 bebionic Glove The bebionic glove is made from a multi-layered, variable hardness, silicone-based material, lined with fabric mesh. This construction resists soiling, wear and puncture damage. bebionic gloves provide high compliance with gripped objects. The fabric liner allows the glove to slide over the joints during motion, this reduces the amount of power need to drive the hand and conserves battery life.
-
Page 14: Bebionic Glove
bebionic Glove 3.2 Fitting the bebionic glove Move the thumb into the opposed Switch the hand OFF by pressing down the program position. switch on the back of the hand for approximately three seconds. CAUTION Do not attempt to fit the glove unless the hand is in glove donning mode. -
Page 15: Removing The Bebionic Glove
Ensure the fingers and thumb of the hand Hold down the program switch for four seconds to align correctly with the fingers and thumb of the exit glove donning mode and begin using the hand. glove. 3.3 Removing the bebionic glove Firstly oppose the thumb. -
Page 17: Wrist Options
4.0 Connections and Compatability A bebionic system is very versatile and allows a number of different power and connectivity options. Most options are detailed in the following section of this document. However if you have a question regarding a specific build not outlined in this document please contact your local supplier. -
Page 18: Power Information
4.3 Power Information WARNING System cables MUST NOT be cut while power is ON. This will short the battery and damage the system. Any damage caused in this way will void the bebionic warranty. Power Cables A bebionic hand uses five actuators and therefore requires a higher current supply than single motor devices. This can be accommodated safely using bebionic power cables. -
Page 19: System Connections
4.3 System Connections The system detailed below is suitable for a bebionic hand with Electronic Quick Disconnect, Multi-Flex Flex Wrist BBI=2200S bebionic 7.4V 2200mAh split or single cell battery B27804 battery switch and charge point with cable. 13E200=50/13E200=60 13E202=50/13E202=60 2x Electrode 50 Hz or 60 Hz 9E196 co-axial plug... - Page 20 The system detailed below is suitable for a bebionic hand with a Short Wrist BBI=2200S bebionic 7.4V 2200mAh split or single cell battery B27804 battery switch and charge point with cable. 13E200=50/13E200=60 13 E202=50/13E202=60 2x Electrode 50 Hz 13E190=150 or 60 Hz connector Please note: Part B27804 is supplied with each battery pack and will not need to be ordered separately, however part 13E190=150 will need to be ordered separately for hands with Short Wrist.
-
Page 21: System Compatibility
4.5 System Compatability CAUTION Use of unsuitable prosthetic components Injury due to unexpected product behaviour. - Use the product only in combination with components listed below. Electrodes Compatible electrodes 13E200, 13E202. Both are available to purchase and are optimized for use with bebionic. -
Page 23: Bebalance
5.0 bebalance+ bebalance+ has been designed to give you optimum control over the new bebionic small hand. It features many new tools which will help you and your patients optimize and customize the function of the hand. Language selection, electrode configuration with a simulation preview, and simplified menu systems are all included in bebalance+. CAUTION Please DO NOT program or control a bebionic system with unapproved, alternative software or hardware... -
Page 24: Installation
5.2 Installation Close all open applications Insert the bebalance+ CD Wait for Autorun Follow instructions on screen The default target directory is C:\users\<user>\bebalance+. An alternative installation directory can also be specified, however it is essential that the application directory and sub-directories have read and write permissions. If setup fails to automatically open, run it manually by doubling clicking on the installation program setup.exe on the CD. -
Page 25: Start Up
5.3 Start up Screen 5.4 Communications Upon opening the application, the screen shown below will 5.4.1 Introduction appear. The red highlighted areas show the following: To configure any bebionic hand for patient use, the communications must first be enabled between the hand 1) bebalance+ version, Steeper Group information and and its corresponding communications dongle. - Page 26 5.4.4 Communications Form A user can access the communications form by clicking on the communications button in the top right in the bebionic main form as shown below. Before any of the USB dongles can function correctly, each device driver file must first be installed. If the device drivers are not installed, please go to section 5.2 for installation information.
-
Page 27: Operating Modes
5.5 Operating Modes 5.4.7 Hand Configuration When the hand has been successfully connected, the buttons ‘Send to Hand’ and ‘Read from Hand’ will be 5.5.1 Overview enabled to allow the hand configuration to be read. The main screen below is where the configuration of the bebionic hands takes place. - Page 28 5.5.4 Control Options 5.5.7 Grip Selection The hand can be controlled not just by electrodes, but by Grip patterns can be selected as desired by the user by other transducers, such as force sensitive resistors and selecting the options in the relevant tables. linear transducers interfaced with a hand.
- Page 29 5.5.8 Operating Modes Certain modes only allow the use of a specific range of grip patterns that the user can have in their configuration. The following is a list of each operating mode. Control Operating Mode Interface Open and Close Strategy Control Options Grip Switch Response...
- Page 30 5.5.9 Advanced Options Close Dwell Time (Mode 1) In bebalance+, adjustment of further specific features can The minimum time in milliseconds the control signal has to be accessed by clicking on ‘Advanced’, which will open be asserted before being recognised as a Close signal. a dialog box.
-
Page 31: Device Information
5.6 Device Information History Clicking the ‘History’ button opens a list of saved configurations for the user. By entering a patient identifier Once a hand has been connected, the ‘Device Information’ and clicking the ‘Find’ button, the records can be filtered. button becomes active. -
Page 32: Electrodes
5.7 Electrodes To request a license key, click the ‘Request License Key’ button. An information form will appear with the details required by the customer services team, along with contact To monitor, review and adjust the electrode signals, select details. the ‘Electrode Screen’... - Page 33 One channel will be displayed with signals moving upwards, and the second channel generating signals moving downwards. When the trace reaches the right hand side of the display, it will automatically stop. To remove the previous trace, click the ‘Clear’ button, this will then automatically start a new one.
-
Page 35: Repairs
6.0 Additional Information, Warranty, Re- turns and Repairs There are a number of field repairs and replacement parts that are available for the bebionic. Instructions are set out in this section. For further advice on any repairs please contact the manufacturer’s customer service. For both parts and service, include details on date of purchase, size (medium, large) and side (left or right). - Page 36 Using a spare clevis link assembly from the tool kit. Place Bend finger forward to align the holes for the it into the slot in the proximal. Ensure that the curve of pivot pin. the clevis link curves away from the finger towards the palm.
- Page 37 6.1.1 Gaitor Removal Pull the rear strap down and over the EQD to reveal the Tilt the hand backward and stretch the strap over the serial number on the back of the hand. bottom of the EQD. Using the screwdriver with the 1.50mm hex bit con- Slide gaiter flaps out from under the tained within the toolkit, loosen the screws in the rear rear cover.
- Page 38 Completely remove the gaiter from Note the thumb cable position, as this is key when the hand. refitting a new gaiter. 6.1.2 Gaitor Refitting Slide the thumb section of the gaiter over the thumb. Ensure the thumb section of the gaiter is pushed all the Ensure the gaiter strap is under the thumb.
- Page 39 Carefully push the flap all the way home Ensure there is as small a gap as possible between the under the rear cover. gaiter and the rear cover. Retighten both of the screws in the Finished. rear cover. Note: Do NOT overtighten.
-
Page 40: Quality Assurance
6.2 Quality Assurance Steeper operate a UKAS approved quality management system and fully complies with the requirements of BS EN ISO 9001:2008, ISO27001:2005 & TickIT Issue 5. This certifies that Steeper meet the appropriate international quality standards for design, manufacture and supply of prosthetic products and user software. Steeper is registered with both the Medicines and Healthcare Regulatory Authority in the UK and the Food and Drugs Administration of the United States Government for the manufacture and supply of prosthetics and orthotics products. - Page 41 FCC Warning Statement This device complies with Part 15 of the FCC Rules. Operation is subject to the following two conditions: 1. This device may not cause harmful interference and 2. This device must accept any interference received, including interference that may cause undesired operation. •...
- Page 42 IMPORTANT NOTE In the event that these conditions can not be met (for certain configurations or co-location with another transmitter), then Industry Canada certification is no longer considered valid and the IC Certification Number can not be used on the final product. In these circumstances, the OEM integrator will be responsible for re-evaluating the end product (including the transmitter) and obtaining a separate Industry Canada authorization.
-
Page 43: Warranty
6.3 Warranty Warranty Terms The bebionic hand comes with a 2-year-standard warranty from Otto Bock Healthcare Products GmbH. In addition, the following warranty pacakges are available at the date of purchase: • 3-year-product warranty • 5-year-product warranty • Warranty extension from a 3- to 5-year-product warranty. The 2-year warranty extension can also be purchased subsequently. -
Page 44: Environmental Conditions
6.5 Environmental conditions Environmental conditions Storage and transport in original packaging -20°C/-4°F to +40°C/+104°F -20°C/-4°F to +40°C/+104°F Storage and transport without packaging max. 80% relative humidity, non-condensing -20°C/-4°F to +40°C/+104°F Operation max. 80% relative humidity, non-condensing 6.6 Disposal In some jurisdictions it is not permissible to dispose of these products with unsorted household waste. Disposal that is not in accordance with the regulations of your country may have a detrimental impact on health and the environment. - Page 46 www.bebionic.com Steeper Mayflower House 14 Pontefract Road Stourton LEEDS LS10 1TB Tel: +44 (0) 870 240 4133 Email: customerservices@steepergroup.com www.steepergroup.com RSLLIT317 Issue 1 2017...
Need help?
Do you have a question about the BBHLG and is the answer not in the manual?
Questions and answers