
Related Manuals for RTI Barracuda

Summary of Contents for RTI Barracuda
- Page 1 Barracuda & QABrowser Reference Manual - English - Version 4.3A RTI article number: 9620501-00...
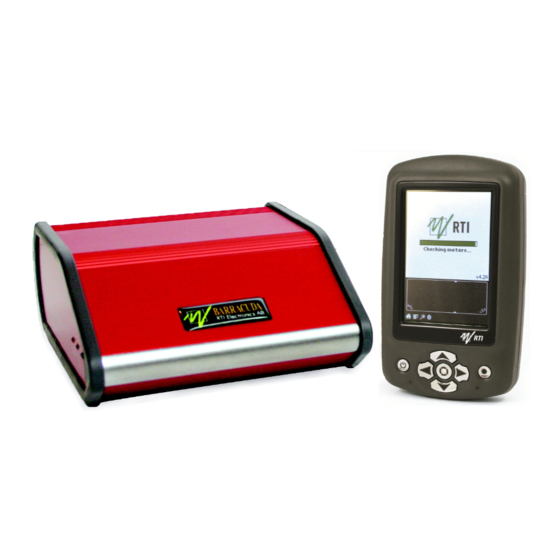
- Page 2 Welcome to Barracuda and the QABrowser The Barracuda is an X-ray Analyser/Multimeter for everybody working with Quality Assurance and Service of X-ray systems.
- Page 3 Notice NOTICE RTI Electronics AB reserves all rights to make changes in the Barracuda, the QABrowser, and the information in this document without prior notice. RTI Electronics AB assumes no responsibility for any errors or consequential damages that may result from the use or misinterpretation of any information contained in this document.
- Page 4 Intended Use Intended Use of the Barracuda System Accessory to diagnostic X-ray equipment to be used as an electrometer. Together with external probes it is to be used for independent service and quality control, as well as measurements of kerma, kerma rate, kVp, tube current, exposure time, luminance, and illuminance within limitations stated below.
-
Page 5: Table Of Contents
Description of the Barracuda Overview of the Barracuda ..................... 10 Cabinet and Modules ..................... 11 The Multi-Purpose Detector (MPD) ..................... 14 Setting Up the Barracuda for the First Time ..................... 15 Setting Up the Barracuda ..................... 16 Hardware and Specifications ..................... 17 2.6.1 Cabinet ......................17... - Page 6 Measurement Principle for the MPD ..................... 103 HVL & Total Filtration ..................... 104 Linearity ..................... 105 Reproducibility ..................... 106 Measurements with the Barracuda System ......................109 Introduction ..................... 109 Very Low Dose Rate Measurements with EMM-BiasW ..................... 110 2012-10/4.3A Barracuda & QABrowser Reference Manual...
-
Page 7: Contents
5.5.4 Pulsed Fluoroscopy ......................129 Mammography ..................... 132 5.6.1 General ......................132 5.6.2 Setting Up the Barracuda for Mammography ......................134 5.6.3 kVp, Time, and Dose Measurements with the MPD ......................136 5.6.4 Dose Measurements with the R100 or Ion Chamber ......................138 5.6.5 HVL Application ......................140... - Page 8 ..................... 182 Problems and Solutions ......................186 Troubleshooting ..................... 186 Bluetooth ..................... 188 7.2.1 Bluetooth Passkey ......................188 7.2.2 Enable Bluetooth Passkey ......................190 How To Report a Problem ..................... 191 Glossary ......................193 Index ......................204 2012-10/4.3A Barracuda & QABrowser Reference Manual...
- Page 9 Chapter 1 Introduction...
-
Page 10: Introduction
Description of different accessories for the Barracuda. Troubleshooting tips, an FAQ, and a glossary. Users who use the Barracuda with only a PC and oRTIgo are recommended to read at least the following topics: · Introduction · Description of the Barracuda ·... - Page 11 · Free upgrade of firmware (software in cabinet and modules) · New and unique design The modular design makes it very simple to upgrade your Barracuda hardware if you later need more measuring capacity or when new technology requires new measuring capabilities.
-
Page 12: Pc Requirements
1. Introduction PC Requirements PC Requirements To run the RTI Updater and the QABrowser Updater the following is required: Minimum requirements Windows XP, 2003, Vista, 7 32-bit, or 7 64-bit. Pentium class 300 MHz, 64 MB RAM (24 MB free), 60 MB of HD USB port or RS232 serial port Display and graphics card with at least 800×600 resolution... - Page 13 Chapter 2 Description of the Barracuda...
-
Page 14: Description Of The Barracuda
(MPD) (with modules) (RTI Handheld Display shown) Many different probes and detectors can be used with the Barracuda. These probes require at least one EMM (electrometer module): · R100, solid-state dose detector for low dose rate measurements. · R100B, solid-state dose detector for low or very low dose rate measurements. -
Page 15: Cabinet And Modules
Overview of the Barracuda Cabinet and Modules The cabinet is the main part of the Barracuda to which all detectors are connected. The cabinet can be configured in different ways depending on the requirements of the user. Connectors, switches, and indicators are located both on the cabinet and on the contained modules. - Page 16 Barracuda) may be connected. The data speed is 57,6 kbit/s when using a handheld computer, and maximum 115 kbit/s when using a PC. The USB interface is used to connect the Barracuda to a PC running the QA software oRTIgo. Note that the USB connector cannot be used when connecting to a handheld computer.
- Page 17 2. Description of the Barracuda Cabinet and Modules MP-SEM Signal Expansion Module for MPD. Combined with MPM. Electrometer Module Multi-Purpose Module. Connects to MPD. EMM LED indicator MPM LED indicator Indicates if the Indicates if the module is selected module is selected or...
-
Page 18: The Multi-Purpose Detector (Mpd)
(LEMO, BNT, or TNT connectors) as well as BNC/Banana connectors. Modules can easily be uninstalled or installed by the user at any time allowing easy upgrade or solve technical problems without sending away the complete Barracuda system for service. Read more in the topic... -
Page 19: Setting Up The Barracuda For The First Time
The MPD connects to the MPM in the cabinet via a 2 m cable (an optional 6 m cable is available). The normal way to work with the Barracuda is to place the cabinet and the MPD close to the tube inside the X-ray room. The handheld computer or PC is connected with a long cable and placed in the control room together with the user. -
Page 20: Setting Up The Barracuda
Then continue according to the following section. Setting Up the Barracuda The Barracuda system comes in a customized case. Two different cases are available, one smaller carrying case (CAS-6) with space for a basic Barracuda system. The larger case (CAS-7) is a transportation case with space for a complete Barracuda system with all its accessories. -
Page 21: Hardware And Specifications
The modular design gives a flexible system, which can be individually designed to fit almost any QA need. The Barracuda uses six 1.5 V R6 batteries (alkaline or chargeable) or an external 12 V DC power supply. The chargeable batteries can be recharged when the Barracuda is powered from the external power supply. -
Page 22: Specifications, Cabinet
2. Description of the Barracuda Hardware and Specifications 2.6.1.2 Specifications, Cabinet General 155 × 135 × 62 mm, (6.1" × 5.3" × 2.4") Size Approximately 1,0 kg Weight Operating temperature and 15 – 35 °C at <80 % relative humidity relative humidity –10 °C to +50 °C... -
Page 23: Specifications, Mpd
2. Description of the Barracuda Hardware and Specifications Typically the exposure time has to be at least 5 ms to get a kVp value but it depends on the waveform. On modern X-ray generators (high-frequency with fast rise and fall times) the peak tube voltage can normally be measured with exposure time as short as 1 ms. - Page 24 2. Description of the Barracuda Hardware and Specifications Parameters Tube voltage (kVp) The average of all samples with compensation for the ripple (default method) Irradiation time (Exposure time) Time Measured air kerma (may be called dose or air kerma in this...
- Page 25 2. Description of the Barracuda Hardware and Specifications Measuring range and inaccuracy Radiography, Fluoroscopy, and Dental Parameter Range Inaccuracy Resolution 4 digits kVp (standard) ±1.5 % (10 or 100 V) W / 3 mm Al 35 – 155 kV kVp dental ±1.5 %...
- Page 26 2. Description of the Barracuda Hardware and Specifications Mammography Parameter Range Inaccuracy Resolution kVp (standard) ±1.5 % or ±0.7 kV 4 digits Mo / 30 µm Mo 18 – 49 kV ±2 % or ±1 kV (10 V) Mo / 25 µm Rh 22 –...
- Page 27 2. Description of the Barracuda Hardware and Specifications Computed Tomography Parameter Range Inaccuracy Resolution 4 digits kVp (standard) ±1.5 % (10 or 100 V) W / 3.0 mm Al 45 – 155 kV kVp (optional) W / 3.0 mm Al + 80 –...
-
Page 28: Typical Response, Mpd
49,4 13,23 1,0072 Note: These values are typical values measured at PTB in Germany in 2009. Mammography, Mo / 30 µm Mo and 30 µm Mo + 2 mm Al (measured using RTI RQ 2012-10/4.3A Barracuda & QABrowser Reference Manual... - Page 29 RQA-M4 20,96 0,75 0,9804 Note: These values are typical values measured at PTB in Germany in 2007. Mammography, Mo / 1 mm Al (measured using RTI RQ Code M8) Radiation quality Air kerma measurement Mean energy ISO 4037 Factor kQ...
- Page 30 2. Description of the Barracuda Hardware and Specifications Mammography, Rh / 25 µm Rh (measured using RTI RQ Code M4) Radiation quality Air kerma measurement Mean energy ISO 4037 Factor kQ air kerma (keV) HVL (mm Al) IEC 61267 (Rel. RRV28)
-
Page 31: Angular Sensitivity, Mpd
2. Description of the Barracuda Hardware and Specifications Note: These values are typical values measured at PTB in Germany in 2009. 2.6.2.4 Angular Sensitivity, MPD In this section you can see graphs of the typical angular sensitivity for dose measured with the MPD at 28 and 70 kV. - Page 32 2. Description of the Barracuda Hardware and Specifications 2012-10/4.3A Barracuda & QABrowser Reference Manual...
-
Page 33: Signal-Extension Module (Mp-Sem)
(e.g. tube current from a MAS probe, light from a L100 light detector, or tube voltage from a voltage divider). The Trig In makes it possible to trig the Barracuda from an external signal. The Analogue Out gives the analogue radiation output measured by the Multi-Purpose Detector, via a BNC connector attached to the Signal Extension Module. -
Page 34: Specifications, Emm
2. Description of the Barracuda Hardware and Specifications between –300 to 300 V. · EMM-BiasB, single channel electrometer module with polarizing voltage (bias) between –300 to 300 V on either the triaxial connector or on a banana connector. · EMM-BiasW, single channel electrometer module with polarizing voltage (bias) between –300 to 300 V on either the triaxial connector or on a banana... - Page 35 2. Description of the Barracuda Hardware and Specifications Bias voltage (valid for EMM-Bias/BiasB/BiasW) Range -300 to +300 V (+20/-10 V) Ripple max 100 mV, typ. 30 mV - Bias, BiasB max 30 mV, typ. 20 mV - BiasW Max residual voltage (when LED off) <1 V...
- Page 36 2. Description of the Barracuda Hardware and Specifications Parameter Effective range Total inaccuracy Noise - EMM-1Ch/2Ch/Bias/BiasB Reading×10 or 100 fA – Reading×10 or 2.5 fA - EMM-BiasW 0.1 ms – 34000 s ±1 % or ±0.5 ms Resolution Irradiation time 1 –...
-
Page 37: Optional Detectors
2.6.4.3 Optional Detectors Several different detectors, probes, and ion chambers from RTI Electronics can be connected to the electrometer module (EMM). The measuring range are different between the EMMs with bias and the two models without. The table below gives measuring ranges for the most commonly used types. - Page 38 2. Description of the Barracuda Hardware and Specifications Module type Range Inaccuracy Typ. noise Air kerma rate 4 nGy/s – 76 mGy/s ±5 % or ±1 nGy/s ±500 pGy/s 460 nR/s – 8,7 R/s ±5 % or ±100 nR/s (Dose rate) 26 µR/min –...
- Page 39 2. Description of the Barracuda Hardware and Specifications The table below shows the typical response for the R100B at standardised radiation qualities, measured using RTI radiation quality code R1 (W/Al). Radiation quality Air kerma measurement Mean energy Total air kerma...
- Page 40 2. Description of the Barracuda Hardware and Specifications Module type Range Inaccuracy Typ. noise current. Note 1: For Tube current the specified Inaccuracy is valid for Irradiation times > 100 ms. See Note for R100B above. - MAS-2B, Non-invasive mAs probe (sensitivity 1 nC/mAs)
- Page 41 2. Description of the Barracuda Hardware and Specifications - L100B, Light detector (typical sensitivity 670 pA/nit or 200 pA/lx) Module type Range Inaccuracy Typ. noise EMM-1Ch/2Ch/ Bias/BiasB 0.03 – 72000 cd/m² ±5 % or ±0.006 cd/m² ±3 mcd/m² Luminance 0.01 – 24000 lx ±5 % or ±0.002 lx...
-
Page 42: Typical Other Detectors
2. Description of the Barracuda Hardware and Specifications A600-MO52622 at standardised radiation qualities, measured using RTI radiation quality code M1. Radiation quality Air kerma measurement Mean energy ISO 4037 Factor kQ air kerma (keV) HVL (mm Al) IEC 61267 (Rel. RQR-M2) - Page 43 2. Description of the Barracuda Hardware and Specifications - Generic 1 cm³, Ionization chamber (typical sensitivity 35 nC/Gy) Module type Range Inaccuracy EMM-Bias/BiasB 1500 nGy – 2 MGy ±5 % Air kerma 0.05 mGy/s – 250 Gy/s ±5 % or ±6 µGy/s (for time > 20 ms)
- Page 44 2. Description of the Barracuda Hardware and Specifications - Generic 60 cm³, Ionization chamber (typical sensitivity 2 µC/Gy) Module type Range Inaccuracy EMM-Bias/BiasB 25 nGy – 14 kGy ±5 % Air kerma 1 µGy/s – 4 Gy/s ±5 % or ±0.1 µGy/s (for time > 20 ms)
-
Page 45: Standards And Compliances
Equipment (WEEE) places an obligation on manufacturers, distributors, and retailers to take back electronics products at the end of their useful life. The WEEE directive covers all RTI products being sold into the European Union (EU) as of August 13, 2005. Manufacturers, distributors, and retailers are obliged to finance the cost of recovery from municipal collection points, reuse, and recycling of specified percentages per the WEEE requirements. -
Page 46: Manufacturer's Declaration Of Conformity
2. Description of the Barracuda Standards and Compliances 2.7.2 Manufacturer's Declaration of Conformity 2012-10/4.3A Barracuda & QABrowser Reference Manual... -
Page 47: Intended Use
2. Description of the Barracuda Standards and Compliances 2.7.3 Intended Use 2012-10/4.3A Barracuda & QABrowser Reference Manual... -
Page 48: Maintenance
As always is the case for batteries, they should be removed if the device is not used for a long time. They may leak acid that affects the battery compartment. You will also find a label on the bottom side of the Barracuda. It tells you the manufacturer's address, device type, version, conformity markings, and the serial number of the product. -
Page 49: Updating The Barracuda Firmware
1. First download the latest version of the RTI Updater Setup from RTI Electronics Web site. 2. Unzip the file and run the file "RTI Updater Setup.exe" to install it on your PC. In the end of the installation process you will get the question if you want to run that updater immediately. - Page 50 2. Description of the Barracuda Maintenance USB ports on the PC. Power on the Barracuda. Use the power supply to ensure that no power failure occur during the update process. If you do not have a power supply available, make sure you have fresh batteries in the Barracuda. You will get a notice about that.
- Page 51 8. Note that storing the new firmware in the flash memory may take several minutes for each module. The RTI Updater will indicate which modules have been updated. 9. Power off the Barracuda and disconnect the serial cable when the program indicates that everything is OK.
-
Page 52: Managing Detector Calibrations
RTI Detector Manager is a special Windows software that gives an overview of all calibrations for the detectors and probes in your system. You will find the RTI Detector Manager on your Product CD, in the folder \Software\RTI Detector Manager\.,Start the file RTI Detector Manager.exe by double-clicking it. -
Page 53: Transferring Detector Calibrations
2.8.4 Transferring Detector Calibrations For the Barracuda, the calibration factors for the external detectors are stored inside the cabinet. If you have access to more than one cabinet you will need to transfer the detector calibrations to the other cabinet(s) to be able to use all available detectors with all the systems. -
Page 54: Exchanging Modules
Please note where your export file is located. 5. Connect the other cabinet, start the RTI Detector Manager again, and choose Main | File | Import. 6. The window shows all files exported, presently and earlier. Select the the proper file (the one you just exported). - Page 55 2. Description of the Barracuda Maintenance 2. Remove the side covers. Start with the side where the serial connector is located. 3. Use the screwdriver to push out the pin that locks the modules. 4. Use the screwdriver (or better, a plastic pin to avoid...
- Page 56 2. Description of the Barracuda Maintenance 5. Remove the module and insert the new one. 6. Put back the pin that locks the modules. 7. Put back the side covers. Start with the side where the power switch is located.
- Page 57 2. Description of the Barracuda Maintenance 8. Connect the MPD and the Palm (or PC). Power on the Barracuda. Use the QABrowser System Info to verify that the new module is recognized by the system. 2012-10/4.3A Barracuda & QABrowser Reference Manual...
- Page 58 Chapter 3 Description of the QABrowser...
-
Page 59: Description Of The Qabrowser
The text in this section assumes that you purchased your Handheld Display either directly from RTI or a RTI dealer, which means that QABrowser is already installed and configured on the Handheld Display. If you have purchased your handheld on your own, then you first need to install the QABrowser to the handheld. -
Page 60: Real-Time Display And Waveforms
3. Description of the QABrowser Starting the QABrowser Cable or Holder 1. Connect the cable to the Barracuda and to your handheld or connect the holder to the Barracuda and position the handheld in the holder. 2. Turn on the Barracuda 3. - Page 61 The actual configuration for your Barracuda is now shown. If your Barracuda has a MAS-probe you can now decide if you want to measure mAs or not. The MPD detector is selected to measure kVp, time, dose, and dose rate.
- Page 62 4. The Real-Time Display (RTD) is now shown and you are ready to measure, see figure below. The Barracuda is set to the most suitable settings for the selected type of measurement, in this case radiography. The selected kV-range is 45-125 and the beam quality (BQ) is W/3mmAl (reference beam quality).
- Page 63 You are now ready to make the first exposure. Set the generator to 80 kV. Make sure that the correct kV range is used, in this case "R1[4] 45-125". When you make the first exposure, the Barracuda will evaluate what kind of waveform it is (DC/HF, 2012-10/4.3A...
- Page 64 3-phase/12p, 3-phase/6p, or 1-phase) and the total filtration. This is done for all measurement types but mammography. Default values are "DC/HF" and 3.0 mm Al. 8. Make an exposure. Every time the Barracuda recognizes an exposure the RTI logo is superimposed on screen for a short while.
-
Page 65: Waveforms - Acquiring And Viewing
Every time you tap Hold, the waveforms are acquired again. When you do this, the previously acquired waveforms will be replaced. The waveforms available for viewing will be the ones from you last Hold tap. To view waveforms after the exposure: 2012-10/4.3A Barracuda & QABrowser Reference Manual... -
Page 66: Measurement Settings
Barracuda is still capturing the waveform. Then you can go back to the RTD and tap Wave again, when the waveform recording time has passed, to get the full waveform. - Page 67 MPD: Specific settings for the MPD detector. MAS-2: Specific settings for the external probe. As seen, all detectors in use will show up in this list. Barracuda Shows general settings for the Barracuda. You can find information about the different parameters in Settings - Barracuda 2012-10/4.3A...
-
Page 68: Settings - Conditions
Conditions - TF and Waveform These are parameters of the X-ray generator which influence the measurements. The Barracuda can measure these, or you can set them yourself. Total Filtr. Shows actual total filtration value. Estimate means that a new estimation will be performed at next exposure and the values will be displayed on screen. - Page 69 Therefore it is important to select the AMX-4 waveform under Settings | Conditions. More about the AMX-4 correction can be found in the Application Note 1-AN-52020-1 from RTI Electronics Pulsed This waveform type should be used for pulsed fluoroscopy especially when the pulses do not have a "good"...
- Page 70 Please note that the pressure easily changes by 10 %. For the same effect from temperature, it must change 30 °C (or 54 °F). If you have an EMM-BiasW module, the atmospheric pressure is automatically measured when changing Type of Measurement or starting a Favourite. 2012-10/4.3A Barracuda & QABrowser Reference Manual...
- Page 71 The compression paddle will however normally affect the Barracuda kV and dose reading. With this check box, all the measured values (kV, dose and HVL) will be corrected according to what the user has selected. The default setting the first time you start the software is without the compression paddle in the field.
-
Page 72: Settings - Barracuda
Settings - Barracuda Here general measurement settings for the Barracuda are shown. The post delay time defines how long time the Barracuda shall Post Delay wait and "look for more" after detecting what can be considered to be "the end of the exposure". Default value is 250 ms. The 2012-10/4.3A... - Page 73 PEAK · The end time is the last time the signal goes below TL×S PEAK See example below. This setting defines when Barracuda shall send Update measured values to the QABrowser. Four different alternatives are available: · After exp., the QABrowser receives a new value when the exposure terminates.
-
Page 74: Settings - Mpd
The reason for this is that the Barracuda needs the waveform from start to be able to accurately calculate the irradiation time. - Page 75 The sensitivity can be set to: Low and High. Default value is set according to type of measurement selected. The delay time defines how long time the Barracuda shall wait before Delay starting to measure kVp after that radiation has been detected.
-
Page 76: Settings - Other Detectors
This is used to set the sensitivity for the electrometer module. The Sensitivity sensitivity can be set to: Low, High, and Very High. The Very High option is only available for the Barracuda EMM-BiasW. Default value is set according to selected type of measurement and used detector. -
Page 77: The Accuracy Application (Single-Parameter)
The set values (for kVp) are stored in a Set-value list. You can modify the list or individual values. To modify an individual set value tap with the pen on it. In this case tap 60. 2012-10/4.3A Barracuda & QABrowser Reference Manual... - Page 78 You can always tap a previous row and redo that exposure. Number of exposures and maximum inaccuracy is shown at the lower part of the screen. Tap Graph to show result in a graph. 2012-10/4.3A Barracuda & QABrowser Reference Manual...
-
Page 79: The Accuracy Application (Multi-Parameter)
2. Available applications for Radiography/All are shown. Choose Accuracy by tapping it with the pen. You can also use the scroll button to highlight Accuracy and then press the button that corresponds to Select (the right-most button). 2012-10/4.3A Barracuda & QABrowser Reference Manual... - Page 80 You can now change/delete/insert values in the set value list for current application. Use the graffiti area to enter new values. Tap OK to save changes or Cancel to return to the application without changing the list. 2012-10/4.3A Barracuda & QABrowser Reference Manual...
-
Page 81: Data Logging
Prepare the data log by first entering some basic information about the measurement. Open the pull-down menu and select Setup or go to the Start Screen and tap Setup. From the Setup menu select Log. 2012-10/4.3A Barracuda & QABrowser Reference Manual... - Page 82 Note that when measuring in an Application, the data will not be stored in the log file until you exit the Application. That means that even if you start the log after you have begun measuring you will still get all the application measurements in the log file. 2012-10/4.3A Barracuda & QABrowser Reference Manual...
-
Page 83: Favourites
You may give the Favourite a title or use the one suggested by the QABrowser. If you instead select Start Here!, a special Favourite will be created, that gets you right back to this test, the next time you start the QABrowser. 2012-10/4.3A Barracuda & QABrowser Reference Manual... -
Page 84: Getting Started With Favourites
You then selects one of the favourites from the list depending on what they intend to measure with the Barracuda. For the next measurement You may select another favourite from the list. If you have any favourites saved, the QABrowser will always start with the Favourites screen. - Page 85 The saved favourites can be found in the menu field, tap Options and then Favourites..To start the favourite that you are interested of, you have to mark the favourite and then tap Select, in the bottom right corner. 2012-10/4.3A Barracuda & QABrowser Reference Manual...
- Page 86 PDB file. By double-clicking this PDB file, it will be HotSynced in to the Palm, the next time you run the HotSync function. See picture below. This PDB file containing favourites can easily be shared between different users. 2012-10/4.3A Barracuda & QABrowser Reference Manual...
-
Page 87: Start Here
Actually, Start Here! is a special case of the Favourites, as described above, and can thus be found there. QABrowser Setup The Barracuda Setup is used to define different parameters that control the function of the QABrowser and Barracuda. Open the QABrowser main menu and select Setup. -
Page 88: Regulations Setup
Tap the unit you want to change and tap the desired unit in the list that pops up. When measuring in the RTD you can temporarily change a unit by tapping the unit text with the stylus. 2012-10/4.3A Barracuda & QABrowser Reference Manual... -
Page 89: Log Setup
Stay on in Cradle defines that it should stay on as soon as it is connected to and powered from the Barracuda. Auto prompt is for the built-in applications in multi-parameter mode. It defines how long time the result from one exposure is shown before the cursor moves on to the next position. -
Page 90: Detector Information
3.7.6 System Info System Info is used to get information about the Barracuda system. You can tap the module name (in this case MPM) to open a list with all modules, then select one by tapping it. You can tap the module name (in this case MPM) to open a list with all modules. -
Page 91: System Test
Barracuda, since the charging of the Palm batteries are fully handled by the Palm OS. Note that this only should be turned on if the Barracuda has chargeable batteries. Be careful! Charging other types of batteries may cause battery leakage and damage your Barracuda. - Page 92 Palm Startup Charging You can select the ability to have the Barracuda charge the Palm from the time the Barracuda is turned on. This feature means that if the handheld has dead batteries the Barracuda can still be used to measure. It is not necessary to bring the cradle and power supply for the handheld.
-
Page 93: Indicators And Symbols
This symbol indicates that settings information is available. Tap this icon to open the additional information screen. Here are measurement information and settings for the Barracuda and its detectors found. This menu is accessed when you need to override the default settings of the Barracuda that are set by the QABrowser. - Page 94 The doses measured by the MPD detector can then be compensated to simulate the scatter effect, that an ion chamber shows when a compression paddle is positioned directly above the detector. The equivalent thickness and scatter factor can be changed under Settings 2012-10/4.3A Barracuda & QABrowser Reference Manual...
-
Page 95: Installation Of Palm Os Handheld Computers
If you have a Windows Mobile device, please see the QABrowser for Windows Mobile User's Manual for instructions on how you install the QABrowser. For the RTI Handheld Display or Palm OS handheld computer, see the HTML help file on your Product CD for details. - Page 96 #4 below can be ignored. Perform step #6 and answer "Yes". 3. Attach the HotSync cable. 4. Go to Start | RTI Electronics | QABrowser Updater | QAB Updater to start the QABrowser Updater. 5. The QABrowser Updater starts.
-
Page 97: Uninstalling The Qabrowser
Application Launcher. Removing the QABrowser Updater from your PC This is accomplished by using the Windows Control Panel "Add and Remove Programs" or by choosing Start | RTI Electronics | QABrowser Updater | Uninstall QAB Updater. 2012-10/4.3A Barracuda & QABrowser Reference Manual... - Page 98 Chapter 4 Measurement Principles & Theory...
-
Page 99: Measurement Principles & Theory
(ms) (ms) – Radiography 1000 – Cine/Pulsed exposure Fluoroscopy 1000 Pulsed Fluoroscopy – Mammography 1500 – – Dental Panoramic Dental (OPG) – Light Abbreviations: AE=After Exposure, T=Timed, C=Continuous, FR=Free run, WF =Waveform recording time 2012-10/4.3A Barracuda & QABrowser Reference Manual... -
Page 100: Update Modes
This means when the output goes under the trig level and stays there at least the time set by Post Delay under Settings | Barracuda. Reset time is one second. · Continuous, the Barracuda is continuously sending data as long as radiation is detected. -
Page 101: Using Timed Update Mode
Reset time is the time it takes to perform a reset each time you hit Reset. Sample time is the time between individual data point of the waveform. Waveform recording time is the range of user selectable recording times the Barracuda allows. -
Page 102: Using Free Run Update Mode
In the same way it will take X seconds for the Barracuda to show a zero value after the radiation has ended. Great care must be taken into choosing a time constant fitted to the nature of the signal. -
Page 103: Display Messages And Active Messages
Display Messages and Active Messages Display Messages and Active Messages Even though the range of the Barracuda measurement system is quite wide, sometimes the signal may get too low or too high. To inform you of this, there are display messages. These are mainly of two types, Active or Passive. Active messages are shown when the hardware settings can be adjusted to adapt the measurement ranges. -
Page 104: Display Messages
4. Measurement Principles & Theory Display Messages and Active Messages Low signal The Barracuda detects a signal but it is too low to present a reliable result. High kVp Measured tube voltage is higher than that of the selected kV-range. - Page 105 · Change to a lower kV-range. Low Signal The Barracuda detects a signal but it is too low to present a reliable result. · Increase the mA and/or decrease the distance from X-ray tube to detector or change the sensitivity for the dose parameter to High sensitivity or even Very High sensitivity.
-
Page 106: Waveforms And Triggers
7. The radiation ends, i.e. it goes under the detector's lowest trig level. 8. If the signal has been below the trig level during all of Post delay, the exposure is considered finished. All exposure readings are calculated. Integrated signal (dose, mAs, etc.) 2012-10/4.3A Barracuda & QABrowser Reference Manual... -
Page 107: Measurement Principle For The Mpd
S3 and S4 is used to estimate the total filtration for the radiography range. Using these signals together more accurate dose and tube voltage readings can be obtained. Since all signals is measured simultaneously and with a relative high speed, the MPD 2012-10/4.3A Barracuda & QABrowser Reference Manual... -
Page 108: Hvl & Total Filtration
X-ray beam to one-half of its value in absence of that material, usually aluminium. See also Application Note 03-009/01 that can be downloaded from RTI Electronics web page at http://www.rti.se. From the HVL-value the total filtration value can be estimated. See Application Note 1-AN-52020-11 from RTI Electronics AB. -
Page 109: Linearity
1. Place the detector on the table-top. If patient-equivalent phantom should be used it is recommend to use the Barracuda HVL stand to simplify the set up. Use 2 pieces of 10 mm Al filter as "patient -equivalent" filter in the beam. -
Page 110: Reproducibility
4. Use some form to record your measurements. 5. Make 5 to 10 exposures and record the reading for each exposure. 6. Calculate the mean value, difference from mean value and square of differences. 2012-10/4.3A Barracuda & QABrowser Reference Manual... - Page 111 8. Calculate the square of the variance, i.e. the standard deviation, and divide it by the mean value of the n measurements An acceptable value for the coefficient of variation is less than 0.05. 2012-10/4.3A Barracuda & QABrowser Reference Manual...
- Page 112 Chapter 5 Measurements with the Barracuda System...
-
Page 113: Measurements With The Barracuda System
5. Measurements with the Barracuda System Introduction Measurements with the Barracuda System Introduction The Barracuda system has a modular design and can presently, using an MPD and an electrometer module, measure up to eight parameters simultaneously plus three waveforms from a single exposure: · kVp ·... -
Page 114: Very Low Dose Rate Measurements With Emm-Biasw
5. Measurements with the Barracuda System Introduction Very Low Dose Rate Measurements with EMM-BiasW To get access to the wide range of the EMM-BiasW, update mode Free run or Timed needs to be selected, as shown to the left. Both these modes measure without any trig levels or background compensation. -
Page 115: Radiography
This feature uses the kV filter R1[4] (55 - 105 kV). This is the default kV range for radiography when the Barracuda is turned on. The displayed dose value has very little energy dependence since it is automatically compensated for each exposure since both the kV, estimated filtration, and the waveform are measured. - Page 116 5. Measurements with the Barracuda System Radiography If any of the displayed values are not possible to compensate or cannot be measured with full accuracy the symbol is displayed at the top of screen. When the symbol is shown you can tap it, to get more information.
-
Page 117: Kvp, Time, Dose, And Dose Rate
Time, Dose, and Dose Rate To measure on radiographic units: 1. Set up the Barracuda and the handheld computer according to the description in Setting Up the Barracuda 2. Place the detector on the table at the distance that is clinically relevant. - Page 118 7. Make an exposure. The RTI logo flashes to indicate that the MPD has detected the exposure. The Barracuda now first analyses the beam and displays the type of waveform. This is done once for every test. 2012-10/4.3A Barracuda & QABrowser Reference Manual...
- Page 119 5. Measurements with the Barracuda System Radiography Then the estimated total filtration is displayed (estimated in the range of 50 - 150 kV). Depending of the selection of display parameter different display screens may be presented. 8. Tap Wave to study the waveforms.
-
Page 120: Dose Measurements With R100 Or Ion Chamber
1. Place the R100 or Ion Chamber in the field and connect the cable to the EMM input. 2. Set up the Barracuda and the handheld computer according to the description in Setting Up the Barracuda 3. -
Page 121: Hvl Application
5. Measurements with the Barracuda System Radiography 3. Set kVp and mAs (or mA/time) to the desired values. 4. Make an exposure. The RTI logo flashes to indicate that the MPD has detected the exposure. 5. Read the values. As complementary information the dose rate and exposure time is also displayed below. -
Page 122: Quick-Hvl And Total Filtration
5. Measurements with the Barracuda System Radiography Set up the system the same way as described earlier to measure dose in radiography beams and select the MPD. The only difference is that you select the built-in HVL application for the dose measurement. The HVL application can be found in the Dose test (under Appl on the Quickbar). - Page 123 5. Measurements with the Barracuda System Radiography The following examples very clearly shows the excellent independence of the beam filtration for kV and dose readings. Three exposures were made with 3 mm Al, 6 mm Al, and 12 mm Al. The MPD was used to measure kVp, exposure time, dose, and dose rate.
-
Page 124: Cine/Pulsed Radiography
HVL are shown as supplementary information. The HVL is calculated to be 6.42 mm Al. The set kV was changed and the Barracuda measured 102.6 kV. The HVL is calculated at 5.70 mm for this kV. The set kV is changed again and a third exposure is made. -
Page 125: Kvp, Time, Dose, And Dose Rate
5. Measurements with the Barracuda System Cine/Pulsed Radiography 5.4.1 kVp, Time, Dose, and Dose Rate Use the same procedure as for the normal radiography measurement but select the All... parameter. If only Tube voltage is selected: 5.4.2 Pulse Measurements with R100 or Ion Chamber Use the same procedure as for the normal radiography measurement using ionization chamber. -
Page 126: Hvl, Quick-Hvl, And Total Filtration
X-ray. The Position Check should be used to confirm the position of the MPD. When you select fluoroscopy or pulsed fluoroscopy (as type of measurement) the Barracuda system automatically changes to continuously updating the display and using the highest possible sensitivity. -
Page 127: Image Intensifier Input Dose Rate
Use patient equivalent phantom to measure the image intensifier input dose rate according to manufacturer's specification: 1. Connect the R100 to the EMM. 2. Set up the Barracuda and the handheld computer according to the description in Setting Up the Barracuda 3. Select type of measurement. - Page 128 5. Measurements with the Barracuda System Fluoroscopy and Pulsed Fluoroscopy 4. Select I.I. input dose rate from the menu. 5. The Select Detector screen is now displayed. Select the R100 probe. 6. Tap Select. 7. Place the R100 in front of the image intensifier but outside the measuring field for the mA feedback loop.
-
Page 129: Kvp And Dose Rate
5. Measurements with the Barracuda System Fluoroscopy and Pulsed Fluoroscopy 9. Start the fluoroscopy. A little triangle is displayed, indicating that the Barracuda has detected the radiation. 10. The figure to the left shows the real-time display during fluoroscopy. The image... - Page 130 MPD, even on this extremely low level, still makes corrections for the beam filtration. The Barracuda can measure both kV and dose rate at very low levels for instance on Mini C-arm systems. Barracuda can (as an example) successfully measure the tube voltage as low as 43 kV with a 25 µA tube current.
-
Page 131: Hvl, Total Filtration, And Quick-Hvl
Total Filtration and Quick-HVL The total filtration is measured continuously when the MPD is used under fluoroscopy. The following pictures illustrates this excellent feature of the Barracuda and the MPD: The fluoro is started and the total filtration is estimated and automatically displayed during two seconds. - Page 132 Fluoroscopy and Pulsed Fluoroscopy The displays with measured values are continuously updated every four seconds. Add 10 mm of aluminum. The Barracuda will "notice" that the filtration is changed and shows a new total filtration value. The dose rate is now much lower. The added filtration does not affect measured kVp at all.
-
Page 133: Pulsed Fluoroscopy
Most other invasive kVp meters have a correction for the kVp of around 5 to 10 kV for a change of the beam filtration of 10 mm Al. The correction graphs given, does not help if the actual beam filtration are not known. The Barracuda system detects and compensates automatically for a change of beam filtration. See Specifications, MPD , for details of the range of beam filtration. - Page 134 5. Measurements with the Barracuda System Fluoroscopy and Pulsed Fluoroscopy These pictures describes the check of the output levels in pulse fluoroscopy mode. This example shows measurements of dose/pulse, dose rate, and pulse rate on an ordinary C-arm system. Example of more measurement done using this application: The first slides are the measuring results of measuring on a 5 Hz fluoroscopy system using the R100.
- Page 135 5. Measurements with the Barracuda System Fluoroscopy and Pulsed Fluoroscopy The next two pictures shows measurement on the same type of the system but instead is the frame rate is 25 Hz. In this case a 15cc ionization chamber connected to an EMM-Bias module was used instead.
-
Page 136: Mammography
5. Measurements with the Barracuda System Fluoroscopy and Pulsed Fluoroscopy 1. X-ray on, momentary reading 2. X-ray on, momentary reading 3. X-ray off, mean value displayed Mammography This topic will describe how to measure kVp, dose, HVL, AGD (MGD), and time on a mammography unit using the MPD. - Page 137 5. Measurements with the Barracuda System Mammography The displayed dose value has very little energy dependence because the dose value is automatically compensated, using the tube voltage, which is measured simultaneously for each exposure. If any of the displayed values cannot be compensated or cannot be measured with full accuracy, the symbol is displayed at the top of the screen.
-
Page 138: Setting Up The Barracuda For Mammography
5. Measurements with the Barracuda System Mammography 5.6.2 Setting Up the Barracuda for Mammography To set up the Barracuda: 1. Pick up the cabinet, the MPD, and the handheld computer from the case. 2. Connect the MPD cable to the connector on the rear on the cabinet, see figure below. - Page 139 PC: connect the Bluetooth serial module, the 8 m serial cable, or the USB cable. 7. Optionally you may connect the power supply to the cabinet from the power outlet. 8. Power on the Barracuda using the power switch. 9. Power on the handheld computer (or the PC).
-
Page 140: Kvp, Time, And Dose Measurements With The Mpd
5. Measurements with the Barracuda System Mammography 5.6.3 kVp, Time, and Dose Measurements with the MPD Set up the Barracuda and the handheld computer according to the description in Setting Up the Barracuda for Mammography In this picture the MPD is placed to minimize the influense of the heel effect of the tube. - Page 141 28 kV. After the check the MPD automatically changes back to the previously selected kV range. 4. Set kVp and mAs (or mA/time) to the desired values. 5. Make an exposure. The RTI logo flashes to indicate that the MPD has detected the exposure. 6. Read the values in the RTD.
-
Page 142: Dose Measurements With The R100 Or Ion Chamber
1. Place the R100 or Ion Chamber in the field and connect the cable to the EMM input, see picture below. 2. Set up the Barracuda and the handheld computer according to the description in Setting Up the Barracuda for Mammography 3. - Page 143 5. Measurements with the Barracuda System Mammography 3B. The selected EMM LED is flashing to assist you to confirm that your detector has been connected to the module of your choice. More display information will guide you if an ionization chamber is selected. The EMM-Bias bias diode is on to indicate that the bias is activated.
-
Page 144: Hvl Application
5. Measurements with the Barracuda System Mammography 6. Make an exposure. The RTI logo flashes to indicate that the Barracuda has detected the exposure. 7. Read the dose value. Note that if a R100 is used the dose reading has to be corrected manually according to the R100 DETECTOR DATA manual. -
Page 145: Mammo Compensations And Corrections
Corrections for the Compression Paddle The MPD is well collimated above its small detector area, and will measure the same whether the compression paddle is placed directly on top of the Barracuda or high above. This is NOT true for an ion chamber. -
Page 146: Normalization
5. Measurements with the Barracuda System Mammography Note 1-AN-52020-2 from RTI Electronics AB. Please also see section Angular Sensitivity, MPD for details on sensitivity in different directions. 5.6.6.2 Normalization A normalization function is available which enables all measurements to be virtually performed at the same distance, increasing productivity. -
Page 147: Beam Correction Factor
5. Measurements with the Barracuda System Mammography For an ion chamber it is not quite as easy because of the scatter contribution that is not allowed during HVL measurement. The ion chamber and/or the compression paddle must be moved to support good geometry. -
Page 148: Average Glandular Dose, Agd (Mgd)
Hence, the HVL filter can be placed on top of the compression paddle without any extra collimation even at close distance to the MPD. The Barracuda has a built-in HVL application which should be used to get accurate HVL readings. -
Page 149: Mammographic Pre-Pulses
1 s and the waveform recording time to a corresponding time. It is important to cover both signals. In this measurement setup, the Barracuda will add the dose from both pulses. This is OK if the beam quality is not changed between the signals. -
Page 150: Dental And Panoramic Dental
This topic will describe how to measure kVp, dose, and time for a Dental and Panoramic Dental X-ray units using the MPD only. Set up the Barracuda and the handheld computer according to the description in Setting Up the Barracuda . - Page 151 5. Measurements with the Barracuda System Dental and Panoramic Dental The definition of both what is the true kVp and exposure time cannot be as easily determined without study the waveform and select appropriate measurement parameters as delay and window. Introducing small CCD detectors instead of film also demands carefully calibration of single phase dental systems.
- Page 152 Dental and Panoramic Dental Moreover, since the detector during the scan often moves more than 180 degrees relative to the Barracuda cabinet, this also makes the way the cable is attached very important. Special fixation rods for the head should be placed so that they are not in the beam during the scan or can hit the detector.
-
Page 153: Kvp, Time, Dose, And Dose Rate
The Barracuda has addressed these challenges. Since the panoramic scan has an exposure time of about 10 to 20 seconds, the Barracuda is set up to continuously update the display during the scan. It is preferable to select a single parameter display and angle the Palm holder, making it easy to read the values during the scan, from a distance. - Page 154 5. Measurements with the Barracuda System Dental and Panoramic Dental If you want to measure the exposure time in number of pulses you can do so. 2. Place the detector on the table at the distance that is clinically relevant. As default, the kV-filter for 55 - 105 kV is selected automatically.
- Page 155 5. Measurements with the Barracuda System Dental and Panoramic Dental 5. Make an exposure. The RTI logo flashes to indicate that the MPD has detected the exposure. The Barracuda now first analyses the beam and displays the type of waveform. This is done once.
-
Page 156: Waveforms
Therefore a delay of 200 ms is default for the Barracuda. If the signal to the detector is too low to give a correct kV value, this part of the waveform will be blank. - Page 157 5. Measurements with the Barracuda System Dental and Panoramic Dental 1. Set up the Barracuda and the handheld computer according to the description in Setting Up the Barracuda . Selecting one parameter mode enables you to see the measured values from a distance of several meters.
- Page 158 9. Select kV, mA, and scan time. 10. Start the scan. A little triangle in the RTD indicates that the Barracuda detects the radiation. It is not needed to use the whole scan for the purpose of measure the kV 2012-10/4.3A...
-
Page 159: Hvl, Total Filtration, And Quick-Hvl
5. Measurements with the Barracuda System Dental and Panoramic Dental since the display is continuously updated. 11. Stop the panoramic dental unit. The RTI logo flashes and the last kVp value is displayed. As complementary information the estimated total filtration is measured as well as the scan time. -
Page 160: Ct Kvp
Update Modes To measure CT kVp: 1. Set up the Barracuda and the handheld computer according to the description in Setting Up the Barracuda 2. Place the detector on the patient bed in a region that is irradiated during the topogram process. - Page 161 5. Measurements with the Barracuda System 4. Select Tube voltage. 5. The real-time display for tube voltage is now shown. At the bottom of the screen you can select kV range and calibration. Three different calibrations are available: C1 = W/3.0 mm Al C2 = W/3.0 mm Al + 0.25 mm Cu (optional)
-
Page 162: Ct Dose And Ct Dose Index (Ctdi)
5. Measurements with the Barracuda System 7. Set up the CT to make a topogram. 8. Start the topogram program. If the procedure includes more than one topogram you may abort after the one taken with the tube in the top position. - Page 163 LED is on without first turning off the bias. 2. Set up the Barracuda and the handheld computer according to the description in Setting Up the Barracuda Place the phantom with the one of the peripheral holes at "12 o'Clock". Use the laser alignment tool on the CT to centre the phantom in both vertical and horizontal direction.
- Page 164 "normal" CT images. 9. Make sure to reset Barracuda after the topogram has been acquired. Tap Reset. 10. Setup the CT based on the topogram to make one scan in the middle of the CT phantom.
- Page 165 5. Measurements with the Barracuda System 11. You can now make one scan to verify that everything works before you go on to the CTDI application. You can also read the scan time, in this case 1.008 s. 12. Now tap Appl and select CTDI.
- Page 166 5. Measurements with the Barracuda System 16. Measure with the CT chamber in all positions. 17. The weighted CTDI is shown. It is calculated according to the definition in the topic Definition of CTDI If you move the CT chamber when the message box is not shown a false trig will most likely occur.
-
Page 167: Ct Scan Time (Exposure Time)
C3 = W/3 mm Al + 1.2 mm Ti (optional) (for Siemens Somatom Definition 32 and similar) With the calibration C1 the total filtration can be measured and the Barracuda automatically corrects the kV value accordingly. It is optional to set a known total filtration instead, see the table below. -
Page 168: Definition Of Ctdi
5. Measurements with the Barracuda System parameters, Dose Assessment, Optimisation, Scanner Data, Terminology. 4th Edition, Hamburg, Germany, December 2002, CTB Publications, D-21073 Hamburg, ctb-publications@gmx.de 2. Stamm, G., Nagel, H. D. Software CT-Expo, Medizinische Hockschule Hannover, D-30625 Hannover, stamm.georg@mh-hannover.de 5.8.6 Definition of CTDI The CTDI is calculated as described below. -
Page 169: Tube Current Probes
Tube Current Probes Tube Current Probes Three different mAs probes can be used with the Barracuda. One invasive and two non-invasive types are available. The description of the mAs probes is valid for all different type of X-ray systems. The mAs probes are used to measure mAs (current time product) and mA (tube current). -
Page 170: Mas-1B, Invasive Mas Probe
1. Connect the MAS-1B probe to the X-ray generator as described in the MAS-1B User's Manual. 2. Connect the MAS-1B probe to the EMM module. 3. Set up the Barracuda and the handheld computer according to the description in Setting Up the Barracuda 4. In the QABrowser select type of measurement. - Page 171 5. Measurements with the Barracuda System Tube Current Probes 6. The real-time display for mAs is now displayed. Set the generator. Tap Reset. Make an exposure. 7. The figure to the left shows the result from an exposure with 80 kV, 50 ms, and 100 mA.
-
Page 172: Mas-2B, Non-Invasive Mas Probe
5. Measurements with the Barracuda System Tube Current Probes To measure tube current with the MAS-1B 1. Setup the Barracuda according to the description earlier in this manual. 2. Connect the MAS-1B probe to the X-ray generator as described in the MAS-1B User's Manual. - Page 173 1. Connect the MAS-2B probe to the X-ray generator as described in the MAS-2B User's Manual. 2. Connect the MAS-2B adapter cable to the EMM. 3. Set up the Barracuda and the handheld computer according to the description in Setting Up the Barracuda 4. In the QABrowser select type of measurement.
- Page 174 5. Measurements with the Barracuda System Tube Current Probes 7. The figure to the left shows the result from an exposure with 80 kV, 100 ms, and 25 mA. The exposure time is measured with the MAS-2B probe. If you would get a message as shown in the figure to the left, the mAs probe is probably connected in the wrong direction.
-
Page 175: Mas-3, Non-Invasive Mas Probe
X-ray exposures. To measure mAs with the MAS-3: 1. Set up the Barracuda and the handheld computer according to the description in Setting Up the Barracuda 2. Connect the MAS-3 probe to the X-ray generator as described in the MAS-3 User's Manual. - Page 176 5. Measurements with the Barracuda System Tube Current Probes 4. In the QABrowser select type of measurement. 5. Next select parameter mAs from the menu. 6. The Select Detector screen is now displayed. Select the MAS-3 probe. 7. Tap Select.
- Page 177 The MAS-3 probe can also be used for measurement of tube current during fluoroscopy. To measure tube current with the MAS-3: 1. Setup the Barracuda according to the description earlier in this manual. 2. Connect the MAS-3 probe to the X-ray generator as described in the MAS-3 User's Manual.
-
Page 178: Light Measurement
1. Attach the monitor adapter to the L100 as described in the L100 User's Manual. 2. Connect the L100 to the EMM. 3. Set up the Barracuda and the handheld computer according to the description in Setting Up the Barracuda 4. -
Page 179: Illuminance - Ambient Light (Lx)
1. Do as described in step 1 to 8 above. 2. Press and hold the shutter. If the Barracuda does not start to measure, lift the L100 and direct it towards a bright spot (with the shutter button pressed). Do not release the shutter button. - Page 180 "start" to measure. You should then do as follows: 1. Do as described in step 1 to 8 above. 2. If the Barracuda does not start to measure, lift the L100-L and direct it towards a bright spot. 3. Place the L100 detector on the spot where you want to measure.
- Page 181 Chapter 6 Optional Accessories...
-
Page 182: Optional Accessories
6. Optional Accessories Optional Accessories Optional accessories and tools available for the Barracuda. Holder & HVL Stand Measuring HVL using the classic method? Then the MPD holder and HVL stand together with a filter kit may be handy. The stand features a camera screw that fits perfectly into the camera thread of the MPD. - Page 183 Magnet or tape position Insert the MPD in the Holder, lock it with the rubber strap and perform the measurement. The extra magnet may be used for hanging the MPD cable "out of the way". 2012-10/4.3A Barracuda & QABrowser Reference Manual...
-
Page 184: Usb Serial Port Adapter
USB Serial Port Adapter The USB serial port adapter can be used if you do not have any serial ports on your PC, or just need an extra. It can be used both with the RTI Updater and oRTIgo software for the Barracuda. - Page 185 6. Optional Accessories USB Serial Port Adapter Barracuda. Always exit Barracuda applications before disconnecting the USB cable. 2012-10/4.3A Barracuda & QABrowser Reference Manual...
-
Page 186: Barracuda Bluetooth Serial Module
Barracuda. Please use the normal serial cable or a USB cable. Getting Started 1. Make sure that you have v1.3A or newer of the Barracuda Cabinet firmware (if not, make sure that you have not disabled your Palm startup charging (described below). - Page 187 2. Select Off on the screen shown in the leftmost picture below. If you only use the Bluetooth connection in the Palm for communicating with the Barracuda, you may want to disable the Discoverable feature under Prefs, see above. Disabling this will also increase the battery life of your handheld.
- Page 188 6. Optional Accessories Barracuda Bluetooth Serial Module 2012-10/4.3A Barracuda & QABrowser Reference Manual...
- Page 189 Chapter 7 Problems and Solutions...
-
Page 190: Problems And Solutions
The cabinet batteries does not last very long Check: 1. Have you updated the Barracuda Cabinet software to version 1.4A or newer? 2. Have you tried with a different set of batteries? With 2600 mAh batteries a typical system (with one EMM and one MPD) should typically run for 6.5 hours. - Page 191 Bluetooth only shows "Unknown device" when trying to connect Depending on Palm model it may take a little while for the serial number to appear, the Barracuda will appear as "Unknown device". Normally it will show the serial number if you wait a while.
-
Page 192: Bluetooth
Bluetooth Bluetooth is a wireless way of communication between your PC/handheld and your meter. The Piranha has built-in support for this, but with the Barracuda you need the Barracuda Serial Bluetooth Module accessory. A Palm OS handheld also has built-in support for Bluetooth but a PC may or may not have built-in support for Bluetooth. - Page 193 2.5.4 supports multiple Bluetooth devices, which means that you can use it with both a PC and handheld without additional steps. The new Barracuda serial to Bluetooth adapter below can also be used with multiple Bluetooth devices.
-
Page 194: Enable Bluetooth Passkey
2008.6A or later) which is available on your RTI Software & Documentation CD and the RTI website (www.rti.se). 1. Connect your meter using the USB cable. If you are using a Barracuda then also connect the Barracuda Serial Bluetooth Module. -
Page 195: How To Report A Problem
This is how you use that functionality: 1. HotSync the Palm handheld that you are experiencing the problem with. 2. On your PC, go to Start Menu | All Programs | RTI Electronics | QABrowser Updater and click Send Support Information. - Page 196 Chapter 8 Glossary...
-
Page 197: Glossary
Area exposure product Product of the area of a cross-section of a radiation beam and the averaged exposure over that cross-section. SI unit: Gy·m² Attenuation The reduction of radiation intensity upon passage of radiation through matter. 2012-10/4.3A Barracuda & QABrowser Reference Manual... - Page 198 General: a program that does the job of loading the OS kernel of a computer. Barracuda bootloader: Miniature program stored in cabinet and modules which normally just starts the Firmware. It is used more when the Firmware is updated. See Firmware.
- Page 199 (Sv). The previous special unit of dose equivalent was the rem. One sievert equals 100 rem. SI unit: Sv = J/kg Dose rate meter Radiation meter intended to measure absorbed dose per unit time. Dosemeter Radiation meter intended to measure absorbed dose. 2012-10/4.3A Barracuda & QABrowser Reference Manual...
- Page 200 General: The operating system and software installed on a small device. Sometimes called embedded software. Barracuda firmware: Program stored in cabinet and modules which handles all control of measurement electronics. Can be updated, then a special part of the firmware called bootloader, is used.
- Page 201 X-ray tube. Installation A radiation source with associated equipment, and the space in which it is located. Interlock A device used to assure proper and safe use of a radiation installation by monitoring 2012-10/4.3A Barracuda & QABrowser Reference Manual...
- Page 202 Kilovolt (kV) A unit of electrical potential difference equal to 1000 volts. See Peak tube voltage Lead equivalent The thickness of lead affording the same attenuation, under specified conditions, as the material in question. 2012-10/4.3A Barracuda & QABrowser Reference Manual...
- Page 203 Also known as personal monitor. An appropriately sensitive device used to estimate the absorbed dose received by an individual. Peak tube voltage Ûo (kVp) The peak value of the tube voltage (corresponding to the highest available radiation energy). 2012-10/4.3A Barracuda & QABrowser Reference Manual...
- Page 204 Scattered radiation Radiation that, during passage through matter is changed in direction. (It is usually 2012-10/4.3A Barracuda & QABrowser Reference Manual...
- Page 205 114,1 R thus equals an Air Kerma of 1 Gy. That also means that the value in R should be multiplied by 8,76 to get the Air Kerma in mGy. (See also Exposure.) 2012-10/4.3A Barracuda & QABrowser Reference Manual...
- Page 206 A radiograph taken during a fluoroscopic examination for the purpose of providing a permanent record of an area of interest of to verify the filling of a void with contrast media. Stray radiation See radiation. Survey See radiation protection survey. 2012-10/4.3A Barracuda & QABrowser Reference Manual...
- Page 207 Evacuated vessel for the production of x-radiation by the bombardment of a target, usually contained in an anode, with electrons accelerated from a cathode by an electric field. Thus: Rotating anode X-ray tube. Double focus X-ray tube. 2012-10/4.3A Barracuda & QABrowser Reference Manual...
-
Page 208: Index
45, 193 Analyse waveform Built-in applications Anode Anode/Filter combination - C - Mo/Mo Mo/Rh Cabinet Rh/Rh Connectors W/Rh Indicators Aperture Calibrations Application View 117, 140 CAS-6 Applications CAS-7 Multi-parameter cd/m² Single-parameter CE Declaration Atmospheric pressure 2012-10/4.3A Barracuda & QABrowser Reference Manual... - Page 209 USB Serial Port Adapter Definition Drop-down menu CTDI values - E - Typical CT-Expo software Electrometer Module 10, 29 Current Electrometer waveform Current waveform EMM-1Ch/2Ch - D - EMM-Bias/BiasB Data logging EMM-BiasW 11, 110 2012-10/4.3A Barracuda & QABrowser Reference Manual...
- Page 210 Gray Introduction Invasive mAs probe - H - ion chamber Ionization chamber 37, 193 Half Value Layer Ionization constant Theory Irradiation time 21, 30, 102, 193 Half-value layer ISO 4037 24, 33 Handheld computer 2012-10/4.3A Barracuda & QABrowser Reference Manual...
- Page 211 Mean Glandular Dose 138, 144 Operating air pressure Measurement Operating temperature Cine 146, 193 Dental Optional Accessories Dose Orthopantomography 178, 193 Dose per pulse 120, 129 Oscilloscope Fluoroscopy Overview of Measurement Modes Image intensifier 2012-10/4.3A Barracuda & QABrowser Reference Manual...
- Page 212 RTI Detector Manager 48, 49 Pulsed fluoroscopy 122, 129 RTI Updater Default settings - S - Pulsed radiography Saving a Favourite - Q - Scan time QABrowser Scanning Beam Mammography Setup Scatter factor 62, 142 Uninstallation 2012-10/4.3A Barracuda & QABrowser Reference Manual...
- Page 213 Sleep time Half Value Layer Smallest detectable charge/pulse Irradiation time Specifications Linearity Air kerma (Dose) Post delay Air kerma rate (Dose rate) Radiation time Atmospheric pressure sensor Reproducibility Bias voltage TF and HVL conversion Cabinet 2012-10/4.3A Barracuda & QABrowser Reference Manual...
- Page 214 Unit Default Gray Prefixes Röntgen Unit of measure Change Units 84, 186 Unknown device Update Firmware Update Mode 68, 95, 97, 98 Update modes Update of Barracuda Updating QABrowser Upgrading USB Serial Port Adapter 2012-10/4.3A Barracuda & QABrowser Reference Manual...
Need help?
Do you have a question about the Barracuda and is the answer not in the manual?
Questions and answers