Table of Contents
Advertisement
Quick Links
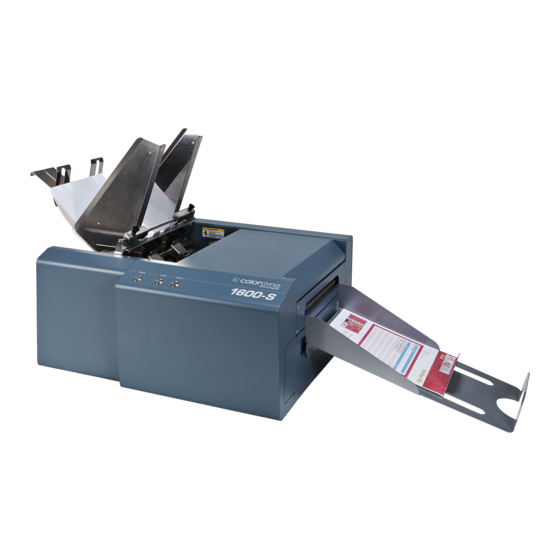
Colordyne 1600-S
Quick Start Guide
Step 1
Remove the Printer and Accessories from packaging.
Place the Printer on a stable surface.
Step 2
Hydrate the Printhead.
Before you begin assembling the Printer, it is a good idea to hydrate the Printhead Cartridge for about 20 minutes.
Use electrostatic discharge (ESD) protection when handling.
Hold the Printhead Cartridge by the handles ONLY.
DO NOT touch the ink couplings, nozzle surface or electrical contacts.
DO NOT unpack the Printhead Cartridge until the Printer is ready for installation. Once unwrapped,
delay in installing the Printhead can compromise print quality due to dehydration.
DO NOT place an unwrapped Printhead on any surface before installing. Protect the Printhead from
dust, fibers, dirt and other contaminants at all times.
1. Carefully remove the Printhead Cartridge from the foil
packaging.
[A] Tear at notch or cut end with scissors.
[B] Remove the protective plastic cover. Hold the
Printhead by the handle and unclip the cover from the
Printhead.
[C] Remove protective strip from the Printhead Electrical
Contacts. DO NOT allow removed strip to touch the
electrical contacts.
[D] Remove protective strip from the Printhead Nozzles.
Hold the Printhead by the handle with one hand. Pull the
strip tab with the other hand and slowly peel the strip from
the Printhead. DO NOT pull the strip at any angle less
than 45° with the Printhead surface. DO NOT allow
removed strip to touch the Printhead Nozzles.
2. Pour just enough distilled water into the orange plastic cover you removed in Step 1B to moisten the bottom
strip inside. Carefully reinstall the Printhead back into the plastic cover. Set the Printhead aside for installation
later. This rehydrates the Printhead and allows easier priming once it is installed in the Printer.
CAUTION
Page 1
Advertisement
Table of Contents

Subscribe to Our Youtube Channel
Related Manuals for Colordyne Colordyne 1600-S


Summary of Contents for Colordyne Colordyne 1600-S
- Page 1 Colordyne 1600-S Quick Start Guide Step 1 Remove the Printer and Accessories from packaging. Place the Printer on a stable surface. Step 2 Hydrate the Printhead. Before you begin assembling the Printer, it is a good idea to hydrate the Printhead Cartridge for about 20 minutes.
- Page 2 Step 3 Step 4 Remove Service Station Transport Tab Assembly 1. Open the Top Assemble the Adjustable Side Guide [1], Cover. Envelope/Paper Side Guide [2], 2. Release the Rear Paper Support [3], two latches (one on either and Back Guide [4]. Save the packing material. side of the Print Engine).
- Page 3 Step 6 3. The “Install Printer Software” window opens on Print Driver Installation the computer screen. Click “Install Printer Software”. Print Driver Installation Minimum System Requirements: Windows XP, Windows Vista, Windows 7. (Supports 32 and 64 bit systems) You must have administrative privileges on the system.
- Page 4 6. After a few moments the “M Series Driver” 9. The “Finished software installation” window window opens followed by the “Would you like to opens. Do not print a test page since printer is install this device software?” window. Click not set up yet.
- Page 5 4. Slide the new Tanks (label up) into their Step 7 appropriate color slots [B]. INSTALLATION TIP – Make sure the Tanks seat properly. Insert the Tank into the Install the Ink Tanks appropriate Ink Station, then pull the Tank back about an inch and push forward firmly This Printer uses a single Printhead Cartridge and five to insure that the Ink Nozzles penetrate the...
- Page 6 Step 8 2. Take the Printhead Cartridge you hydrated and Install the Printhead Cartridge set aside earlier, remove the orange cover and The Printhead Cartridge is a delicate precision device. proceed to Step 3. Handle with extreme care to avoid damage and issues that could degrade print quality.
- Page 7 For instructions on installing the Accessories and Printer Printhead. This may take a few minutes. Make set-up or operation, please refer to the "Colordyne sure that ink is flowing through the hoses. 1600-S Color Page Printer Operator Manual", supplied with the machine.
Need help?
Do you have a question about the Colordyne 1600-S and is the answer not in the manual?
Questions and answers