Table of Contents
Advertisement
Quick Links
FCC ID:2ABDSSB03
Sequence CAV‐SB03‐DISH
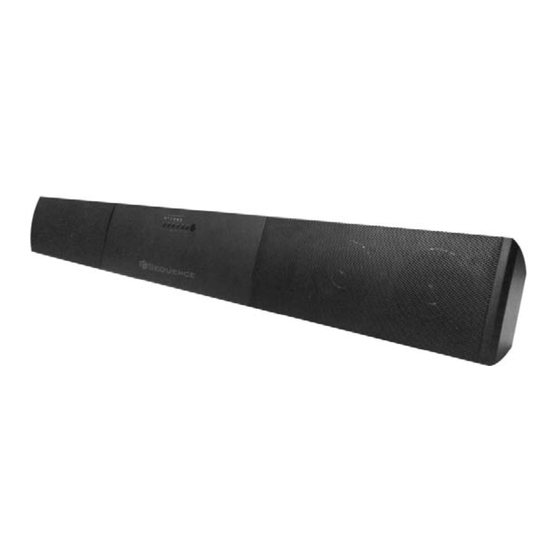
Powered Soundbar Speaker
QuickStart Manual
Thank you for choosing the Sequence CAV‐SB03‐DISH Soundbar.
This completely integrated sound system will dramatically improve sound quality from
multiple input sources, including a TV, satellite or cable box, and mobile devices. It can be
mounted on the wall or placed on a shelf or cabinet. Input connectors are located on the
back of the speaker, and Bluetooth® compatible devices can connected wirelessly.
We're confident that this Sequence Soundbar will exceed all your expectations. You can
find more great Sequence audio products at www.sequencebysteren.com.
This Quick‐Start Manual will guide you through speaker installation and set‐up. For more
information, please go to our website.
Key Features:
• Easy and quick hook up
• Wireless technology
• Multiple pre‐set EQ settings
• Exceptional Sound
• Built‐in mounting brackets
• Easy to use front mounted controls
Advertisement
Table of Contents

Summary of Contents for Sequence CAV-SB03-DISH
- Page 1 FCC ID:2ABDSSB03 Sequence CAV‐SB03‐DISH Powered Soundbar Speaker QuickStart Manual Thank you for choosing the Sequence CAV‐SB03‐DISH Soundbar. This completely integrated sound system will dramatically improve sound quality from multiple input sources, including a TV, satellite or cable box, and mobile devices. It can be mounted on the wall or placed on a shelf or cabinet. Input connectors are located on the back of the speaker, and Bluetooth® compatible devices can connected wirelessly. We’re confident that this Sequence Soundbar will exceed all your expectations. You can find more great Sequence audio products at www.sequencebysteren.com. This Quick‐Start Manual will guide you through speaker installation and set‐up. For more information, please go to our website. Key Features: • Easy and quick hook up • Wireless technology • Multiple pre‐set EQ settings • Exceptional Sound • Built‐in mounting brackets • Easy to use front mounted controls ...
- Page 2 Soundbar Rear‐Panel Connections and Controls Optical Input (digital) Connect TVs, DVD players, cable boxes or satellite boxes with optical outputs here. CAUTION: Optical cables are made of glass fiber so please handle with care and do not kink the cable. Aux Input (analog) This input can be used with most devices that have audio outputs in either 3.5mm or dual RCAs. Use a standard 3.5mm to 3.5mm cable or a 3.5mm to RCA (stereo) cable to connect device to this input. Power Switch Set the power button to the “on” position to activate the Soundbar. In normal use, this switch will be left in the “on” position. Power will not be drawn until the front power switch is also turned on. ...
- Page 3 Power Cord Connector Connect the power cord coming from the power supply to this connector. IMPORTANT: Make sure all connections are made before plugging the power cord into the AC outlet. If you need to adjust the connections, unplug the power cable from the AC outlet. Once the adjustments are complete, plug the power cable back into the AC outlet. ...
- Page 4 Soundbar Front‐Panel Controls Power Button To turn the Soundbar on, press the Power button and the green LED will turn on and remain solid. To put the Soundbar into Standby Mode, press the Power button and the green LED will turn off. Pressing the programmed Dish Network remote Power button will also place the device in Standby Mode. To take the Soundbar off of Standby Mode, you can either press the Power button on the Soundbar, or the Power button on the programmed Dish Network remote. EQ Button Use this button to adjust the EQ settings of your Soundbar. As you push the button, it will toggle between 2 preset EQ settings. The Music setting provides full range sound designed for the best music listening experience. The Video setting provides full range sound with an emphasis on the higher range to enhance video viewing. Input Button This button switches between the inputs connected on the back of the Soundbar: Aux and Optical. It also allows for a Bluetooth® input, signified by “BT”. As you press the Input button, it toggles between each input. When Aux is active, the purple LED remains solid. When the Optical is active, the yellow LED remains solid. When BT (Bluetooth®) is active, the blue LED remains solid. Mute Button Press the Mute button to mute the Soundbar. The LED will flash slowly when the speaker is muted. Press the Mute button again or adjust the volume with either of the Volume buttons to restore sound. Volume Up/ Down Buttons Press the VOL+ button to increase the sound volume of the Soundbar. Press the VOL‐ to decrease the sound of the Soundbar. When maximum volume is reached the LED will flash quickly several times.
- Page 5 Soundbar Placement Sitting on Top of Shelf or Cabinet If the desired placement of your Soundbar is on top of a cabinet or shelf: start by attaching the rubber feet provided to the bottom of the Soundbar. The small round feet go toward the front of the speaker, between 4 to 8 inches from the outside edge. Then attach the larger rubber feet toward the back of the Soundbar, between 4 to 8 inches from the outside edge. When complete, the Soundbar should sit level. When placing the Soundbar, make sure it’s directly in front of and centered above or below the TV. WallMounting If your TV is installed on the wall, you can use the integrated keyhole mounting brackets to mount your Soundbar onto the wall, above or below the TV screen. Measure the distance between the keyhole brackets on the back of the speaker and mount 2 screws into your wall that match the measurements. Make sure the screws are level so the Soundbar will be level once mounted. Connect all Input cables and the Power cable before hanging the Soundbar on the wall. Do not plug the power cable into the AC outlet at this time. Make sure to use the correct hardware for your wall when mounting this soundbar. ...
- Page 6 Connections Source Connections Digital: Use an optical digital cable if your TV, satellite or cable box, or DVD player has an optical digital output. Plug one end into the optical output of the TV and the other end into the back of the Soundbar, using the Optical input. Analog: Use a 3.5 mm to Stereo RCA cable if you are hooking your TV up to the Soundbar with the analog input. Plug the RCAs into the Audio output on your TV and the 3.5mm end of the cable into the AUX input on the Soundbar. If your TV has more than one set of RCA audio outputs, make sure to connect to the Fixed (not Variable) output level. This will allow you to turn your TV speakers all the way down but the TV will still supply a constant audio signal to the Soundbar. Bluetooth® Wireless Source: This Soundbar features Bluetooth® wireless technology. To use your device, first pair your device with the Soundbar. Pairing creates the ability for your device to connect with your Soundbar wirelessly. Make sure your Bluetooth® device and the Soundbar are both powered on. Activate the Bluetooth® on your device. Once it is turned on, look for the Bluetooth® device named Sequence01. Select Sequence01 and this will start the pairing process. This will take between 5 to 10 seconds. After this time, your device should display “Connected to Sequence01”. You can now play music from your device on the Soundbar. ...
- Page 7 NOTE: Most Dish Network set top boxes feature Bluetooth® technology to send the sound from the set top box wirelessly to the Soundbar. Please read the instruction manual for your set top box and pair the device as listed above if this feature is available. Power: After making sure all the cable connections have been made, it is now safe to plug the Power cable into an AC outlet. This device complies with part 15 of the FCC rules. Operation is subject to the following two conditions: (1) this device may not cause harmful interference, and (2) this device must accept any interference received, including interference that may cause undesired operation. Changes or modifications to this unit not expressly approved by the party responsible for compliance could void the user's authority to operate the equipment. Note: This equipment has been tested and found to comply with the limits for a Class B digital device, pursuant to part 15 of the FCC Rules. These limits are designed to provide reasonable protection against harmful interference in a residential installation. This equipment generates, uses and can radiate radio frequency energy and, if not installed and used in accordance with the instructions, may cause harmful interference to radio communications. However, there is no guarantee that interference will not occur in a particular installation. If this equipment does cause harmful interference to radio or television reception, which can be determined by turning the equipment off and on, the user is encouraged to try to correct the interference by one or more of the following measures: —Reorient or relocate the receiving antenna. —Increase the separation between the equipment and receiver. —Connect the equipment into an outlet on a circuit different from that to which the receiver is connected. —Consult the dealer or an experienced radio/TV technician for help. ...
Need help?
Do you have a question about the CAV-SB03-DISH and is the answer not in the manual?
Questions and answers