
Summary of Contents for Ecopower Heating VANTAGE NEHV06
- Page 1 IST 03 F 079 - 01 Electric Heating Expert, Gateway House, Kings Parade, Kings Road, Fleet, Hampshire, GU51 3AB. Phone number: 01252 560770. Website: www.electricheatingexpert.co.uk.
-
Page 2: Table Of Contents
Dear Customer, we thank you for your confidence. Before installing and/or using the product, please read carefully this manual concerning the correct installation, use and maintenance of the appliance. We remind you as well that this manual must accompany the radiator in case of transfer to another place of installation. -
Page 3: Warnings
1. WARNINGS The symbol shown here appears on a label on the radiator, whose meaning is: to avoid the overheating of the appliance, DO NOT COVER THE RADIATOR with clothes or other objects. The radiator shall in no case: - be covered in part or in full - be in direct contact or too close to curtains, furniture, etc. -
Page 4: Electrical Connections
This appliance is filled with a precise quantity of oil. Any reparations requiring the opening of the oil tank must be carried out only by the manufacturer or its technicians, that should be contacted in case of oil leaks; when the appliance is scrapped, it is necessary to comply with regulations concerning the disposal of oil. -
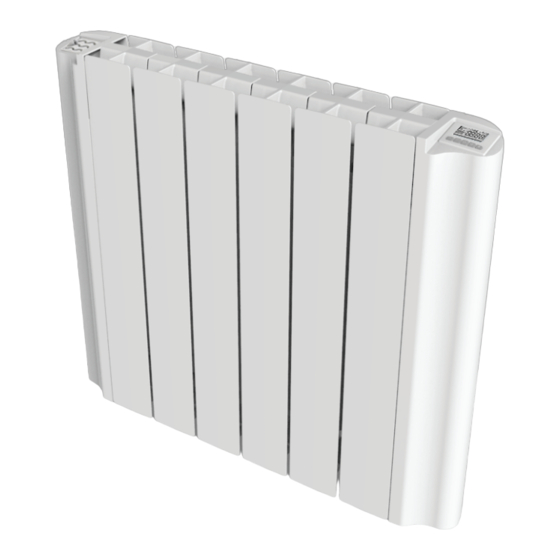
Page 5: Installation Of The Appliance
In the bathroom, protect the power line with a high sensitivity 30 mA differential protection device Install a multipolar switching device. The minimum separation distance between contacts shall be at least 3 mm. fig. 1 3. INSTALLATION OF THE APPLIANCE To achieve the best results in terms of heat output and comfort of your appliance, we recommend to install the radiator, if possible, under a window or near areas with high heat loss of the room to heat. -
Page 6: Radiator Wall Mounting
3.1. RADIATOR WALL MOUNTING The radiator must be fastened to a wall through the suitable mounting brackets provided with the product. The fastening system is composed of: Using adhesive tape, stick the template supplied in the desired position and mark the position of the holes, then remove the template:... - Page 7 Without any template, mark the position of the holes according to the indications of the following tables: Number of sections/power 5/600 W 6/1000 W 9/1200 W 10/1500 W 12/1800 W DIMENSION A 239 mm 319 mm 558 mm 558 mm 797 mm Then follow the steps illustrated below: Drill as indicated by the holes marked and then insert the blocks in the wall.
- Page 8 Position "b" upper plastic parts of the bracket. Fit the two "c" lower clamps and rotate them until you hear a first click. Electric Heating Expert, Gateway House, Kings Parade, Kings Road, Fleet, Hampshire, GU51 3AB. Phone number: 01252 560770. Website: www.electricheatingexpert.co.uk.
-
Page 9: Adjustment And Programming
Position the radiator by leaning it on the upper part of the brackets and then rotating it. Push the radiator until it is automatically locked by lower plastic clamps. The operation is over only when locking hooks are blocked and the radiator is fixed on the wall, without any possibility of movement. -
Page 10: User Functions
The display contains the icons shown below, and they are switched on from time to time according to the state of the radiator: Window opening detection Freeze protection Night Heating on Standby Holiday Programming Comfort Energy consumption indication Key lock Pilot wire Check of surface temperature... -
Page 11: Description Of Functions
4.2.1. DESCRIPTION OF FUNCTIONS Pilot Wire Mode (for France only). In this mode the radiator is controlled by a remote control unit. 1. Press the “Function” key until the relevant key is displayed. 2. Select the desired temperature using “+” and “-” keys. The operating mode is selected by the Pilot Wire control unit. - Page 12 From day 1 to day 5 (Monday - Friday) Comfort Night Day 6 and 7 (Saturday and Sunday) Comfort Night From day 1 to day 5 (Monday - Friday) Comfort Night Day 6 and 7 (Saturday and Sunday) Comfort Night Boost Mode This function can be used to heat up the rooms as fast as possible.
- Page 13 When the function is activated and detected at window opening, the displayed symbol of the window is intermittent. When the function is deactivated the symbol of the window is not displayed. The user can activate or deactivate this function as follows: Switch the radiator to standby state.
-
Page 14: Use Of The Radiator
Key lock function It is possible to lock the device to avoid an improper or unintentional use, for instance for children protection or in a public space. To lock/release the keys press "Function" key and hold for about three seconds. In this way the keyboard is locked/released. -
Page 15: Setting Of Current Day And Time
4.3.1. SETTING OF CURRENT DAY AND TIME Switch the radiator to standby state. Press and hold "Programming" key for more than 3 seconds: the display shows "Prog", meaning programming or "tEd", meaning time and date. With "+" key it is possible to switch from "Prog" to "tEd" selection. When "tEd"... - Page 16 TABLE OF TECHNICAL FAULTS STATE OF THE PROBLEM PROBABLE CAUSE SOLUTION RADIATOR Radiator is not working The temperature Contact a Service “ALL” is displayed properly sensor is faulty Centre The display does not Check the presence of No power supply show any notice mains voltage The radiator does not...
-
Page 17: Warranty
7. WARRANTY The body in aluminium alloy is warranted against manufacturing defects for 10 years from date of purchase. Electric and electronic components are warranted for 2 years from the date of purchase of the radiator. To validate your warranty, it is necessary to produce a document attesting the date of purchase (tax receipt, invoice, sales receipt). - Page 18 Input voltage 230V AC 50 Hz Mod. NEHV06 600 W Mod. NEHV10 1000 W Mod. NEHV12 1200 W Mod. NEHV15 1500 W Mod. NEHV18 1800 W Insulation class Class II Water protection class IP24 Working temperature 0 ÷ 50 °C Consumption in standby mode <...
-
Page 19: Declaration Of Conformity
10. DECLARATION OF CONFORMITY DECLARATION OF CONFORMITY We hereby declare for Ecopower Heating Ltd 252 High Street Aldershot Hampshire GU12 4LP that ELECTRICAL RADIATORS FOR HEATING Model VANTAGE are manufactured according to European directives and European regulations: Direttiva 2006/95/EC : “Bassa Tensione”... - Page 20 The manufacturer reserves the right to modify the products as it deems necessary and useful, without affecting their basic features. IST 03 F 079 - 01 Luglio 2015 (07/2015)
Need help?
Do you have a question about the VANTAGE NEHV06 and is the answer not in the manual?
Questions and answers