Table of Contents
Advertisement
Advertisement
Table of Contents

Related Manuals for Whirlpool AMW 730


Summary of Contents for Whirlpool AMW 730
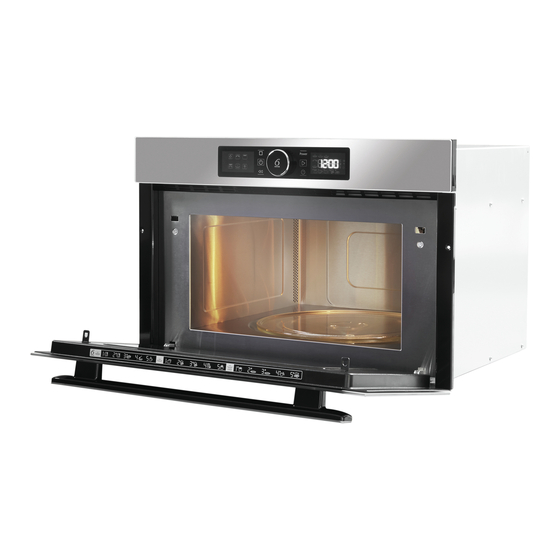
- Page 1 AMW 730 Instructions for use...
- Page 2 IMPORTANT SAFETY INSTRUCTIONS shall also be available on website: his insTrucTion docs.whirlpool.eu YOUR SAFETY AND THAT OF All safety warnings give specific OTHERS IS VERY IMPORTANT details of the potential risk present and indicate how to reduce risk of This manual and the appliance...
- Page 3 - This appliance is intended to - Regulations require that the be used in household and appliance is earthed. similar applications such as: - The power cable must be long Staff kitchen areas in shops, enough for connecting the offices and other working Appliance, once fitted in its environments;...
- Page 4 - Do not leave the appliance - During and after use, do not unattended, especially when touch the heating elements or interior surfaces of the using paper, plastic or other combustible materials in the appliance: risk of burns. Do not allow the appliance to cooking process.
- Page 5 - Overheated oils and fats catch - Do not use harsh abrasive cleaners or sharp metal fire easily. Always remain vigilant when cooking foods scrapers to clean the appliance door glass since rich in fat, oil or alcohol (e.g. rum, cognac, wine). they can scratch the surface, which may result in shattering - Do not use microwave oven...
-
Page 6: Safeguarding The Environment
SAFEGUARDING THE ENVIRONMENT isposal of packaging maTerials crapping The proDucT The packaging material is 100% recyclable and This appliance is marked in conformity with European Directive 2012/19/EU, Waste is marked with the recycle symbol ( Electrical and Electronic Equipment (WEEE). The various parts of the packing must therefore By ensuring this product is disposed of be disposed of responsibly and in full... -
Page 7: Installation
INSTALLATION , make sure that it has , only remove the appliance fter unpAcking the AppliAnce o prevent Any dAmAge not been damaged during transport and that the from its polystyrene foam base at the time of appliance door closes properly. installation. -
Page 8: Recommended Use And Tips
RECOMMENDED USE AND TIPS HOW TO READ THE COOKING TABLE to use for any food and type of accessory used. Always cook he Table inDicaTes The besT funcTions given food. Cooking times, where indicated, food for the minimum cooking time given and start from the moment when food is placed in check that is it cooked through. -
Page 9: Panel Description
PANEL DESCRIPTION Function STOP/PAUSE ON/OFF POWER START symbols button button button button Power BACK ADJUST CLOCK Digital button knob button display... - Page 10 ACCESSORIES GENERAL GLASS TURNTABLE a number of accessories available on with all cooking meth- here are se The glass TurnTable the market. Make sure that they are suitable for ods. It collects the dripping juic- microwave use before making any purchases. es and food particles that would otherwise stain and soil the inte- are micro-...
-
Page 11: Standby Mode
STIR OR TURN FOOD SENSE FUNCTIONS ONLY) hen using some of The ense funcTions efrosT moDe The oven conTinues au oven may stop (depending on the chosen pro- if the food has not TomaTically afTer minuTes gram and food class) and prompt you to TURN been turned. - Page 12 FOOD CLASSES SENSE FUNCTIONS ONLY) the oven needs hen using The ense uncTions FOOD to know which food class it needs to use in or- der to achieve good results. The food class digit and food class symbol is displayed when you are (100 g - 2.0 kg) choosing a food class with the adjust knob.
-
Page 13: Cooling Down
COOLING DOWN to temporarily , the oven may per- ress The ack buTTon hen a funcTion is finisheD view the 24-hour clock when “Cool form a cooling process. This is normal and the On” is displayed. display shows “Cool On”. After this process, the oven switches off auto- can be interrupted without he cooling process... -
Page 14: Power Level
COOK & REHEAT WITH MICROWAVES for normal cook- se This funcTion Power ing and reheating, such as vegeta- bles, fish, potatoes and meat. Switch on the microwave by pressing the button and proceed as follows: until you find the microwave function. -
Page 15: Jet Start
JET START to quickly re- his funcTion is useD Power heat food with a high water con- tent such as clear soup, coffee or tea. Switch on the microwave by pressing the button and proceed as follows: and place food in the oven. Close the door. pen The Door ... -
Page 16: Manual Defrost
MANUAL DEFROST for “Cook & Reheat with . You will ollow The proceDure heck anD inspecT The fooD regularly microwaves” and choose power level 160 W learn the times required for various amounts when defrosting manually. from experience. , plastic film or card- halfway through the defrost- rozen fooD in plasTic bags urn large JoinTs... -
Page 17: Jet Defrost
JET DEFROST for defrosting se This funcTion Power meat, poultry, fish, vegetables and bread. Jet Defrost should only be used if the net weight is between 100 g and 2.5 kg. on the glass lways place The fooD turntable. -
Page 18: Frozen Foods
JET DEFROST WEIGHT: the net weight of the food. The oven his funcTion neeDs To know will then automatically calculate the time needed to finish the process. : Follow f The weighT is lesser or greaTer Than recommenDeD weighT the procedure for “Cook & Reheat with microwaves” and choose 160 W when defrosting. - Page 19 GRILL quickly turn the se This funcTion To Power surface of any food placed on the wire rack golden brown. Switch on the microwave by pressing the button and proceed as follows: until you find the Grill function. urn The aDJusT knob to confirm your selection.
-
Page 20: Grill Combi
GRILL COMBI cook food such se This funcTion To Power as lasagne, fish and potato gratin. Switch on the microwave by pressing the button and proceed as follows: until you find the Grill Combi function. urn The aDJusT knob to confirm your selection. - Page 21 CRISP reheat and se This funcTion To Power cook pizzas and other dough- based food. It is also good for fry- ing bacon and eggs, sausages, hamburgers etc. Switch on the microwave by pressing the button and proceed as follows: until you find the Crisp function.
- Page 22 SENSE REHEAT when reheat- se This funcTion Power ing ready-made food from frozen, chilled or room temperature. onto a microwave-safe lace fooD heat-proof dinner plate or dish. Switch on the microwave by pressing the button and proceed as follows: until you find the 6 Sense function.
- Page 23 SENSE REHEAT a meal in the refrigerator when using this function ex- hen you are keeping lways cover fooD or “plating” a meal for reheating, arrange the cept when reheating chilled soups, in which thicker, denser food case a cover is not needed. around the outside in such way that f The fooD is packageD...
- Page 24 SENSE COOK cooking ONLY. se This funcTion for Power Sense Cook can only be used for food in the categories listed here. Switch on the microwave by pressing the button and proceed as follows: until you find the 6 Sense function.
-
Page 25: Th Sense Crisp
SENSE CRISP crisping ONLY. se This funcTion for Power Sense Crisp can only be used for food in the categories listed here. onto the crisp plate. lace fooD Switch on the microwave by pressing the button and proceed as follows: until you find the 6 Sense function. -
Page 26: Maintenance And Cleaning
MAINTENANCE & CLEANING operate the microwave oven leaning is The only mainTenance o noT when the turntable has been removed normally required. for cleaning. in a ailure To mainTain The oven , water and a soft cloth to se a milD DeTergenT clean condition could lead to de- clean the interior surfaces, front and rear of the terioration of the surface, which... -
Page 27: Troubleshooting Guide
TROUBLESHOOTING GUIDE , do not make a service making unnecessary calls f The oven Does noT work his is To avoiD call until you have made the following checks: for which you will be charged. ɳ The turntable and turntable support is in When calling Service, please give the se- place. - Page 28 4 0 0 0 1 0 8 8 8 4 2 9...
Need help?
Do you have a question about the AMW 730 and is the answer not in the manual?
Questions and answers