Table of Contents
Advertisement
Advertisement
Table of Contents

Summary of Contents for dentronix DDS 7000
- Page 1 DDS 7000 Dry Heat Sterilization System (115V/230V) Operating Instructions...
-
Page 3: Table Of Contents
DOOR LATCH SAFETY DOOR INTERLOCK FIRST TIME USE CYCLE TEST STERILIZING YOUR INSTRUMENTS INSTRUMENT HANDLING PLIER RACKS LOADING YOUR DDS 7000 PLIER RACKS LOADING THE STERILIZATION CHAMBER OPERATION SPECIAL NOTE ON MOUTH MIRRORS ABORTING A CYCLE RESETTING THE TEMPERATURE OVERLOAD SENSOR... -
Page 4: Introduction
INTRODUCTION Thank you for your purchase of the DDS 7000 Dry Heat Sterilization System. We appreciate your commitment to safe sterilization and effective patient care. The DDS 7000 Dry Heat Sterilizer is a convection type unit, designed for the sterilization of un-bagged orthodontic instruments that can withstand temperatures of up to 420ºF(215ºC). -
Page 5: General And Technical Specifications
4 full plier or combo racks, or 8 full Same mini racks, or two full racks and the half tray or a full tray. Refer to section “Loading Your DDS 7000 Plier Racks” on pages 14 & 15 Sterilization Temperature 374°F +/- 9°F Same (190°C +/- 5°C) -
Page 6: Dds 7000 Unit Overview
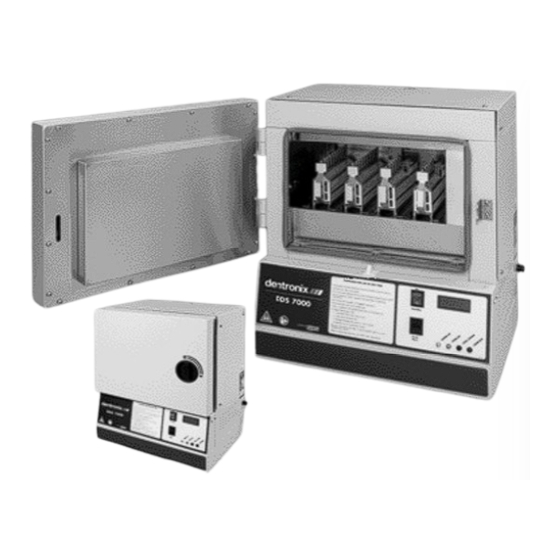
DDS 7000 UNIT OVERVIEW Rack Channels Louvers Standby/On Door Lock Door Switch Digital Display Port Cycle Start Switch Cycle Indicator Lights Magnetic HEPA Filter Cover Figure 1: Outside view of the DDS 7000... -
Page 7: Unpacking Your Dds 7000
Read the Operating Instructions completely before operating the sterilizer CAUTION! Set-up your DDS 7000 Sterilizer in a dry location according to the directions in the Operating Instructions. Run your unit through a complete cycle with an empty chamber. This is a heavy piece of equipment (96 pounds/43.64 Kg). Please make sure the counter top will safely support the weight. -
Page 8: Selecting Your Sterilization Area
DAD-UL or DAD-BL. Exhaust Stack Figure 2 Exhaust stack of DDS 7000 - It is important to leave 4-inches around the sides of the unit and 12-inches above the top of the unit to maintain proper airflow during the cool down cycle. -
Page 9: Venting
CAUTION: Do not remove cooling duct for any reason (See Figure 3) Venting is recommended under the following conditions: a) Installation of the DDS 7000 in a small room less than 12’ x 12’ CAUTION (3.66m x 3.66m). -
Page 10: Connecting To A Power Source
CONNECTING TO A POWER SOURCE Connect the DDS 7000 to a grounded power source in compliance with the specification label on the side of the unit. 115V: Sterilizers used in the U.S. and Canada require a 15-amp, 115-volt grounded receptacle and operate at 50/60 Hz. -
Page 11: Indicator Led Lights
INDICATOR LED LIGHTS The control panel of your DDS 7000 is equipped with four (4) indicator lamps to monitor progress of the sterilization cycle. 1) Warm-up – this Yellow LED will illuminate after pressing the “Cycle Start”switch. It indicates heating element activation to raise instrument load to sterilizing temperature of 374°F (190°C). -
Page 12: Safety Door Interlock
NOTE WARNING ABOVE: An Error Code will display notifying the operator of an interruption. Toggling the “Standby/On” switch from “On” to “Standby” then back to “On” will clear the error message. To restart the cycle, press “Cycle Start”. The DDS 7000 will first cool down and then restart the complete cycle from the beginning. - Page 13 ITEMS THAT ARE LABELED “AUTOCLAVABLE” ARE NOT NECESSARILY DRY HEAT STERILIZ- ABLE. IF IN DOUBT ABOUT SPECIFIC PRODUCTS, CONTACT THE MANUFACTURER. CAUTION! REMOVE ALL VINYL GRIPS FROM PLIERS BEFORE STERILIZING. CAUTION!
-
Page 14: Instrument Handling
Cleaning Unit (such as the Dentronix DDUS60 Ultrasonic Cleaner). Non-Ionic multi-purpose cleaning concentrates, which include a rust inhibitor and require no rinsing (such as Dentronix MP-US Plus), are highly effective for the process- ing of orthodontic pliers. Ultrasonic cleaning will remove dirt, debris and old lubricants, which could cause discoloration and stiffening of joints. -
Page 15: Plier Racks
Incorrect Correct Rack Rack Placement Placement Figure 6 Correct and Incorrect placement of racks in DDS 7000. Note: The incorrectly placed rack is not over the air vents of the rack channel, whereas the correctly placed rack is. - Page 16 Horizontal Tray Cat. No. D5000S-T or Half Tray Cat. No. D5000S- HT. Never place any items below the Tray units to be sterilized. Never Use Cassettes in the DDS 7000. CAUTION!
-
Page 17: Loading The Sterilization Chamber
LOADING THE STERILIZATION CHAMBER Example of proper and improper loadings Figure 7A: Properly Loaded DDS 7000 with Figure 7B: Properly Loaded DDS 7000 four Plier Racks. with Half-Tray and two Plier Racks. Figure 7C: Improperly loaded Half Tray with Figure7D: Close up of improperly loaded Plier Rack. -
Page 18: Operation
OPERATION Once the DDS 7000 is loaded, it is time to begin the sterilization process. Close the door by gently pushing the door against the rubber door gasket and turning the knob counter-clockwise. This will engage the cam lock, which pulls the door against the gasket, sealing the chamber. - Page 19 Figure 10 The DDS 7000 is programmed to sterilize for three (3) minutes. At the completion of three (3) minutes, the DDS 7000 automatically begins the cool down phase of the cycle. The blue “Cool Down” LED is lit. 113°F Figure 11 Cool down is achieved by forcing ambient filtered air across the load and expelling the heated air.
-
Page 20: Special Note On Mouth Mirrors
SPECIAL NOTE ON MOUTH MIRRORS The DDS 7000 has been tested to safely sterilize good quality metal mouth mirrors. However, depending on the age of your mirrors and their exposure to chemical disinfectants and cleaning solutions, there may be moisture leakage behind the glass. -
Page 21: Aborting A Cycle
To abort the DDS 7000 in any cycle phase, toggle the lower portion of the “Standby/On” switch to the “Standby” position. An error code will display in the red LED window, alerting user of a power interrup- tion. -
Page 22: Biological Testing In Your Sterilizer
For more information on monitoring, please contact Dentronix Customer Service. 3. For customers who wish to test in their office, Dentronix also offers dry indicator strips (DIS100) which can be used on every cycle or the 370 starter kit (DSK037) for weekly testing. -
Page 23: Maintenance And Cleaning
2) HEPA Filter located below unit. Remove magnetic strip and replace filter when dirty or if an error code is indicated during cool-down cycle. An increased “Cool Down Cycle” time is a good indication that the HEPA filter needs replacing. Replacement filter is available from Dentronix Inc. (Cat. No. D7000F). HEPA Filter... - Page 24 CLEANING: Outside of unit can be cleaned with warm soapy water. Wipe the inside of the sterilizer chamber with a damp cloth. Any cleaner which leaves a residue may result in smoking or undesired fumes during the sterilizing cycle. Any other malfunction in operation should be reported to Dentronix Sterilizer Repair Department for further instruction.
-
Page 25: Selecting User Options
SELECTING USER OPTIONS The DDS 7000 user interface has been designed to allow the user to change aspects of how the display looks and responds to the user. The user can change temperature units from Fahrenheit to Celsius, en- able or disable the door interlock, enable or disable audible sounds, add additional cooling time, print log reports and perform a self test to assist you with trouble shooting. - Page 26 The Circulating Fan and Cool Down Fan will run for 10 seconds – hear the fans run f ). A sound will “beep” indicating end of test If one of these systems does not work, contact the Dentronix Sterilizer Repair Department. (Indicates Test Mode Enabled) 10) The final menu item is “Done”.
-
Page 27: Using The Com Port
Unit #1000011 failed in the Cool Down cycle. An error code E19 was generated and printed. (See Appendix II for a list of all possible error codes.) COM Port Figure 17 COM Port Location on DDS 7000. The COM Port can be found on the left hand side of the control panel. - Page 28 …PASS Cycle Report… …Failed Cycle Report… Dentronix Dentronix --------- --------- DDS-7000 DDS-7000 Dry Heat Sterilizer Dry Heat Sterilizer a subsidiary of a subsidiary of Coltene Whaledent Coltene Whaledent Copyright 2004 Copyright 2004 All Rights Reserved All Rights Reserved FIRMWARE VERSION: 02.05...
-
Page 29: Warranty / Return Policy
Extra cartons and packaging materials are available from Dentronix at a nominal fee. Loaners are available at no charge if unit to be repaired is under warranty. After one year from date of sale, loaners are available at a nominal charge. All shipping costs are the responsibility of the customer. -
Page 30: Appendix I (Symbol Explanation)
Appendix I (Symbol Explanation) Etiqueter important d’Avertissement English Francais Se REFERER AU MANUEL REFER TO OPERATING D'OPERATIONS INSTRUCTIONS PRUDENCE CAUTION LE RISQUE DE CHOC RISK OF ELECTRICAL SHOCK ELECTRIQUE DO NOT REMOVE COVER ON Ne PAS ENLEVER LA BASE OR REAR. COUVERTURE SUR LA BASE REFER SERVICING TO OU DE RETOUR... - Page 31 Appendix II (Error Codes Switch. The DDS 7000 Dry Heat Sterilizer is programmed to allow optimum time to warm up, sterilize and cool down during a complete cycle. If any stage of this process is interrrupted before a cycle has completed,...
- Page 32 Manufactured for: Dentronix Inc. Coltene/Whaledent GmbH + Co. KG Subsidiary of Coltène/Whaledent Inc. Raiffeisenstrasse 30 235 Ascot Parkway 89129 Langenau/Germany Cuyahoga Falls, OH 44223/USA Tel. +49 (0) 7345 805 0 Tel. USA & Canada +1 800 523 5944 Fax +49 (0) 7345 805 201 +1 330 916 7300 info@coltenewhaledent.de...
Need help?
Do you have a question about the DDS 7000 and is the answer not in the manual?
Questions and answers
Why do our seal instrument packages come out dripping wet at the end of a cycle? We have had new door gaskets installed and it actually made the problem worse. And once a cycle has been completed there is also a lot of built up pressure still in the sterilizer once the door is opened.
The cause of sealed instrument packages coming out dripping wet after a cycle in the Dentronix DDS 7000 is likely due to opening the door before the chamber has cooled to a safe handling temperature. This premature opening can also result in built-up pressure being released when the door is opened, as the chamber has not completed the Cool Down phase. The DDS 7000 has a safety lock to prevent this, and forcing the door open early may lead to exposure to hot instruments and pressure release.
This answer is automatically generated
Hello, what is the most common fix for the error code E19, E04? on Dentronix DDS 7000. It's not cooling down. I suspect is the big cooling fan that's cooked. Thank you!