
Summary of Contents for Convert Technologies PLATO
- Page 1 HOME ENTERTAINMENT FOR ALL Plato Complete Guide V1.3.0 Convert Technologies Suite 3 Acorn Place Alfreton Road Derby. DE21 4AS...
- Page 2 Plato Introduction Congratulations on your purchase of Plato! Plato is a highly capable product and will revolutionise the way you, and your family, access audio and video content in your home; consolidating all media access through one simple interface. This home entertainment/media management system is designed and manufactured to the highest specification in the UK and rigorously tested to ensure you enjoy many years of listening and viewing pleasure.
-
Page 3: Table Of Contents
Switching off your Plato unit using the rear panel switch ..........19 2.4.2. Switching off your Plato unit using the front panel On/Off button ......... 19 2.4.3. Switching on your Plato unit using the front panel On/Off button ......... 19 The Plato Control App for Android ................... - Page 4 3.5.5. Lyrics ..........................27 3.5.6. Show Media Info ......................27 3.6. Downloading the Plato Android app to your smartphone or tablet ........28 3.7. Updating your Plato App & System Firmware ................29 3.8. Advanced Menu Options Overview ..................30 3.8.1.
- Page 5 Plato Complete Guide V1.3.0 5.3.3. Input Capacitance ......................39 5.3.4. Rumble Filter ........................39 5.4. Record Controls ........................39 5.4.1. Record default setting ...................... 39 5.4.2. Record Bit Depth ......................39 5.4.3. Record Sample Rate ......................39 Playing music from external inputs ..................40 Recording from an external source ..................
- Page 6 Debug ..........................78 14.2. Factory Reset ..........................78 14.3. Exit ............................79 14.4. UPnP friendly name ........................79 Operating Plato using an Air Mouse remote controller ............80 Advanced Media Library editing options .................. 81 16.1. Editing Artwork ......................... 83 Convert Technologies...
- Page 7 16.4. Merging a fragmented album ....................90 Backup and restore ........................94 17.1. Selecting a backup device ......................94 17.2. Configuring your backup ......................95 17.3. Restoring data from a backup copy ..................96 iOS Application ......................... 97 The Plato Range ........................98 Convert Technologies...
-
Page 8: Before You Begin
Please ensure that other equipment connected to Plato is earthed according to the manufacturer’s instructions. The Plato unit incorporates a mains fuse that is located on the rear panel, next to the AC switch. This must only be replaced by a fuse of the type and rating as described on the rating label on the rear panel of the unit. -
Page 9: Ventilation
Your Plato should be kept away from sources of heat, excess dust, humidity and from direct sunlight. Ensure there is a minimum of 10cms (4 inches) of ‘free space’ all the way around the Plato unit. Do not expose your Plato to rain or moisture, this unit must not be exposed to dripping or splashing water. -
Page 10: Unpacking Your Plato Box
Android remote control tablet (Amplified Models) 1.3. Maintenance After disconnecting the Plato unit from the mains supply, the casing and front panel may be cleaned with a lightly dampened soft cloth or chamois leather. Avoid using abrasives or solvents. Convert Technologies... -
Page 11: Your Plato Unit
Plato pre-amplifier, which can be accessed at the rear of the unit. Plato can connect to your home/office network and is therefore able to access audio/video content that may exist on other UPnP (Universal Plug and Play) servers connected on that network, and stream that content to other UPnP compliant devices. -
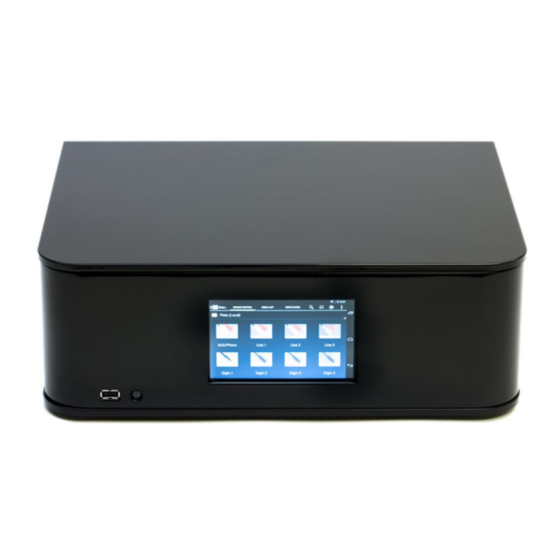
Page 12: Front View
To connect a USB device to transfer media files. Plato is set by default to go to sleep after 10 minutes of inactivity using the display. This can be changed by selecting the android settings/display/sleep timer or by selecting “standby timer”... -
Page 13: Pre-Amplifier Module
Connection to speakers is via the 4mm banana plug connectors. It is possible to purchase Plato without the power amplifier module installed, in this case a blanking plate will be supplied in place of the power amplifier module. -
Page 14: Digital Module
TV. Note that Plato offers 3 USB sockets for expansion. The socket on the front of the unit is configured for import/export (see section 11.2) to transfer data into, or out of Plato. Media files located on USB devices plugged into the front port will not be directly accessible to Plato. -
Page 15: Connecting Your Plato
You must not plug your Plato unit into the mains until you have connected your Plato unit to the other equipment in your system. Your Plato unit operates with 230V 50Hz mains supplies. Do not connect it to a DC or any other supply. -
Page 16: Connecting Your Digital Inputs
Connecting your digital inputs Some devices may provide a digital instead of analogue connection. There are four digital input connectors on the rear panel of your Plato unit. One is coaxial and three are optical. Select the appropriate connector for your digital input. -
Page 17: Connecting Your Speakers Via 4Mm Banana Plugs
Connecting to an external amplifier This applies for Plato models without the integrated power amplifier option. Use Phono cables from the Pre Out connections on the rear of the Plato unit to connect to an external power amplifier and speaker system. -
Page 18: Connecting To A Digital Sound System
2.3.7. Connecting to the internet directly via your home router To use all the functions of your Plato unit, an internet connection is required. The best option is to connect directly to your home router via an Ethernet cable. See connection diagram below. Note that your home router and its connections may vary according to the specific router and type of internet connection. -
Page 19: Connecting To Your Tv Via Hdmi
Plato Complete Guide V1.3.0 2.3.8. Connecting to your TV via HDMI Use the HDMI cable provided with your Plato unit to connect Plato directly to your TV. 2.3.9. Playing to remote TVs and speakers You can play music and video to remote TVs and speakers using your home network, either wired directly or through Wi-Fi. -
Page 20: Switching On Your Plato Unit And Launching The Plato App
LAN using a tablet or phone installed with the Plato app controller. Tips: If your Plato unit will be switched off for any length of time (more than 2 days) it is recommended that you fully power down the unit using the rear panel switch. - Page 21 1. Press the front panel On/Off button. (Please wait up to 7 seconds for the front panel display to light up again). 2. If the Plato control app is not already running, touch on the Plato icon located on the desktop.
-
Page 22: The Plato Control App For Android
Plato’s operation. The App should be running at all times on Plato itself, and the touchscreen on Plato can be used to control its operation. However, it is often more convenient to use a remote device (standard tablet or smart-phone) to allow remote operation of Plato and its features. -
Page 23: The Plato Main Drawer Feature Menu
The Advanced Menu Options will be discussed later in this manual. 3.3.1. The Plato Main Drawer Feature Menu Select the Plato logo in the top left hand corner of the display to show the Main Drawer Feature Menu. Main Drawer... -
Page 24: Selected Device
Plato App you are currently using always has (Local) displayed after its name to make it easier to identify. By default, the Plato app assigns a unique ‘Plato’ name on start-up as its UPnP name. It is recommended that you modify the name of each unit running the Plato app to make it easier to identify different devices on your network. -
Page 25: Plato Features Menu Options Overview
History of tracks that have been played or recorded on an external input. NOW PLAYING 3.4.2. Media Library Use Media Library to access your media files stored on Plato, or other UPnP servers. The Tabs for Media Library are: LIBRARY Browse all media on the selected device. -
Page 26: Import
Folder based view for full access to internal and external storage devices NOW PLAYING 3.4.6. HighResAudio Use to access the ‘High Res Audio’ website and download material direct to your Plato device. The Tabs for HighResAudio are: BROWSE An embedded web browser to access the contents of HighResAudio online. -
Page 27: Volume Control
Plato Complete Guide V1.3.0 The device shown in the dropdown list is the currently selected playback device. If you would like to see what is playing on a different device, simply select it from the list. Any tracks selected for playback will automatically play out to the selected device. See section... -
Page 28: Mute
3.5.5. Lyrics The Lyrics option is only available from a tablet and will not be available on Plato’s touch screen. This option integrates with the MusixMatch app to display lyrics for the currently playing audio track. -
Page 29: Downloading The Plato Android App To Your Smartphone Or Tablet
Downloading the Plato Android app to your smartphone or tablet The most convenient way to operate Plato is by using a smartphone or tablet as a remote control device. This is possible by loading the Plato control app onto your chosen device. -
Page 30: Updating Your Plato App & System Firmware
Updates to your tablet or smartphone will be issued automatically via the Google PLAY store. When using your Plato app, keep an eye out for a small icon appearing at the very top left of your Android Notifications screen. Place your finger at the top of the screen and drag it downwards to reveal the update notification message. -
Page 31: Advanced Menu Options Overview
14.1.1 System Firmware 1. Close the Plato app by selecting the Android backspace icon on the right of the screen (It’s the bottom icon of the three displayed). You may have to press this several times before it asks if you would like to close the app. This will take you to the Android home screen. -
Page 32: Exiting The Plato App
3.8.3. Exiting the Plato App Caution: You must exit the Plato App on your Plato unit before switching off your Plato unit. To exit the Plato App 1. Press the Back icon (these... -
Page 33: Advanced Menu List
Plato Complete Guide V1.3.0 2. Select Exit. The Confirm exit dialog box is displayed. 3. Press OK. 3.8.4. Advanced menu list The additional advanced menu options are used less frequently and described in more detail in section 14. Convert Technologies... -
Page 34: Configuring And Using External (Pre-Amp) Inputs
The SOURCE CONTROL tab shows a diagrammatic view of the pre-amp inputs. When you use your Plato unit for the first time, all the inputs are marked unassigned. By configuring your inputs, it will be easier to determine which audio device is connected to which input, and configure the inputs to ensure the best quality of playback, and get the most from your Plato. -
Page 35: Adding A Turntable
Plato Complete Guide V1.3.0 4.1. Adding a Turntable The turntable must be connected to the AUX/Phono input. To assign a turntable 1. From the Main Drawer Feature Menu, select External Source, and open the SOURCE CONTROL tab. 2. Long Press the UNASSIGNED icon above the AUX/Phono text. -
Page 36: Adding A Cd Player
Plato Complete Guide V1.3.0 4.2. Adding a CD Player A CD player with analogue outputs can be connected to the Line 1, Line 2 or Line 3 input. A CD player with digital outputs can be connected to either the coaxial or optical digital input. - Page 37 Plato Complete Guide V1.3.0 6. Use the or the Delete key to delete the existing text 7. Type in new text. 8. Select Done. Convert Technologies...
-
Page 38: Adding Other Devices
Plato Complete Guide V1.3.0 4.3. Adding other devices Continue to assign all your other input devices. There are a range of icons you can choose to match your connected device for general line and digital inputs. Once all your inputs are correctly labelled it is very easy to see which port should be selected to allow playback from each connected device. -
Page 39: Configuring Inputs
Phono controls There are additional settings that only apply to turntable input devices which must be connected to the ‘AUX/Phono’ inputs. These allow you to match Plato to the connected cartridge to ensure the best quality audio reproduction. Convert Technologies... -
Page 40: Moving Magnet/Moving Coil Select
Plato Complete Guide V1.3.0 Check with your cartridge manufacturer’s details for appropriate settings for: 5.3.1. Moving Magnet/Moving Coil Select Select the appropriate choice to match your cartridge. 5.3.2. Input Resistance Input resistance is fixed at 47kR for Moving Magnet sources, but selectable as 100R/200R for Moving Coil sources. -
Page 41: Playing Music From External Inputs
Plato Complete Guide V1.3.0 Playing music from external inputs Once your system is correctly installed, you can begin playing music from your connected CD player or turntable. 1. Select External Source from the MAIN Plato menu. 2. Select the appropriate source by touching the appropriate icon. - Page 42 Note that Plato’s music recognition software requires an internet connection to return track information. The album (including artwork) is determined by looking at a sequence of tracks and thus Plato may need to play multiple tracks before finding the correct match. This is especially difficult for tracks which have been released on multiple albums (e.g.
-
Page 43: Recording From An External Source
Plato Complete Guide V1.3.0 Recording from an external source Now that you have your Plato system up and running, you can play music and record your music collection to the internal Plato disk drive automatically. Plato’s automatic music recognition system will detect the music that is playing and generate tag information. This is especially useful for recording records. - Page 44 Plato Complete Guide V1.3.0 If the levels are too low (too quiet) or are clipping, you should adjust the input gain up or down using the appropriate ‘Source Configure’ controls to correct this. See section 7.2 for instructions on how to make adjustments.
-
Page 45: Changing Input Gain Settings
-6dB for high output DAC devices For a turntable input, Plato provides a wide range of gain settings to support a large range of cartridge types. Follow the same procedure to setup the phono input gain. See option list below. -
Page 46: Media List Tab
So, to record an album, simply cue up the record, start the recording and stop once both sides of the album have finished playing through the system. Plato will then generate a fully tagged FLAC file for each track on the album. - Page 47 MEDIA LIST shows this as indicated: Once the FLAC file has been generated and added to Plato’s database the MEDIA LIST will show the track with a green dot. Now the track (or tracks) are available for playback from Plato’s internal database.
- Page 48 Plato Complete Guide V1.3.0 Convert Technologies...
-
Page 49: Media Library
Artist/Album name, and select Play Menu, OR: Short press on the album artwork and select ‘Play All’ from the Album Details screen Plato is a streaming device which means you can choose to play media to any compliant device on your home network. The Play Menu... - Page 50 Plato Complete Guide V1.3.0 To listen to an album that you have recorded or imported. 1. From the Main Drawer Feature Menu, select Media Library. 2. Select Album in the option list in the top right hand corner of the display.
-
Page 51: Using Media Search
Plato Complete Guide V1.3.0 Inserts this track (or tracks) at the end of the current play Play now queue, and begins to play the selected track immediately. Inserts this track (or tracks) after the current playing track, and Play next ... -
Page 52: Additional Features On The More Options Menu
The edit option is described later in this manual in section 16. 8.3.4. Delete The Delete option provides a means of removing the selected media from the selected Plato server. To use this option, it must be enabled in the Advanced Settings as described in section 14. -
Page 53: Download
If there is no USB device plugged into the main Plato unit, the notification will show this. The export process will start once a valid USB device (with enough free space) has been plugged into the front USB socket. -
Page 54: Viewing Image Files
8.4. Viewing image files Plato supports viewing collections of image files as well as audio and video data. Details on how to import image files are given in section 11.4. To view your image files select Image from the drop down filter in the main library view. This will show the top-level folder view of your image collection. -
Page 55: The Play Queue Tab
Plato Complete Guide V1.3.0 8.5. The Play Queue tab The Play Queue tab shows a running list of tracks which have been played on the selected device, or are queued waiting to be played on the selected device. Select the PLAY QUEUE tab to see what songs have played and which are queued to play. -
Page 56: Saving A Playlist From The Play Queue
Plato Complete Guide V1.3.0 When you have finished making changes to the Play Queue, select Done. Whilst in Edit mode, you also have the option to empty the whole Play Queue by selecting Clear All in the top right hand corner of the display. -
Page 57: Now Playing In Media Library
Two options on the right hand side of the media access controls provide some additional control of playback through the current Play Queue: • Random play: Plato will randomly step through the current Play Queue. • Loop play: Plato will continuously loop through the current Play Queue. -
Page 58: Internet Radio
Once the station is selected, the Plato screen automatically changes to display the NOW PLAYING tab and shows an icon of the selected radio station. Note that there may be a short delay before audio content is played while Plato fills its internal buffers prior to audio playback. -
Page 59: Saving Radio Stations To Your Presets List
Plato Complete Guide V1.3.0 From the Now Playing screen, press anywhere on the screen to bring up further media control options. With the options displayed, you can change the volume, using the volume slider control, and pause playing of the station. -
Page 60: Listening To Your Saved Radio Stations
3. Select a radio station from the displayed list 9.3. Search for radio stations When the Internet Radio feature is selected Plato’s search function will return matches on internet radio stations. Using this feature, it is possible to search for: Stations by name •... -
Page 61: Playlists
Playlists are stored on UPnP servers. Normally you will store them on your main Plato device, but you could choose to store them on a different UPnP server (maybe a tablet or smartphone). -
Page 62: To Play A Playlist
Plato Complete Guide V1.3.0 10.2. To Play a Playlist 1. From the Main Drawer Feature Menu, select Playlist. 2. Select the PLAYLISTS tab. 3. Choose a Playlist to play back, and commence playback using Long press on the playlist background, or opening the More Options menu. -
Page 63: Playlist Options
The Mood Grid provides a different method of selecting your music. As you import music Plato will automatically categorise it according to the mood the track evokes. The mood grid provides a means of generating lists of tracks based on a mood rather than selecting them by hand. -
Page 64: Building A Mood Based Playlist
Plato Complete Guide V1.3.0 Each mood is represented by a pink circle, the dark purple circles indicate the number of tracks associated with this mood on the grid (a larger circle indicates more tracks are available). It is possible to select a mood by touching the appropriate circle, and the selected mood is displayed at the top of the screen, with the number of available matching tracks in brackets. - Page 65 Plato Complete Guide V1.3.0 It is possible to edit the order of the list, or remove tracks just list like any playlist using the Edit controls. The Settings control allows you to generate a new playlist, and configure the maximum number of tracks in each generated list.
-
Page 66: Import
Plato Complete Guide V1.3.0 Import The Import Feature allows you to import media files to your Plato unit. This option provides a fully automated import facility from a USB device plugged into the FRONT USB port. The import will include file copy, additions to the internal media database, and Gracenote checks to find artist images and other tagging information. - Page 67 Plato Complete Guide V1.3.0 The first time you plug in your supplied CD drive you will have to grant access on the Plato device. Simply follow on-screen instructions on the Plato touchscreen to complete the operation. Once this has been done once, it should not be necessary again.
-
Page 68: Alternatives
More Options menu before you choose to start the rip operation. Note that it is possible to edit META data tags once the CD has been imported into Plato using the editing tools as described in section 16. -
Page 69: Importing From A Usb Memory Stick Or Drive
Plato Complete Guide V1.3.0 11.2. Importing from a USB memory stick or drive. Plug your USB memory stick or USB disk drive into Plato’s front USB socket, and select USB on the IMPORT MEDIA tab. This shows a simplified view to import all media files from the attached device. The buttons will remain inactive (greyed out) until a suitable USB device has been added to USB port on the front of Plato. -
Page 70: Importing Video Files
Prior to importing, image files should be sorted in up to 3 levels of folder as follows: Year->Month->Day Each level will be preserved on Plato after the import process so it is possible to view images sorted into date based folders. 11.5. File Manager The middle tab of the Import/Export feature shows a fully featured file browser screen. - Page 71 This is useful to copying files off of Plato. Do not use copy to import media files into Plato, as Copy does not perform the database operations required for media files. Imports selected file/folder onto Plato. Plato will decide where to Import ...
-
Page 72: Streaming Audio And Video
Plato Complete Guide V1.3.0 Streaming audio and video You can use your Plato unit to stream music to a wireless speaker, or video to a Smart TV in other locations in your house. You must first have wireless speakers or Smart TVs configured on the same home network that your Plato unit is connected to. -
Page 73: To Watch Video From Your Media Library
3. Select the top device to display the full drop down device list. 4. Select Either Your main Plato unit if you want to watch on the HDMI TV connected to your Plato unit, Any compatible TV/tablet connected to your router to stream to that external device. -
Page 74: Accessing Highresaudio Content
From this page it is also possible to go through the site checkout and purchase new material. Once you have purchased new material it is possible to download it direct to Plato using the DOWNLOAD MANAGER tab. Note that registration can be done via a PC using a full sized keyboard for ease of use. - Page 75 Plato Complete Guide V1.3.0 Select the Plato device onto which you wish to download from the drop down list of compatible devices, and start the download. The download manager will show the download progress. Once the download is complete your files will be ready for playback in the Media Library as described elsewhere in this manual.
-
Page 76: Advanced Menu Options
Some functions are only available on Plato devices, others are applicable to mobile devices running the Plato App. The friendly name should allow you to identify which device you are talking to in each case. -
Page 77: Progress
(depending on individual device support) for app updates. Plato devices will update directly using our own Convert Technologies service. Note that updates to the Plato device will require access to its touch screen. Follow all on- screen prompts to complete the update process. -
Page 78: Backup And Restore
Plato Complete Guide V1.3.0 14.1.3. Backup and restore Plato now supports automated backup and restore of all media data. Use this option to configure automated backups, or restore data from a previous backup. See section 17 for more details on backup and restore. -
Page 79: Debug
14.2. Factory Reset The factory reset option will return the Plato app configuration to its factory default settings. This will have no effect on user data (including media files, and recorded data), or additional... -
Page 80: Exit
Plato since installation. 14.3. Exit Use Exit to exit the Plato app. The app should be exited prior to powering the unit off. 14.4. UPnP friendly name It is strongly recommended that you set an individual friendly name for each device running the Plato app on your home network. -
Page 81: Operating Plato Using An Air Mouse Remote Controller
HDMI screen to provide visual feedback on what Plato is doing. This could be useful if you want to drive Plato without using an Android or iOS tablet or smartphone, or if you would like to try controlling a third party Android application running on Plato. -
Page 82: Advanced Media Library Editing Options
Plato Complete Guide V1.3.0 Advanced Media Library editing options There are a variety of editing options available to modify META data tags in your Media Library. For all options, you must choose the Edit option for a song or album. - Page 83 Plato Complete Guide V1.3.0 3. Select Save Tags after making any changes. 4. Progress on saving the changes can be seen as a progress bar at the bottom of your screen. Press the ‘Clear’ button after saving edited tags. Note that Android uses album title and album artist to define an album. So, all tracks with the same album title and album artist will be grouped into a single album on the Media Library view.
-
Page 84: Editing Artwork
Plato Complete Guide V1.3.0 16.1. Editing Artwork Gracenote occasionally returns an incorrect album art thumbnail image. This can happen when recording a ‘Greatest Hits’ or ‘Best of’ album, or if Gracenote is unable to determine the track being played. The following example shows changing a thumbnail image for Bob Marley’s greatest hits ‘Legends’... -
Page 85: Adjust Start/End Points Of A Track
Plato Complete Guide V1.3.0 3. In the Media Library, press the More Options icon for the album and select edit from the pop up list. 4. Swap incorrect image for new one. Note that exactly how the image browser looks depends on the version of Android running on your device. - Page 86 Plato Complete Guide V1.3.0 appeared on numerous albums and then selects one that is different to the one you’re actually recording. Note: The ‘Edit Start/End of track’ button will only appear if the raw data is still in the record cache. If you recorded the track a long time ago, or have recorded lots of other material in the meantime, this data may be deleted and you won’t be able to edit these files anymore.
-
Page 87: Creating A Missing Track
Occasionally, a track can be missed out if it was not recognised by Gracenote as anything at all. This means that a flac file for the track has not been created but the raw music recording is still in Plato’s record cache, as Plato records everything from the start to the end of a recording session. - Page 88 Plato Complete Guide V1.3.0 2. Select Edit. 3. Select Edit start/end of track. 4. Select the Adjust window edge right arrow several times to extend the window size to large enough to cover the track after ‘Second Hand News’. 5. Select (Play) and then select the Mark Start button where the next track starts.
- Page 89 Plato Complete Guide V1.3.0 6. Select the Mark End button where the next track ends. Here, it was pressed at 7 min and 00 sec. 7. Select the New button. This will set a new track that starts at 2 min 46 sec and ends at 7 min 00 sec.
- Page 90 Plato Complete Guide V1.3.0 9. When the save has finished, the screen will have been updated for the new file. The new start will have been set to the end of this file and the new duration will have been set to 3 minutes. This makes it as easy as possible to create the next track if that is needed.
-
Page 91: Merging A Fragmented Album
Gracenote can’t be 100% sure which album you are recording. Again, Plato has editing tools to help merge all songs into a single album, as described below. If you have only just recorded this album, then the easiest way of modifying all of the tracks is to use the Recently Added playlist. - Page 92 Plato Complete Guide V1.3.0 4. Press Multi-select, then select the tracks that make up the album. If this album was the last thing you recorded, then these tracks will be at the top of this playlist. 5. Short press the ‘more info’ (three dots) icon adjacent to one of the selected (correctly tagged) tracks and select edit from the pop up menu.
- Page 93 Plato Complete Guide V1.3.0 6. If none of the tracks listed are correctly tagged, fill in the correct album title and album artist. This will ensure all the tracks are recognised as part of a single album. Correct the album artwork if needed and set a disc number, or leave blank for asingle disk album.
- Page 94 Plato Complete Guide V1.3.0 9. Some or all of the tracks listed may need to be edited to correct the track number and track title. This can be done one at a time using the ‘Edit’ option in the ‘More Options’...
-
Page 95: Backup And Restore
Plato Complete Guide V1.3.0 Backup and restore Plato is designed to form the central hub for all digital media data. This could include ripped files from a CD collection, recorded albums, downloaded hi-resolution material, as well as video files and photo collections. Putting all your data in one place has many advantages, it is easier to access, and easier to manage. -
Page 96: Configuring Your Backup
Plato Complete Guide V1.3.0 drive to be a single 4TB NTFS partition, using the pre installed LaCie Setup Assistant. Simply follow the instructions on screen and click on the partition ‘arrow slider’, moving it all the way to the left hand side. This reduces the exisiting FAT32 (32Gb) partition to zero and increases the NTFS partition to use the full amount of available space on the drive. -
Page 97: Restoring Data From A Backup Copy
Restore all will attempt a restore of all data from the last complete backup. It will re-install all data from the backup location to your Plato system. Note that if your Plato system already contains files with the same name (maybe some of your data is still available), you will be asked whether you would like to overwrite with backup data, or keep the current version on Plato. -
Page 98: Ios Application
Note that the app is free to download, but support will only be provided to Plato customers. To access all of Plato’s features it is recommended that you use an Android tablet or smartphone. The iOS control app provides access to the most commonly used features. -
Page 99: The Plato Range
Plato Complete Guide V1.3.0 The Plato Range Convert Technologies... - Page 100 Plato is a one box, home Plato Lite, as the name suggests, entertainment solution that entertainment solution with the is a slimmer version of the Plato combines hifi amplification with ability to record from both Product. It still has Plato’s great...
- Page 101 Class A bias current applied to the output transistors. When a digital file/stream is played the Plato looks ahead in the data and adjusts the bias, so before the transient hits the output transistors the bias has been raised enough to ensure the output transistors stay on.
- Page 102 Plato Class A Brief Description Plato is a one box, home entertainment solution that combines hifi amplification with the ability to record from both analogue and digital sources, such as vinyl, tapes and CD’s. Enjoy listening to your precious collections played through Plato’s own stunning high performance amplifier.
Need help?
Do you have a question about the PLATO and is the answer not in the manual?
Questions and answers