Subscribe to Our Youtube Channel
Summary of Contents for Craig CHT914n
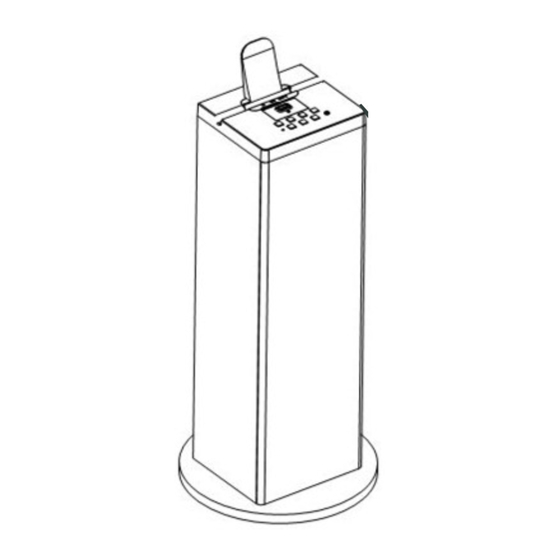
- Page 1 TOWER STEREO SYSTEM TOWER STEREO SYSTEM Owner's Manual PLEASE READ BEFORE OPERATING THIS EQUIPMENT. Model: CHT914n...
-
Page 2: Important Safety Instructions
IMPORTANT SAFETY INSTRUCTIONS... -
Page 4: Power Source
POWER SOURCE Insert the AC plug into a conveniently located AC outlet having AC 120V~60Hz. NOTE: The AC plug supplied with the unit is polarized to help minimize the possibility of electric shock. If the AC plug dose not fit into a non polarized AC outlet, do not file or cut the wide blade. -
Page 5: Location Of Controls
LOCATION OF CONTROLS MAIN UNIT 1. USB Port (For recharge only) VOL- (Volume Down) button 9. AUX IN 2 jack (Power) button 3. STANDBY indicator (Play/Pause) button 4. SOURCE button 11. SOURCE indicator / TUNE + button Speaker Connector 6. VOL+ (Volume Up) button (For Left Channel Speaker) TUNE - button 13. - Page 6 LOCATION OF CONTROLS REMOTE CONTROL POWER button (Mute) button /TUNE - button / TUNE+ button 3. VOL (Volume)+/- buttons (Play/Pause) button 4. SOURCE button 8 EQ (Equalizer) button...
-
Page 7: Battery Installation--- Remote Control
BATTERY INSTALLATION--- REMOTE CONTROL -First Time Use Remove and discard the insulation tab as figure on the right -Replacing Batteries For Remote Control 1. Push and slide out the battery holder as figure 1 below. 2. Replace the battery with a new CR2025 button cell as the polarity markings on the rear of the Remote Control. -
Page 8: General Operations
LEFT SPEAKER CONNECTION Black wire Main Unit Red wire Left Speaker Connect the connection wires (Red and Black) from Left Speaker to the Speaker Connectors on the rear of Main Unit as the figure above. GENERAL OPERATIONS 1.Insert the AC Power Cord into conveniently located AC outlet having AC 120V~60Hz.The Red Standby Indicator will light. -
Page 9: Listen To Fm Radio
LISTEN TO FM RADIO 1.Power ON the unit as previous procedures. 2.Press the SOURCE button repeatedly until the color of source Indicator turns Green. 3.Press and hold the /TUNE - or /TUNE + buttons until the source Indicator start blinking. The unit will start to search next (or previous) available FM radio station then plays. - Page 10 LISTEN TO EXTERNAL AUDIO DEVICES AUX IN 2 jack 1. Connect one end of supplied audio connection cable to the AUX IN 2 jack on the top of the unit. as the figure above. 2. Connect the other end to the AUX out/Line out/Phone jack on the external player (such like iPod, iPhone, iPad, MP3 Player, Discman...
- Page 11 BT player(For detailed paring procedures, please refer to the user's manual of your BT device.) C. When the external BT player searched the Speaker, our model number"CHT914n" will appear on the display of the external BT device. Paring code"0000" may need to enter.
-
Page 12: Troubleshooting Guide
TROUBLESHOOTING GUIDE Check the followings before requesting service SYMPTOM POSSIBLE CAUSE POSSIBLE SOULTION AC plug not connected to the Plug to the wall outlet. No power wall outlet Volume in minimum position Raise volume level by pressing the VOL (Volume) + button Play the music/movie in the connected The connected device is not device as usual... -
Page 13: General Specifications
GENERAL SPECIFICATIONS Power Source......................AC 120V~60Hz Power Consumption........................45W Radio Coverage....................FM 87.5 -108.0 MHz Impedance of Speakers Loud ....................... 8 Ohm, 10W x 2 Speakers Tweeters........................8 Ohm, 5W x 2 Bluetooth working distance..................Up to 30 feet (Measured in open area. Wall and structures may affect the effective range.) Remote working distance.....................Up to 15 feet USB port output ....................DC 5V, Max. - Page 14 Under no circumstance shall Craig be liable for any loss or consequential damage arising out of the use of this product. This warranty gives specific legal rights. However, you may have other rights which may vary from state to state.


Need help?
Do you have a question about the CHT914n and is the answer not in the manual?
Questions and answers