
Subscribe to Our Youtube Channel
Related Manuals for Orbitsound T4

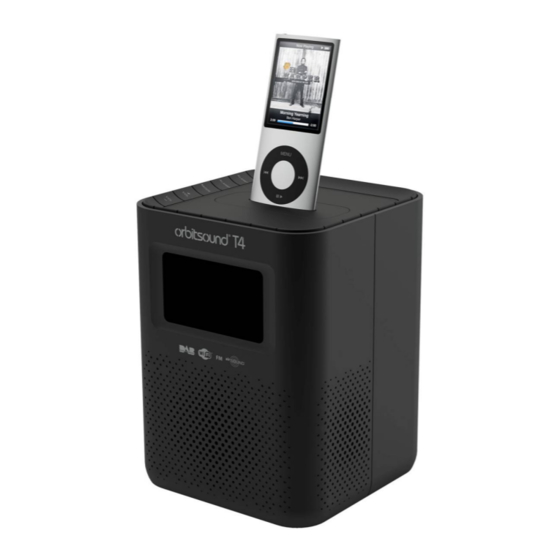
Summary of Contents for Orbitsound T4
- Page 1 WiFi Internet/DAB/DAB+/FM radio and iPod dock User's Guide Software version: v2.019...
-
Page 3: Table Of Contents
Care in use............................5 Contact Information Package Contents Internet Radio Requirements........................7 Unit top & Controls Overview Front and Back Overview ..........................9 Using the T4 Switching on..............................10 Setup Wizard (first use) ......................10 Internet Radio..............................12 Local Stations..........................13 Choosing a Station........................14 Podcasts............................ - Page 4 Software Updates ........................35 Enter Setup Wizard ........................36 SW Version and Radio ID ......................36 Media Sharing Guide Set Up Media Sharing in WMP 11 ......................37 Set Up Media Sharing in MAC OSX......................38 Troubleshooting Specifications Orbitsound Warranty...
-
Page 5: Important Safety Information
2. Do not place the radio near a heat source when in use. 3. Take care that the power cord is not tripped over or damaged in another way. 4. NEVER USE the power supply if it is damaged. Contact orbitsound for a replacement power supply if there is damage apparent. -
Page 6: Package Contents
Package Contents 1. orbitsound T4 radio unit 2. AC-DC mains adaptor 3. Instruction booklet 4. iPod adaptors... -
Page 7: Internet Radio Requirements
Internet Radio Requirements In order to use the WiFi Internet radio, you will need the following: 1. A broadband Internet connection. 2. A wireless access point (Wi-Fi) connected to your broadband Internet, (usually referred to as a router). 3. If your wireless network is configured to use Wired Equivalent Privacy (WEP) or Wi-Fi Protected Access (WPA) data encryption then you need to know the WEP or WPA code. -
Page 8: Unit Top & Controls Overview
Unit top & Controls Overview Button Internet DAB+ iPod mode Press to turn on/off Radio When alarm is sounding, press to turn off alarm BACK Press to goes to previous menu page Press to tune backwards Previous Track FM mode: press and hold to auto-search Press to confirm Play/Pause FM mode: press to auto-search... -
Page 9: Front And Back Overview
Front and Back Overview Remote control Overview Unit Back Overview... -
Page 10: Using The T4
Using the T4 Switching on 1. Connect to your Radio power adaptor and ensure the power LED is lit. 2. Press to switch the radio on. 3. On first use, the ‘Setup wizard’ is offered (see below) Setup Wizard (first use) 1. - Page 11 confirm. 7. Press to your local ‘Wlan region’, and then press to confirm. 8. Press to your prefer ‘SSID’, press to confirm. Radio will save it in memory. Note: Your radio may find more than one network. Press to your favorite one, press to confirm.
-
Page 12: Internet Radio
Note: WEP/WPA pass codes are case-sensitive. If you make a mistake while entering your password, select ‘ ’ (backspace) to delete that character. You can reach the 'cancel', 'ok', and 'bksp' buttons by proceeding before '0' or after 'Z'. 10. After selecting the final character of your password, press , and then press to confirm. -
Page 13: Local Stations
3. Move the cursor to < Station list >, then press to confirm. Note: If there is a problem connecting to the WiFi connection, the unit will show the following: You need to check your WiFi connection: 1. Check your router, see it working normally or not; 2. -
Page 14: Choosing A Station
Press to your favourite item, press to confirm, and then step to step to the program you desired. Choosing a Station 1. Press MENU, point the cursor to < Station list >, and then press to confirm. 2. Press to < Stations >, and then press to confirm. -
Page 15: Podcasts
2. Genre ‘GENRE’ enables you to choose radio stations according to their content, for example Classic Rock, Sport, News, etc. 1. Press to < Genre >, press to confirm. 2. Press to highlight your preferred genre, press to confirm. 3. Press to highlight the station you would like, press to confirm. -
Page 16: Internet Radio - Add Stations To 'My Favourites
Internet Radio - Add Stations to ‘My favourites’ You can add stations to the ‘my favourites’ area within the T4 by visiting the website: http://www.wifiradio-frontier.com. You will need to register and follow the instructions online to add stations to your favourites. You will also need an access code in order to give your radio access to your preferred stations. -
Page 17: Displaying Station Information
This displays the date which is provided by the broadcaster. Station Updates Occasionally, the T4 will tell you that it is receiving an updated station list. It does this automatically and periodically, ensuring your radio always has the latest station directory on-board. -
Page 18: Music Player Mode (Streaming Music)
Music Player Mode (streaming music) Note: To play streaming music, a configured server needs to be available. Information on setting this up can be found in the appendix. Play Shared Media 1. Press MODE repeatedly until < Music player > is showing / active 2. -
Page 19: Dab/Dab+ Mode
DAB/DAB+ Mode Press MODE repeatedly until < DAB radio > is shows up. For initial use, the T4 will do a full scan: Note: in use, you can press SCAN to redo a ‘Full scan’, and add new station to your station list. -
Page 20: Manual Tune
Manual Tune: 1. Press MENU, and then press to < Manual tune >, press to confirm. 2. Press to step between the channels and press to select the preferred channel. Note: If there is a multiplex corresponding to this channel and frequency, then the display will show a tuning meter with the signal strength and the multiplex name after a few seconds. -
Page 21: Drc (Dynamic Range Control) Value
DRC (Dynamic Range Control) value DRC makes DAB stations sound the same volume. This is an optional feature. You can set the level of the 'compression' of stations to eliminate the differences in dynamic range or sound level between radio stations. Set DRC to off indicates no compression. -
Page 22: Fm Mode
1. Press MODE repeatedly until < FM Radio > is showing up. When this mode is selected, the T4 remembers the last listened to station. For initial use, The T4 will be tuned to the start of the FM frequency range (87.50MHz). 2. Press to increase or decrease FM frequency by 0.05MHz per step. -
Page 23: Setting Station Presets
Setting Station Presets The T4 can store 10 Internet, 10 DAB+ and 10 FM stations presets. To store the current station: 1. Press and hold PRESET, and then press to your desired preset 'slot' . 2. Press to confirm. And then it will return to its normal working condition, and preset icon appeared on display. -
Page 24: Ipod Mode
(check the iPod screen). Or another way to enter iPod mode by pressing MODE repeatedly until 'iPod' is displayed. You can choose tracks to play from the iPod control, or by using the selector buttons on the T4: 3. Press to previous track. -
Page 25: Aux In Mode
AUX IN Mode AUX In allows external music/sound sources to play through the T4's airSOUND speakers. Good connection sources include laptops, desktop computers, alternative MP3 players etc. 1. Connect a stereo 3.5mm jack lead to the sound source and the other end to the AUX input on the T4 (rear of unit). -
Page 26: Other Functions
Other functions Sleep Function The sleep function will cause the T4 to switch off (go into standby) after a chosen time period. 1. Press SLEEP to directly enter its setting, 2. or It also can be activated from < Main menu > < Sleep >, press to confirm. -
Page 27: Setting Clock - Time / Date
Setting Clock - Time / Date Manually setting the Time/Date 1. Time setting can be activated from < Main menu > < System settings > < Time/Date >, press to confirm. 2. While the cursor points to < Set Time/Date >, press to confirm. -
Page 28: Set Hour Format
Set hour format 1. Press to < Set format >, press to confirm. 2. Press to your favoured format, press to confirm. Set timezone 1. Press to < Set timezone >, press to confirm. 2. Press to your location timezone, press to confirm. -
Page 29: Setting Alarm
Setting Alarm 1. Press ALARM1 or ALARM2 to directly enter its setting mode, or; It also can be activated from < Main menu > < Alarms >, press to confirm, and then press to your purpose one, press to confirm. 2. - Page 30 Note: Alternatively, you may also press to < Preset: Last listened > to choice alarm sound. 8. Press to confirm, and then press to < Volume: 12 >, press to confirm. 9. Press to your ideal volume level, press to confirm. 10.
-
Page 31: To Turn Off Alarm
To turn off Alarm When alarm is sounding, you can either press Alarm 1, Alarm2, or to turn it off, or press 'SNOOZE' to pause the alarm temporarily. When alarm is sounding, touch SNOOZE repeatedly, which located at top of unit, the snooze interval time will be 5/10/15/30minutes in turn (changed by the number of times SNOOZE is pressed). -
Page 32: General Operation
Adjust Volume level Adjust the volume level by pressing The T4 will remember its previous volume level usually. Browse Station Information It is possible to view the information that is displayed on the second line of the display when listening a radio program. -
Page 33: System Settings
System Settings Equaliser 1. Press MENU, and then press to ‘Main Menu’, press to confirm. 2. Press to highlight < System settings >, press to confirm. 3. Press to < Equaliser >, press to confirm. 4. Press to your ideal option, press to confirm. -
Page 34: Network Setup
If you want get MAC address, Wlan region, IP address etc. then you need 'View settings' If you take the T4 to another region, then you need 'Wlan region' Manual settings allows direct access to the network configuration (for advanced Users only). -
Page 35: Factory Reset
Factory Reset WARNING: running this will completely erase your radio’s memory, clearing all WEP/WPA codes and other user settings. 1. It can be activated from < Main menu > < System settings > < Factory reset >. 2. Press to confirm, and then press to ‘YES’. -
Page 36: Enter Setup Wizard
3. You can choose to update the software any time by selecting 'Check Now' . The T4 will confirm if it is up to date. Enter Setup Wizard 1. It can be activated from < Main menu > < System settings > < Setup wizard >, press to confirm. -
Page 37: Media Sharing Guide
Media Sharing Guide Set Up Media Sharing in WMP 11 Note: After you download and install Windows Media Player 11 for Windows XP and connect your Radio to the network, you need to set up media sharing so that you can share music with your Radio. The following steps describe how to set up media sharing in Windows Media Player 11. -
Page 38: Set Up Media Sharing In Mac Osx
Set Up Media Sharing in MAC OSX Using the Radio with a MAC will require Windows File Sharing (recent version of OSX, Tiger or later). Set up Windows File Sharing on OSX 1. From the 'Dock' , click on 'System Preferences' . From the 'System Preferences' window, under the 'Internet &... -
Page 39: Troubleshooting
Troubleshooting If you experience any trouble with your wireless Internet Radio, then you may find it useful to visit the help section on the webpage: http://www.wifiRadio-frontier.com. If you have trouble connecting the Radio to your wireless network, these steps may help to resolve the problem: 1. -
Page 40: Specifications
Specifications ITEMS DESCRIPTION Specifications: Internet Radio/DAB+/DAB/FM/iPod Docking Radio AC Power Input: 100-240VAC, 50-60HZ Power Requirements: (for use, please refer rear panel silk-screen) (FM) 87.50 – 108.00 MHz Frequency Ranges: (DAB+,DAB) 174 - 240 MHz LCD Display: High resolution full dot display Rated Output Power: 5Wrms Speakers: 8 ohm, airSOUND mid/side array. -
Page 41: Orbitsound Warranty
Contact your Orbitsound support agent FIRST. A list of support agents can be found on www.orbitsound.com. If the support agent advises to do so, return the unit in its original packaging complete with PROOF OF PURCHASE to the address advised. You will be advised by the Agent on the action that will be taken and any costs payable, subject to the conditions of this warranty. - Page 42 God, explosion, fire, terrorism, accident, war or threats of war, prohibitions of any kind, embargoes, strikes or lockouts. GENERAL The Agent may assign or subcontract responsibilities and rights under this warranty. In all warranty cases, please refer to the support pages of www.orbitsound.co.uk first. ORBITSOUND LTD. TQ1 1QB UK Tel 08456 521 219 Web www.orbitsound.com Email info@orbitsound.com...
Need help?
Do you have a question about the T4 and is the answer not in the manual?
Questions and answers