Table of Contents
Advertisement
Quick Links
Advertisement
Table of Contents

Summary of Contents for L-1 Identity Solutions 4G Lite
- Page 1 4G INSTALLATION GUIDE Version 4.4.2.0.0.0.0...
- Page 2 Neither the name of the L-1 Identity Solutions, Inc. nor the names of its contributors may be used to endorse or promote products derived from this software without specific prior written permission.
-
Page 3: Table Of Contents
2.1.5 PLAN DEVICE NETWORK.............22 2.1.6 CHOOSE NETWORK TYPE.............23 2.1.6.1 RS-485 ...............24 2.1.6.1.1 RS-485 CABLE SPECIFICATION..........24 2.1.6.1.2 RS-485 CABLE LENGTHS..........25 2.1.6.1.3 RS-485 NETWORK TOPOLOGY..........25 2.1.6.2 ETHERNET..............25 2.1.7 CHOOSE POWER SOURCE.............26 Part # 430-4G-050-00-005 © 2011 - L-1 Identity Solutions Inc. All rights reserved... - Page 4 6.1.2 TO REGISTER A DEVICE VIA A CLIENT........64 CHAPTER 7 - MAINTENANCE AND CLEANING..........68 CHAPTER OVERVIEW..............69 7.1 CLEANING FINGER PRINT DEVICES..........70 CHAPTER 8 - TROUBLESHOOTING...........72 CHAPTER OVERVIEW..............72 Part # 430-4G-050-00-005 © 2011 - L-1 Identity Solutions Inc. All rights reserved...
- Page 5 Figure 4-3 4G SecureControl Mounting Hole Locations (in mm)....46 Figure 4-4 Connections for an External Wall Adapter (4G V-Flex Lite)..49 Figure 4-5 Connections for an External Power Source (4G V-Flex Lite)..49 Figure 4-6 Certification Marks..........49 Part # 430-4G-050-00-005 © 2011 - L-1 Identity Solutions Inc. All rights reserved...
- Page 6 List of Tables Table 2-1 Communications Network Comparison........24 Table 2-2 Category 5 Cable Characteristics........24 Table 2-3 4G V-Flex Lite, CR-Pass, and SecureControl Power Requirements..26 Table 4-1 PoE Pin Assignments..........50 Part # 430-4G-050-00-005 © 2011 - L-1 Identity Solutions Inc. All rights reserved...
-
Page 7: Chapter 1 - Introduction
CHAPTER 1 - INTRODUCTION CHAPTER OVERVIEW This chapter provides an introduction to the L-1 Identity Solution 4G Lite product family devices. The 4G V-Flex Lite, 4G CR-Pass and 4G Secure Control, their specifications and features, and safety guidelines that should be observed when using or handling the devices. - Page 8 This symbol denotes a cautionary condition that may cause injury or minor damage to property. NOTICE This symbol denotes a situation needing additional advice to avoid incorrect usage. Part # 430-4G-050-00-005 © 2011 - L-1 Identity Solutions Inc. All rights reserved...
-
Page 9: Product Overview
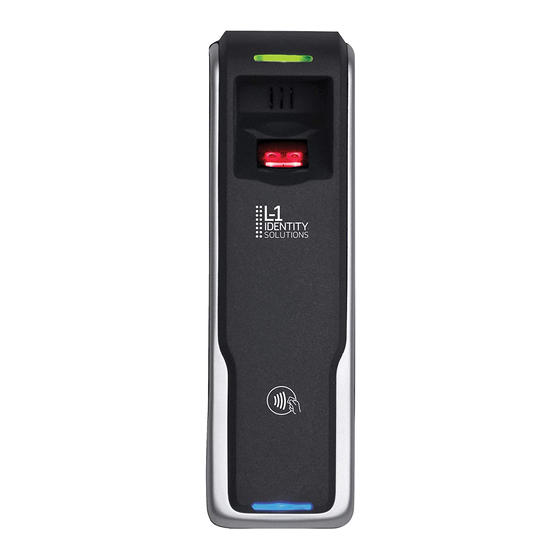
Introduction 1.2 PRODUCT OVERVIEW 1.2.1 4G V-FLEX LITE & CR-PASS Figure 1-1 4G V-Flex Lite & CR-Pass Part # 430-4G-050-00-005 © 2011 - L-1 Identity Solutions Inc. All rights reserved... -
Page 10: Secure Control
Introduction 1.2.2 4G SECURE CONTROL Figure 1-2 4G Secure Control Part # 430-4G-050-00-005 © 2011 - L-1 Identity Solutions Inc. All rights reserved... -
Page 11: Device Dimensions
Introduction 1.3 DEVICE DIMENSIONS 1.3.1 4G V-FLEX LITE Figure 1-3 4G V-Flex Lite Part # 430-4G-050-00-005 © 2011 - L-1 Identity Solutions Inc. All rights reserved... -
Page 12: Cr-Pass
Introduction 1.3.2 4G CR-PASS Figure 1-4 4G CR-Pass Part # 430-4G-050-00-005 © 2011 - L-1 Identity Solutions Inc. All rights reserved... -
Page 13: Secure Control
Introduction 1.3.3 4G SECURE CONTROL Figure 1-5 4G Secure Control Part # 430-4G-050-00-005 © 2011 - L-1 Identity Solutions Inc. All rights reserved... -
Page 14: Safety Precautions
Below are safety precautions that should be observed when operating or installing a device. 1.4.1 ELECTROSTATIC DISCHARGE L-1 Identity Solutions recommends that Administrators inform Users of these points during the enrollment process: Always use the Ridge-Lock to position a finger *before* touching the sensor. -
Page 15: Device Handling Guidelines
Do not allow articles of clothing to touch the sensor. L-1 Identity Solutions recommends that Installers always follow these points (in addition to the points listed above): When installing or working on a unit, always use a grounding wrist-strap that is connected to a quality Earth ground. -
Page 16: Chapter 2 - Planning The Installation
Signal: Door contact, request-to-exit push button, alarm input, etc. When planning device placement, determine the distance limitation of each signal type and use repeaters if necessary. Part # 430-4G-050-00-005 © 2011 - L-1 Identity Solutions Inc. All rights reserved... -
Page 17: Recomended Steps For A Successful Installation
Planning the Installation If you have any unresolved issues with the items on this list, contact L-1 Identity Solutions Technical Support for additional information before beginning any installation. WARNING 4G Lite devices should be installed by only a qualified technician. If you are not qualified to perform an... -
Page 18: Requirements
Separate power supply for the deadbolt/door strike based on supplier's recommendations. External relay (if required) Networking cable 2.1.2.2 COMPUTER REQUIREMENTS 2.1.2.2.1 SECUREADMIN LITE SERVER REQUIREMENTS Hard disk space: 10 MB Part # 430-4G-050-00-005 © 2011 - L-1 Identity Solutions Inc. All rights reserved... -
Page 19: Secureadmin Lite Client Requirements
Actual Hard Disk Space Requirements: 280 MB for the recommended installation. 2.1.2.3 NETWORK REQUIREMENTS The 4G Lite devices function on 100 baseT networks. 2.1.2.4 SOFTWARE REQUIREMENTS Both SecureAdmin Lite Server and SecureAdmin Lite Client require these software applications as prerequisites: ... -
Page 20: Unpack Equipment
Qty 1 – 6-32 Security Screw 1/8 pin-in-hex 1/4” length Qty 1 – Cable, MicroUSB Device Cable Qty 1 – Cable, MicroUSB PC Cable 1 Ethernet ferrite core Part # 430-4G-050-00-005 © 2011 - L-1 Identity Solutions Inc. All rights reserved... -
Page 21: Securecontrol
1 Quick Start Guide (printed copy in package) The documentation is provided in Adobe Acrobat format (PDF). The Adobe Acrobat Reader application is available on the Installation CD or at: http://www.adobe.com Part # 430-4G-050-00-005 © 2011 - L-1 Identity Solutions Inc. All rights reserved... -
Page 22: Choosing The Install Location
Figure 2-1 Correct Mounting Height 2.1.4.2 4G SecureControl SecureControl devices can be used in combination with any 4G Lite devices (up to quantity of 4) for control of up to 2 physical doors. SecureControl devices are also designed to be placed on the secure side of the installation. -
Page 23: Plan Device Network
All of the above scenarios are valid given that the location is on the secure side of the installation. 2.1.5 PLAN DEVICE NETWORK The 4G Lite devices feature a built-in single-door relay that allows them to control a single door lock. They can therefore function on their own or as part of a larger access control system. -
Page 24: Choose Network Type
31 4G V-Series devices to a PC with an external RS-232 to RS-485 converter (available from L-1 Identity Solutions). Second, the RS-485 specification allows for cable run lengths up to 4000 feet (1200 meters) at modest baud rates. -
Page 25: Rs-485 Cable Specification
The star configuration also presents a termination problem, because terminating every endpoint overloads the driver. Terminating only two endpoints solves the loading problem, but creates Part # 430-4G-050-00-005 © 2011 - L-1 Identity Solutions Inc. All rights reserved... -
Page 26: Ethernet
The most common Ethernet topology in use today is the star configuration with a hub or switch in the center. Part # 430-4G-050-00-005 © 2011 - L-1 Identity Solutions Inc. All rights reserved... -
Page 27: Choose Power Source
4G Lite devices run on DC power between 12 V and 24 VDC. Power requirements for all 4G V-Flex Lite, CR-Pass and SecureControl models are listed... - Page 28 With a ground fault, the signal reference between subsystems may be 115 VAC apart. If these subsystems are interconnected, the large potential difference can cause equipment damage or personal injury. L-1 Identity Solutions recommends using a dedicated regulated DC power supply.
-
Page 29: Chapter 3 - Install Software
A menu is displayed. If Autoplay is not enabled, start the installation process manually by doubleclicking the Setup.exe file located in the "Bioscryptsetup" folder on the root of the CD. Part # 430-4G-050-00-005 © 2011 - L-1 Identity Solutions Inc. All rights reserved... -
Page 30: Figure 3-1 Install Menu
Install Software Figure 3-1 Install Menu 2. Click Server Installation. Part # 430-4G-050-00-005 © 2011 - L-1 Identity Solutions Inc. All rights reserved... -
Page 31: Figure 3-2 Secureadmin Lite Server Installation Wizard
Install Software Figure 3-2 SecureAdmin Lite Server Installation Wizard 3. The Secure Admin Server Installation Wizard is displayed. Click Next to continue the setup process. Part # 430-4G-050-00-005 © 2011 - L-1 Identity Solutions Inc. All rights reserved... -
Page 32: Figure 3-3 Secureadmin Lite Server License Agreement
Install Software Figure 3-3 SecureAdmin Lite Server License Agreement 4. The L-1 Identity Solutions License Agreement is displayed. Select the appropriate radio button to agree with the terms and then click the Next button (You must accept the terms of the licence agreement to continue the installation process). -
Page 33: Figure 3-4 Secureadmin Lite Server Choose Destination Location
Next button or click Browse to choose your own installation path. After you specify a destination folder, the Database Selection screen is displayed. Part # 430-4G-050-00-005 © 2011 - L-1 Identity Solutions Inc. All rights reserved... -
Page 34: Figure 3-5 Database Selection
ID and password values. Enter the name of the database catalog or click Browse to select an existing database catalog. Click Next to continue. Part # 430-4G-050-00-005 © 2011 - L-1 Identity Solutions Inc. All rights reserved... -
Page 35: Figure 3-6 Connecting To Sql Server Option
Select the Database server authentication option and enter valid Login ID and password values. Accept the default database catalog or click Browse to select a different database catalog. Click Next to continue Part # 430-4G-050-00-005 © 2011 - L-1 Identity Solutions Inc. All rights reserved... -
Page 36: Repairing An Installation Of Secureadmin Lite Server
SecureAdmin Lite server is already installed on the machine. If yes, it prompts to upgrade SecureAdmin Lite server. Click Yes to continue with upgrade install. Figure 3-7 Upgrade Confirmation Part # 430-4G-050-00-005 © 2011 - L-1 Identity Solutions Inc. All rights reserved... -
Page 37: Secureadmin Lite Client
A menu is displayed. If Autoplay is not enabled, start the installation process manually by doubleclicking the Setup.exe file located in the SecureAdmin Lite folder on the CD. Part # 430-4G-050-00-005 © 2011 - L-1 Identity Solutions Inc. All rights reserved... -
Page 38: Figure 3-9 Menu
Figure 3-9 Menu 2. Click Client Installation. The InstallShield Wizard is started and the target system is examined. The Welcome screen is displayed. Figure 3-10 InstallShield Wizard Part # 430-4G-050-00-005 © 2011 - L-1 Identity Solutions Inc. All rights reserved... -
Page 39: Figure 3-11 Welcome Screen
Install Software Figure 3-11 Welcome Screen 3. Click the Next button to continue. The License Agreement screen is displayed. Part # 430-4G-050-00-005 © 2011 - L-1 Identity Solutions Inc. All rights reserved... -
Page 40: Figure 3-12 Secureadmin Lite Client License Agreement
Install Software Figure 3-12 SecureAdmin Lite Client License Agreement 4. The L-1 Identity Solutions License Agreement is displayed. Select the appropriate radio button to agree with the terms and then click the Next button. The Choose Destination Location screen is displayed. -
Page 41: Figure 3-13 Secureadmin Lite Client Choose Destination Location
5. Accept the default installation folder and click the Next button or click Browse to choose your own installation path. After you specify a destination folder, the Fingerprint Selection Feedback selection screen is displayed. Part # 430-4G-050-00-005 © 2011 - L-1 Identity Solutions Inc. All rights reserved... -
Page 42: Figure 3-14 Fingerprint Placement Feedback Option Selection
7. Click the Next button. The InstallShield Wizard completes the installation and displays a Finished screen. 8. Select either or both of the optional Check Create Desktop Icon and Launch Secure Admin Client check boxes. Part # 430-4G-050-00-005 © 2011 - L-1 Identity Solutions Inc. All rights reserved... -
Page 43: Modifying An Installation Of Secureadmin Lite Client
6. Click Next to continue. 7. On the Maintenance Complete screen, click the Finish button to complete the modified installation. Part # 430-4G-050-00-005 © 2011 - L-1 Identity Solutions Inc. All rights reserved... -
Page 44: Repairing An Installation Of Secureadmin Lite Client
To upgrade a previous version of SecureAdmin Lite Client, first uninstall the older version using Windows Add/Remove Programs or the SecureAdmin Lite installer, then re-install the new version of SecureAdmin Lite Client. Part # 430-4G-050-00-005 © 2011 - L-1 Identity Solutions Inc. All rights reserved... -
Page 45: Chapter 4 - Install Hardware
CHAPTER 4 - INSTALL HARDWARE CHAPTER OVERVIEW This chapter explains how to install a 4G Lite device, how to mount a wall plate, how to attach a device to a wall plate, and how to make the required electrical connections to the device. -
Page 46: Figure 4-1 4G V-Flex Lite Flush-Mount Mounting Plate (In Mm)
Install Hardware Figure 4-1 4G V-Flex Lite Flush-mount Mounting Plate (in mm) Part # 430-4G-050-00-005 © 2011 - L-1 Identity Solutions Inc. All rights reserved... -
Page 47: Figure 4-2 4G Cr-Pass Flush-Mount Mounting Plate (In Mm)
Install Hardware Figure 4-2 4G CR-Pass Flush-mount Mounting Plate (in mm) Part # 430-4G-050-00-005 © 2011 - L-1 Identity Solutions Inc. All rights reserved... -
Page 48: Installation Hardware
The hardware listed above is provided to mount the mounting plate to the wall and the 4G V- Flex Lite or 4G CR-Pass device to the mounting plate. Part # 430-4G-050-00-005 © 2011 - L-1 Identity Solutions Inc. All rights reserved... -
Page 49: Attach Device To Mounting Plate
The two options for providing 12V power to 4G V-Flex Lite devices are by using an external wall plug-in adapter (Figure 4-11, or through external wiring and a mini plug (Figure 4-11). Figure 4-4 Connections for an External Wall Adapter (4G V-Flex Lite) Part # 430-4G-050-00-005 © 2011 - L-1 Identity Solutions Inc. All rights reserved... -
Page 50: Figure 4-5 Connections For An External Power Source (4G V-Flex Lite)
Solutions products. An example of a suitable PoE injector is Model No. AT-61 01 G from Allied Telesis Inc. (http://www.alliedtelesis.com). Any such device should carry at least one of the certifications shown below and should be FCC listed. Figure 4-6 Certification Marks Part # 430-4G-050-00-005 © 2011 - L-1 Identity Solutions Inc. All rights reserved... - Page 51 Detailed RJ-45 pin assignments for PoE are given in Table 4-1 PoE Pin Assignments, and the physical location of the pins in Figure 4-14 the RJ-45 connector. Table 4-1 PoE Pin Assignments SOURCE LOAD REMARKS STANDARD Ethernet RJ-45 connector pin number Part # 430-4G-050-00-005 © 2011 - L-1 Identity Solutions Inc. All rights reserved...
-
Page 52: Connect Device To Network
Figure 4-8 RJ45 Pin Location 4.6 CONNECT DEVICE TO NETWORK The 4G Lite devices support RS-485, Ethernet 10baseT and 100baseTX protocols. 4.6.1 ETHERNET NETWORK CONNECTIONS Ethernet connections to the device are made through a standard RJ-45 connector on the back of the device. - Page 53 Check each device's cabling for ground faults before connecting to an RS- 485 network. Each device should have pin 3 of the mini-connector connected to earth ground. Part # 430-4G-050-00-005 © 2011 - L-1 Identity Solutions Inc. All rights reserved...
-
Page 54: Single-Door Controller Installation
After all devices are configured and connected to the RS-485 network, the baud rate can be increased to the highest supported rate (some experimentation might be required). 4.7 SINGLE-DOOR CONTROLLER INSTALLATION The 4G Lite devices incorporate an internal relay that enables them to operate a deadbolt/door strike directly. WARNING The internal relay is limited to a maximum current of 1A. - Page 55 The power supply for the external relay must be chosen to match the operating voltage and current of the external relay coil, but its voltage must not exceed the 4G Lite device's internal relay maximum voltage rating of 250 volts.
-
Page 56: Aux Port
CAUTION Current rating of the Aux port is not to exceed 100 mA Maximum. Part # 430-4G-050-00-005 © 2011 - L-1 Identity Solutions Inc. All rights reserved... -
Page 57: Install Ferrite Core
4.9 INSTALL FERRITE CORE In order for the 4G Lite devices to comply with FCC Class B & CISPR 22 Class B regulations, the installer and/or end user is required to use the supplied Ferrite Material with 3 turns on the Ethernet cables exiting the rear of all 4G V-Flex Lite and 4G CR-Pass models. - Page 58 SecureControl device with WLAN option only. Ethernet Ferrite P/N: STEWARD 28A2432-0A2 I/O Lines P/N: STEWARD 28A2432-0A2 Install the ferrite cores as close to the device as possible. Part # 430-4G-050-00-005 © 2011 - L-1 Identity Solutions Inc. All rights reserved...
-
Page 59: Chapter 5 - System Start-Up Procedures
Never wire up a system and apply power to it all at once. SYSTEM START-UP OVERVIEW L-1 Identity Solutions recommends always following these system start-up steps: 1. Do not apply power to any device. 2. Check all wiring and device configurations. -
Page 60: System Start-Up Procedures
5.1.3 DEVICE GROUND FAULT CHECK To check for a ground fault on a new 4G Lite device: 1. Apply power to all devices already successfully connected to the RS-485 line. 2. Power up the new device but do not connect it to the RS-485 line. -
Page 61: Chapter 6 - Configure Device
Configure Device CHAPTER 6 - CONFIGURE DEVICE OVERVIEW This chapter explains how to configure devices. All 4G Lite devices must be configured before use. This includes setting various communication parameters. 6.1 REGISTER DEVICE After a device is physically installed, it must be registered. This can be done several ways --... - Page 62 Configure Device Figure 6-1 Network Sidebar Tab 3. Click the Register via Server button. A Register via Server dialog box is displayed. Part # 430-4G-050-00-005 © 2011 - L-1 Identity Solutions Inc. All rights reserved...
- Page 63 5. Click the Scan button. SecureAdmin Lite scans the network for connected devices and lists the results. Devices with "plus" signs in their icon are available to add. Part # 430-4G-050-00-005 © 2011 - L-1 Identity Solutions Inc. All rights reserved...
- Page 64 IP address of the device (select the DHCP check box if dynamic IP addressing is used). Figure 6-4 Register Device Dialog Box 7. Enter a Device Name. Part # 430-4G-050-00-005 © 2011 - L-1 Identity Solutions Inc. All rights reserved...
- Page 65 Configure Device 8. Select a Group. 9. Click Register. A Device Summary is displayed. Figure 6-5 Device Summary Dialog Box 10.Click OK. 11.Click Close. The device is registered. Part # 430-4G-050-00-005 © 2011 - L-1 Identity Solutions Inc. All rights reserved...
-
Page 66: To Register A Device Via A Client
Windows Device Manager for your RS-485 entry under the "Ports (COM & LPT)" heading), Baud Rate, and Device ID. If you are connecting via Ethernet: Enter the network IP Address of the device you want to connect to. Part # 430-4G-050-00-005 © 2011 - L-1 Identity Solutions Inc. All rights reserved... - Page 67 6. Click Next. The Step 2 Device Information dialog box is displayed. Figure 6-7 Step 2 Device Information Dialog Box 7. Click Next. The Step 3 Server Communication Parameter dialog box is displayed. Part # 430-4G-050-00-005 © 2011 - L-1 Identity Solutions Inc. All rights reserved...
- Page 68 IP Address of the device (select the DHCP check box if dynamic IP addressing is used). 10.Click Next. The Step 4 Register Device dialog box is displayed. Figure 6-9 Step 4 Register Device Dialog Box Part # 430-4G-050-00-005 © 2011 - L-1 Identity Solutions Inc. All rights reserved...
- Page 69 12.Select the Group the device will belong to from the drop-down menu. 13.Click Register. The Device Summary dialog box is displayed. Figure 6-10 Device Summary Dialog Box Part # 430-4G-050-00-005 © 2011 - L-1 Identity Solutions Inc. All rights reserved...
-
Page 70: Chapter 7 - Maintenance And Cleaning
Never use products such as abrasive cleaning powders, steel wool, scouring pads, or fine sandpaper to clean the sensor surface. These types of cleaning products will damage the sensor surface. Part # 430-4G-050-00-005 © 2011 - L-1 Identity Solutions Inc. All rights reserved... - Page 71 CAUTION Risk of explosion if battery is replaced by an incorrect type. Dispose of used batteries according to the instruction. Part # 430-4G-050-00-005 © 2011 - L-1 Identity Solutions Inc. All rights reserved...
-
Page 72: Chapter 8 - Troubleshooting
This error can occur during SecureAdmin Lite Client installation at the last step (right before "Finish"). If it occurs, it means that the user does not have sufficient rights to install software on the computer. Part # 430-4G-050-00-005 © 2011 - L-1 Identity Solutions Inc. All rights reserved... -
Page 73: Error 27552 - Error Creating Database
SQL database. Contact your IT department to ensure that your privileges are correct for the specified database. Part # 430-4G-050-00-005 © 2011 - L-1 Identity Solutions Inc. All rights reserved... -
Page 74: Invalid Password
The password should be between 8 and 30 characters long and contain at least one capital letter, one number, and one non- alphanumeric character. Part # 430-4G-050-00-005 © 2011 - L-1 Identity Solutions Inc. All rights reserved... -
Page 75: Error 27502 - User Not Associated With Trusted Sql Server
InstallShield Wizard could not access the specified SQL database. Check your user name and password or contact your IT department to ensure that your user name is associated with the specified SQL database. Part # 430-4G-050-00-005 © 2011 - L-1 Identity Solutions Inc. All rights reserved... -
Page 76: Error 27502 - Sql Server Does Not Exist
Check your user name and password or contact your IT department to ensure that your user name is authorized to access the specified SQL database. Part # 430-4G-050-00-005 © 2011 - L-1 Identity Solutions Inc. All rights reserved... -
Page 77: Insufficient System Memory
If it occurs, it means that the computer you are trying to install SecureAdmin Lite Server on does not have sufficient system memory. Install more memory or install on a different machine. 8.1.7 OUT OF DISK SPACE Figure 8-7 Out of Disk Space Part # 430-4G-050-00-005 © 2011 - L-1 Identity Solutions Inc. All rights reserved... - Page 78 Troubleshooting This error can occur during the SecureAdmin Lite Client installation process when SecureAdmin Lite starts to configure components, after the fingerprint feedback options selection. Part # 430-4G-050-00-005 © 2011 - L-1 Identity Solutions Inc. All rights reserved...
-
Page 79: Chapter 9 - Notices
- Increase the separation between the equipment and receiver. - Connect the equipment into an outlet on a circuit different from that to which the receiver is connected. Part # 430-4G-050-00-005 © 2011 - L-1 Identity Solutions Inc. All rights reserved... - Page 80 Cet équipement est conforme aux limites d'exposition aux rayonnements définies par IC pour un environnement non contrôlé. Cet équipement doit être installé et utilisé avec un minimum de 20 cm. Part # 430-4G-050-00-005 © 2011 - L-1 Identity Solutions Inc. All rights reserved...
-
Page 81: Ce Information To Users
S151AH-2450S, NEARSON INC. 9.2 CE Information to Users All 4G Lite devices and 4G Secure Control have the CE mark, for compliance with CISPR22/EN55022 requirements. For European Union (EU) countries, 4G Lite devices and 4G Secure Control are compliant with CE under the R&TTE Directive, related to the radio transceivers that are part of their design. -
Page 82: Glossary
Identification uses the finger scan only -- no cards or PINs. Identification is only available on devices that are in 1:N mode. Part # 430-4G-050-00-005 © 2011 - L-1 Identity Solutions Inc. All rights reserved... - Page 83 (pass or fail) that is re-turned is based on whether the score is above a pre-defined threshold value. Some type of credential (PIN, prox card, smart card, etc.) is necessary to initiate the biometric verification. Part # 430-4G-050-00-005 © 2011 - L-1 Identity Solutions Inc. All rights reserved...
- Page 84 Glossary and Acronyms Acronyms and Abbreviations These acronyms and abbreviations are used in this document: AUX Auxiliary Finger Placement Feedback Thin Film Transistor LED Light Emitting Diode Part # 430-4G-050-00-005 © 2011 - L-1 Identity Solutions Inc. All rights reserved...
Need help?
Do you have a question about the 4G Lite and is the answer not in the manual?
Questions and answers