
Summary of Contents for Rainin Instrument P-10
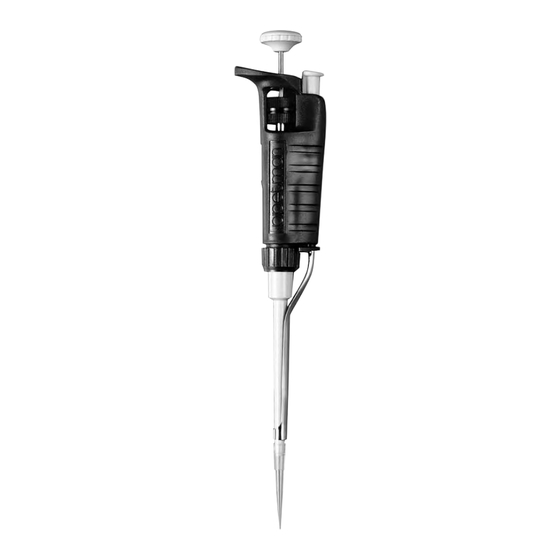
- Page 1 Pipetman ® continuously adjustable digital microliter pipettes 8 pipettes for volume ranges from 0.1 µL to 10 mL P-10 P-20 P-100 P-200 P-1000 P-5000 P-10ML Pipetman P-200 shown...
-
Page 2: Table Of Contents
Figure 2 Operating Pipetman ........4 Figure 3 Removing Tip Ejector Arm.......9 DIAGRAMS FOR REPLACEMENT PARTS Models P-2, P-10, P-20, P-100 ......12 Models P-200, P-1000, P-5000, P-10ML ....13 TABLES Specifications ..............11 Technical Assistance: 800-543-4030 Call this toll free number for technical consultation and product information for Pipetman, RAININ pipettes, and disposable tips. -
Page 3: Description
Description Eight models of Pipetman continuously adjustable digital pipette cover entire volume range from µL 10 mL. The P-200-M8 eight-channel Pipetman is also available, with a volume range of 20–200 µL, for convenience when using 96-well plates. Pipetman pipettes are not limited to fixed volume increments — 5 µL or 10 µL. -
Page 4: Autoclaving
Volume Indicator The digital volume indicator is read from top to bottom. For P-2, P-10, P-20, P-100, and P-200, black digits indicate microliters and red digits tenths and hundredths of microliters. For P-1000 and P-5000, red digits indicate milliliters and black digits micro- liters. -
Page 5: Operation
9. To dispense sample, touch the tip end against the side wall of the receiving vessel and depress the plunger slowly to the first stop. Wait: 1 second* (P-2, P-10, P-20, P-100, P-200) 1-2 seconds* (P-1000) 2-3 seconds* (P-5000, P-10ML) * Longer for viscous solutions. -
Page 6: Tip Selection
10. With the plunger fully pressed, withdraw Pipetman from the vessel carefully, tip against the vessel wall. 11. Allow the plunger to return to the up position. Figure 2 Operating Pipetman 12. Discard the tip by depressing the tip ejector button. A fresh tip should be used for each sample to prevent sample carryover. -
Page 7: Tip Immersion Depth
Pipetman model is shown in the table below. Pipetman Model Volume Range Immersion Depth 0.1 - 2 µL 1 - 2 mm P-10 0.5 - 10 µL 1 - 2 mm P-20 2 - 20 µL 2 - 3 mm P-100 10 - 100 µL... -
Page 8: Pre-Rinsing Recommended
4. For Models P-5000 and P-10ML Pipetman, use the special safety filters supplied. Pre-Rinsing Recommended Some solutions (e.g. serum, protein-containing solutions, and organic solvents) can leave a film on the inside tip wall, resulting in an error larger than the tolerance specified. Since this film remains relatively constant in successive pipettings with the same tip, excellent precision may be obtained by refilling the tip and using the refilled volume as the sample. -
Page 9: Temperature Considerations
Temperature Considerations Warm or cold liquids can be measured with good precision by using a consistent pipetting rhythm. This will help minimize any differences in heating or cooling effects within the pipette. Use a new tip each time for best accuracy and precision when measur- ing samples with temperatures greatly different from ambient, and do not pre-rinse. -
Page 10: Troubleshooting And Repairs
Troubleshooting and Repairs Pipetman pipettes give excellent performance and long-term ser- vice. Use these procedures in the case of physical or chemical damage. P-2 and P-10 models have small, fragile components that can be broken or mislaid. Sample Splash (liquid inside the mechanism) 1. -
Page 11: Removing/Replacing Ejector Arm
Removing/Replacing Tip Ejector Arm Tip Ejector Arm Removal 1. Press tip ejector button. 2. Pull arm from handle using ejector arm release collar. Tip Ejector Arm Replacement 1. Press tip ejector button. 2. Hold Pipetman in one hand and the tip ejector arm in the other hand. -
Page 12: Service, Calibration And Repair
Service, Calibration and Repair RAININ maintains its own Pipette Repair and Calibration facilities in the following locations: RAININ Service Center Rainin Road, Woburn, MA 01801, USA Tel: 800-662-7027 Fax: 781-935-7631 RAININ Service Center 7500 Edgewater Drive, Oakland, CA 94621 Tel: 800-662-7027 RAININ Service Center 5955 Mira Mesa Blvd., Ste B, San Diego, CA 92121 Tel: 858-320-0446... -
Page 13: Performance Specifications
Performance Specifications Each Pipetman is factory calibrated and carefully checked gravi- metrically before shipment using distilled water and an analytical balance. Water temperature and ambient conditions are stabilized at 21.5°C ± 1°C. Volumetric corrections are made for both the density of water and evaporation where applicable. Consult the Rainin publication “Procedure for Evaluating Pipette Accuracy and Precision”... -
Page 14: Diagrams For Replacement Parts P-2, P-10, P-20, P-100
P-10 P-20 P-100 Part numbers are listed on the back page. The plunger and plunger button in these diagrams are for dual-adjustment Pipetman, and cannot be used on older Pipetman models. For convenience, old-style part numbers are also listed on the back page. -
Page 15: Models P-200, P-1000, P-5000, P-10Ml
P-200 P-1000 P-5000 P-10ML... -
Page 16: Replacement Parts
Replacement Parts Part Model P-10ML * P-10 P-20 P-100 P-200 P-1000 P-5000 Plunger 844781 844782 844783 844784 844785 844786 844787 861281 button Plunger 44761 44761 44761 44761 44761 44761 44761 44761 rod** Shaft 23654 23654 23654 23654 23654 23654 n.a.
Need help?
Do you have a question about the P-10 and is the answer not in the manual?
Questions and answers