
Related Manuals for TOOQ TQE-25DES01B


Summary of Contents for TOOQ TQE-25DES01B
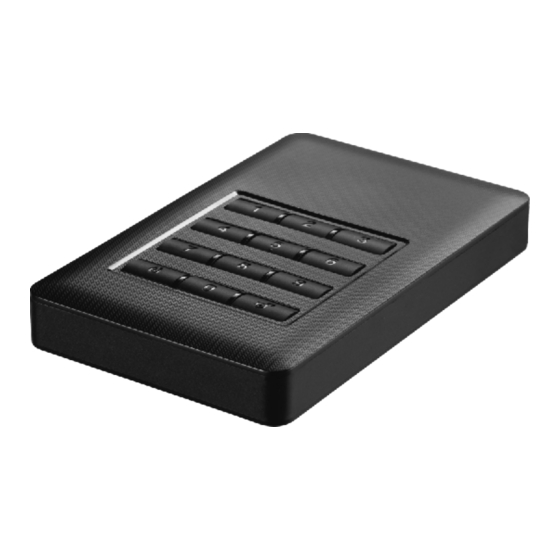
- Page 1 CAIXA EXTERNA ENCRIPTADA EXTERNAL ENCRYPTED ENCLOSURE TQE-25DES01B / SATA_USB3.0 INCH Manual de Instruções User´s Manual...
-
Page 3: Conteúdo Do Pacote
Obrigado por comprar a caixa Conteúdo do pacote „ Caixa externa encriptada externa encriptada 2,5” TOOQ. „ Cabo USB 3.0 „ Manual de instruções „ Tira de borracha Para sua segurança e satisfação de utilizar este Requisitos do Sistema produto, leia este manual antes de iniciar a „... - Page 4 Instalação de Disco Rígido na 2. Introduza o disco rígido com cuidado dentro da caixa externa. caixa Aviso: não manipule os elementos Nota: As imágenes são orientativas, as da placa (PCB), poderia danificá-los e localizações de interruptores, perderia a garantia. ligações e peças podem variar dependendo do modelo adquirido.
- Page 5 5. Ligue o conector Micro USB 3.0 do tira de borracha cabo à porta USB da caixa externa. Ligar a uma porta USB 3.0 do computador 4. Volte a colocar a tampa e faça-a deslizar até o final para completar a instalação. Ligar à...
- Page 6 Atención creação de contrasenha. Por favor, faça uma cópia de segurança dos seus dados antes de iniciar o processo de creação de contrasenha. A TOOQ não asume a responsabilidade da perda dos seus dados. A utilização desta caixa Azul encriptada é da inteira responsabilidade Laranja do seu utilizador.
- Page 7 2, O LED verde pisca uma vez quando tenha A1, Mantenha pressionadas as teclas "1" e pressionado a tecla “Desbloqueio” e fica "3" em simultáneo, depois, ligue o cabo USB aceso de forma continua quando o disco ao seu computador e espere 5-10 segundos rígido esteja desbloqueado.
- Page 8 B5, Introduza a nova contrasenha de novo, B. Modificação de contrasenha depois, pressione a tecla "Desbloqueio" para existente confirmá-la. O LED vermelho apagar-se-á e o LED verde acender-se-á quando a B1, Mantenha pressionada a tecla contrasenha tenha sido modificada com "Bloqueio", depois, ligue a sua caixa ao seu êxito.
- Page 9 FAQ para caixa encriptada Se a senha for esquecida, poderei recuperar NÃO, é impossível recuperar dados se a senha for esquecida. os dados do disco rígido? Por favor, mantenha a sua Password num local seguro. Se a caixa encriptada deixar de funcionar, como Terá...
- Page 11 Ligação com o PC em Sobre formatos do sistema Windows2000 / XP / VISTA / Win7/8/10 ou superior Formatos do sistema de ficheiros de Não é necessário instalar controladores. Windows Ligue a caixa externa à porta USB 3.0 Existem duas categorias de formato do sistema de arquivos para usuários de Windows: NTFS e FAT32.
- Page 12 Partição do Disco Rígido 1. Coloque-se sobre “O Meu Computador” e faça clique sobre o botão direito, escolha Antes de começar, ligue a sua caixa externa “Administrar” para iniciar o programa ao seu PC (o disco rígido deverá estar “Gestão de computadores”. corretamente introduzido na caixa externa).
- Page 13 2. Faça clique em “Administração de discos”, 3. Siga as instruções que aparecem no ecrã. situe o ponteiro do rato sobre o disco rígido Se não desejar modificar nada, por “não assignado”, carregue no botão direito favor, siga carregando em “Seguinte” até que do rato e selecione “Nova partição”...
- Page 14 6. Uma vez finalizada a formatação, o seu 5. Finalizar o assistente. disco rígido terá de aparecer como “Correto”. Agora o seu disco rígido já está particionado, formatado e pronto para ser utilizado. Em O Meu Computador terá de aparecer uma nova unidade de armazenamento.
- Page 15 Informação sobre a garantia O que NÃO está coberto pela O distribuidor de TOOQ ou retalhista onde garantia. comprou a caixa externa TOOQ, „ Defeitos e danos resultantes da utilização e/ou os acessórios originais receberá a sua do produto para outro uso fora do normal e reclamação e/ou prestará...
- Page 16 O sistema não reconhece a unidade? A configuração do computador cumpre com os Encontrará mais informação na secção: Requisitos do requisitos mínimos do sistema para usar esta sistema. unidade? Seguiu corretamente os passos de Reveja os passos da instalação da secção: Instalação instalação correspondentes à...
-
Page 17: Package Contents
Package Contents Thank you for purchasing TOOQ „ External Encrypted Enclosure 2.5” External Encrypted Enclosure. „ USB 3.0 cable „ User´s manual For your safety and the „ Rubber sticker satisfaction of using this product, please read this System requirements... -
Page 18: Hardware Installation
Hardware Installation 2. Insert the hard drive into the external encrypted enclosure carefully. Note: Images are for example only. Actual Caution: Do not touch the chipset on the positions of switches or connectors and PCB or the guarantee will be void. pieces may vary depending on the model. - Page 19 rubber sticker 5. Connect the Micro USB 3.0 connector of the cable to the USB 3.0 port of the external enclosure. Connected to a computer´s USB 3.0 port 4. Put the cover back to the enclosure and slide the cover till the end to finish the installation.
- Page 20 Caution operation. Please backup your data before the password setup operation. TOOQ will not be responsible for any loss of your data. The use of this external encrypted enclosure is entirely at the user's own risk. if the password was...
-
Page 21: Password Setup
2. Green LED blinks 1 time when press the A1, Keep pressing “1” and “3” button at the unlock button, and continuously brightens same time, then plug the USB cable into a when the disk is unlocked. computer’s USB port, and wait for 5-10 seconds until blue and red LED brighten 3. - Page 22 B. Change password operation C. Unlock your hard drive B1, Keep pressing "Lock” button, and then C1, Connect the external enclosure to a PC connect Encrypted HDD enclosure to a computer by USB cable. C2, Enter the password correctly and then press the “Unlock”...
- Page 23 FAQ for external encrypted enclosure If the password was forgotten, is there any It's impossible to restore the data if password was lost. solution to recover the data in HDD? If the enclosure is failure, how to recover the You only need to purchase the same model enclosure, and data in HDD? enter the same password, then you will have data access again.
-
Page 25: About File System Formats
When using the external encrypted About File System Formats enclosure with Windows2000 / XP / VISTA / Win7/8/10 or above No driver installation needed. Windows File System Formats Connect the external HD to a Pc´s USB 3.0 There are two file system formats for windows user: NTFS and FAT32. - Page 26 Create partition and format 1. Right click on the My Computer icon; click "Manage" to initialize the Disk Management Before beginning, connect your external HD program. You can also click "Start" -> "Control to a PC (The HD should be mounted into the panel"...
- Page 27 2. Please click “disk management”, right 3. Follow up the installation of “Partition click the “unallocated” disk and point the Wizard” to operate the disk of partition and “new partition”. (The HD appears unallocated format. only when your HD is not partitioned. If your HD has been partitioned and formatted, please skip this part.) 4.
- Page 28 6. Click "My Computer" and confirm that the 5. Finish the assistant new "Removable" icon appears. The External Enclosure with hard disk drive is now ready for use.
-
Page 29: Warranty Information
Warranty information What is not covered by the The TOOQ dealer or retailer where you warranty purchased the external enclosure and/or „ Defects or damage resulting from use of original accessories will honour a warranty the product in other than its normal and claim and/or provide warranty service. - Page 30 The drive is not recognized by the computer? Does your computer’s configuration meet the See section System requirements for more information minimum system requirements for use with this drive? Did you follow the correct installation steps for Review the installation steps in section: Hardware the specific interface and operating system? Installation.
- Page 32 * Product color and bundled software versions are subject to change without notice. * Brand and product names mentioned are trademarks of their respective companies. TOOQ is registered trademark of TOOQ technology, Corp. ©2010 by TOOQ technology, Corp. Released in 03/2016. All Rights Reserved. www.tooq.com...
Need help?
Do you have a question about the TQE-25DES01B and is the answer not in the manual?
Questions and answers