Table of Contents
Advertisement
Quick Links
Advertisement
Table of Contents

Summary of Contents for Shenzhen MTC WR1201
- Page 1 WR1201 1200M Wireless Router 1200M Wireless Router User Guide...
-
Page 2: Fcc Statement
FCC STATEMENT Warning: Changes or modifications to this unit not expressly approved by the party responsible for Changes or modifications to this unit not expressly approved by the party responsible for Changes or modifications to this unit not expressly approved by the party responsible for compliance could void the user’s authority to operate the equipment. -
Page 3: Ce Mark Warning
2) To avoid unnecessary radiation interference, it is recom DECLARATION OF CONFORMITY DECLARATION OF CONFORMITY Hereby, [Shenzhen MTC Co., L Co., LTD], declares that this [1200M Wireless Router 1200M Wireless Router] is in compliance with the essential requirements and other relevant provisions of Directive 1999/5/EC. -
Page 4: Important Safety Instructions
Important Safety Instructions Important Safety Instructions 1. Don’t disassemble the product, or make repairs yourself. Don’t disassemble the product, or make repairs yourself. If you need service, please If you need service, please contact 2. Do not operate this product near water. 2. -
Page 5: Table Of Contents
CONTENTS Important Safety Instructions.................................... 4 Chapter 1 Product Overview .................................... 8 1.1 Introduction ......................................8 1.2 LED Indicator ...................................... 8 1.3 Physical Interfaces ....................................9 Chapter 2 Connecting Mechanism Chapter 2 Connecting Mechanism .......................... - Page 6 4.3.2 Security Settings 4.3.2 Security Settings ............................. 31 4.3.3 Advanced Settings vanced Settings ..........................34 4.3.4 WPS Settings ..................................35 4.3.5 Access Control ..................................36 4.3.6 Connection Status tion Status ..........................38 4.4 USB Setting ..........................
- Page 7 4.11.2 DDNS ....................................58 4.11.3 Backup & Restore 4.11.3 Backup & Restore ..........................59 4.11.4 Firmware Update irmware Update ..........................60 4.11.5 Restore to Factory 4.11.5 Restore to Factory ..........................61 4.11.6 Reboot ....................................
-
Page 8: Chapter 1 Product Overview
Chapter 1 Product Overview Overview 1.1 Introduction WR1201 1200M Wireless Router 1200M Wireless Router supports simultaneous 2.4GHz and 5GHz connections upports simultaneous 2.4GHz and 5GHz connections for 1200Mbps of total available bandwidth bandwidth, supports for DHCP, PPPOE, static IP three modes to tic IP three modes to Internet. -
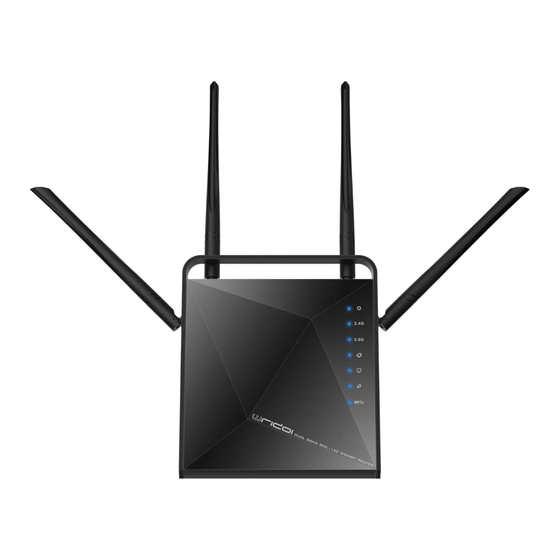
Page 9: Physical Interfaces
2.4G wireless is disabled. Blinking Blinking The 5G wireless is on and have data transfer transferred. 5.0G 5G LED The 5G wireless is disabled. Solid Solid The Internet port is connected but inaccessible. The Internet port is connected but inaccessible. Internet LED Blinking Blinking... -
Page 10: Chapter 2 Connecting Mechanism Chapter 2 Connecting Mechanism
Chapter 2 Connecting Mechanism Connecting Mechanism 2.1 Preparation Before you start the installation process, you need to prepare the following: Before you start the installation process, you need to prepare the following: Item Description Router Find it in your package Find it in your package. -
Page 11: Hardware Connection
to connect your PC to this device to connect your PC to this device 2.2 Hardware Connection Note ------------------------------------------------------------------------------------ ------------------------------------------------------------------------------------------------------------------- ------------------------------- Before connecting, please make sure that you can surf the internet in your Before connecting, please make sure that you can surf the internet in your Before connecting, please make sure that you can surf the internet in your computer to use the reticle provided by ISP. - Page 12 Click Network and Internet Network and Internet. ② ② ② ② Click Network and Sharing Center Sharing Center. ③ ③ ③ ③...
- Page 13 Click Change adapter settings Change adapter settings. ④ ④ ④ ④ Click Local Area Connection Local Area Connection and select Properties. ⑤ ⑤ ⑤ ⑤ Select Internet Protocol Version 4 (TCP/IPv4) Internet Protocol Version 4 (TCP/IPv4) and click Properties. ⑥ ⑥ ⑥ ⑥...
- Page 14 Select Obtain an IP address automatically Obtain an IP address automatically and click OK ⑦ ⑦ ⑦ ⑦ Click OK on the Local Area Connection Properties Local Area Connection Properties window to save your settings to save your settings ⑧ ⑧ ⑧ ⑧...
-
Page 15: Chapter 3 Log In To The Router
Chapter 3 Log in to the Router the Router 3.1 Log in To access the Router’s Web To access the Router’s Web-based Utility, launch a web browser such as Internet Explorer or based Utility, launch a web browser such as Internet Explorer or Firefox and enter http://192.168. -
Page 16: Web Page
3.2 Web Page After clicking the “Sign in” ,t ,the system will display the router Web page. You can view . You can view and modify settings here... - Page 17 3.3 Web page Introduce to Layouts to Layouts The Web page consist of Primary & secondary navigation, configuration area configuration area and help information area. Name Introductions Primary navigation navigation The navigation bar organize function menu function menu of Web ○...
-
Page 18: Commonly Used Web Page Elements 3.4Commonly Used Web Page Elements Introductions
Note Change the resolution of the screen the help information may become Change the resolution of the screen the help information may become “ ” as above shown, if you want to refer the help information please click the symbol. you want to refer the help information please click the symbol. -
Page 19: Chapter 4 Features & Configurations Chapter 4 Features & Configurations
Chapter 4 Features & Configurations Features & Configurations 4.1 System Status Click “System Status”, enter the system status web page, in this page you can see the , enter the system status web page, in this page you can see the , enter the system status web page, in this page you can see the “SystemStatus”, “WAN Status WAN Status”... -
Page 20: Wan Status
4.1.2 WAN Status Parameters Specification: Connection Type:It displays the current access mode displays the current access modeof WAN port. Connection Status: The network connection status. The network connection status. WAN MAC Address: MAC address of your ISP's router to see MAC address of your ISP's router to see. -
Page 21: Lan Status
4.1.3 LAN Status Parameters Specification: IP Address: The Router’s LAN IP The Router’s LAN IP Address (not your PC’s IP address). Subnet Mask: The Router’s LAN subnet mask. The Router’s LAN subnet mask. DHCP Server: the status of DHCP server. the status of DHCP server. - Page 22 Parameters Specification: SSID Name: : : : The name ofWireless The name ofWireless. BSSID: The MAC Address of Wireless. The MAC Address of Wireless. Channel: : : : The Channel of Wireless. The Channel of Wireless. Security Mode: Encryption schemes. Encryption schemes.
-
Page 23: Network Settings
Network Settings Click “Network Settings ” enter the Network setup web page, in this page you can set in this page you can set “LAN Settings”, “WAN Settings”, “MAC Address Clone MAC Address Clone”. 4.2.1 LAN Setting This page is to configure the basic This page is to configure the basic parameters for LAN ports. -
Page 24: Wan Setting
3. The router's LAN IP address and WAN IP address cannot be on the same IP segment. If not, the router will not be able to access Internet. the router will not be able to access Internet. 4.2.2 WAN Setting Plug Internet cable to WR1201 WAN port. Set Steps: : : : Enter the web and Select“Network Settings”... - Page 25 uses a static IP connection. If your ISP provides you with an Ethernet cable from the incoming cable from the incoming Dynamic IP Internet side but no ISP login account or IP information, your ISP Internet side but no ISP login account or IP information, your ISP uses a DHCP connection.
- Page 26 MTU better to choose the default values. MTU better to choose the default values. 1.2>Dynamic IP mode. Set Steps: : : : Click “Network Settings”. ① ① ① ① Select“WAN Settings”. ② ② ② ② Select Connection Type “Dynamic IP” “Dynamic IP”.
- Page 27 Knowledge Expansion MTU: Maximum Transmission Unit. It is the size of the largest data packet Maximum Transmission Unit. It is the size of the largest data packet Maximum Transmission Unit. It is the size of the largest data packet that can be sent over the network.
- Page 28 Some ISPs (Internet Service Providers) require end Some ISPs (Internet Service Providers) require end-user's MAC address to access their user's MAC address to access their network. This feature copies your current PC's MAC address to the router. network. This feature copies your current PC's MAC address to the router. Set Steps:...
-
Page 29: Wlan Settings
using to the router. Also, you can manually enter the MAC address that you want to use. You o the router. Also, you can manually enter the MAC address that you want to use. You o the router. Also, you can manually enter the MAC address that you want to use. You have to use the computer whose MAC address is allowed by your ISP have to use the computer whose MAC address is allowed by your ISP 4.3 WLAN Settings... - Page 30 Parameters Specification: Wireless: wireless “Enable Enable” or “Disable”. SSID: It is the unique nameof the wireless network and can be modified. It is the unique nameof the wireless network and can be modified. It is the unique nameof the wireless network and can be modified. Broadcast (SSID): Select “Enable”...
-
Page 31: Security Settings
attached on the bottom of the device. attached on the bottom of the device. 2. If you are not an advanced user, it is advisable to only change the SSID (name of the network) If you are not an advanced user, it is advisable to only change the SSID (name of the network) If you are not an advanced user, it is advisable to only change the SSID (name of the network) and channel and leave other items unchanged other items unchanged. - Page 32 Security mode:WPA – Personal Personal、WPA2 – Personal、Mixed WPA/WPA2 Mixed WPA/WPA2 – Personal. Security mode Instruction Disable Not open this function WPA – Personal Support AES and TKIP cipher types WPA2 – Personal Support AES, TKIP and TKIP+AES cipher types cipher types Both WPA-Personal and WPA2-Personal Personal secured Mixed WPA/WPA2 –...
- Page 33 Parameters Specification: WPA Algorithms: Wi-Fi Protected Access Algorithms. Fi Protected Access Algorithms. Pass Phrase: The default is 12345678. The default is 12345678. Knowledge Expansion 1. WEP: (Wired Equivalent Privacy Wired Equivalent Privacy)is the wireless transmission of data between two devices for the wireless transmission of data between two devices for encryption, to prevent illegal users wiretapping or invade the wireless network encryption, to prevent illegal users wiretapping or invade the wireless network...
- Page 34 wireless network card does not support wireless network card does not support security mode, cause cannot connect the wireless , cause cannot connect the wireless network. Backup Configuration Procedures: Backup Configuration Procedures: Configure security mode, cipher type and security key. Configure security mode, cipher type and security key.
-
Page 35: Wps Settings
Power and Basic Data Rate and so on. Power and Basic Data Rate and so on. 4.3.4 WPS Settings Set Steps: : : : Click “WLAN Settings”. ① ① ① ① Select “WPS Settings”. ② ② ② ② Knowledge Expansion WPS provides you with two main functions: provides you with two main functions: if your wireless network unencrypted... -
Page 36: Access Control
Parameters Specification: The WPS provides below methods: methods: PBC:Using routers and physical or logical button on a wireless device to connect WPS. Using routers and physical or logical button on a wireless device to connect WPS. Using routers and physical or logical button on a wireless device to connect WPS. You have below methods to connect WPS: ou have below methods to connect WPS: 1、... - Page 37 Set Steps: : : : Click “WLAN Settings”. ① ① ① ① Select “Access Control” ② ② ② ② Parameters Specification: The Wireless Access Control is based on the MAC address of the wireless adapter The Wireless Access Control is based on the MAC address of the wireless adapter The Wireless Access Control is based on the MAC address of the wireless adapter to determine whether it communicates with the Router or not;...
-
Page 38: Usb Setting
Tips Up to 10 wireless MAC addresses can be configured Up to 10 wireless MAC addresses can be configured If you don't want to configure the complex wireless security settings and want to disallow If you don't want to configure the complex wireless security settings and want to disallow If you don't want to configure the complex wireless security settings and want to disallow others to join your wireless network, you can configure a wireless access control rule to allow others to join your wireless network, you can configure a wireless access control rule to allow... -
Page 39: Media Server
Click “Scan” button , wait a minute , you could see the ” button , wait a minute , you could see the USB drive connected to the Router. connected to the Router. You can click the “Share” or “Delete Delete”... -
Page 40: Print Server
4.4.3 Print Server You could connect a network pri You could connect a network printer to the router and Enable the Print Server. Print Server. The other user in this local area network could use the printer. this local area network could use the printer. 4.4.4 User Accounts You could add user in your USB Server. -
Page 41: Iptv Settings
4.5 IPTV Settings If you enable this function, you could connect a set function, you could connect a set-top box to the router to use. top box to the router to use. 4.6 DHCP Server Click “DHCP Server” enter the Virtual Server configure page ,here you can set enter the Virtual Server configure page ,here you can set enter the Virtual Server configure page ,here you can set “DHCP Server”, “DHCP List &... - Page 42 Click “DHCP Server”. ① ① ① ① Select “DHCP Server”. ② ② ② ② Parameters Specification: DHCP Server:Select whether enable or disable the DHCP server feature Select whether enable or disable the DHCP server feature Select whether enable or disable the DHCP server feature. Start IP Address and End IP Address: Start IP Address and End IP Address: You can specify the starting and ending address of You can specify the starting and ending address of...
-
Page 43: Dhcp List & Binding T & Binding
By default, the router functions as a DHCP server. Do not disable the DHCP server feature By default, the router functions as a DHCP server. Do not disable the DHCP server feature By default, the router functions as a DHCP server. Do not disable the DHCP server feature unless you want to manually configure the TCP/IP settings for all PCs on your LAN. -
Page 44: Virtual Server
Static Assignment Application Example: Static Assignment Application Example: To have a PC at the MAC address of 44:37:E6:4F:37:3B always receive the same IP address of To have a PC at the MAC address of 44:37:E6:4F:37:3B always receive the same IP address of To have a PC at the MAC address of 44:37:E6:4F:37:3B always receive the same IP address of 192.168.1.200 Parameters Specification:... -
Page 45: Port Range
4.7.1 Port Range You want to share resources on your PC with your friends who are not in your LAN. But, by default, resources on your PC with your friends who are not in your LAN. But, by default, resources on your PC with your friends who are not in your LAN. But, by default, the router's firewall blocks inbound traffic from the Internet to your computers except replies to the router's firewall blocks inbound traffic from the Internet to your computers except replies to the router's firewall blocks inbound traffic from the Internet to your computers except replies to... -
Page 46: Dmz Settings
Parameters Specification: Start/End Port: Enter the start/end port number which ranges the External ports used to set Enter the start/end port number which ranges the External ports used to set Enter the start/end port number which ranges the External ports used to set the server or Internet applications. -
Page 47: Upnp Settings
Tips The DMZ Settings screen allows one local computer to be exposed to the Internet for use of a The DMZ Settings screen allows one local computer to be exposed to the Internet for use of a The DMZ Settings screen allows one local computer to be exposed to the Internet for use of a special-purpose service such as Internet purpose service such as Internet gaming or videoconferencing. -
Page 48: Security Settings
4.8 Security Settings Click “Security Settings” enter the Security configure page ,here you can set enter the Security configure page ,here you can set enter the Security configure page ,here you can set “Client Filler”,“URL Filter”, “MAC Filler”, “Prevent” ”, “Remote WEB”, “WAN Ping”. 4.4.1 Client Filter This section allows you to set the times specific clients can or cannot access the Internet via the This section allows you to set the times specific clients can or cannot access the Internet via the... -
Page 50: Url Filter
4.4.2 URL Filter This section is to set URL filtering access. If you want to enable this function, please activate the checkbox. Select one policy from the drop-down menu and enter a policy name in the field. Of course, you can set the access restriction in details (e.g. the fixed IP range, URL, times and days). Note: When time is 0:0~0:0, it express 24 hours. -
Page 51: Mac Filter
Tips 1. Different URL strings must be separated with a comma. To match all websites, use * (asterisk) . Different URL strings must be separated with a comma. To match all websites, use * (asterisk) . Different URL strings must be separated with a comma. To match all websites, use * (asterisk) 2.Up to 10 filter rules can be configured. -
Page 52: Prevent
4.4.4 Prevent This section is to protect the internal network from exotic attack such as SYN Flooding attack, Smurf attack, LAND attack, etc 4.4.5 Remote WEB This section is to allow the network administrator to manage the router remotely. If you want to access the router remotely, please select “Enable”. - Page 53 Parameters Specification: Port: The management port to be open to outside access. The management port to be open to outside access. Tips 1. For better security, configure a port 1. For better security, configure a port number (between1025-65535) as remote web management 65535) as remote web management interface, do not use the number of any common service port (1 interface, do not use the number of any common service port (1-1024).
-
Page 54: Wan Ping
Knowledge Expansion 1. Port: This is the management port to be open to outside access. The default setting is 8080. This can be changed 4.4.6 WAN Ping The ping test is to check the status of your internet connection. When disabling the test, the system would prevent the ping test from WAN. -
Page 55: Routing Settings
② ② ② ② Select the “WAN Ping” ③ ③ ③ ③ Select the “Enable” 4.9 Routing Settings In this page you can view the routing table information. Click “Refresh” to update Destination IP: The IP address of the final destination. “0.0.0.0” indicates any network segment. - Page 56 Tips 1. 1M=128KByte/s. 2. The volume of uplink traffic/downlink traffic should not be larger than that allowed on your 2. The volume of uplink traffic/downlink traffic should not be larger than that allowed on your 2. The volume of uplink traffic/downlink traffic should not be larger than that allowed on your router's WAN (Internet) port.
-
Page 57: System Tools
IP Range: Enter the last number of the IP address. Here in this example, enter Enter the last number of the IP address. Here in this example, enter Enter the last number of the IP address. Here in this example, enter 101 in both ②... -
Page 58: Ddns
Set Steps: : : : Click “System Tools”. ① ① ① ① Select “Time Settings”. ② ② ② ② The time will synchronize with the internet automatically in the default situation ③ ③ ③ ③ Select Time Zone ④ ④ ④ ④ If you can enter the time and date manually or click “Sync with your PC”, synchronize ⑤... -
Page 59: Backup & Restore
4.11.3 Backup & Restore Set Steps: : : : Click “System Tools”. ① ① ① ① Select “Restore to Factory”. ② ② ② ② Parameters Specification: This “Restore” button is to reset all configurations to the default values. It means the Range... - Page 60 Extender will lose all the settings you have set. So please note down the related settings if necessary. Default Password: admin Subnet Mask:255.255.255.0 Default IP:192.168.1.1 Note If you enable this option, all current settings will be deleted and be restored to factory default values.
-
Page 61: Restore To Factory
Select “FirmwareUpgrade” ② ② ② ② Click “Browse”, select the upgrade file ③ ③ ③ ③ Click “Upgrade”, and wait for it to complete. ④ ④ ④ ④ Note 1. Before you upgrade the firmware, make sure you are having a correct firmware. A wrong firmware may damage the device. -
Page 62: Reboot
Extender will lose all the settings you have set. So please note down the related settings if necessary. Default Password: admin Subnet Mask:255.255.255.0 Default IP:192.168.1.1 Note If you enable this option, all current settings will be deleted and be restored to factory default values. -
Page 63: Change Password Word
4.11.7 Change Password You can change the password by this function You can change the password by this function Set Steps: : : : Click “System Tools” ① ① ① ① Select “Change Password Change Password” ② ② ② ② Enter “Old Password”“New Password New Password”and“Confirm New Password”... - Page 64 Set Steps: : : : Click “System Tools” ① ① ① ① Select “System Log” ② ② ② ② Click “Refresh” can update the information ③ ③ ③ ③ Click “Clear” to clear the screen ④ ④ ④ ④...
-
Page 65: Appendix
Appendix 1 Configure PC TCP/IP Settings Windows 7 Click Start -> Control Panel. ① ① ① ①... - Page 66 Click Network and Internet. ② ② ② ② Click Network and Sharing Center Sharing Center. ③ ③ ③ ③...
- Page 67 Click Change adapter settings Change adapter settings. ④ ④ ④ ④ Click Local Area Connection Local Area Connection and select Properties. ⑤ ⑤ ⑤ ⑤...
- Page 68 Select Internet Protocol Version 4 (TCP/IPv4) and click Properties. ⑥ ⑥ ⑥ ⑥...
- Page 69 Select Obtain an IP address automatically and click OK. ⑦ ⑦ ⑦ ⑦...
- Page 70 Click OK on the Local Area Connection Properties window to save your settings. ⑧ ⑧ ⑧ ⑧...
-
Page 71: Windows Xp
Windows XP Right-click My Network Places and select Properties. ① ① ① ① Right click Local Area Connection and select Properties. ② ② ② ②... - Page 72 Select Internet Protocol Version 4 (TCP/IPv4) and click Properties. ③ ③ ③ ③ Select Obtain an IP address automatically and click OK. ④ ④ ④ ④...
- Page 74 Click OK on the Local Area Connection Properties window to save your settings. ⑤ ⑤ ⑤ ⑤...
-
Page 75: Faqs
2 FAQs This section provides solutions to problems that may occur during installation and operation of the device. Read the following if you are running into problems. 1. Q: I cannot access the device's management interface. What should I do? Make sure the System LED on the device's front panel is on. -
Page 76: Factory Default Settings
displays only part of a web page. What should I do? This problem mainly happens to users who use the PPPOE or Dynamic IP Internet connection type. You need to change the MTU size. Try changing the MTU to 1450 or 1400. If this does not help, gradually reduce the MTU from the maximum value until the problem disappears. - Page 77 SSID Broadcast Enabled Channel 2437MHz(Channel 6) Channel Bandwidth 20/40 Extension Channel 2417MHz(Channel 2) Wireless Security Disabled Wireless Access Control Disabled Country America Wireless Enabled MTC_XXXXXX (where XXXXXX is the last SSID characters the device's address) 802.11 Mode 11a/an/ac mode SSID Broadcast Enabled 5.0G Wireless Channel...
Need help?
Do you have a question about the WR1201 and is the answer not in the manual?
Questions and answers