Advertisement
Table of Contents
- 1 Table of Contents
- 2 Introduction
- 3 General Notes
- 4 Special Safety Information for this Unit
- 5 Unpacking the Appliance
- 6 Appliance Equipment
- 7 Installation
- 8 Prior Using for the First Time
- 9 Loading the Dishwasher Baskets
- 10 Starting a Rinse Program
- 11 Cleaning and Maintenance
- 12 Troubleshooting
- 13 Technical Data
- 14 Disposal
- Download this manual
Advertisement
Table of Contents

Related Manuals for BOMANN GSP 851


Summary of Contents for BOMANN GSP 851
- Page 1 GSP 85 851 1 1 1 H H H H - - - - D D D D OUSEHOLD OUSEHOLD ISHWASHER ISHWASHER OUSEHOLD OUSEHOLD ISHWASHER ISHWASHER Instruction Manual Instruction Manual Instruction Manual Instruction Manual...
-
Page 2: Table Of Contents
Contents Contents Contents Contents Introduction ……………………..………….……………………………………………………………..Page 3 General Notes …...…………………………………………..…………………………………...……..…. Page 3 Special safety information for this Unit ……………………..………………………………...….... Page 4 Unpacking the Appliance …...………………………………..…………………………………………… Page 5 Appliance Equipment ……………………..………………………………………………….…………..Page 5 Installation …...………………………………………………..…..……………………………………..…. Page 5 Prior Using for the first Time ………………………..…………………..…………….……………..Page 7 Loading the Dishwasher Baskets …………………………………..………………………...…….. -
Page 3: Introduction
Introduction Introduction Introduction Introduction Thank you for choosing our product. We hope you will enjoy using the appliance. Symbols in these Instructions for Use Symbols in these Instructions for Use Symbols in these Instructions for Use Symbols in these Instructions for Use Important information for your safety is specially marked. -
Page 4: Special Safety Information For This Unit
Special safety Information for thi Special safety Information for thi Special safety Information for thi Special safety Information for this Unit s Unit s Unit s Unit • The maximum number of place settings to be washed is 14. • This unit is intended to be used in household and similar applications such as - staff kitchen areas in shops, offices and other working environments;... -
Page 5: Unpacking The Appliance
Unpacking the Appliance Unpacking the Appliance Unpacking the Appliance Unpacking the Appliance • Remove the appliance from its packaging. • Remove all packaging material, such as foils, filler and cardboard packaging. • To prevent hazards, check the appliance for any transport damage. •... - Page 6 • Place the appliance so that all controls are easily to reach and the appliance door can open without being impeded. • Take care of a solid and horizontal position of the appliance. If the appliance is not horizontally leveled, adjust the feet accordingly.
-
Page 7: Prior Using For The First Time
C C C C AUTION AUTION: : : : AUTION AUTION In order to prevent backflow of contaminated water, the free end of the hose must not come under the water level of the drain. • Connect the drain hose to a drain pipe with a minimum diameter of Ø 40 mm; alternatively the drain hose can be fixed directly to the sink. - Page 8 A A A A . Filling salt into the salt container . Filling salt into the salt container (water softener) (water softener) . Filling salt into the salt container . Filling salt into the salt container (water softener) (water softener) Water softener Water softener Water softener...
- Page 9 Fill the rinse aid dispenser Fill the rinse aid dispen Fill the rinse aid dispen Fill the rinse aid dispen B B B B ..Function of rinse aid Function of rinse aid Function of rinse aid Function of rinse aid The rinse aid is automatically added during the final rinse, ensuring thorough rinsing and a spot and streak free drying.
-
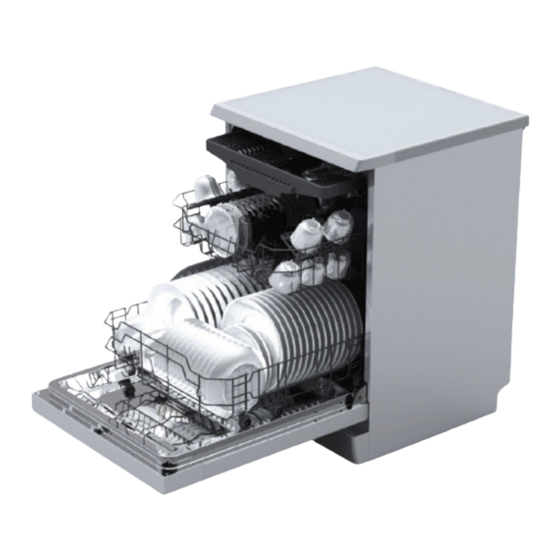
Page 10: Loading The Dishwasher Baskets
6°dH. If detergents without phosphate are used in the case of hard water often white spots appear on dishes and glasses. In this case add more detergent to reach better results. Detergents without chlorine do only bleach a little. Strong and colored spot will not be removed completely. In this case choose a program with a higher temperature. - Page 11 For rinsing in the dishwasher the following cutlery and For rinsing in the dishwasher the following c utlery and dishes.. dishes.. For rinsing in the dishwasher the following c For rinsing in the dishwasher the following c utlery and utlery and dishes..
- Page 12 C C C C up shelves up shelves P P P P late holders late holders up shelves up shelves late holders late holders If necessary, fold the In order to create a better ar- cup shelves downwards rangement for bulky dishes, the or remove them.
-
Page 13: Starting A Rinse Program
Starting a Rinse Program Starting a Rinse Program Starting a Rinse Program Starting a Rinse Program Rinse cycle table Rinse cycle table Rinse cycle table Rinse cycle table Select a suitable program depending on dishes and degree of soiling. Detergent Detergent Runnin Runnin... - Page 14 NOTE: : : : NOTE NOTE NOTE • *EN 50242: this program is the test program and of combined energy and water consumption most efficient. The information for comparability: Capacity: 14 settings; Position of the upper basket: upper wheels on rails; Rinse aid setting: 6 Control panel Control panel Control panel...
- Page 15 • Set the available options, if required. • Press the start/pause button and the dishwasher starts. Program change Program change Program change Program change CAUTION: CAUTION: CAUTION: CAUTION: A program change should be done only a short time after starting the program. Otherwise, maybe detergent has been released and already drained rinse water.
-
Page 16: Cleaning And Maintenance
• Open the door and pull out the basket. • To avoid water dripping from the upper basket onto the dishes in the lower basket, it is advisable to unload the appliance from the bottom up. Cleaning Cleaning and Maintenance and Maintenance Cleaning Cleaning... - Page 17 sary. • Put the filter system properly in reverse order together and reinstall in its provided posi- tion. Fix the entire system, by tightening the filter unit clockwise. Cleaning the spray arms Cleaning the spray arms Cleaning the spray arms Cleaning the spray arms Lime and impurities from the rinsing water can block nozzles and bearings of the spray arms.
-
Page 18: Troubleshooting
Troubleshooting Troubleshooting Troubleshooting Troubleshooting Before you contact an authorized specialist Before you contact an authorized specialist Before you contact an authorized specialist Before you contact an authorized specialist Problem Problem Problem Problem Possible causes Possible causes Possible causes Possible causes What do to What do to What do to... - Page 19 Problem Problem Possible causes Possible causes What do to What do to Problem Problem Possible causes Possible causes What do to What do to Yellow or brown film on Tea or coffee stains Using a solution of ½ cup of bleach and 3 cups of warm wa- inside surface ter to remove the stains by hand.
-
Page 20: Technical Data
Product data sheet for household dishwasher dishwasher ccor ccor ding to regulation (EU) No. 10 ding to regulation (EU) No. 10 /2010 /2010 Brand Brand BOMANN BOMANN Brand Brand BOMANN BOMANN Model Model Model Model GSP 85 851 1 1 1... -
Page 21: Disposal
Disposal Disposal Disposal Disposal Meaning of the “Dustbin” Symbol Meaning of the “Dustbin” Symbol Meaning of the “Dustbin” Symbol Meaning of the “Dustbin” Symbol Protect our environment; do not dispose of electrical equipment in the domestic waste. Please return any electrical equipment that you will no longer use to the collection points provided for their disposal. - Page 24 C. Bomann GmbH C. Bomann GmbH C. Bomann GmbH C. Bomann GmbH www.bomann.de www.bomann.de www.bomann.de www.bomann.de Made in P.R.C.
Need help?
Do you have a question about the GSP 851 and is the answer not in the manual?
Questions and answers