Table of Contents
Advertisement
Advertisement
Table of Contents

Summary of Contents for BYE BIKE ONE&ONE
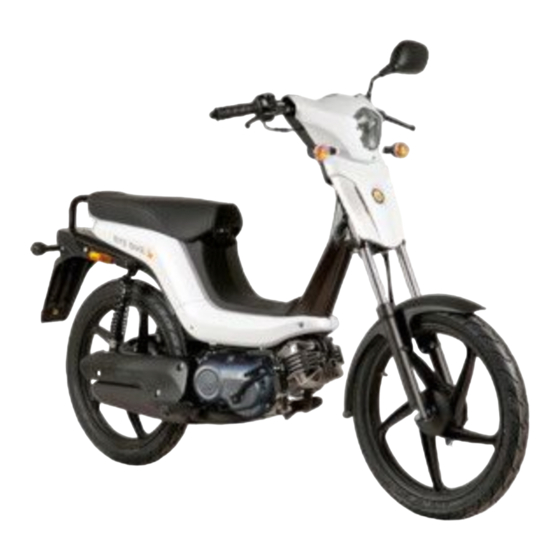
- Page 3 OWNER'S MANUAL & WARRANTY CARD • This manual should be con- • The vehicle pictured in this • Manufacturer reserves the • No part of this publication may sidered a permanent part of the owner's manual may not match right to make changes at any be reproduced without written vehicle and should remain with your vehicle. time without notice incurring permission. the vehicle when it is resold. any obligation. OWNER'S MANUAL & WARRANTY CARD | BYE BIKE ONE & ONE+ 2015 | ALL RIGHTS RESERVED...
- Page 4 BLAHOŽELÁME! ВІТАЄМО! TEBRIKLER! ПОЗДРАВЛЯЕМ! АЛАЛ ДА МУ Е! GRATULERER! APSVEICAM! ЧЕСТИТАМО! GEFELICITEERD! ČESTITAMO! GRATULÁLUNK! BLAHOPŘEJEME! LLONGYFARCHIADAU! SVEIKINAME! Welcome to the BYE BIKE family! dition for many years. In case of doubt, please contact your BYE BIKE dealer. As the owner of a BYE BIKE vehicle you are enjoying a BIKE BYE wishes you the best riding experiences in its high quality product, carefully designed and manufactured in compact but exciting BYE BIKE. Spain. Please read this manual before operating your vehicle and Sincerely, follow all recommendations. Information contained will help BYE BIKE TEAM you to safely enjoy your vehicle and keep it in perfect con- CRESPIÀ (SPAIN), 2015...
-
Page 5: Table Of Contents
Table of contents 0. Warranty card and service record 1. Safety 2. Parts location 3. Instrument and control functions 4. Pre-operation checks 5. Operation 6. Maintenance 7. Clean and care 8. Specifications 9. Index... - Page 6 The engine identification number (EIN) is NOTE stamped on the top left of the crankcase. Safety Provides key information to make procedures easier or clearer. Your safety, and other's safety, is very im- portant for BYE BIKE. Particularly important information is distinguished in this manual by the following notations. This information alerts you to potential hazards that could The vehicle and engine numbers unique- hurt you or others. Is not possible to warn ly identify your vehicle and are required in you about all hazards associated with op- order to register your vehicle. They may erating or maintaining a vehicle, you must also be required when ordering replace- use your own judgement. ment parts or in case the vehicle is stolen. The vehicle identification number (VIN) is 1. Engine identification number (EIN) stamped on the right rear of the frame, next to the rear suspension linkage. This is the safety alert symbol. It is used to alert you to potential personal injury hazards.
- Page 7 My BYE BIKE Record the vehicle identification numbers and dealer details in the spaces provided below for assistance when ordering spare parts or repairing your vehicle. Model Colour Year Vehicle identifica- tion number Engine identifica- tion number Your BYE BIKE BYE BIKE dealer: dealer information Address: Phone: E-mail: Web:...
-
Page 8: Warranty Card And Service Record
0. WARRANTY CARD AND SERVICE RECORD... - Page 9 WARRANTY ACTIVATION COPY FOR THE MANUFACTURER VEHICLE Model Vehicle identification number Engine identification number DEALER The vehicle has been assembled and all components are working properly Name Address Postcode City State Country Phone E-mail This document properly completed must be sent to: BYE BIKE WARRANTY DEPT. Pol. Pla de la Font, Parc.1. 17832, Crespià (Girona), SPAIN. Or to: warranty@byebike.com. It is the seller's responsibility to activate and send the warranty card to BYE BIKE in a week. Ignoring this requirement may result in the loss of warranty.
- Page 10 CUSTOMER Name Address City Postcode Country State Phone E-mail Delivery date Dealer stamp & signature Customer signature Warranty period: 24 months This document properly completed must be sent to: BYE BIKE WARRANTY DEPT. Pol. Pla de la Font, Parc.1. 17832, Crespià (Girona), SPAIN. Or to: warranty@byebike.com. It is the seller's responsibility to activate and send the warranty card to BYE BIKE in a week. Ignoring this requirement may result in the loss of warranty.
- Page 11 WARRANTY ACTIVATION COPY FOR THE CUSTOMER VEHICLE Model Vehicle identification number Engine identification number DEALER The vehicle has been assembled and all components are working properly Name Address Postcode City State Country Phone E-mail...
- Page 12 CUSTOMER Name Address City Postcode Country State Phone E-mail Delivery date Dealer stamp & signature Customer signature Warranty period: 24 months...
- Page 13 BYE BIKE without charge, within the period of warranty which led the repair. Warranty without any limitation in the number of kilo- Any defects detected in the product must metres or number of operating hours. be brought to the attention of an authorized This Warranty and Service Record must BYE BIKE dealer during the warranty period. be available to the dealer when requesting If the last day of the warranty period is a Sun- Thank you for choosing BYE BIKE revisions, repairs or warranty. day or public holiday, the warranty period will Thank you for choosing BYE BIKE. As the be extended until the next business day. Keep this manual, as it will be requested to owner of a BYE BIKE vehicle you will enjoy benefit from the warranty, as well as for future Warranty claims for nonconformities not a high quality product carefully designed and references you may need. This manual should brought to the attention of an authorized BYE manufactured in Crespià (Girona, Spain). This be considered part of the vehicle and should BIKE dealer before the end of the warranty Warranty Card and Service Record has been remain with him in case of transmission. period will be excluded.
- Page 14 been used in service works and / or repairs product influences. ty period will end on the date of expiry of the or when fuels, lubricants and other liquids warranty period of the product concerned. 5. Damage caused by nonconformities (including cleaning products) that were not ex- and directly or indirectly expenses (commu- 4. If a defect cannot be repaired and the pressly mentioned by the manufacturer have nication costs, accommodation expenses, replacing has a disproportionate cost to the been used in the vehicle. car hire costs, public transport costs, courier manufacturer, buyer will be entitled to cancel 5. The vehicle has been in any way altered, costs...) and other damages (caused by the the contract (compensation payment) or a modified or fitted with components that not loss of use of a vehicle, loss of revenue, loss partial refund of the purchase price (discount) have been specifically authorized by TG. of time...). instead of repairing the vehicle. 6. The vehicle has been stored or trans- 6. Acoustic or aesthetic phenomena that do 5. Warranty claims by the purchaser under ported not in agreement with the technical not significantly affect the use of the vehicle the contract of sale with the corresponding requirements. (for example, small or hidden imperfections, authorized BYE BIKE dealer shall not be noise or vibrations). affected by this warranty. This warranty does 7. The vehicle has been used for a special not affect any additional contractual rights of use other than the ordinary one, like races. 7. Nonconformities due to age of the vehicle the purchaser under the general conditions of (for example, discolouring of painting).
- Page 15 PRE-DELIVERY OPERATIONS SERVICE RECORD SERVICE RECORD 500 KM 1.000 KM ELEMENTS TO REVIEW BY THE DEALER BEFORE THE VEHICLE DELIVERY 1st INSPECTION 2nd INSPECTION (FREE OF CHARGE FOR THE CUSTOMER) (BORNE BY THE CUSTOMER) Check packaging and vehicle for damage Unpack the vehicle DATE DATE Install the parts (battery, mirror/s ...) Check chain tension Tyre pressure Check all the bolts are tight Oil level...
- Page 16 SERVICE RECORD SERVICE RECORD SERVICE RECORD 3.000 KM 5.000 KM 7.000 KM 2rd INSPECTION 4th INSPECTION 5th INSPECTION (BORNE BY THE CUSTOMER) (BORNE BY THE CUSTOMER) (BORNE BY THE CUSTOMER) DATE DATE DATE DEALER STAMP AND SIGNATURE DEALER STAMP AND SIGNATURE DEALER STAMP AND SIGNATURE PARTS TO BE SERVICED PARTS TO BE SERVICED...
- Page 17 SERVICE RECORD SERVICE RECORD SERVICE RECORD 9.000 KM 11.000 KM 13.000 KM 6th INSPECTION 7th INSPECTION 8th INSPECTION (BORNE BY THE CUSTOMER) (BORNE BY THE CUSTOMER) (BORNE BY THE CUSTOMER) DATE DATE DATE DEALER STAMP AND SIGNATURE DEALER STAMP AND SIGNATURE DEALER STAMP AND SIGNATURE PARTS TO BE SERVICED PARTS TO BE SERVICED...
-
Page 18: Safety
1. SAFETY... - Page 19 Avoid carrying an excessive load. Tie 1.3. Before riding all luggage securely, balanced and close to the centre of the vehicle. Do not attach 1. Safety Make sure that you are physically fit, items near the lights or the hot parts of the mentally focused and free of alcohol and vehicle. drugs. Check that you and your passenger 1.5. Carbon monoxide are both wearing an approved motorcycle Follow these guidelines to enhance your helmet and protective apparel. Wear a face and third parties security. shield or glasses. Never wear loose-fitting All engine exhaust generate carbon mon- clothes, otherwise they could catch on the oxide, a colourless, odourless and tasteless 1.1 Responsibility control levers or wheels and cause injury or poisonous gas. Breathing carbon monoxide an accident. Make yourself more visible by can cause headaches, dizziness, drows- As the vehicle’s owner, you are respon- wearing reflective or bright clothes. iness, nausea, confusion, and eventually sible for the safe and proper operation of death. your vehicle. You should obtain thorough WARNING instructions from a competent source on all WARNING aspects of vehicle operation, observe the Always wear an approved helmet and warnings and maintenance requirements in protective apparel when riding your...
- Page 20 • Always obey the speed limit and never sidecar to, your vehicle. Your vehicle was travel faster than warranted by road and not designed for these attachments, and traffic conditions. their use can seriously impair your vehicle's • Driver must take a natural posture, handling. feet in stirrups and both hands on the handlebars. Passenger (if the vehicle CAUTION is approved for two) should be secured Always use BYE BIKE genuine with both hands on the handle (if avail- parts. Its quality and perfect fit able) or on the driver's body and feet ensures excellent performance and resting in stirrups. will extend your vehicle's service • For full brake effectiveness close the life. throttle and operate both the front and...
- Page 21 This page is left blank intentionally...
-
Page 22: Parts Location
2. PARTS LOCATION... - Page 23 2.1. Controls and instruments 1. Rear brake lever 4. Dashboard 7. Front brake lever 2. Left handlebar switches 5. Main switch 8. Throttle grip 3. 12V power outlet 6. Right handlebar switches...
- Page 24 2.2. Right view 1. Grab bar / fastening system 5. Battery 9. Passenger footrests 2. Oil tank cap 6. Fuse 10. Throttle 3. Fuel tank cap 7. Spark plug 11. Front brake lever 4. Seat 8. Kickstarter 12. Manual fuel tap (opt.)
- Page 25 2.3. Left view 12. Headlamp 16. Air filter 20. Rear suspension 13. Front suspension 17. Transmission chain 21. Central compartment 14. Front brake 18. Chain adjuster 22. Rear brake lever 15. Centerstand 19. Rear brake...
-
Page 26: Instrument And Control Functions
3. INSTRUMENT AND CONTROL FUNCTIONS... - Page 27 CAUTION If the warning light comes on during operation, stop immediately and fill the oil tank to prevent serious damage at the engine. BYE BIKE Disconnected switch (OFF). recommends GLOBAL RACING OIL (GRO) Scooter Oil 2T to ensure the proper lubrication and performance.
- Page 28 fuel. Turning on the ignition key the warning for the high beam, and to for the low light will come on for a few seconds. Electrical system switch: beam. turns OFF the electrical system and High beam indicator light: This Turn signal switch: To signal turns ON the vehicle's electrical indicator light comes on when the high a right-hand turn, push this switch to the system. beam of the headlight is switched on. right. To signal a left-hand turn, push this Engine start switch: Push this switch to the left. When released, the switch switch while applying the front or rear returns to the centre position. To cancel the 3.3 Handlebar switches brake to crank the engine with the electrical turn signal lights, push the switch in after it starter. has returned to the centre position. Left handlebar switches Horn switch: Press this switch to CAUTION sound the horn.
- Page 29 Rear brake 3.4 Brake levers 3.5 Seat Front brake Rear brake lever operation. Opening and closing the seat. Front brake lever operation. The rear brake lever is located on the left handlebar grip. To apply the front brake, pull To open the seat: this lever gradually toward the handlebar The front brake lever is located on the 1. Place the vehicle on the centerstand. grip. right handlebar grip. To apply the front 2. Press the handle on the left side of the brake, pull this lever gradually toward the seat (1) introducing two fingers through the handlebar grip. opening thereof. 3. Fold the seat up (2). To close the seat: Fold the seat down, and then push it down to lock it in place. A "click" will indi- cate that it has properly closed.
- Page 30 Fuel tank closing 3.6 Fuel tank CAUTION To install the fuel tank cap, turn it clock- Use only unleaded petrol, otherwise wise. malfunction and engine damage may happen. WARNING Gasoline is toxic. If you should Installing the fuel tank cap. swallow any gasoline, inhale a lot of gasoline vapour, or allow gasoline to Refuelling get into your eyes, see your doctor • Handy fuel only outdoors.
- Page 31 Close the oil tank 3.7 Engine oil tank CAUTION BYE BIKE recommends GRO (GLOBAL RACING OIL) Scooter Oil 2T oil to ensure proper lubrication and performance. Installing the oil tank cap. 3.8 Kickstarter To install the oil tank cap, turn it clock- wise. Refilling the oil tank • Before riding make sure there is enough engine oil in the tank to prevent 1.
- Page 32 2. Pull gently to remove the accessory. CAUTION Do not exceed the maximum load of 150kg for the vehicle. 3.10 Fuel tap 1. Frame rear part. 2. BYE BIKE original accessory. 3. Screws. Your BIKE BYE is equipped with a smart fastening system that enables a fast and 1. Closed tap. 2. Open tap. secure way to install accessories on the rear part of the chassis. Only BYE BIKE ac- cessories have been developed along with Manual fuel tap the vehicle and guarantee your safety.
- Page 33 This page is left blank intentionally...
-
Page 34: Pre-Operation Checks
4. PRE-OPERATION CHECKS... - Page 35 If any item in the pre-operation • Check tyre condition and tread depth. check list is not working properly, Tyres • Check air pressure. have it inspected and repaired in a • Correct if necessary. BYE BIKE dealer before operating Instruments the vehicle. • Check operation. light and 27, 52 • Replace defective parts (bulbs) or visit a BIKE BYE dealer for replacement.
-
Page 36: Operation
5. OPERATION... - Page 37 5.2 Starting the engine CAUTION Never rev a cold engine in order to 5. Operation avoid excessive wear. 5.3 Starting off The following explains some of the com- 1. While pulling the rear brake lever with mon operations aboard your BIKE BYE. your left hand and holding the grab bar with your right hand, push the scooter off the 5.1 Before riding centerstand. 2. Sit astride the seat, and then adjust Make sure your vehicle is in good condi- the rear view mirrors. tion before each ride performing pre-riding 3. Switch the turn signal on, check for checks listed at chapter 4. Starting the engine. oncoming traffic, and then slowly turn the throttle grip in order to take off. Switch the CAUTION 1. Place the vehicle on the centerstand.
- Page 38 Parking with the centerstand 5.4 Acceleration Brake levers use. Centerstand use. CAUTION Grip throttle use. 1. Stand on the left side of the vehicle. Avoid braking hard or suddenly, The speed can be adjusted by opening 2. Hold the left handle grip with your left especially while leaning or riding on and closing the throttle. To increase the hand (1), the grab bar with your right hand low-grip surface. speed, turn the throttle grip in your direction (2) and let down the centerstand with your (1). To reduce the speed, turn the throttle right foot (3). grip forward (2). 3. Press down on the tip of the center- 5.6 Parking stand with your foot and simultaneously, 5.5 Braking pull up and back.
- Page 39 • Avoid harsh braking and acceleration, 5.7 Refuelling anticipate to traffic. • Avoid unnecessary loads. • Use only unleaded petrol with recom- mended octane number. • Do not accelerate when starting your vehicle, in addition to unnecessary fuel • Do not use fuels containing a high con- consumption can cause excessive wear centration of alcohol, oil-petrol mixture of engine parts. or contaminated or lapsed petrol. • Avoid getting dust or water in the fuel tank. 5.8 Engine running-in To increase the durability of the vehicle dur- ing the first 1.000 kilometres consider these recommendations: • Avoid prolonged full-throttle operation or overheat the engine. • Avoid sudden braking and handling of your vehicle. 5.9 Fuel Consumption In order to minimize fuel consumption, con- sider the following recommendations: • Avoid over-rev the engine during accel- eration.
-
Page 40: Maintenance
6. MAINTENANCE... - Page 41 6.1 Safety on 6.2 Service maintenance schedule 6. Maintenance Make sure that you have the tools, parts Most important points of inspection, ad- and skills required to perform each task. In justment, replacement and lubrication are case of doubt, visit a Bye Bike dealer. explained on the following pages. Keeping your vehicle well-maintained is Unless otherwise indicated in this man- The intervals given in the service absolutely essential to your safety, protect ual, turn off and cold the engine before schedule should be simply considered as a your investment and obtain maximum per- performing any operation. general guide under normal riding condi- formance. Maintenance is the owner's re- tions. However, depending on the terrain, sponsibility. Be sure to inspect your vehicle weather, geographical location and individ- before each ride and perform the periodic ual use, the service schedule may need to checks specified in the Service Schedule. be shortened. From 11,000 Km repeat the service inter- vals starting at 3,000 Km.
- Page 42 KILOMETERS PRE-RIDE ANUAL ITEM 1.000 3.000 5.000 7.000 9.000 11.000 13.000 CHECKS CHECK Fuel tank level Engine oil tank level Fuel line Air filter Carburetor Engine oil pump Spark plug Transmission oil Drive chain and sprockets Every 500 Km Variator belt Variator rollers Battery Brakes and shoes/pads...
- Page 43 Access the air filter element 6.3 Spark plug 1. Remove the screws that fasten the air Spark plug check filter case cover. 2. Remove the air filter case cover and For the recommended spark plug see the fastening grid "Specifications" (Chapter 8). 3. Pull the air filter element out. 4. Refit all components in reverse order. CAUTION Using spark plugs with an improp- er heat range can cause engine 1. Electrodes gap. damage. 6. Make sure the plug washer is in good 1.Disconnect the park plug cap. condition. 2.Clean any dirt from around the spark 7. With the plug washer attached, oil the plug base.
- Page 44 Drive chain free-movement check 6.6 Throttle grip 6.7 Transmission The vertical movement of the drive chain free play must be in the range 10 - 15 mm. Never For safety and to prevent excessive wear ride your vehicle if the free-movement the drive chain must be checked, adjusted clearance exceeds 30 mm. Free-movement and lubricated in accordance with service must be checked at different points on the schedule. Checking, adjustment and lubri- chain, if this is not constant it is possible cation must be carried out more frequently that some links or sprockets are in bad con- for extreme conditions such as salty or heavily gritted roads. If the chain does not dition. Have a BYE BIKE dealer check the drive chain and sprockets immediately. move smoothly, makes strange noises, has damaged rollers, loose pins or deforma- Drive chain check: 1. Place the vehicle on a level surface tions, please inspect the chain in a BIKE and hold it in an upright position with no BYE dealer. weight on it. Front and rear sprockets also must be 2. Loosen the screws and remove the inspected. If any of these elements is worn transmission cover. or damaged, must be replaced on your Throttle grip free play.
- Page 45 Drive chain free-movement adjustment 5. Check the drive chain free-movement. grease from the chain and sprockets. Drive chain free-movement adjustment After cleaning, lubricate the drive chain requires advanced mechanical skills, there- with the chain lubricant recommended by fore this task should be left to a BYE BIKE BIKE BYE. Do not use solvents with a low dealer. flash point or gasoline to clean the chain. Keep other parts 1. Place the vehicle on a level surface and hold it in an upright position with no NOTE weight on it. To maximize its life, BIKE BYE rec- Loosen the rear axle nut. 1. Drive chain free-movement ommends lubricate the chain and 3. Rotate the tensioner clockwise and pull the sprockets each 500Km with GRO 6. Check the rear axis alignment.
- Page 46 (2,60 kgf/cm2, 37,7 psi, 2,60 bar). lever free play and, if necessary, adjust it Riding on tyres that are excessive- as follows. To increase the brake lever free ly worn or improperly inflated can play, turn the adjusting nut at the brake cause a crash. Have your tyres Inspecting for damage: shoe plate in direction (1). To decrease the replaced by your BYE BIKE dealer. 1. Inspect the tyres for cuts, slits, or brake lever free play, turn the adjusting nut cracks that exposes fabric or cords, or nails in direction (2). or other foreign objects embedded in the side of the tyre or the tread. Also inspect for the bumps or bulges in the side walls of the tyres.
- Page 47 CAUTION Improper free play in the brake levers could indicate a problem in the brake system. Do not use your vehicle until a BYE BIKE dealer inspect the brake Brake levers and cables lubrication. system. Brake shoes wear indicator. Brake levers recommended lubricant:...
- Page 48 1. Check the inner tubes for scratches, CAUTION damage and excessive oil leakage. 2. Place the vehicle on a level surface If the centerstand does not move up and hold it in an upright position. and down smoothly, have a BYE BIKE 3. While applying the front brake, push dealer check or repair it. Otherwise, the down hard on the handlebars several times centerstand could contact the ground to check if the front fork compresses and resulting in a possible loss of control.
- Page 49 Worn or loose steering bearings may cause danger. Therefore, steering must be checked as follows at the intervals specified in the service schedule. To check the steering operation, place the vehicle on the centerstand, hold the lower ends of the front fork legs and try to move them forward and backward. If any free play can be felt, have a BYE BIKE dealer check or repair the steering. 6.15 Wheels bearings Pre-load levels: 5. Minimum pre-load - 1. Max- Pre-load adjustment. imum pre-load. Adjusting the rear suspension You can adjust the pre-load on the rear 6.14 Steering shocks to adapt your vehicle to load. To set pre-load, turn the knob to the left or right to the desired position. Position 5 provides the lower pre-load while 1 offers the highest pre-load. Use a special wrench for suspensions to perform this task. Wheels bearings check. The front and rear wheel bearings must be checked at the intervals specified in the service schedule. To check the wheels...
- Page 50 and try to move the wheel sideways. If there Electrolyte check: is any play in the wheel hub or if the wheel 1. Place the scooter on a level surface does not turn smoothly, have a BYE BIKE and hold it in an upright position. dealer check or repair the steering. 2. Remove the engine compartment top panel. 3. Check the electrolyte level in the 6.16 Battery battery. The battery is located on the top centre 4. If the electrolyte is at or below the mini- mum level mark, add distilled water to raise of the chassis. Remove the top panel of the engine compartment to access the battery. it to the maximum level mark. 5. Check and, if necessary, tighten the Remove the central cover: battery lead connections and correct the 1. Remove the screw. breather hose routing. 1. Battery. 2. Remove the central cover. Check the electrolyte level CAUTION Use only distilled water, as tap water contains minerals that are harmful to the battery.
- Page 51 than two months, check the specific gravity 6.17 Fuse WARNING of the electrolyte at least once a month and Electrolyte is poisonous and dan- fully charge the battery whenever neces- Fuses protect the electrical circuits on gerous since it contains sulphuric sary. your vehicle. If something electrical on your acid, which causes severe burns. 3. Fully charge the battery before instal- vehicle stops working, check the fuse and Avoid any contact with skin, eyes or lation. replace it if necessary. clothing and always shield your eyes 4. After installation, make sure that the when working near batteries.
- Page 52 6.18 Bulbs Headlight bulb If the headlight bulb burns out, replace it as follows: 1. Turn the key to the "OFF". 2. Remove the front cover by removing the screws. Fuse location. 1. Headlight. 2. Bulb cover. 4. Disconnect the headlight coupler. CAUTION 5. Unhook the headlight bulb holder, and Do not use a fuse of a higher am- then remove the burnout bulb. perage rating than recommended to 6. 6. Place a new headlight bulb into avoid causing extensive damage to position, and reinstall all the parts.
- Page 53 Headlight beam adjustment Turn signal light bulb CAUTION Do not touch the glass part of the headlight bulb to keep it free from oil, otherwise the transparency of the glass, the luminosity of the bulb, and the bulb life will be adversely affected.
- Page 54 Tail light 6.19 Additional informations Fuels containing alcohol Some conventional fuels blended with alcohol are available in some locales to help reduce emissions to meet clean air standards. If you plan to use blended fuel, check that it is unleaded and meets the minimum octane rating number. CAUTION 1. Tail light. Change your fuel supplier if you notice a performance loss or engine malfunction. If the tail / brake light does not work or does not work properly contact a BYE BIKE dealer. The tail/brake light is composed by Main switch LED lamps. The tail/brake light also serves If you leave the main switch connected as license plate light. with the engine off, the battery will dis- charge.
- Page 55 This page is left blank intentionally...
-
Page 56: Clean And Care
7. CLEAN AND CARE... - Page 57 Cleaning CAUTION After a normal use Do not use high-pressure washers Remove dirt with warm water, a mild de- 7. Clean and care or steam-jet cleaners. They can tergent, and a soft, clean sponge, and then damage electric components and rinse thoroughly with clean water. Use a moving parts. toothbrush or bottle-brush for hard-to-reach areas. Stubborn dirt and insects will come Frequent cleaning and polishing is im- off more easily if the area is covered with a After riding in the rain, near the sea or on portant to ensure the life of your BYE BIKE wet cloth for a few minutes before cleaning.
- Page 58 7.2 Long-term storage CAUTION WARNING Do not direct water at the follow- Contaminants on the brakes or tyres If you won't be riding for an extended ing parts: can cause loss of control. Make sure period of time, follow these guidelines: Muffler. Water can prevent starting that there is no oil or wax on the 1. Clean your vehicle and wax all painted and causes rust in the muffler.
- Page 59 7.3 Transporting the vehicle If your vehicle needs to be transported, it should be carried on a motorcycle trailer or a flat-bed truck or trailer that has a loading ramp or lifting platform, and motorcycle tie- down straps. Never try to tow your vehicle with a wheel or wheels on the ground. CAUTION Towing your vehicle can cause serious damage to the transmission.
-
Page 60: Specifications
8. Specifications Dimensions Spark plug - electrodes gap: 0,7 to 0,9 Tyre air pressure Length: 1.858 mm 0 to 90 kg loading Width: 689 mm (without rear-views) Choke: automatic Front tyre: 245 kPa Height: 1.098 mm Clutch: centrifugal, automatic (2,45 kgf/cm2, 35,5 psi, 2,45 bar). Seat height: 801 mm Air filter: wet element Rear tyre: 245 kPa Wheelbase: 1.216 mm Fuel tank capacity: 4,2 litres (including a (2,45 kgf/cm2, 35,5 psi, 2,45 bar). Minimum ground clearance: 187 mm 0,5 litres fuel reserve) 91 to 150 kg loading Recommended fuel: unleaded gasoline Front tyre: 260 kPa Weight... - Page 61 8. Specifications Suspensions Notes Front suspension: helical spring fork with 28 mm oil shock absorbers Rear suspension: Two 24mm shock absorbers with helical spring Battery Type: GT4L-BS (12V, 4.0 Ah) Fuse Type: 15A Bulbs Headlamp: HS1 12V 35/35W (x1) Brake / tail light: LED (x5) Front turn signals: R19/10 12V 10W (x2) Rear turn signals: R19/10 12V 10W (x2) Torque specifications Spark plug: 25 Nm...
-
Page 62: Index
9. Index Horn switch Starting off Acceleration and deceleration Starting switch Air Filter Installing accessories Starting the engine 31/37 Steering Battery Kickstarter Storage Brake levers Brake pads and shoes Light switches Throttle grip and cable Brakes Turn signal switch Bulbs Main switch Turn signals bulb Maintenance Tyres Carburettor Service record Tyre air pressure Care Service schedule Centerstand Maximum load Vehicle identification number Consumption Oil level warning light Warranty Dashboard Oil tank cap Washing Drive chain Outlet 12V Wheel bearings Engine identification number...
Need help?
Do you have a question about the ONE&ONE and is the answer not in the manual?
Questions and answers