Table of Contents
Advertisement
Advertisement
Table of Contents

Subscribe to Our Youtube Channel
Summary of Contents for BREWART BEERDROID
- Page 1 OPER ATING MANUAL...
-
Page 2: Table Of Contents
BREWART BY COOPERS Welcome to the Contents art of brewing! Safety Congratulations on the purchase Customer Service of your BrewArt BeerDroid. BrewArt Customer Service Product Specifications This manual covers the Provided in the box basic setup and operation Getting to know your of your BeerDroid. - Page 3 Wi-Fi via the BrewArt App Starting a LAGER Program Part 1 – On your Device Starting an ALE Program Part 2 – On your BeerDroid Starting your own CUSTOM Program 16 Part 3 – On your Device Brewing Program Zones Option 2 –...
-
Page 4: Safety
AS/NZS 60335.1:2011 Inc A1-2, AS/NZS 4268:2012). To ensure a safe, successful and rewarding experience please read these instructions fully prior to use, and if you have any queries, do not hesitate to contact BrewArt support on 1300 240 242 or at info@brewart.com... -
Page 5: Customer Service
Coopers Brewery Ltd. Power cord ABN 13 007 871 409 Instruction manual Coopers Brewery Ltd. 461 South Road, To view the complete BrewArt System Regency Park including the full range of BrewPrints South Australia 5010 and Accessories visit brewart.com Product Specifications... -
Page 6: Getting To Know Your Brewart Beerdroid
BREWART BY COOPERS Getting to know your BrewArt BeerDroid Did you know? Brewart.com/101 has lots of great how-to videos, FAQs and tips. A. Quick lock lid: D. Drain plug: Lid that locks into position. Keeps Allows residual fluid to drain your brew contaminant free... - Page 7 BEERDROID INSTRUCTIONS G. Control panel: To control the BeerDroid H. Carry handles: For lifting the unit. Do not lift using the handle on the lid. I. Power cord connection and ON/OFF switch WARNING Never lift the unit by the lid handle.
-
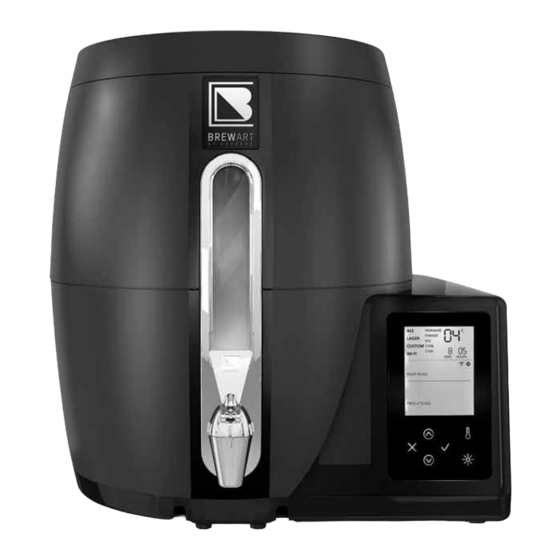
Page 8: Lcd Display Screen & Control Panel
BREWART BY COOPERS LCD Display Screen & Control Panel B. Brewing Zones C. Temperature Display A. Main Menu D. Time Display E. Wi-Fi F. Brew Information Status Panel G. User Prompt Panel H. Control Buttons... - Page 9 Brewing zones will also be used information. to set custom brewing programs. E. Wi-Fi Information C. Temperature Display Indicates Wi-Fi and BrewArt Server Indicates current brew temperature and connectivity. For more information is used to set custom temperatures. on how to configure Wi-Fi refer to Appendix A.
-
Page 10: Control Panel
BREWART BY COOPERS Control Panel H. Control Buttons Light Turns on the light in the BeerDroid to Arrows view the brew from the viewing window. Navigate the menus and set the Note temperature in custom programs. The light automatically turns ... -
Page 11: Getting Started
BEERDROID INSTRUCTIONS Getting started To receive expert help from our Customer Support Team, we recommend that you create a BrewArt Account and configure your BeerDroid for Wi-Fi operation. OPTION 2: Note Setting up your BeerDroid You do not need to connect the via the Internet... -
Page 12: Before Use
WARNING of the seal with a small amount of olive oil. DO NOT tilt or lay BeerDroid on its back or side as this can cause damage to the compressor. Leave for one hour. Open the tap and release half a Position near a sink or cup of liquid through the tap. - Page 13 BEERDROID INSTRUCTIONS Important When brewing is complete, we recommend you thoroughly clean and rinse the BeerDroid, lid, tap and plug while the residue is still moist and leave to completely dry. Before each use all equipment must be sanitised.
-
Page 14: Ready To Brew
BrewPrint, may and turn on at the power point. cause error codes to display. Switch power to ON, at ON/OFF switch at the rear of the BeerDroid. Preparation The LCD display screen will light up, firstly showing all data and... -
Page 15: Adding Ingredients
Follow the directions included in your BrewPrint and any 'Brew Notes' on the BrewPrint web page. You can use the BrewArt App to monitor and control your BeerDroid Fill BeerDroid with 10 litres of provided that you have connected... -
Page 16: Controlling Beerdroid From Control Panel
BREWART BY COOPERS Controlling BeerDroid from Control Panel Starting a LAGER Program Starting your own CUSTOM Program Using the control panel arrows, scroll through to the lager Using the control panel arrows, program. The word lager will scroll through to the custom flash on the display screen. - Page 17 BEERDROID INSTRUCTIONS Set fermentation temperature Set storage temperature The ferment zone and The store zone and temperature will now flash. temperature will now flash. Use the arrows on Use the arrows on the control panel to adjust the...
-
Page 18: Brewing Program Zones
The duration of the ferment zone is for yeast propagation (growth of dependent on many factors, such as, yeast cells). Your BeerDroid will then the recipe, the yeast strain used, and transition to the ferment zone. the fermentation temperature. -
Page 19: Keg
This will end the current program. Note Turn unit off at the rear power switch. If your BeerDroid is configured for Wi-Fi operation, you may Keg or bottle your beer. transition between the store zone and the keg zone at any ... -
Page 20: Store
To illuminate the viewing window, press the light Note button on the control panel. The light will automatically If your BeerDroid automatically switch off after 15 seconds. transitioned into store zone and eof was not detected during the ferment zone, see previous section 'End of Fermentation not detected'. -
Page 21: Kegging
A. Keg Caddy E. Keg Filling Tube & Connectors Attaches to the base of the Food grade filling tube with 2 x BeerDroid to hold BrewArt connectors for filling for Keg 5 Litre Keg while filling F. Keg Filling Cap For filling your keg. -
Page 22: Clean & Sanitise The Following Kegging Equipment
BREWART BY COOPERS Clean & Sanitise Note the following The orange o-ring must be fitted kegging equipment in the orange valve head. Keg Liner Connector (C) The white o-ring must be fitted in the black valve head. Keg Filling Cap (F) The springs and poppets Keg Filling Tube &... -
Page 23: Kegging Using The Keg Caddy
1. Insert the Keg Caddy into the Note two slots at the bottom of the Take care not to allow any BeerDroid as shown; Ensure that unnecessary air into the Keg Liner. the Caddy is fully inserted into The sleeve assists with this and the slots and securely engaged. - Page 24 8. Attach the two connectors to each end of the Filling Tube. 9. Attach one end to the BeerDroid Tap and the other end to the Filling Cap. 6. Add Primer and any Hops: Note take care not to spill any on...
- Page 25 BEERDROID INSTRUCTIONS Note Place a bucket on the floor under the keg to catch any drips/spill while kegging. 10. Invert the Keg in the Caddy. WARNING Ensure the Filling Tube is connected to the Filling cap before inverting. Some primer...
-
Page 26: Congratulations, You Have Kegged Your First Brew
Place a small bucket on the ground Note the second keg is full when the and drain the residual beer into it beer stops flowing from the BeerDroid from the tap end connector. into the Bag. 16. Remove the Filling Tube and... -
Page 27: Bottling
Note the BeerDroid tap – see Diagram O. Place a bucket on the floor to catch Add two BrewArt carbonation any drips or spills while bottling. - Page 28 BREWART BY COOPERS Switch the tap on full to WARNING fill the bottling valve. Do not tilt your BrewArt Place a bottle over the bottling BeerDroid to finish bottling. valve until the base of the valve touches the base of the bottle and starts to flow.
-
Page 29: Cleaning
Do not use any abrasive materials Rinse your BeerDroid or detergent as these may damage with clean water. your BeerDroid and affect the Sponge out any remaining water. quality of your next brew. Once the entire unit is dry, re-fit... -
Page 30: Appendix A - Wi-Fi Set-Up And Use
BREWART BY COOPERS Appendix A – Wi-Fi Set-up and Use Your BrewArt BeerDroid is internet enabled, however it must first be connected to a compatible Wi-Fi network with internet access, before you can use its internet features. The internet and Wi-Fi capabilities ... -
Page 31: Wi-Fi Set-Up
BEERDROID INSTRUCTIONS Wi-Fi Set-up In order to use the internet capability of your BeerDroid you must connect your BeerDroid with your Wi-Fi network. You can set up your Wi-Fi network settings via: The BrewArt App Wi-Fi Protected Setup (WPS) Manual Setup process. -
Page 32: Option 1 - Setup Beerdroid's Wi-Fi Via The Brewart App
BeerDroid’s Serial Number to your BrewArt Account. Part 1 – On your Device a. Using the App’s menu, navigate to "My BeerDroid". Part 2 – On your BeerDroid d. On your BeerDroid, navigate to Wi-Fi, Manual Setup. Use the ... -
Page 33: Part 3 - On Your Device
Complete the Setup by giving your BeerDroid a name. h. Return to Brewart App. And click the Next button. i. Select your "Home Network" l. Setup is now complete. from the List and tap next button. -
Page 34: Option 2 - Wps Setup
arrows on the control panel to scroll to If the configuration failed, your Wi-Fi in the main menu. BeerDroid will display an e error code and flash refer manual. An additional b. press to configure will appear on the user prompt panel. -
Page 35: Option 3 - Wi-Fi Manual Set-Up
(e.g. iPad, smart phone, etc.) i. Open a browser window, e.g. Internet Explorer, Safari, Part 1 – On your BeerDroid Firefox, Chrome etc. Ignore any message about not being able a. Use the ... -
Page 36: Part 3 - On Your Beerdroid
BREWART BY COOPERS Part 3 – On your BeerDroid p. You should see a list of available networks, including u. The icon should turn your home network. off for a few seconds, and q. If your network is hidden, click then start flashing. -
Page 37: Wi-Fi Operation
ICON STATUS EXPLANATION Both Blank Your BeerDroid’s Wi-Fi is off. Icon On: BeerDroid is connected to your Wi-Fi network Icon Blinking: BeerDroid is attempting to connect to your Wi-Fi network. Icon On: BeerDroid is connected to the BrewArt server via your Wi-Fi network. -
Page 38: Wi-Fi Set-Up Error Codes
BREWART BY COOPERS Wi-Fi Set-up Error Codes During Wi-Fi setup, you may receive one of the following errors: Error Code E2 Description Additional "Cd" code Cause User Action May appear 2: JOIN FAILURE Various Consult your Wi-Fi when configuring modem’s manual... - Page 39 BEERDROID INSTRUCTIONS Error Code E3 Description Additional "Cd" Cause User Action code May appear 1: DHCP FAILURE Wi-Fi modem has Check modem when configuring not issued an IP settings for DHCP Wi-Fi and your address to your and try again.
-
Page 40: Operating Error Codes
BREWART BY COOPERS Operating Error Codes During operation you may receive the following error codes Error Code E1 Description Cause User Action 1. Check liquid level A heating or Cause 1: The unit has failed cooling error has to heat or cool your brew to 2. -
Page 41: Appendix B - Linking Your Beerdroid
BEERDROID INSTRUCTIONS Appendix B – Linking your BeerDroid In order to use your BeerDroid with the BrewArt App and/or BrewArt website you must link your BeerDroid’s serial number to your BrewArt Account. We recommend that you register your hardware items for warranty. -
Page 42: Option 2 - Linking Via The Brewart Website
BREWART BY COOPERS c. Give your BeerDroid a name, leave d. Your BeerDroid is now linked pre-populated serial number and to your BrewArt Account. click on "LINK BEERDROID". Option 2 – Linking via the BrewArt Website Note For security reasons the... -
Page 43: Warranty
BEERDROID INSTRUCTIONS Warranty Disposal BrewArt BeerDroid and BrewFlo Correct Disposal come with a 12 month Limited of this product Replacement Warranty. We recommend that you register your hardware items for warranty. To view full Terms and Conditions of Sale, including Limited Replacement Warranty details go to brewart.com/register... - Page 44 © Coopers 2016 / AU – V1.1 BrewArt, BeerDroid and BrewFlo are registered trademarks of Coopers. Due to continued product improvement, the products illustrated/photographed in this brochure may vary slightly from the actual product. Updates to this manual may be found at...
Need help?
Do you have a question about the BEERDROID and is the answer not in the manual?
Questions and answers