Table of Contents
Advertisement
Quick Links
Advertisement
Table of Contents

Summary of Contents for PLDT Home Telpad HC7
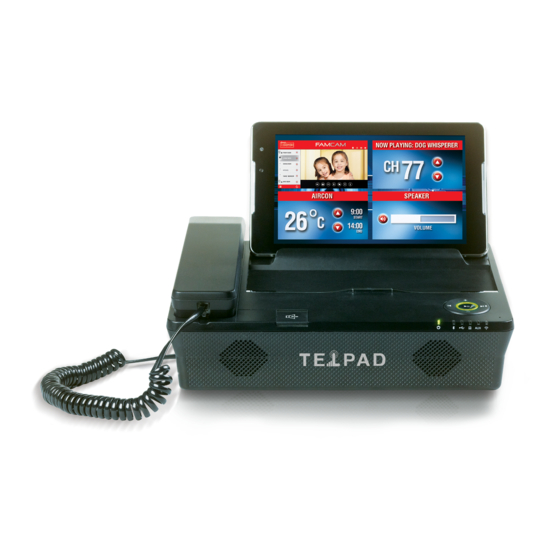
- Page 1 TELPAD HC7 USER MANUAL...
-
Page 2: Table Of Contents
1 GETTING STARTED 1.1 About your Telpad 2 TELPAD INTRODUCTION 2.1 Getting to know your Telpad 2.2 Product Specification 2.3 Installation 2.3.1Basic Connection 2.3.2Installing the dock battery 2.3.3Docking and undocking the Tablet 3 TABLET FUNCTIONS 3.1 Turning the Tablet on or off 3.1.1To turn on your Tablet 3.1.2To turn the Tablet off 3.2 Charging the battery... - Page 3 3.10 Languages & input method & account setting 3.11 Setting the date and time 3.11.1To automatically set date and time 3.11.2 To manually set date and time 3.12 Installing or removing the microSD card 3.13 Connecting or disconnecting from a computer using USB 3.14 Connecting the Tablet to a TV 3.15 Wireless networks 3.15.1 Opening Wi-Fi settings...
- Page 4 3.20.2 IR Learning 3.20.3 Reservation 3.20.4 Reservation Setup 3.20.5 Mobile remote control 3.20.6 Motion detection 3.21 Home care 3.22 Wifidisplay 3.22.1 Source 3.22.2 Sink 3.22.3 Attentions 3.23 DLNA 3.23.1 Wi-Fi connection 3.22.2 The brief introduction of interactions between tablet and modile phone 4 THE CONNECTION BETWEEN DOCK PHONE AND TABLE 4.1 Voice call Services 4.1.1 Making a call...
- Page 5 5 BASIC TROUBLESHOOTING FOR THE TELPAD 5.1 Tablet not powering up 5.2 No dial tone 5.3 Distorted audio on speaker 5.4 Tablet Dialler cannot make a call 5.5 No audio response in the Handset 6 FAQs 7 WARNINGS AND PRECAUTIONS 8 PERSONAL INFORMATION AND DATA SECURITY 9 LEGAL NOTICE 10 DISCLAIMER OF WARRANTIES...
-
Page 6: Getting Started
1 GETTING STARTED... -
Page 7: About Your Telpad
1.1 About your TELPAD The Telpad is the world’s first Tablet and landline in one, a device that that not only gives you access to basic communication services, but also brings to your home a world of productivity and entertainment – powered by Android™, the world’s leader in smartphone technology. -
Page 8: Telpad Introduction
TELPAD INTRODUCTION... -
Page 9: Getting To Know Your Telpad
2.1 Getting to know your TELPAD... - Page 10 22 23 24 25 26 27...
- Page 11 Accessories USB Charger HDMI Converter USB Power Cable DC4.0 Battery Coiled Phone Cord USB Data Cable Phone Line...
-
Page 12: Product Specification
2.2 Product Specificiation GENERAL SPECIFICATIONS AND DISPLAY DIMENSION 114 mm x 193 mm x 10 mm DISPLAY AND RESOLUTION 7 Inch HD IPS (1280X800) SYSTEM SOFTWARE Android™ 4.2.2 AIR INTERFACE Wi-Fi - 802.11b/g/n MULTI-TOUCH PANEL Capacitive 5-Points-Touch PRIMARY KEYPAD 3 Standard Soft Keys: Home, Back, Recent Applications DISPLAY COLOR DEPTH 24-bit CONNECTIVITY... - Page 13 SMART DIALER Call Hold Speed Dial PSTN Speaker Volume Adjustment COMMUNICATION AND ORGANIZER Protocols: SMTP, POP3 and IMAP4 EMAIL Supports Exchange Calendar, Contacts synchronous MEDIA PERFORMANCE 3GPP2, 3GPP, RMV, TS, 3GP, VOB, AVI, MP4, FLV, WMV, MKV VIDEO DECODING AUDIO DECODING AAC, AMR, APE, FLAC, MID, MP3, OGG, WAV, WMA PICTURE FORMATS JPEG, JPG, BMP, PNG...
-
Page 14: Installation
2.3 Installation 2.3.1 Basic Installation Before installing or removing the adapter, telephone line or the dock battery, ensure the tablet is off the dock. extension cord jack line 1 WLAN USB charger DC power adapter telephone jack... -
Page 15: 2Installing The Dock Battery
2.3.3 Docking and undocking the Tablet 2.3.2 Installing the dock battery 1. Removing the back cover To install the tablet on to the dock, refer to To remove the back cover, the following figure. refer to the following figure. 2. Installing the battery To remove the tablet from the dock, do as shown To install the battery, in this figure. -
Page 16: Tablet Functions
TABLET FUNCTIONS... -
Page 17: Turning The Tablet On Or Off
3.1 Turning the Tablet on or off 3.1.1 To turn on your Tablet Before you turn on your tablet. ensure that the battery is correctly installed or the Tablet is properly connected to the power supply. To turn on your tablet, press the Power key. 3.1.2 To turn the Tablet off 1. -
Page 18: Charging The Battery
3.2 Charging the battery 3.2.1 Charging the tablet battery The Tablet is powered by a rechargeable Li-ion battery. There are two ways to charge the Tablet: 1. Place the Tablet on the dock with the power cord supplying power to the dock. 2. -
Page 19: Working With The Key
3.3 Working with the keys 3.3.1 Using the physical keys Power Press and hold to power the Tablet on or off. Press shortly to lock/unlock the screen. Press and hold to open a menu displaying options for Silent mode and Power off Volume Up/Down When the Tablet is ringing, press any of the volume buttons if you want to mute the ringer. -
Page 20: Using The Touchscreen
3.4 Using the touchscreen Touch By touching an item, you can select the item or launch it. For example: Touch the on-screen keyboard to insert text and/or characters. Touch an application icon to launch it. Touch and Hold Touching and holding items will activate them. For example: Touch and hold an application/widget to move it. -
Page 21: Home Screen
3.5 Home screen The Home screen is the starting point in using the Tablet Touch the Home key to display the Home screen. You can customize the Home screen with various wallpapers and create shortcuts for items you want to easily access. 3.5.1 Getting to know the Home screen 1. -
Page 22: 2Extended Home Screens
Main display area: This area displays application shortcuts, widgets, and other items that can be easily accessed by touching them. Google Search : Touch to search using Google, or touch the microphone to search using your commands. Weather Widgets: The weather widget informs you of the time, date, and weather in your location. It can be customized based on your preference. -
Page 23: Locking And Unlocking The Screen
3.6 Locking and unlocking the screen 3.6.1 Locking the screen When the Tablet is powered on, press the Power key and the screen will turn off and lock. When the Tablet is left idle for a specified time period that you have set, the screen will automatically turn off and lock. -
Page 24: Inputting Text
3.7 Inputting text You can enter and edit text in text fields and use menu commands to cut, copy, and paste text within or across applications. 3.7.1 Entering text using the onscreen keyboard To open the onscreen keyboard, touch a text field where you want to enter text. To switch the input method, touch the icon located at the lower right corner of the keyboard. -
Page 25: 2Cutting Or Copying Text
3.7.2 Cutting or copying text To quickly cut or copy all the text in a text field: 3.7.2.1 Touch and open the text field that contains the text that you want to cut or copy. 3.7.2.2 Touch and hold the text field to display the Edit text menu. 3.7.2.3 Touch Select all, Cut all, or Copy all. -
Page 26: Opening And Switching Applications
3.8 Opening and switching applications To open an application, touch the shortcut on the Home screen, or go to the Applications screen by touching the Application button on the Home screen . To open and switch to a recently used application, touch the key at the lower left corner of the touchscreen. -
Page 27: Languages & Input Method & Account Setting
3.10 L anguages& input method & account setting 3.10.1Languages setting 1. Open setting list; 2 .Click languages & input; 3. Select language from the following scrolling list. 3.10.2Input method setting 1.Open setting list; 2.Click languages & input; 3.Click keyboard & input; 4. -
Page 28: Setting The Date And Time
3.11 Setting the date and time 3.11.1 To automatically set date and time 1. Open the Settings list. 2. Touch Date & time. 3. Check the box for Automatic date & time. 4. Touch Select time zone, then scroll down and select the correct time zone from the list. 5. -
Page 29: Installing Or Removing The Microsd Card
3.12 Installing or removing the microSD card Insert your microSD card into the microSD card slot until it clicks into position as shown in the following figure. Micro SDcard slot Remove the microSD card by gently pushing the card further into the slot, and then release it. The card will eject from the slot, and can be removed. -
Page 30: Connecting Or Disconnecting From A Computer Using Usb
3.13 Connecting to or disconnecting from computer using USB 3.13.1 Connecting the Tablet to a computer using USB cable: USB Micro port USB power cable 1. Use the appropriate USB cable (micro USB connector) to connect the Tablet to a USB port on your computer. Once it is properly connected, the Tablet displays a notification indicating that the USB is connected. -
Page 31: Connecting The Tablet To A Tv
3.14 Connecting the Tablet to a TV You can use the Tablet to play audio and video files on a high-definition TV, using a High-Definition Multimedia Interface (HDMI) cable. The HDMI cable is an optional accessory that’s not included with your Telpad. When purchasing an HDMI cable, please HDMI adapter... -
Page 32: Wireless Networks
3.15 Wireless networks The tablet is able to connect to various wireless networks and devices. Including Wi-Fi data networks, and Bluetooth devices such as headsets for voice and data transmission. Wi-Fi Wi-Fi is a wireless networking technology. Wi-Fi technology can provide wireless Internet connection over distances of up to 100 meters, however the connectivity of the Wi-Fi depends on the Wi-Fi router, and the surrounding environment in which it operates. -
Page 33: Connecting To A Wi-Fi Network
3.15.3 Connecting to a Wi-Fi network When the Wi-Fi is turned on, the device searches for available networks accessible within range. Inside Settings, when the Wi-Fi is turned on, the available networks will be listed on the side. Select the network you would like to connect to. If the network is open, it will automatically connect as soon as you select it. -
Page 34: Forgetting A Wi-Fi Network
3.15.6 Forgetting a Wi-Fi network Tap Settings > Wi-Fi Touch the network name you want to remove from the Wi-Fi networks list Touch Forget in the menu that opens. -
Page 35: Bluetooth
3.16 Bluetooth Bluetooth is a wireless communications technology for exchanging information over short distances. The connectivity between the Bluetooth devices may be affected by their surroundings and is altered or reduced by obstacles such as walls or other electronic devices. 3.16.1 Opening Bluetooth settings To configure the Bluetooth settings of the tablet in the Bluetooth settings list: Touch and open the Settings from the Home screen or Applications screen... -
Page 36: Connecting To Bluetooth Devices
3.16.4 Connecting to Bluetooth devices Pairing with a Bluetooth device Search for a Bluetooth device, pair with it, and exchange information between devices. Open the Settings Under Wireless & Network touch Bluetooth. Touch the name of your device to make it visible to nearby devices. Touch Search for devices at top to begin or reinitiate search for other devices. -
Page 37: Google Services
3.17 GOOGLE SERVICES 3.17.1 Creating a Google Account When accessing a Google service for the first time with your device, you will be asked to sign in using your Google account. Make sure the Tablet is connected to a network to sign in or create a Google account. If you already have a Google account, simply enter your information and sign in. -
Page 38: Using Play Store
3.17.2 Using the Play Store You can access thousands of easily downloadable applica- tions and games for your Tablet via the Google Play Store. 3.17.3 Searching for Applications There are several ways to search for applications in the Play Store, through: 1. -
Page 39: Uninstalling An Application
3.17.5 Uninstalling an Application 1. Go to Play Store, touch the My apps button. 2. Touch the application to uninstall, and then touch Uninstall. 3. When asked for confirmation, touch OK to remove the application from your Tablet. 3.17.6 Backing up and restoring apps and settings from a Google account 1. -
Page 40: Adding And Deleting E-Mail Accounts
3.18.2 Adding and deleting e-mail accounts Adding an e-mail account The first time you open E-mail, you are prompted to set up an e-mail account. If you have an existing e-mail account, you can add this by touching Add account. Automatic setup: 1. - Page 41 3.18.3 Gmail Gmail is an e-mail service provided by Google. Gmail can be accessed from the Applications screen by touching the Gmail icon. To add a Gmail account: 1. After opening Gmail, touch Add existing. 2. Enter the e-mail address and password of your Gmail account. 3.
-
Page 42: Using The Camera
3.19 USING THE CAMERA To start taking pictures or shooting videos, touch Camera on the Home screen or on the Applications screen to open the camera. Be sure to clean the protective lens cover with a microfiber cloth before taking pictures. A lens cover with fingerprint smudges can cause blurry pictures with a “halo”... -
Page 43: Home Control
3.20 Home control This section contains a description of Home Control application which includes (1) IR (infrared) universal remote, (2) Reservation, (3) mobile remote control and (4) motion detection. Telpad Home control will work with the devices that are already in your home. It can control your TV, Cable Box, Radio, DVD, DVR, VCR, Blu-Ray, CD, Audio, Air Con (A/C), Amplifier and Satellite and much more. -
Page 44: Ir Learning
-From the main menu tap “add Remote control” Select Device Select Brand Select Model Confirm if signal is working Save remote with “Remote Name” Select Zone and tap save Tap selected Zone tap saved “Remote Name” you can find installed IR remote UI. When confirm signals, please point the Red part of Telpad towards the device you are trying to control just like a standard remote control. -
Page 45: Reservation
-Please point your original remote controller with the Red part of Telpad like right picture. And follow on-screen instructions to configure the device. -Please check if your device is working just like original remote controller with “Test” button. If not, please tap “Learn” button and repeat several times until it works. -
Page 46: Reservation Setup
3.20.4 Reservation Setup -Reservation is just like Alarm App. The difference is we have to assign a IR signal rather than a melody. Please install required IR signal with “IR Universal remote Initial Configuration” process before reservation setup. -From the main menu tap “Reservation Setup” Select Time (tap Select Zone Select Device... -
Page 47: Mobile Remote Control
3.20.5 mobile remote control Telpad provides mobile remote control feature. All you have to do is pairing your mobile and Telpad. You can control your home device like air-conditioner or IR controllable light system with your android mobile from Anywhere with your 3G or WIFI connection. ... - Page 48 Mobile remote Setup “Mobile remote Setup “ is just like Bluetooth pairing process.It allows you to establish connection between Telpad and mobile device. Please follow on-screen instructions to connecting the device. Please execute “Home Control Remote” in your mobile and click the “Remote Setup” menu with on-screen instruction. Telpad and “mobile remote”...
- Page 49 Mobile remote control -Please make sure “Mobile remote Setup “ and IR Universal remote Initial Configuration process is done before this process. -From the main menu in your “Home Control Remote” tap tap “Sync With Telpad”. Once downloaded, mobile remote can control Telpad with IR Remote menu( Select Zone tap “Remote Name”...
-
Page 50: Motion Detection
3.20.6 Motion detection - “Motion detection” feature will take and send photo of what it is in front of Telpad. You can use it for intruder detection. Use Telpad built in camera as a motion detection triggers. It will provide notifications to your mobile with captured images... - Page 51 Motion detection -Please make sure “Mobile remote Setup “ process is done if you want receive notification on mobile. -From the main menu in Telpad, please tap “Motion Detection” and follow on-screen instructions. The notification will be forwarded to connected mobile once started. If Telpad camera faces continuous change, it will not send all of the pictures. - Please provide Telpad with continuous power supply for operation.
-
Page 52: Home Care
3.21 Home care This section contains a description of Home Care application which is working with ‘iFever manager” dongle. iFever Manager enable your Telpad for body temperature measurement. You can keep history of your family temperature for a long time. If your baby gets a fever, you can show doctor with the daily graph screenshot. - Page 53 4. Tap the Start button or volume up hard key to begin temperature measurement. 5. Please move your iFever Manager sensor part to close your (or others) forehead position during three seconds. Measured distance is within 1 cm. 6. Please see the measured value, and tap the save button to store the data. Tap Clear button to clear last measured value if needed.
- Page 54 Appendix 1. Daily Graph ltem Description Last month button Move to previous month Calendar Display current date Next month button Move to next month No measured If no measured date, will be displayed with pale sky blue Today Tody is Green background Selected date This date can be selected when user touched View Graph...
- Page 55 * If Basel body temperature option is not ON in the Setting menu, No 7, 8, 9 menus will not be displayed, and if user selects a date it will show Graph View. ltem Description Last month button Move to previous month Calendar title Display current date Next month button...
- Page 56 Appendix 2. Monthly Graph ltem Description Start menstruation First day of menstruation (Marked in Daily graph) Graph Show graph with temperature Made love Made love date( Marked in Daily graph) Y axis Date for the month Non-Childbearing Indicate non Childbearing period Childbearing period Indicate Childbearing period Menstrual period...
- Page 57 Appendix 3. Setting ltem Description Information Show software version number & release date Logout Logout for another user login Basal body temperature Enable/ Disable BBT Menstrual cycle Menstrual cycle can be set up to 20-40 days Length of menstrual cycle Menstrual period can be set up to 1-7 days Time setting Setting time range for BBT temperature measurements (00:00 ~ 23:59)
- Page 58 Appendix 4. Basal body temperature Basal body temperature (BBT) is our lowest temperature during rest, which is usually during the time we're sleeping. This is the reason why BBT should be taken before getting out of bed for accurate fertility charting. Ovulation causes one half to one-degree rise in BBT, so monitoring BBT helps provide information on the best time for conception.
-
Page 59: Wifidisplay
3.22 Wifidisplay 3.22.1SOURCE 1. MOBILE PHONE Our HC7 tablet can support“ wifi display”and please operate as following: 2. You need a mobile phone as source port, but the version of the android must be 4.2 and above (only version 4.2 of android can support miracast),such as nexus 4.Please make sure you have turned on the Wi-Fi before using, it won’t affect whether the mobile phone is connected the router or not. - Page 60 2. Click the Display option, you will find Wireless 3. Click the Wireless display, you will find paired display option: devices, click the SEARCH FOR DISPLAYS to refresh the paired device list: Figure 1.3 refresh for finding more devices Figure 1.2 Wireless display option on Nexus 4...
-
Page 61: Sink
3.22.2 SINK HC7 tablet 1. Please make sure that you have turned on wifi on HC7 pad; Then start the apk 2. WifiDisplay: ,you can find your device name“Telpad_HC7”once accessed this apk. Figure 1.4 The app wifi display on HC7 tablet Dongle... - Page 62 3. You will find the name from Nexus 4,its name is Android_8c32.If you can’t find the paired device on tablet, you can click Search for device name on Nexus 4. Figure 1.5 How to checkout you device name on Nexus4 Figure 1.6 Android_8c32 is you device name on Nexus4 4.
-
Page 63: Attentions
3.22.3 ATTENTIONS This step is very important, please read it carefully. 3.22.3.1 Source: When you use nexus 4 as source port, you should make sure that the paired device name on you mobile phone is available, just like the picture: Figure 1.7 Second connect to HC7 tablet... - Page 64 The Wi-Fi source name will be displayed on HC7 tablet once connected successfully at first time. if you want to connect it again, you can start to connect HC7 pad by cilcking the peer device name on Nexus 4 untill HC7 pad has been ready for being connected,so when the HC7 pad has been ready,you can look at step3.22.2.
-
Page 65: Dlna
3.23 DLNA 3.23.1 Control device discovery and connection Our HC7 can support DLNA and you can operate as below: Please use mobile phone as source port and ensure the version of the android must be 2.3 and above(because only version 2.3 of android can support miracast) such as nexus 4. 3.23.1.1 Wi-Fi connection Please make sure two devices are in same Wi-Fi network, such as AURA_2.4g Figure1.1 nexus 4 has connected WIFI... - Page 66 3.23.1.2 Start Application 1. Please open “eHomeMediaCenter” in HC7 tablet and click “Settings” to change your device name for easy identification . Such as “HC7”. Figure1.3 click settings Figure1.4 Change device name...
- Page 67 Figure1.5 finish Figure1.6 apk-iMediaShare interface 2. Please start “apk-iMediaShare” and the interface Figure1.6.
-
Page 68: The Brief Introduction Of Interactions Between Tablet And Modile Phone
3.23.2 The brief introduction of interactions between tablet and mobile phone 3.23.2.1To push local video, music or photo to display on your mobile phone to tablet. Please refer to picture 1.6 “GALLERY VIDEOS”、“GALLERY PHOTOS” and“GALLERY MUSIC”. For example, click “Gallery Music”... - Page 69 When you start “Media Player” and the interface will show shared music, video and photos. You can click the files which you want to play. 3.23.2.4 HC7 tablet can share local music, video or pictures to mobile phone. Please start the “Media server” in “eHomeMediaCenter”interface on HC7 tablet when apk-iMediaShar is started on mobile phone.
- Page 70 Figure1.11click“OK” Figure1.12 select top right corner“start Figure1.13 the shared files from HC7tablet...
- Page 71 Please start the “local network” in mobile phone “iMediaShare” interface when the local files on HC7 tablet have been shared. The picture below for your reference. Figure 1.14 handsets apk - iMediaShare Shared interface display...
-
Page 72: The Connection Between Dock Phone And Table
4 THE CONNECTION BETWEEN DOCK PHONE AND TABLE... -
Page 73: Voice Call Services
4.1 VOICE SERVICES The touchscreen Dialer can be accessed by touching the Dialer shortcut. The Dialer is automatically launched when the Tablet is placed on the dock. When the Tablet’s dock interface comes into contact with the dock connector, the keypad on the dock is automatically disabled. With this set-up, you must use the Tablet dialler to make calls. -
Page 74: Answering A Call
4.1.1.4 Switching from handset to speakerphone and vice versa 1. Touch to switch from handset call to speakerphone. 2. To return to using the handset, lift the handset. The call will be continued via handset. Only one of the two modes will be active at a time. To end a call, please make sure both the handset and Tablet is off-hook 4.1.1.5 Making a call from the Contacts 1. -
Page 75: Favorites
When the area you are in has been selected, the phone will automatically recognize the similar area code for all incoming and outgoing calls, and will display the phone number without the area code. You will also be able to direct dial the phone number within the same area. -
Page 76: Changing Ringtones
4.1.8 Changing ringtones Within the Dialer, touch the Phone Setting tab. Touch the Ringtones & Volume from the list Touch the Menu button at the top corner. Touch Settings in the menu displayed. From the options that shows up touch Phone ringtone. Select the ringtone you would like from the list provided. - Page 77 4. Once you have finished entering details, flick to the bottom of the page and touch Done to save the contact details to your Tablet. While viewing the Call log, touch and hold the call log list to show contact details. You can add numbers to the contacts via the virtual screen.
-
Page 78: Dock Phone Entertainment Functions
4.2 Dock phone entertainment functions 4.2.1The speaker box function 4.2.1.1Dock phone can support music play in Bluetooth mode 1. Please connect power supply of dock phone and long press to start Bluetooth. The dock phone will make a voice prompt and Bluetooth indicator will display in blue light and flashing constantly . Please refer to the picture below. - Page 79 3. The dock phone will make a voice prompt once connected successfully. The dock phone can play any of audio files on your tablet/mobile phone or notebook. Please short press the below buttons on dock phone to control: Volume key +/- to adjust dock phone volume 、...
- Page 80 3. Dock will shift to TF mode automatically and beep sound indicating, and meantime TF indicate light will lighting as below picture .the dock could read the TF card storage music file and play automatically .during playing could press Volume key +/- to adjust volume, press 、...
- Page 81 4.2.1.4 Dock play music under USB HiFi Audio mode 1. Please long press to start Bluetooth, the Bluetooth indicator will display and dock phone will make a voice prompt meanwhile. 2. Please connect tablet with dock phone well. Then the dock automatically switch to USB HiFiAudio mode. The indicator of HiFi Audio will display in blue and keep long bright.
-
Page 82: Dock Phone Wifi Function
4.3 Dock Phone Wifi Function HC7 dock phone Wifi is equipped with functions of Wi-Fi router and Wi-Fi repeaters. Wi-Fi router: It supports traditional wired broadband ADSL dial-up, dynamic network and static network access. Wi-Fi repeaters: It can increase the network coverage without network cable. 4.3.1 Interface Specification Interface Name Function description... -
Page 83: Wi-Fi Router Configuration Interface
Step two: Please input router initial password 1~8,“ connected” will display below SSID once connected successfully, and will show on the top right corner of screen meanwhile. Please double check your password if the connection failed. 4.3.3 Wi-Fi router configuration interface Please click Android system browser and input http://192.168.1.1, click “GO”. -
Page 84: Setting Of Wired Broadband Internet Parameters
In order to ensure data security, please remember to change WIFI password in “WIFI security” when you are using your device at first time. Reminder: a) in order to guarantee your Wi-Fi not to be accessed by other persons, you can set up Wi-Fi encryption. And we suggest you to encrypt through WPA-PSK/WPA2-PSK. - Page 85 b)Dynamic IP If network supplier provides you the accessing way as dynamic IP, you no need to make any setting here, just click “ok”. Dynamic IP is the accessing internet way at guesthouses, hotels and some other public places.
- Page 86 c)PPPoE If your Internet connection as a "virtual ADSL dial-up" way, only needs to be in the "user name" and "password" in the input box enter the ISP to provide your account information, set up, click "ok" d) Repeater Click Scan AP, select the target AP and input the password, the Apply to complete...
-
Page 87: Wifi Basic Setting
4.3.5 WiFi basic setting Click left menu bar, “WiFi setting” -> “basic setting”, you can set network modes, SSID, wireless channel and etc. 4.3.6 The restoration of wireless router to factory setting You will encounter some problems once modified some parameters of router. For instance, we modified the password but forgot the modified password after a period of time. -
Page 88: Basic Troubleshooting For The Telpad
5 BASIC TROUBLESHOOTING FOR THE TELPAD... -
Page 89: Tablet Not Powering Up
5.1 Tablet not powering up 5.1.1. Press Tablet power key and check whether the PLDT Telpad logo appears upon initialization. 5.1.2. If the Android™ Tablet doesn’t launch, connect the Tablet to the power supply through the dock. 5.1.3. If the problem still exists, please contact the PLDT Business Office. 5.2 No dial tone 5.2.1. -
Page 90: Faqs
6 FAQs... - Page 91 Reason: It may be caused by the poor contact between Dock Phone and Tablet. Telpad can’t work when tablet Solutions: In order to guarantee the well connection, please clean those connected points is inserted into dock phone. between dock phone and tablet with naphtha. Reason: The adaptor may be damaged or the poor contact of DC power cable.
- Page 92 Reason: The Bluetooth of tablet didn’t open or its setting is wrong. The tablet Bluetooth can’t be Solution: - Please check if Bluetooth of tablet is opened or not; paired with other devices. - Please check Bluetooth’s setting; - Please restart tablet and open Bluetooth again. Reason: The tablet is may on standby.
- Page 93 Reason: The indicator on dock phone - Please check if dock phone battery has been installed well or not; didn’t display once battery - Please re-install battery or clean the metal terminals of battery holder with installed. naphtha. Reason: The terminals of DC cable wasn’t enough plugged into the bottom of power socket.
- Page 94 Reason: It may be caused by the poor contact between TF card and tablet or the TF card has already been damaged. The music in TF card can’t be Solution: played. - Please check the speaker box of dock phone has been opened firstly, pull out TF card and re-plug it into tablet;...
- Page 95 - The metal barrier which is not only resist WiFi signal but also absorb electromagnetic energy. Therefore, the biggest metal barrier in your family is those floors with bar-mat reinforcement and the WiFi signal from this directionis impossible to penetrate. The signal will be very weak even though it penetrated.
-
Page 96: Warnings And Precautions
7 WARNINGS AND PRECAUTIONS... - Page 97 Please read the following instructions carefully. Abide by the safety warnings described in order to use the device safely and properly as it is designed for. These instructions apply to the whole device including all the accessories. Basic Requirements Keep the device dry at all times and prevent from any collision with other objects, including during storage, transportations, and using of the device.
- Page 98 Never install telephone wiring during an electrical storm Never install telephone line jacks in wet locations unless the jack is specifically designed for wet locations. Never touch exposed (insulation broken) telephone wires or terminals unless the telephone line has been disconnected at the network interface Precautions for Using Wireless Devices When using the device, ensure that the antenna of the device is at least 20 cm away from all persons.
- Page 99 Use the appropriate power supply defined in the specifications of the charger. An improper power voltage may cause a fire or amalfunction of the charger. Do not connect two poles of the battery with conductors, such as metal materials, keys, or jewelries. Otherwise, the battery may be short-circuited and may cause injuries and burns on your body.
- Page 100 If the device screen is damaged, do not touch or try to remove the broken part. In this case, stop using the device immediately, and then contact an authorized service center in time. Do not trample, pull, or over bend any cable. Otherwise, the cable may get damaged, causing malfunction of the device. Before cleaning the device, stop using it, power it off, and then remove all the cables connected to it.
-
Page 101: Personal Information And Data Security
8 PERSONAL INFORMATION AND DATA SECURITY... - Page 102 The use of some functions or third-party applications on your device could result in your personal information and data being lost or becoming accessible to others. Several measures are recommended to help you protect personal and confidential information. Place your device in a safe area to prevent it from unauthorized use. Set your device screen to lock and create a password or unlock pattern to open it.
-
Page 103: Legal Notice
9 LEGAL NOTICE... - Page 104 Copyright © 2014 by AURA Technology Limited. All rights reserved. No part of this document may be reproduced, distributed, or transmitted in any form or by any means without prior written approval of AURA Technology Limited. For the device explained in this manual may contain copyright software of AURA Technology Limited. and other possible licensors. No person shall not or is permitted in any manner to reproduce, distribute, modify, decompile, disassemble, decrypt, extract, reverse engineer, lease, assign, or sublicense the software, unless such restrictions are outlawed by related laws or permitted by individual copyright holders.
-
Page 105: Disclaimer Of Warranties
10 DISCLAIMER OF WARRANTIES... - Page 106 The information within this manual are provided “AS IS”, except required by applicable laws, no warranties of any kind; either expressed or implied, including without limitation, the implied warranties of merchantability and fitness for a particular purpose, are made in relation to the accuracy, reliability, or information of this manual. LIMITATIONS OF LIABILITY In no event shall AURA Technology Limited.
-
Page 107: Index
11 INDEX... - Page 110 Warranty card NAME: TEL. NO.: ADDRESS: DATE OF PURCHASE: VERSION: SERIAL NO.:...
- Page 111 TELPAD HC7 USER MANUAL AURA Technology Limited Address: FLAT/RM810, Star House, 3 Salisbury Road, Tsimshatsui, Hong Kong E-mail: info@auratech.hk for Android™ Android™ is a trademark of Google Inc. Use of this trademark is subject to Google Permissions.
- Page 112 FCC Statement This equipment has been tested and found to comply with the limits for a Class B digital device, pursuant to part 15 of FCC Rules. These limits are designed to provide reasonable protection against harmful interference in a residential installation. This equipment generates and can radiate radio frequency energy and, if not installed and used in accordance with the instructions, may cause harmful interference to radio communications. However, there is no guarantee that interference ...
Need help?
Do you have a question about the Telpad HC7 and is the answer not in the manual?
Questions and answers