
Subscribe to Our Youtube Channel
Summary of Contents for Air Control TERMOSPLIT 35.14 KONDENS
- Page 1 TermoSplit 35-70.14 KONDENS INSTALLATION, FIRST IGNITION, USE AND MAINTENANCE MANUAL ITALIAN DESIGN...
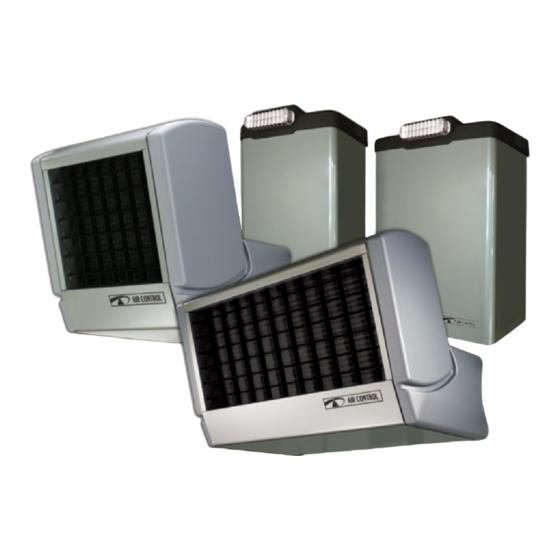
- Page 2 APPLICATION FIELD OF “TERMOSPLIT” TERMOSPLIT, the hot air generator device, can be used for heating large environments where fire risk activities are carried out or with relevant flow of people. The different models of TERMOSPLIT are composed of an external unit and an internal unit that can be connected by a supplied kit.
-
Page 3: Table Of Contents
STATEMENT OF THE MANUFACTURER The Air Control devices are EC certified (DM April 2nd 1998 Implementing regulation art. 32 Law 10/91) and comply with the following Directives and subsequent amendments: Gas Directive 90/396; Electromagnetic Compatibility Directive 89/336/EEC; Efficiency Directive 92/42/EEC; Low Voltage Directive 73/23/EEC; satisfy the minimum energy performance requirements at rated load. -
Page 4: Law And Safety Rules
GENERAL WARNINGS The instruction manual is an integral and essential part of the product and is supplied with every TERMOSPLIT Air Control. Read carefully all the Warnings in the Manual as they provide important information on safe installation, operation and maintenance. -
Page 5: Technical Data
TECHNICAL DATA MODEL TERMOSPLIT 35 KONDENS TERMOSPLIT 70 KONDENS CATEGORY II 2H 3P II 2H 3P WORKING POWER Heat output (referred to H 59.28 12.14 Thermal efficiency (referred to H 32.3 58.0 12.7 20 mbar 17 mbar 20 mbar 17 mbar Supply pressure 37 mbar 25 mbar... - Page 6 Weight in kg Internal unit External unit TERMOSPLIT 35 KONDENS TERMOSPLIT 70 KONDENS FUNCTIONAL HYDRAULIC DRAWING Fig. 2 1. External unit exchanger 2. Automatic vent valve 3. Expansion tank 4. Heat exchanger 5. Unloading/loading valve 6. Pressure gauge 7. Safety valve 8.
-
Page 7: Installation
INSTALLATION POSITIONING OF THE APPLIANCE Before installing the appliance, you have to take Fig. 4 CEILING note of the minimum clearances necessary for the TERMOSPLIT KONDENS .14 installation. 1000 min In addition to what shown in Fig. 4, you should also be borne in mind that: - Installing the appliance far higher than the 1000... -
Page 8: Connecting The Condensate Line
Fig. 7 Fig. 8 Connection cable Seal with cement or silicon "A" BLUE "B" RED 50 mm Fig. 9 If a standard installation is not feasible as it is not possible to drill a connection hole between internal and external unit as per the cardboard template, you can guide the two connection pipes and the electrical cable through the bottom removing the pre-cut slot (see Fig. -
Page 9: Flue Ducts Selection
FLUE DUCT SELECTION Similarly to all condensing appliances, TERMOSPLIT We suggest you to buy only genuine Air Control KONDENS .14 needs approved fittings made of acid parts. aggressive resistance materials for fumes exhaust. EXHAUST FUMES AND AIR INTAKE SYSTEM INSTALLATION The external unit TERMOSPLIT KONDENS .14 comes... -
Page 10: Connection Of The Two Units
INTERNAL UNIT INSTALLATION When you have chosen the installation position - Screw a counter-locknut between the wall and of the TERMOSPLIT KONDENS .14 internal unit and the mount bracket, then hang up the internal unit verified the corrected clearances as shown in Fig. and lock with a self-locking nut. - Page 11 CONNECTION TO THE METHANE GAS NETWORK (G 20) - Check the inside of the pipe for contaminants - According to the installation design, prepare the and, when the installation is complete, the tightness gas supply line as per values shown in the data as per UNI-CIG 7129 standard.
-
Page 12: Termosplit 70.14 Kondens I.s.p.e.s.l
CARRIER FLUID FILLING/TOPPING UP BY SELF REFILLING KIT Fig. 18 - TERMOSPLIT KONDENS 35.14 Refilling the carrier fluid is performed automatically during the first start-up of the appliance. In order to do this, once the internal unit is installed, open the two connection valves between the units (making sure no leaks are present), pour the content of the included fluid can in the machine refilling tank and power the... - Page 13 Cock with pressure gauge Upon request, Air Control can supply the fuel shut-off valve CALEFFI mod. 541050 (already Bithermostat installed in the external unit) as highlighted in Figure 21. Thermometer Minimum Fig. 21 pressure switch Maximum pressure switch V.I.C. capillary...
-
Page 14: Single Control Connection
SINGLE CONTROL CONNECTION AND INSTALLATION - Locate the position in which you plan to install Fig. 25 the single control; - Drill 2 holes Ø 5 mm. spanning 97 mm between "CRONO" CABLE centres and insert anchors and screws, tightening CONNECTOR the screws as to leave a 3-4 mm gap from the wall (Fig. - Page 15 FIRST IGNITION IMPORTANT: the first ignition MUST be solely Technical Assistance Centre. performed by an AIR CONTROL Authorized GENERAL INSPECTION Furthermore, you must check that the installation Before performing the first ignition (also known as has been performed as described in the AIR "first ignition test") the local T.A.C.
- Page 16 • If the CO level does not match, adjust it using the screw "M" (Fig. 31) of the ratio adjuster, after Fig. 31 removing the protective cover "L" until the specified level is reached. Turn clockwise to increase the value, anticlockwise to decrease it. Once the adjustments are complete it's advisable to move the "A"...
-
Page 17: Warning For The Tenant
USE AND OPERATION WARNING FOR THE TENANT - Before any use of the equipment, and within 30 days from the installation, you are required to have the local T.A.C. perform the free First Ignition test. (The list of the authorised Technical Assistance Centres is attached to the documentation of each appliance). -
Page 18: Password Request
PASSWORD REQUEST Password change In the initial screen, press one of the following buttons to enter the access After being allowed to access, you can modify AUTO PROG password screen. Entering the correct password the two passwords by pressing simultaneously the keys will enable all the keys for 5 minutes after the last PROG... -
Page 19: Schematic Layout
ILLUSTRATIVE GRAPH MAIN SCREEN AUTO PROG >> COMFR (Comfort) >> OFF (STANDBY) >> OFF (OFF) >> VENT 0 >> T AMB >> PARTY >> ECONM (Economy) >> AUTOMATIC >> VENT 1 >> OFF (Vacation) >> TIME (Clock) >> MANUAL COMFORT >>... -
Page 20: Manual Mode Set-Up
During automatic operation, the keys can be 2. By selecting MANUAL COMFORT, the symbols used to manually change the level set by the program or to appear on the display. The boiler satisfies the heat request for heating based on the switch off the heating. - Page 21 On 1 Of 1 On 2 Of 2 On 3 Of 3 On 4 Of 4 6:30 8:00 11:00 13:00 17:00 23:00 24:00 24:00 MONDY DAY 1 (Monday) 6:30 8:00 11:00 13:00 17:00 23:00 24:00 24:00 TUEDY DAY 2 (Tuesday) 6:30 8:00 11:00...
- Page 22 Note: setting the start time of the interval, on... equal to the Groups of days end time of the interval, of… will cancel the time interval and This function is used to program 4 intervals with the same inter- the programming will go to the next interval. val start and end times for the equipment for multiple days or (e.g.
-
Page 23: Technical Menu
TECHNICAL MENU This menu is used to change the parameters in the TECHNICAL To exit the TECHNICAL mode press the key. PROG menu listed below. To scroll use the keys, to change the parameters To access the menu, enter the INFO menu and hold down use the keys. - Page 24 ERROR CODES E0 - FAILED COMMUNICATION WITH REMOTE CONTROL It shows in case of communication failure between the remote control and the TERMOSPLIT unit. Check the electrical connection; in case the fault persists, contact the authorized assistance centre. E1 - LOCK FOR FAILED IGNITION It shows in case the burner fails to ignite (after 3 failed attempts).
-
Page 25: Appliance Check
At the end of summer it is highly advisable to check NOTES FOR THE MAINTENANCE TECHNICIAN All operations described in this Chapter are to be performed by AIR CONTROL assistance (T.A.C.) technical personnel. - Before performing any activity, the technician maintaining TERMOSPLIT appliances shall make sure that the appliance he/she is going to work on has been fully disconnected by the mains power. - Page 26 NOTES ........................................................................................................................................................................................................................................................................................................................................................................................................................................................................................................................................................................................................................................................................................................................................................................................................................................................................................................................................................................................................................................................................................................................................................................................................................................................................................................................................................................................................................................................................................................................................................................................................................................................................................................................................................................................................................................................................................................................................................................
- Page 28 MADE IN ITALY G20 ENGINEERING Brand G20 ENGINEERING SRL Loc. Campogrande 13, 29013 CARPANETO PIACENTINO (PC), Italy tel. + 39 0523 850513 - fax. +39 0523 850712 - www.aircontrol-pc.com - www.g20engineering.com...
Need help?
Do you have a question about the TERMOSPLIT 35.14 KONDENS and is the answer not in the manual?
Questions and answers