
Summary of Contents for SWEDX SWSS156
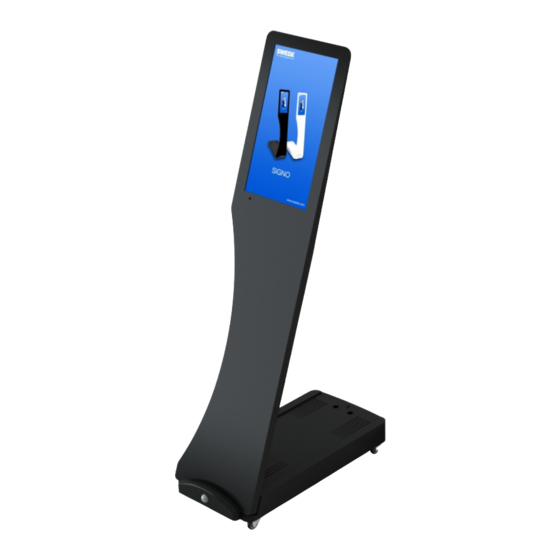
- Page 1 Your Digital Signage Partner User’s Guide SWSS156 SWEDX Signo 15.6 inch SWSST156 SWEDX Touch Signo 15.6 inch...
- Page 2 SWEDX Matrix Video Walls SWEDX Direct SWEDX Lamina SWEDX offers a wide range of LED-TVs and digital signage products and its accessories. For more information please visit www.swedx.com Digital Signage Screens SWEDX V...
-
Page 3: Table Of Contents
INDEX Page Introduction Safety precaution Basic operation Assembly guide Assembly guide Motion Sensor Contents Inputs Remote control buttons (FR4) Main operations Volume control OSD menu operations OSD menu structure: Picture menu Sound menu Time menu Settings menu USB media player Supported formats and codes Troubleshooting Warranty and service... -
Page 4: Introduction
Introduction received, including interference that may Thank you for choosing SWEDX Digital Signage cause undesired operation products. Please read this manual thoroughly before operating the product. Make sure the Please disconnect the power cord if this display was not damaged in transit. Should the equipment will not be used for a long time. -
Page 5: Basic Operation
Using inadequate spare parts can lead to electric shocks, short-circuits fire or others incidents. Please contact a technical authorized by SWEDX Departure in holidays • Unplug the product during lightning storms or... -
Page 6: Assembly Guide
SWSS156/SWSST156 - SWEDX Touch Signo/Signo Assembly Guide E. 4 x Wheels F. 1 x Tool for E G. 4 x M6 Screws. 25 mm H. 1 x Tool for G J. 1 x M4 Screw M. 1 x Power adapter + Cord N. -
Page 9: Assembly Guide Motion Sensor
SWSMS01 - SWEDX Motion Sensor for Signo Assembly Guide K. 5 x M4 Screws 14 mm... -
Page 10: Contents
Contents Included items: 15.6 inch Signo / Touch Signo Base Cover Signo Base Wheels 31 mm Wrench M6 Screws 25 mm. 4 pcs Hex Key M4 Screws Power Adapter Input: AC 100-240 V ~ 50/60Hz Output: DC 12V - 2 A Remote Control Remote Control Battery. -
Page 11: Remote Control Buttons (Fr4)
Remote control buttons On/Off button 36. Exit the OSD 2. Shortcut to HDMI 37. Not applicable for this 3. Not applicable for this product product 38. Not applicable for this 4. Display additional product information 39. Not applicable for this 5. -
Page 12: Main Operations
Main Operations OSD Menu Structure • OSD (On Screen Display) allows users to Turning On And Off control or adjust various features and settings The product turns on automatically when it in accordance with desired preferences. is connected to power. When the product •... - Page 13 Picture which means if the signal resolution is lower than 3840x2160 then the picture will be shown according to its original size. Just Scan Just Scan mode will display crispier picture with Picture Mode Standard scaling to fill the entire screen. Contrast Brightness Noise Reduction...
-
Page 14: Sound Menu
Sound Sound Mode Standard Treble Bass Balance Surround Sound Off SPDIF Mode SPDIF Audio Delay Select Move Return MENU Use the Sound menu to adjust the sound settings to meet desired requirements: Sound Mode Choose between predefined settings: Standard: Suitable for normal programs Music: Suitable for music program Movie: Suitable for movies Sports: Suitable for sport programs... - Page 15 Time Timer example: Timer Mode: Customize Mode: Mon~Fri Time 1: ON Clock 2016/01/Jan 10:05:18 On Time: 08:00 Timer Mode Customize Off Time: 13:00 Set Timer Mode: Saturday Auto Sleep Never Time 1: ON On Time: 10:00 Off Time: 13:00 Mode: Sunday Select Move Return...
-
Page 16: Settings Menu
Settings can activate the Smart HDMI function by setting the No Signal Standby to On mode and the product will go into sleep mode in 30 seconds if no HDMI signal is detected. The product will automatically wake up when the HDMI signal is OSD Language Standard detected. -
Page 17: Usb Media Player
USB MEDIA PLAYER is chosen the product will display automatically all video and picture files stored in the USB flash drive. When Video is chosen the product will display Play Mode Automatic automatically only all video files stored in the Media Type Video USB flash memory. - Page 18 Automatic Play Available options are On and Off. When the Auto Play mode is On the product will start to display the files automatically when the product is turned on. When the Auto Play mode is Off the product will show the content of the connect USB flash drive when the product is turned on.
-
Page 19: Supported Formats And Codes
Supported Formats and Codecs Format Video Codec Audio Codec Resolution Frame Rate Mbit/s 23,976~30≤ MJPEG 640x480 ≤ 10Mbps 16Mbps DIVX.311/DIVX4/DIVX5 720x576 ≤ 10Mbps XVID/MPEG- ≤ 20Mbps 2/MPEG4/H.264 MP3, WMA, 1920x1080 AAC, MP2, MPEG-2/MPEG-4/H.264 MPEG-2 ≤ 40Mbps Video MPEG-1/MPEG-2 ≤ 20Mbps MPEG-4/H.264 MPEG1 352X288... -
Page 20: Troubleshooting
Troubleshooting Pixel Mapping It is recommended to choose aspect ratio Before contacting SWEDX service or your PointToPoint or JUST SCAN to achieve dealer, perform the following simple checks. If pixel mapping in HDMI modes you cannot solve the problem using the... -
Page 21: Warranty And Service
Before you contact us, please consult the workmanship during the warranty period, troubleshooting section in your user's manual or SWEDX will, at its sole option repair or replace SWEDX's FAQ web pages at the product with a similar product, provided the http://www.swedx.com to see if you can easily... -
Page 22: How To Get Service
Limitation of liability If your SWEDX product fails to work as warranted above, your sole and exclusive remedy shall be repaired or replaced. SWEDX's maximum liability under this limited warranty is expressly limited to... -
Page 23: Signo Accessories
Battery for SWEDX Signo 32A 12V SWSBT50 Battery for SWEDX Signo 50A 12V SWSBTCH Charger for SWEDX Signo Batteries 12V SWSMS01-A1 Motion Sensor for SWEDX Signo - White SWSMS01-A2 Motion Sensor for SWEDX Signo - Black SW-Z8350 SWEDX Windows Mini-PC Z8350 / 4K SW-X96... - Page 24 Your Digital Signage Partner Other products from SWEDX www.swedx.com...
Need help?
Do you have a question about the SWSS156 and is the answer not in the manual?
Questions and answers