Table of Contents
Advertisement
Quick Links
Advertisement
Table of Contents

Subscribe to Our Youtube Channel
Related Manuals for GoLife GoWatch X-Pro


Summary of Contents for GoLife GoWatch X-Pro
- Page 1 GPS Orientation Smart Sport Watch User Manual Peruse Before Use Table of Contents...
-
Page 2: Peruse This Manual Before Use
Peruse this manual before use Thank you very much for purchasing our product. To ensure correct use of the product, please peruse this manual before use. Keep the manual properly for convenient use at all times as required. ※ The protection film affixed on the product, as in most cases, must be removed before use. -
Page 3: Precautions On Using The Product
Peruse this manual before use Precautions on using the product Warning Precautions This mark indicates that improper This mark indicates that incorrect handling may result in major injury operation may result in minor injury or severe consequences or material losses Stop using the product in any of following Avoid using or storing GoWatch in any of ●... -
Page 4: Product Features
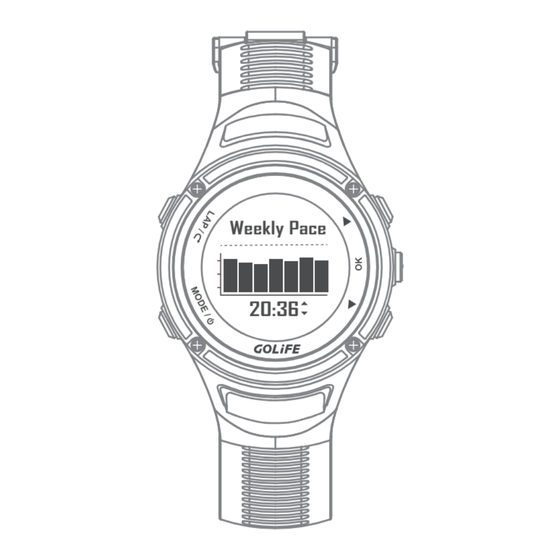
Peruse this manual before use Product Features ※ The product is a smart watch for outdoor activities featuringmicrocomputer, GPS and 3 major sensors. ※ GPS refers to Global Positioning System. Three major sensors include devices for detecting atmosphere/altitude, temperature and azimuth. At any location in the world, a single Built-in 3 major sensors for press on the button is all you need... - Page 5 Peruse this manual before use Product Features Tracing Daily Activities Real time coordinates display Automatic tracing amount of daily activities On completion of positioning, current coordinates ● ● including paces, distance and calories. are displayed at once. Bar Chart showing weekly pace variation and Press [ OK ] to switch to real time coordinates current week average can be displayed.
- Page 6 Display Smart Phone prompt info in Chinese. ● ● accordingly and indicate direction and distance of its Use GOLiFE RUN App from Smart Phone to record location. activities. Press [ MODE ] key to enter Main Menu, select Press [ Down ] key in clock screen of daily [ Navigate ] to activate the function mode to read prompt info read from Smart Phone.
-
Page 7: Perform Calibration Before Initial Use
Peruse this manual before use Perform calibration before initial use ※ In addition to initial use, perform these calibration items if the product was left unused for a long time, for ensuring the watch being ready and actual when providing respective functionalities. Initial Use of Watch Calibrating 3 Sensors Charge your watch for initial use;... -
Page 8: Table Of Contents
GOLiFE RUN APP Smart Phone app features ----------------------- 15 How to install GOLiFE RUN App ------------------------------------ 17 How to pair with GoWatch X-PRO ---------------------------------- 18 How to upload activity data to GOLiFE RUN App ------------------ 19 GOLiFE CONNECT ( ) -------------------------- 20 Sync and Upload records via PC How to install GOLiFE CONNECT ---------------------------------- 20... - Page 9 Table of Contents Start Activity --------------------------------------------------------------- 34 Activity Mode -------------------------------------------------------------- 35 Menu Mode ---------------------------------------------------------------- 37 Activity -------------------------------------------------------------- 37 GYM ----------------------------------------------------------------- 41 Stopwatch ----------------------------------------------------------- 44 Timer ---------------------------------------------------------------- 44 Navigation ---------------------------------------------------------- 44 Track/Notify ( ) ----------------------------------- 44 Steps and Messages Settings ------------------------------------------------------------- 45 Bluetooth ------------------------------------------------------------------ 52 Data sync ----------------------------------------------------------- 52 Pair ------------------------------------------------------------------ 52 Pairing Sensors ------------------------------------------------------------ 53 H.R.
-
Page 10: Before Use
Efforts must be made to allow GoWatch being charged within the range of working temperature, -10°C~60°C )。 As shown in the figure, both the GOLiFE mark on ● the Charge Clip and the face of watch must face Gently press down the tail of Charge Clip so that ●... -
Page 11: Components
Before Use Components [ LAP / Return ] Key ( LAP / Press this key in Menu to return to the previous ● layer of menu. Press and hold this key in Clock Screen of Daily ● Mode to lock up GoWatch for preventing unwanted key activation. -
Page 12: Basic Operation
Basic Operation Basic Operation ※ Press and Hold [ MODE ] Key to switch OFF/ON. ※ Press [ MODE ] key to switch-over among 3 major modes: Daily Mode, Menu Mode, and Activity Mode. Heart rate Activity Curr. pace 05:00 In Daily Mode, press [ OK ] Key to switch-over among Clock Screen, 3-Sensor Screen ( Atmosphere/ Altitude/ ※... -
Page 13: Status Line
Basic Operation Status Line Heart rate Curr. pace H.R. Monitor / Speed Cadence Sensor Exercise Record Status Connection In Activity Record (Depending on type of exercise) H.R. Monitor Connected In Clock Function, this Icon flashes Speed Cadence Sensor Connected Pause the record Lock Status Type of Exercise Key Lock status, Press and Hold... -
Page 14: Initiating Gowatch X-Pro
5. On completion of the above procedure, you may enter the Watch Screen. ※ Please perform positioning at a fixed unshaded area when GoWatch X-PRO displays Satellite Searching Screen; it takes about 1 to 5 minutes to complete positioning. For first-time positioning of GoWatch, or for positioning it after a prolonged period of switched off status, it may take more than 5 minutes. -
Page 15: Time Zone Calibration ( Manual And Automatic )
※ Please perform positioning at a fixed unshaded area when GoWatch X-PRO displays Satellite Searching Screen; it takes about 1 to 5 minutes to complete positioning. For first-time position- ing of GoWatch, or for positioning it after a prolonged period of switched off status, it may take more than 5 minutes. -
Page 16: Golife Run App Smart Phone App
Easy to Use Pairing GoWatch X-PRO with a GOLiFE RUN App. First go to [ Bluetooth ] and enter [ Pair ]. At the same time activate RUN App and enter [ My Device ], and add device. Please follow the steps of APP, and key the paring code in it;... - Page 17 Basic Operation On the spot Viewing Quick Sharing All the exercise data allow for clear viewing from a Exercise data can be uploaded to smart phone smart phone, including route browsing, distance, or cloud platform via one-key operation; it time, lap count or calorie consumption, etc. allows as well sharing in Facebook, WeChat and friends.
-
Page 18: How To Install Golife Run App
How to install GOLiFE RUN App Download and install the App using the On completion of installation, select following method: GOLiFE RUN App, log in with a GOLiFE account. If you have no GOLiFE account yet, go to GOLiFE RUN at Scan the QR Code http://run.goyourlife.com/... -
Page 19: How To Pair With Gowatch X-Pro
How to pair with GoWatch X-PRO Press the [ Add Watch ] icon on the upper Followed by pressing [ MODE ] key of right corner in the GOLiFE RUN App and X-PRO to switch over to Menu Mode, select [ GoWatch X-PRO ]. -
Page 20: How To Upload Activity Data To Golife Run App
Basic Operation How to upload activity data to GOLiFE RUN App Press the watch icon on upper right corner of GOLiFE RUN App and press [ Synchronize Data ], to activate data sync of GoWatch X-PRO. Press [ Sync mode enabled ] on GOLiFE RUN App and start data sync. -
Page 21: Golife Connect ( Sync And Upload Records Via Pc )
8, Mac OS 10.7 and later. After download, click GOLiFE CONNECT to perform installation. Open the installed GOLiFE CONNECT and log in your GOLiFE account. If you don’t have a GOLiFE account, go to GOLiFE RUN at : http://run.goyourlife.com/ to create a GOLiFE account. - Page 22 Basic Operation ※ If the system shows GOLiFE device not found, verify your connection and log in again. If connection is correct, proceed with the following steps : Remove USB cable on the Press [ LAP ]+[ MODE ]+[ OK ] at the same other end of Charge time to re-start-up GoWatch.
-
Page 23: Golife Connect Upload Instruction
Basic Operation GOLiFE CONNECT Upload Intruction Clip up Charge Clip to GoWatch. Enter a GOLiFE account or log in your Facebook, QQ or Weibo account. Connect USB cable on the other end of Now you may select [ Synchronize Data ] Charge Clip to USB port of PC. -
Page 24: Golife Run Cloud Service Site
Create your goals and log in daily of distance, time, lap or calorie consumption. figures, GOLiFE RUN will generate your growth curve in no time. Add new goal Copyright ©2016 GOYOURLIFE INC. - Page 25 Add other friends to allow GOLiFE CONNECT, where you may store your ranking in terms of type of exercise, date, log data as long as you like.
-
Page 26: How To Use Golife Run Cloud Service Site
Basic Operation How to use GOLiFE RUN Cloud Service Site After logging in GOLiFE RUN Cloud Service By uploading exercise log using GOLiFE Site, you may edit data on the left side and RUN APP or GOLiFE CONNECT, you may introduce yourself. - Page 27 Basic Operation It allows clear viewing of slope and stability analysis report or selecting basic data reports on the right. ※ To apply for a free account, visit http://run.goyourlife.com/ Copyright ©2016 GOYOURLIFE INC.
-
Page 28: Modes And Functions
] Key to switch-over to the following modes Daily Mode: When not performing exercise logging, GoWatch X-PRO is used as an ordinary watch. 24H, 12H Style Setting: see Menu Mode→ [ Setting ] → [ Time Mode ] → [ Time Style ] and [ Time Format ]. -
Page 29: Daily Mode
Modes and Functions Daily Mode Clock In Daily Mode, press [ OK ] to GoWatch X-PRO can be used as an ordinary switch over functions watch when not performing exercise records. You may manually return to Daily Mode. Clock GoWatch will return to this mode ( no-activity mode ) after being standby for a while ( which can be checked by Menu Mode →... -
Page 30: Atmosphere And Altitude ( Barometer Calibration )
Modes and Functions Atmosphere and Altitude X-PRO has built-in barometer and altime- Elevation ter. In general use, X-PRO collects altitude Current atmosphere, and atmosphere data continuously in historic atmosphere chart, every 5 mins, intervals and displays the current altitude data in the atmosphere screen. Barometer Press [ Up ], [ Down ] displays approximate altitude based on to display:... -
Page 31: Compass ( Compass Calibration )
Modes and Functions Compass Steps Count Press [ Up ] or Compass will alter orientation in accordance [ Down ] to display : with the watch movement, with the center of Current Steps (ex. 6529) watch displaying the angle between Watch Target Steps (ex. -
Page 32: Message
Modes and Functions Message During Clock mode of GoWatch X-PRO, press [ Down ] to view messages and LINE notifications of communication apps such LINE as LINE, Facebook, etc. ( Smart phone notification must be open in advance. ) For activating Message Function, go to Menu →... - Page 33 [ Msg notify → [ Off ]. (This procedure will close all the messages.) ※ For how to install GOLiFE RUN App, see P17; for pairing method, see P18. In the event an Android series smart phone encounters Bluetooth disconnected problems, refer to the following settings.
- Page 34 Modes and Functions For smart phones provided with One-key Delete, One-key Acceleration, Smart Phone Acceler- ation, Clear Internal Storage, Release Memory or similar functions, add GOLiFE RUN into the Ignore List (or Exception List, Protected List, White List). ※ For how to install GOLiFE RUN App, see P17; for pairing method, see P18.
-
Page 35: Start Activity
GOLiFE RUN App to view data and tracks, or log in the GOLiFE RUN website to view the same. ( For how to install GOLiFE RUN App, see P17. ) Copyright ©2016 GOYOURLIFE INC. -
Page 36: Activity Mode
Save Recording Exercise: Abort [ Up ] / [ Down ]: Switch pages of exercise information ( GoWatch X-PRO provides 6 Manual Lap: pages for viewing data, select with Menu Press [ LAP ] to activate message of Lap Page. - Page 37 Modes and Functions Activity Mode In Triathlon Activity Mode: Press [ LAP ] to switch-over to Transition or Next Activity To set up type and sequence of 3 items under Triathlon, go to Menu Mode → [ Activity ] → [ Settings ] →...
-
Page 38: Menu Mode
Modes and Functions Menu Mode 2. Auto Pause: Menu Mode → [ Activity ] Activity: Menu Mode → [ Activity ] → [ Settings ] → [Auto Pause ] [ Log ] Set whether to pause activity record or Menu Mode → [ Activity ] → [ Log ] not when reaching a pre-set low speed Historic records are listed by date. - Page 39 Modes and Functions Menu Mode 2. [ Speed /Pace ]: Menu Mode→ [ [ Alarm ] Activity ] → [ Settings ] → [ Alarm ] Menu Mode → [ Activity ] → [ Settings ] → [ Speed/Pace ] →...
-
Page 40: Heart Rate
Modes and Functions Menu Mode [ Auto laps ] Heart Rate: Menu Mode→ [ Activity ] → [ Settings ] Menu Mode→ [ Activity ] → [ → [ Auto laps ] Settings ] → [ Alarm ] → [ Heart Rate ] Set whether to add a lap record when When taking [ Heart Rate ] ( bpm ) as... - Page 41 Modes and Functions Menu Mode [ Interval ] [ Memory ] Menu Mode → [ Activity ] → [ Settings ] Menu Mode → [ Activity ] → [ Memory ] → [ Interval ] Check for available memory of GoWatch. System is capable of recording 45.5 Set interval for recording a GPS point, hours of data when no Activity Log...
-
Page 42: Gym
[ Dist./Time ]: Menu Mode → [ Gym ] → [ Trainer ] → [ Dist./Time ] Menu Mode → [ Gym ] → [ Trainer ] GoWatch X-PRO is your private coach that Training Target: To achieve how many acts as a virtual trainer accompanying distance in how long time. - Page 43 Modes and Functions [ Interval ] [ Speed/Time ]: Menu Mode → [ Gym ] → [ Trainer ] → [ Speed/Time ] Create Training: Menu Mode → [ Gym ] → [ Interval ] → [ Create ] Training Target: To maintain how long time at what Average Speed.
- Page 44 Modes and Functions [ Training list ]: [ Delete all ]: Menu Mode → [ Gym ] Menu Mode → [ Gym ] → [ Interval ] → [ Interval ] → [ Delete all ] → [ Training list ] Delete all the Training Plan sessions.
-
Page 45: Stopwatch
Modes and Functions Navigate Track /Notify [ Stopwatch ]: [ Track/Notify ]: Menu Mode → [ Stopwatch ], Menu Mode → [ Track/Notify ] this will Pedometer: Calculates daily steps; activate Stopwatch function. Press [ OK ] to start activity; press [ OK ] again can be set to [ Off ] or [ On ] based on to pause activity. -
Page 46: Track/Notify ( Steps And Messages )
Modes and Functions Settings [ Profile ]: Menu Mode → [ Settings ] Set page format for real time viewing → [ Profile ] of exercise data when recording the exercise : [ Profile ] includes User Name, Gender, [ Page 1 ], [ Page 2 ], [ Page 3 ], [ Page 4 ] Age, Height, Weight, Wheel Radius, Step Length, etc. - Page 47 Modes and Functions Settings Page Format Setup, taking example of Page 1: Select [ Page 1 ], press [ UP ] and [DOWN] to select number of data per page; each page can display up to 4 exercise types. Once selected, press [ OK ] to enter menu of exercise pages, press [ OK ] to select desired exercise data;...
- Page 48 Modes and Functions Settings [Barometer]: [ Compass ]: Menu Mode → Menu Mode → [ Settings ] → [ Settings ] → [ Compass ] [ Barometer ] Calibrate Compass: Menu Mode → Calibrate Barometer: Menu Mode [ Settings ] → [ Compass ] → →...
- Page 49 Magnetic North Pole Declination W 0.5° Clock style: GoWatch X-PRO provides 5 styles; you may set up as preferred. [ Unit ]: Menu Mode → [ Settings ] → [ Unit ] Unit: Set up unit to be displayed on the...
- Page 50 Backlight Always Key beep Message [ Key / Msg ]: When GoWatch X-PRO [ Off ]: Backlight is off. pops up a message or when any key is pressed, backlight will light up auto- matically and go out in 10s.
- Page 51 White Beep] Key beep: Sets Beep Prompt of GoWatch X-PRO; options: [ Off ], [ On ]. Standby: GoWatch X-PRO enters Time Mode automatically within 30 minutes if not in use. Default: [ 10 minutes ]. Key Beep Options: [ Off ], [ 5 minutes ], [ 10 min- utes ], [ 15 minutes ], [ 20 minutes ], [ 25 minutes ], [ 30 minutes ].
- Page 52 Enables Alarm Function. Default: [ Off ]. When enabled, an alarm icon appears in Time Mode. Reset: Menu Mode → [ Settings ] → [ Reset ] Settings Resumes GoWatch X-PRO to default settings. Every day Sunday Alarm clock Factory...
-
Page 53: Bluetooth
Pair: Menu Mode → [ Bluetooth ] Menu Mode → [Bluetooth] → → [ Pair ] [Data sync.] Enables pairing mode of GoWatch X-PRO. Switch on GoWatch X-PRO Sync Mode ※ For pairing method, see → How to pair GoWatch X-PRO P18 to upload Activity Log with GOLiFE RUN App. -
Page 54: Pairing Sensors
Speed / Cadence: [ Sensors ] → [ H.R. Monitor ] Menu Mode → [ Pairing Sensors ] → [ Speed/CAD ] GoWatch X-PRO supports H.R. Monitor GoWatch X-PRO supports Speed Ca- using ANT+ protocol. dence Sensor using ANT+ protocol. -
Page 55: Ant+ Sensor
10 m at least ANT+ Sensors, if any, are kept at least 10m away. 配對中 ※ GoWatch X-PRO will automatically save and prioritize the recently paired H.R. Monitor. You may check the pairing status in [ H.R. monitor ]. ※... - Page 56 ANT+ Sensor Wearing Method Pairing a H.R. Monitor ※ Wear H.R. Monitor correctly before pairing it First go to last item [ Sensors ] of Menu Mode, press [ OK ] and select [ H.R. Monitor ]. Bluetooth H.R. Monitor Speed/CAD Wet the sensor area with some water.
-
Page 57: Wearing A Speed And Cadence Sensor ( Option )
ANT+ Sensor Wearing a Speed Cadence Sensor ※ Skip this if you do not have a Speed Cadence Sensor. ※ If your Bicycle has no Speed Cadence Sensor, Within 1.5 m no data transmission/reception will take place in the watch. ※... - Page 58 ANT+ Sensor Use Method GoRide 100 Components: GoRide 100 Speed Cadence Sensor Magnet ( Large ) Magnet ( Small ) 3.6 mm Strap 2.5 mm Strap Fix Sensor onto rear lower Fork ( Horizontal Fork ). ( 1 ) Straps have different size and limited quantity;...
- Page 59 ANT+ Sensor When magnet gets closer to Sensor, a relative distance of 12 ( 4 ) mm gives the most accurate data. Locate the Sensor on the route of magnet movement. ( 5 ) With other ANT+™ devices, the maximum sensing range is 150 cm. ( 6 ) Press the button to start or reset.
- Page 60 ANT+ Sensor See the drawing on the right ( 8 ) for replacing battery. Battery Replacement Copyright ©2016 GOYOURLIFE INC.
-
Page 61: Precautions
Precautions Precautions Start-up Setting Procedures after Reset Reset: Make sure that you are at a location Use [ Settings ] → [ Reset ] to reset with good reception of GPS signal, setting values and Activity Log. such as top of building or an open area. It takes about 1min to accomplish GPS positioning. -
Page 62: Prolonging Battery Lifespan
Precautions Prolonging Battery Lifespan Pause Activity: Turn off Backlight: If you are resting or pausing track Menu Mode → [ Settings ] → [ Display ] records, press [ OK ] to pause logging; → [ Backlight ]; available options then press [ LAP ] to stop logging and include [ Off ], [ Always ], [ Message ], select [ Save ] to save data. - Page 63 Precautions Notification Management: In Android System: Open GOLiFE RUN A p p a n d B l u e t o o t h a n d pa i r w i t h You may manage messages displayed X-PRO; select [ Device ]→Select X-PRO on X-PRO using a paired device.
-
Page 64: Firmware Upgrade
On completion of updating, [ Done ] and install GOLiFE CONNECT. Skip this step if already installed. appears; press [ OK ] to end the process. Enter a GOLiFE account or log in your Facebook, QQ or Weibo account. Copyright ©2016 GOYOURLIFE INC. -
Page 65: Precautions On Use
Precautions Precautions on Use X-PRO Compass function is subject to Not suitable for diving or uses in highly influence of external magnetic field. humid environments ( e.g., hot spring Before using Compass, pay attention to bath, steam room, hot showers, diving, objects in the vicinity that may cause etc. - Page 66 Charging Never take out the batter y from a GOLiFE product. Avoid exposing the watch in extreme Goyourlife Inc. shall not be held liable temperatures ( cold or hot ), for any product damage, injury or casu- or permanent damage may occur.
-
Page 67: Faqs
Bluetooth from your smart phone first: [ MODE ] for 2 seconds to start up. iOS smart phone→[ Settings ]→ [ Bluetooth ]→[ GOLiFE X-PRO ]→if the Bluetooth Exclamation Mark appears→ Select [ Forget This Device ]. Copyright ©2016 GOYOURLIFE INC. - Page 68 Precautions Android smart phone→[ Settings ]→ When performing sync, place GoWatch [ Bluetooth ]→[ GOLiFE X-PRO ]→ Delete it. X-PRO in the proximity of smart phone; excessive distance may prevent or interrupt uploading of the activity log. Pairing may take a long time, please be patient.
- Page 69 If you wish to use the device as a new one, click [ Repairing ] to proceed Next Step as follows: First go to Menu Mode of GoWatch X-PRO →[ Bluetooth ]→[ Pair ], then press [ Yes ]; this will activate device search and trial pairing.
- Page 70 Precautions A system message pops up. Enter System completes pairing automatically. pairing code and complete pairing; In this case, as soon as the App detects after detection, App will complete the device, pairing will be completed. ※ See P18 for pairing method. pairing automatically.
-
Page 71: References
Summer Time ( DST ) in different areas may sometimes change due to national or regional conditions. For more information: GOLiFE official link: http://www.goyourlife.com/ GoWatch X-PRO Product Link: http://www.goyourlife.com/gowatchxpro/ Maintenance and Warrant: http://www.goyourlife.com/rma/#policy Customer Service: http://www.goyourlife.com/feedback/ Copyright ©2016 GOYOURLIFE INC. -
Page 72: Index Of Function
Barometer Calibration……..For manual calibration of barometer, See→P29 Compass Calibration……..For compass calibration, See→P30 Charge functions Charge GoWatch……..Use GOLiFE Charge Clip for charging, See→P9 Extend battery lifespan……..See→P61 Activities and Functions Other functions..... For functions other than exercise and activity, See→... - Page 73 References Precautions GPS Positioning……..See→P13 GoWatch Firmware Update……..See→P63 Waterproof……..See→P64 Locations with easy reception/no reception of GPS signal……..See→P70 Troubleshooting GoWatch not responding……..See→P66 GoWatch not paring with smart phone……..See→P68 About GoWatch Temperature Reading……..See→P69 More information Daylight Saving Time ( Summer Time ) ……..See→P70 More product information……..
-
Page 74: Technical Specification
Gravity Sensor 6-axis Acceleration Sensor GOLiFE RUN APP Matching Software ( Applicable to Bluetooth v4.0 BLE Smart Phone )/ GOLiFE CONNECT PC App ( For Windows and iMac ) Prompt Effect Support Sound and Vibration Prompt Activity Modes Run, Cycling, Swimming, Hiking, Walk,...
Need help?
Do you have a question about the GoWatch X-Pro and is the answer not in the manual?
Questions and answers