Table of Contents
Advertisement
Quick Links
Advertisement
Table of Contents

Related Manuals for Red Sea MAX E-170


Summary of Contents for Red Sea MAX E-170
- Page 1 E-SERIES ® E-170 ® E-260 ®...
- Page 2 E-170 ® Installation and Operation Manual Cabinet Installation Guide In-Cabinet Sump Upgrade Manual Hydra 26 HD LED Manual...
- Page 3 E-260 ® Installation and Operation Manual Cabinet Installation Guide In-Cabinet Sump Upgrade Manual Hydra 26 HD LED Manual...
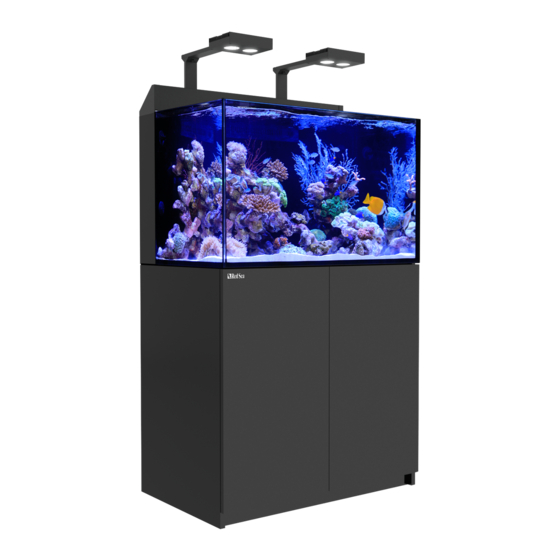
- Page 4 PRINTING INSTRUCTIONS To print only the Installation and Operational Manual, print pages 4-29. Red Sea MAX ® E-Series Complete Plug & Play Open Top Reef Systems ® Installation and Operation Manual...
- Page 5 Installation and Operational Manual ® Red Sea MAX E-Series ® Complete Plug & Play Open Top Reef Systems Installation and Operation Manual...
-
Page 6: Table Of Contents
Installation and Operational Manual Red Sea MAX E-Series ® ® E Installation & Operation Manual Safety ..............4 Location ..............5 ® Unpacking the MAX E System .......6 Components ............7 Assembly ..............8 Installation of Rear Sump Components ......10 Installation of optional Chiller .......15 Installation of LED Modules ...........16... - Page 7 E-Series complete reef system. ® The Red Sea MAX approach to the coral reef experience is to create an environment that is specifically attuned to the needs of coral and all reef inhabitants on an artificial reef. In the ocean coral reefs flourish only where specific physical conditions prevail, such as sufficient light, adequate current, stable temperature and water quality.
-
Page 8: Safety
Installation and Operational Manual Red Sea MAX E-Series ® 1 Safety Please read and follow all safety instructions. d. Always unplug an appliance from an outlet when not in use, before putting on or taking off parts, and before cleaning. Never pull the cord DANGER: To avoid possible electric shock, special care should be itself to remove the plug from the outlet. -
Page 9: Location
Installation and Operational Manual 2 Location Accessibility ® The first step in setting up the MAX E is to choose a suitable location. • Back: Ensure that there is at least 10cm (4") of clearance behind the Electric Supply ® to allow for sufficient air circulation for a chiller and general ease of operation. - Page 10 Installation and Operational Manual Red Sea MAX E-Series ® ® 3 Unpacking the MAX E System Please read this section carefully before proceeding. NOTE: Every precaution has been taken to ensure the safe arrival of ® the MAX E aquarium system, however before installing a new NOTE: Part of Cabinet is packed under the aquarium! glass aquarium it is advisable to inspect it for damage or leaks.
-
Page 11: Components
Installation and Operational Manual 4 Components E system main components E-170 E-260 ® ® E type glass aquarium with integral rear sump 170L 260L ® E Cabinet Self-assembly Self-assembly Power Center Cabinet Unit Cabinet Unit LED – Hydra 26HD™ light units 1 x 90W 2 x 90W MSK 900 Rear Sump Protein Skimmer... -
Page 12: Assembly
Installation and Operational Manual Red Sea MAX E-Series ® 5 Assembly 5.2 Cabinet mounted Power Center Perform the assembly and installation of all of the components in the Remove the Splash Cover from the Power Center by sliding it towards the order described below before adding the water to the system. - Page 13 Installation and Operational Manual 5.3 Cable Channels 5.5 Placing Aquarium Attach the cable channels to the rear wall of the aquarium directly Lifting the glass aquarium onto the cabinet will require at least 2 people. underneath the LED mounts and in line with the bottom of the glass. The top of the cabinet is approximately 86cm (34”) from the floor.
-
Page 14: Installation Of Rear Sump Components
Installation and Operational Manual Red Sea MAX E-Series ® 6 Installation of Rear Sump Components ® The MAX E-Series aquariums are divided into 2 parts, Aquarium and the Rear Sump that houses all of the filtration and circulation systems. 1. Detachable Surface Skimmer 2. - Page 15 Installation and Operational Manual E-260 rear sump component assembly diagram shows position of optional heater, chiller pump and piping...
- Page 16 Installation and Operational Manual Red Sea MAX E-Series ® Overview of the MAX E filtration and (3½”) below the rim. This level ensures positive surface skimming action ® at all times and full adjustment of the protein skimmer. circulation system...
- Page 17 Installation and Operational Manual 6.1 Protein Skimmer: 5. Slide the skimmer into the skimmer compartment. Note the position of the skimmer guides The MSK 900 protein skimmers located on the inner consists of three parts: skimmer wall of the rear sump. body, collection cup and skimmer 6.
- Page 18 Installation and Operational Manual Red Sea MAX E-Series ® 6.3 Media Rack: 6.6 Sump Screen: The media rack is supplied Position the sump screen above the front wall of the rear sump. Align the pre-assembled and placed in its hinges above the clips on the top of the side walls and push firmly into normal operating position within position.
-
Page 19: Installation Of Optional Chiller
For the long-term safety and vitality of reef inhabitants Red Sea 3. Insert the Eyeball Seat into the Outlet Holder that recommends the use of chillers with all reef aquariums. Both the is fixed into the glass. -
Page 20: Installation Of Led Modules
Installation and Operational Manual Red Sea MAX E-Series ® 7. When first operating the chiller pump, check that the water is 8 Installation of LED Modules circulating through the chiller without leaks at any of the connections in the piping. -
Page 21: Operation Of Power Center
Installation and Operational Manual Place the power supply in the cabinet, underneath the power center and 9 Operation of Power Center thread the cable out the back of the cabinet through the hole in the rear wall. With all of the electrical components now installed and plugged into the Power Center, slide the Splash cover along the length of the sockets, Bring the cable to the rear of the mount allowing the recess in the bottom of the cover to collect the cables and... -
Page 22: Led Set Up And Programming
Installation and Operational Manual Red Sea MAX E-Series ® 10 LED Set up and programming Acclimation To prevent photo-inhibition due to the high intensity of LED lights, an The LED modules have a built-in Wi-Fi network and must be connected to... -
Page 23: Initial Fill
Installation and Operational Manual 11 Initial Fill 12 Operation of the Protein Skimmer Follow the mixing instructions for mixing your artificial sea water. It is advisable to place any substrate or live rocks in the tank before adding Adjustment of the skimmer will be necessary from time to time due to the water as this will significantly affect the overall volume of water the constant changes in density and organic material in the water. -
Page 24: General Aquarium Maintenance
Installation and Operational Manual Red Sea MAX E-Series ® New Skimmers or Set-ups 13 General Aquarium Skimmers only produce foam if the Maintenance water contains the proteins that bind ® to the surface of the air bubbles and The long-term success and health of the inhabitants of your MAX give the bubbles the structural rigidity aquarium depends on you. - Page 25 Installation and Operational Manual week to allow proper water flow and stable water level differentiation • Rinse all parts thoroughly, reassemble the pump, ensuring that all between the aquarium and the rear sump. Periodically soak the combs pipes are connected securely and return to the aquarium before in a weak acidic solution (vinegar, citric acid) until any calcium carbonate reconnecting the power cable to the electric supply.
-
Page 26: Trouble Shooting
Installation and Operational Manual Red Sea MAX E-Series ® 14 Trouble shooting Q. My set up is new and the skimmer doesn’t seem to be skimming. Q. My set up is not new and skimmer isn’t producing foam or it is too dry and builds on the neck. - Page 27 Installation and Operational Manual Q. The circulation pumps are injecting micro-bubbles into the skimmer chamber and flow out through the pumps. We strongly aquarium. recommend NOT using tap water. If you are using tap water DO NOT add conditioners or de-chlorinators. A.
-
Page 28: Warranty
15 Warranty Red Sea Aquarium Products Limited Warranty. The limited warranty sets forth all Red Sea Aquatics (HK) Ltd (Red Sea) Some states do not allow the exclusion or limitation of incidental or responsibilities regarding this product. There are no other express or consequential damages, or limitations on how long an implied warranty implied warranties from Red Sea. - Page 29 China North America UK & Ireland Europe Germany & Austria Asia Pacific Red Sea U.S.A & Canada Red Sea Aquatics (UK) Ltd Red Sea Aquatics Ltd Red Sea Aquatics (GZ) Ltd. Red Sea Europe Red Sea Deutschland 18125 Ammi Trail ZA de la St-Denis Büro Deutschland...
- Page 30 E 170 PRINTING INSTRUCTIONS To print only the Cabinet Installation Guide, print pages 30-33. Red Sea MAX ® E-170 #4360 MAX E-170 _v15A...
- Page 31 E 170 Px2, Yx2 Px2, Yx2 Px4, Yx2...
- Page 32 E 170 Ox12 Px7, Yx3 Px7, Yx3 Px6, Yx6...
- Page 33 E 170 ST3.9 x16 ST3.5 x14 #4360 MAX E-170 _v15A Europe UK & Ireland U.S.A Germany & Austria Red Sea Aquatics (GZ) Ltd Block A3, No.33 Hongmian Road, Red Sea Europe Red Sea Aquatics (UK) Ltd Red Sea U.S.A Red Sea Deutschland...
- Page 34 E 260 PRINTING INSTRUCTIONS To print only the Cabinet Installation Guide, print pages 34-37. Red Sea MAX ® E-260...
- Page 35 E 260 H x2 Px6, Yx6 Px4, Yx4...
- Page 36 E 260 Px2, Yx2 Px7, Yx3 Px4, Yx4 Px5, Yx5 DR/DL Ox16 Px7, Yx3...
- Page 37 ST3.5 x14 #4631 MAX E-260 _v15A Europe UK & Ireland U.S.A Germany & Austria Red Sea Aquatics (GZ) Ltd Block A3, No.33 Hongmian Road, Red Sea Europe Red Sea Aquatics (UK) Ltd Red Sea U.S.A Red Sea Deutschland ZA de la St-Denis...
- Page 38 In-Cabinet Sump Upgrade Manual PRINTING INSTRUCTIONS To print only the In-Cabinet Sump Upgrade Manual, print pages 38-44. Red Sea MAX ® E-Series ® Complete Plug & Play Open Top Reef Systems In-Cabinet Sump Upgrade Manual...
- Page 39 In-Cabinet Sump Upgrade Manual Red Sea MAX ® E-Series In-Cabinet Sump Upgrade Manual...
- Page 40 In-Cabinet Sump Upgrade Manual MAX E-170 MAX E-260 30 mm 30 mm MAX E-170 MAX E-260...
- Page 41 In-Cabinet Sump Upgrade Manual MAX E-170 MAX E-260...
- Page 42 In-Cabinet Sump Upgrade Manual ® Red Sea MAX E-Series | In-Cabinet Sump Upgrade Manual Introduction Installation ® Congratulations on your purchase of the MAX E-Series upgrade kit to WARNING: If you are not experienced in the installation of aquarium ®...
- Page 43 In-Cabinet Sump Upgrade Manual ® Red Sea MAX E-Series | In-Cabinet Sump Upgrade Manual 15. Pour approximately 3 liters of seawater into the skimmer chamber MSK 900 Protein Skimmer: of the rear sump to ensure that all of the pipe joins are watertight.
- Page 44 China North America UK & Ireland Europe Germany & Austria Asia Pacific Red Sea U.S.A & Canada Red Sea Aquatics (UK) Ltd Red Sea Aquatics Ltd Red Sea Aquatics (GZ) Ltd. Red Sea Europe Red Sea Deutschland 18125 Ammi Trail ZA de la St-Denis Büro Deutschland...
- Page 45 To print only the Hydra 26 HD LED Manual, print pages 45-53. Red Sea Hydra 26 HD LED ™ Scan this QR to register & activate your Red Sea Hydra 26 HD LED *Hydra TwentySix HD is a registered Trade Mark of AI ™...
- Page 46 Hydra 26 HD LED Red Sea Hydra 26 HD LED ™...
- Page 47 Incorrect use of this device could cause bodily injury or death. Smartphones and tablets: ® Read and follow all of the safety guidelines in the Red Sea MAX manual Download the iOS or Android “myAI” apps at: before assembling and/or using this LED module.
- Page 48 Hydra 26 HD LED Controller settings Spectrum and Intensity The controller provides automatic and manual modes for the lights. Select the “Manual” control option and see the effect of raising/lowering When the “Auto” mode is selected the LED module will vary spectrum and the intensity of individual color channels and the effect of various intensity according to the 24 hour cycle that you program.
- Page 49 Hydra 26 HD LED Red Sea Hydra 26™ HD LED Day / Night Programing Min & Max Ramp EASY SETUP Sunrise & Sunset Before setting up your 24 hour program refer to the general programming Nite: 0 Day. 118 ®...
- Page 50 Hydra 26 HD LED To manually add program points to the graph, drag the green bar to the desired time, Right-click to open the color intensity set window for that point, then click on save or close window to exit. Manually adding the moonlight setting to the 24 hour program Moonlight –...
- Page 51 Hydra 26 HD LED Red Sea Hydra 26™ HD LED Acclimation Button Function To set and activate the acclimation option, click on “EDIT” and then click To reset the LED Module’s network setting, press and hold the button until on the ON/OFF button.
- Page 52 ● Contact Tech support network ● Red + ● Green ● Blue ● Firmware update Thermal cooldown ● Blue ● Green Un-configured state Scan this QR to register & activate your Red Sea Hydra 26 HD LED ™...
- Page 53 China North America UK & Ireland Europe Germany & Austria Asia Pacific Red Sea U.S.A & Canada Red Sea Aquatics (UK) Ltd Red Sea Aquatics Ltd Red Sea Aquatics (GZ) Ltd. Red Sea Europe Red Sea Deutschland 18125 Ammi Trail ZA de la St-Denis Büro Deutschland...
Need help?
Do you have a question about the MAX E-170 and is the answer not in the manual?
Questions and answers
What is the size of the return pump?
The recommended return pump size for the Red Sea MAX E-170 is at least 2700 liters per hour (lph).
This answer is automatically generated