Table of Contents
Advertisement
Available languages
Available languages
Advertisement
Chapters
Table of Contents

Subscribe to Our Youtube Channel
Summary of Contents for Premium PWDC202FM
-
Page 3: Table Of Contents
CONTENTS PRECAUTIONS ....................... 4 IMPORTANT SAFETY INSTRUCTIONS ..............8 SPECIFICATIONS ....................10 INSTALLATION REQUIREMENTS .................11 INSTALLATION INSTRUCTIONS ................13 PARTS AND FEATURES ....................16 BEFORE USE .......................20 OPERATION INSTRUCTIONS ................22 CARE AND MAINTENANCE ................. 25 TROUBLESHOOTING ..................27... -
Page 4: Precautions
PRECAUTIONS NOTE: Before using your Combo Washer/Dryer, read this manual carefully and keep it for future reference. READ THIS USER MANUAL Inside this manual, you will find helpful information on how to properly use and maintain your Combo Washer/ Dryer. You will find many answers to common problems in the Troubleshooting section. Review this manual to ensure safe and proper operation of your appliance. - Page 5 This appliance must be grounded. In the event of a malfunction or breakdown, grounding will reduce the risk of electric shock. This appliance is equipped with an equipment-grounding conductor cord and grounding plug. The appliance must be plugged into an outlet that is properly installed and grounded. Figure 1 DO NOT, under any circumstances, cut, remove, or bypass the grounding prong.
- Page 6 BEFORE OPERATING THIS APPLIANCE • Packing materials may be dangerous to children. Keep all packing materials (plastic bags, foams, etc.) away from children. • Ensure that water and electrical devices are properly connected by a qualified technician in accordance with the manufacturer’s instructions (refer to “Installation Requirements” on page 10) and local safety regulations.
- Page 7 • DO NOT operate the washing machine if any guards, panels and/or fasteners, except transport fixing bolts, have been removed. Check the fill hose connections on a regular basis to ensure they are tight and not leaking. • DO NOT operate the washing machine if parts are missing or broken. NOTE: ALWAYS contact the manufacturer or a qualified service agent about any manual instructions that are unclear.
-
Page 8: Important Safety Instructions
IMPORTANT SAFETY INSTRUCTIONS WARNING: Proper Use To reduce the risk of fire, electric shock, or personal injury when using your appliance, follow these basic precautionary guidelines, which includes the following: Read all instructions before using the appliance. Unit must be properly installed as described in this manual before use. - Page 9 NEVER stop a tumble dryer before the end of the cycle and spread out clothes so heat can be dissipated. Disconnect plug from the power receptacle before attempting any cleaning or maintenance. Ensure water inside the drum has been completely drained before opening the door. DO NOT open the door if there is any water visible.
-
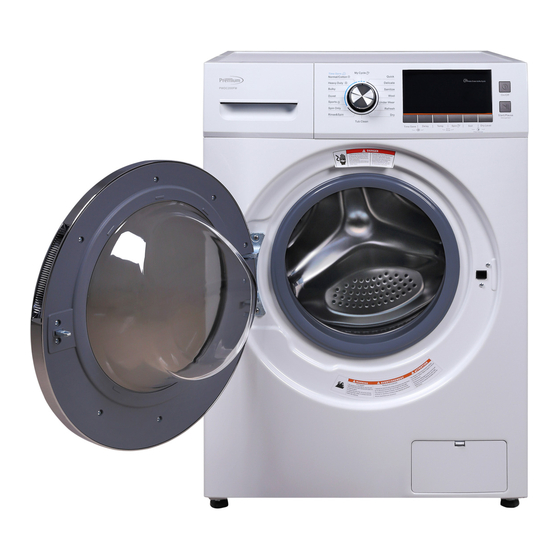
Page 10: Specifications
SPECIFICATIONS Figure 2 Height 23.5” (595mm) Width Depth 41.0” (1035mm) Depth with Door Opened Weight 174.0 lbs. (79.0 kg) Voltage / Frequency AC 120V~60Hz Rated Current Washing Capacity Dry Capacity 7.7 lbs. (3.5 kg) Drum Size 2.0 cu. ft. Standard Water Pressure 0.05Mpa - 1.0Mpa... -
Page 11: Installation Requirements
INSTALLATION REQUIREMENTS TOOLS AND PARTS Gather the required tools and parts before starting installation. The parts supplied are in the washer drum. (Refer to Figure 3). Recommended Tools (NOT included with unit purchase) Included Parts • 1/4” nut driver 3/8” socket with ratchet Figure 3 •... -
Page 12: Installation Clearances
You will need: • A water heater set to deliver 120° F (49° C) water to the washer. • A grounded electrical outlet located within 6 ft. (1.8 m) of where the power cord is attached to the back of the washer. -
Page 13: Installation Instructions
INSTALLATION INSTRUCTIONS REMOVE TRANSPORT BOLTS Figure 6 Before using this washing machine, transport bolts must be removed from its backside. Take the following steps to remove the bolts: Loosen all bolts with a wrench and then remove. Cover the holes with included transport hole plugs. Store the transport bolts properly for future use. -
Page 14: Electrical Connection
Laundry Tub Drain System (Figure 11) Floor Drain System (Figure 12) The laundry tub needs a minimum 20 gallons (76 L) The floor drain system requires a siphon break that capacity. The top of the laundry tub must be at least 23” may be purchased separately. - Page 15 • DO NOT connect and disconnect plug with wet hands. • When connecting and disconnecting the plug, hold the plug tightly by the base and then pull out. DO NOT pull power plug forcibly or by the cord. NOTE: Damaged Power Cord •...
-
Page 16: Parts And Features
PARTS AND FEATURES CONTROL PANEL Figure 15 My Cycle Time Save Normal / Cotton Quick Heavy Duty Delicate Bulky Sanitize Sheets Wool Sports Undergarments Spin De-Wrinkle Rinse & Spin Tub Clean On/Off: Press [On/Off] to turn the unit ON with LCD display. Press the button again to turn the unit OFF. NOTE: If the washer is paused and the current wash cycle is not resumed within 10 minutes, the cycle will be cancelled and the unit will automatically turn OFF. - Page 17 Wool: Only use this option to wash wool clothing articles labeled “Machine Washable”. • Proper detergent must be selected for wool textiles. • Lower spin speed and less agitation Undergarments: Select this option to wash a few or lightly soiled clothes. •...
- Page 18 Soil: Press [Soil] to increase time for heavier soiled items. • There are three (3) soil levels options. • Each bar increases the base wash time by 5 minutes. Dry Level: Adds a dry cycle to the end of the wash cycle (not available on all cycles). Extra Rinse: Press the [Temp.] and [Spin] button at the same time to add an extra rinse to the selected cycle.
-
Page 19: Lcd Display
Figure 16 LCD DISPLAY Cycle Indicator: Indicates stage of wash/dry cycle. • • : Prewash : Speed Wash • • : Wash : Extra Rinse • • : Rinse : Dry • • : Spin : Air Wash Clock: Indicates time left until the end of wash/dry cycle. Feature Indicator: Indicates features that are active. -
Page 20: Before Use
BEFORE USE CHECK LIST AND PREPARATION BEFORE WASHING CLOTHES Read these operating instructions carefully to avoid any damage or issues with the washing machine and to clothes. ALWAYS follow instructions on fabric care labels in clothing articles for proper care. WARNING: NEVER put clothes to be washed in the washing machine for a long period of time. - Page 21 • Balance and Load: Washing a single big and Figure 17 heavy garment such as towels, jeans, jackets etc. may cause an unbalanced load. Therefore, it is suggested to add one or two more clothes to be washed together to prevent unbalance and to allow smooth and complete draining.
-
Page 22: Operation Instructions
OPERATION INSTRUCTIONS WASHING CLOTHES Before washing clothes for the first time, the washing machine must be run with a small amount of detergent and without clothes. Follow below instructions. Connect power source and water. Place a small amount of detergent into the detergent dispenser and close. Press [On/Off] button. - Page 23 Cycle Time Save Temp. Spin Soil Time Time Save Hot+ Highest Heavy High Normal/ Warm Light Cotton Cold Highest Heavy High Warm Heavy Duty Medium Light Cold No Spin Heavy Highest High Bulky Warm Medium Light Cold No Spin Heavy High Medium Light...
- Page 24 Cycle Time Save Temp. Spin Soil Time Time Save Highest Heavy High Warm Light Quick Medium Cold No Spin Heavy High Medium Delicate Warm Light Cold No Spin Hot+ Heavy Sanitize Light Heavy High Medium Light Wool Warm Cold No Spin Highest Heavy High...
-
Page 25: Care And Maintenance
CARE AND MAINTENANCE Periodic cleaning and proper maintenance is recommended and will ensure efficiency, top performance, and extended life of this appliance. Disconnect plug from outlet and turn off (closed position) water tap before performing any cleaning/maintenance to your combo washer/dryer. CLEANING THE EXTERIOR OF THE UNIT NEVER use solvent based, abrasive cleaners, harsh chemicals or steel wool to clean your unit as they can damage the finish. - Page 26 Select any procedure on control knob and press the Figure 20 [Start/Pause] button and let run for about 40 seconds. After 40 seconds, stop the cycle and remove the hot and cold water hoses from the wall and back of the unit. Run warm water through both hoses.
-
Page 27: Troubleshooting
TROUBLESHOOTING Issue Possible Cause Solution Ensure the door is closed tightly. Check that power plug is inserted. Check to make sure the electrical plug has power. Check if water supply tap is turned on (open Unit will not start position). Check if [On/Off] is pressed. - Page 28 Tap is not turned on fully or water flows Open the tap or wait until water flows too slowly. Inlet valve filter may be normally. Check inlet valve filter. Water filling issue blocked. Inlet pipe may be twisted Water Straighten water pipe. Check other taps (Water filling time is shut off.
- Page 31 ÍNDICE PRECAUCIONES ....................32 INSTRUCCIONES DE SEGURIDAD IMPORTANTES ............36 ESPECIFICACIONES ....................38 REQUISITOS DE INSTALACIÓN ................39 INSTRUCCIONES DE INSTALACIÓN ..............41 PARTES Y FUNCIONES ..................44 ANTES DE SU USO ....................48 INSTRUCCIONES DE FUNCIONAMIENTO..............50 CUIDADO Y MANTENIMIENTO..............53 SOLUCIÓN DE PROBLEMAS ................55...
-
Page 32: Precauciones
PRECAUCIONES NOTA: Antes de usar el equipo de lavadora/secadora, lea atentamente este manual y consérvelo para futuras referencias. LEA ESTE MANUAL DEL USUARIO En este manual, usted encontrará información útil sobre cómo utilizar y dar mantenimiento correctamente a su equipo de lavadora/secadora. Usted encontrará muchas de las respuestas a los problemas comunes en la sección Solución de Problemas. - Page 33 Este aparato debe estar conectado a tierra. En el caso de mal funcionamiento o averí a, la conexión reducirá el riesgo de descargas eléctricas. Este electrodoméstico está equipado con un conductor de conexión a tierra y un enchufe con descarga a tierra. El electrodoméstico debe estar conectado a una toma de corriente que esté correctamente instalada y conectada a tierra.
- Page 34 ADVERTENCIA: El uso incorrecto del enchufe de toma de tierra o de la toma de corriente puede resultar en un riesgo de descarga eléctrica. Consulte con un electricista o técnico calificado si no entiende completamente las instrucciones para la a conexión a tierra. ADVERTENCIA: Esta lavadora debe estar conectada a un circuito separado de otros aparatos eléctricos.
- Page 35 • Siga SIEMPRE las instrucciones de cuidado de tela recomendadas por el fabricante de la prenda. (Consulte “Símbolos de cuidado para tela común” en la página 57.) • NO utilice la lavadora si tiene un cable de alimentación desgastado o dañado o enchufe suelto. Póngase en contacto con un agente de servicio autorizado.
-
Page 36: Instrucciones De Seguridad Importantes
INSTRUCCIONES DE SEGURIDAD IMPORTANTES ADVERTENCIA: Uso correcto Para reducir el riesgo de incendio, choque eléctrico o lesiones personales con su electrodoméstico, siga estas directrices básicas de precaución, que incluyen las siguientes: Lea todas las instrucciones antes de utilizar el electrodoméstico. La unidad debe estar instalada correctamente, tal y como se describe en este manual antes de usarse. - Page 37 NO instale o guarde este aparato donde esté expuesto a condiciones climáticas exteriores o a temperaturas por debajo del punto de congelación. NO manipule los controles. NUNCA detenga la secadora antes de la finalización del ciclo y mueva la ropa para que el calor se disperse. Desconecte el enchufe de la toma de corriente antes de realizar cualquier limpieza o mantenimiento.
-
Page 38: Especificaciones
ESPECIFICACIONES Figura 2 Altura 595 mm (23.5”) Ancho Profundidad Profundidad con puerta abierta Peso 79.0 kg (174.0 lbs.) Voltaje / Frecuencia AC 120V~60Hz Corriente nominal Capacidad de lavado Capacidad de secado 3.5 kg (7.7 lbs.) Tamaño del tambor 2.0 cu. ft. Presión de agua estándar 0.05Mpa - 1.0Mpa... -
Page 39: Requisitos De Instalación
REQUISITOS DE INSTALACIÓ N HERRAMIENTAS Y PIEZAS Reúna las herramientas y las piezas necesarias antes de iniciar la instalación. Las piezas se encuentran en el tambor de la lavadora. (Consulte la Figura 3.) Herramientas recomendadas Piezas incluidas (NO incluidas con la compra de la unidad) Figura 3 •... - Page 40 • Asegúrese de que la lavadora no está sobre el cable de alimentación. • NO instale la lavadora en piso alfombrado o sobre una alfombra. Usted necesitará: • Un calentador de agua que suministre agua a 49° C (120° F) a la lavadora. •...
-
Page 41: Instrucciones De Instalación
INSTRUCCIONES DE INSTALACIÓ N QUITAR PERNOS DE TRANSPORTE Figura 6 Antes de utilizar esta lavadora, deben retirarse los pernos de transporte de la parte posterior de la máquina. Realice los siguientes pasos para quitar los pernos: Afloje los pernos con una llave y, a continuación, quí... - Page 42 OPCIONES DEL SISTEMA DE DRENAJE Sistema de drenaje vertical Figura 9 Figura 10 Pared (Figura 9) o Suelo (Figura 10) 50 mm (2”) El drenaje vertical requiere un diámetro vertical mí nimo de 50 mm (2”). La capacidad de caudal mí nimo Mí...
- Page 43 Después de haberla fijado correctamente, presione Figura 14 las cuatro (4) esquinas nuevamente para asegurarse de que las patas se han ajustado correctamente. Si todaví a está inestable, repita los pasos 2 y 3. Utilice un nivel de carpintero en los cuatro (4) lados para asegurar que el aparato está...
-
Page 44: Partes Y Funciones
PARTES Y FUNCIONES CONTROL PANEL Figura 15 Time Save My Cycle Normal / Cotton Quick Heavy Duty Delicate Bulky Sanitize Sheets Wool Sports Undergarments Spin De-Wrinkle Rinse & Spin Tub Clean Encendido/Apagado: Presione [On/Off] para ENCENDER la unidad con la pantalla LCD iluminada. Vuelva a presionar ese botón para APAGAR la unidad. - Page 45 Delicate (Ropa delicada): Seleccione esta opción para las telas delicadas como camisetas de vestir, nailon, etc. • El ciclo de lavado funciona a una temperatura más baja. Sanitize (Esterilización): Seleccione esta opción para eliminar acumulación de detergente y otros residuos. •...
- Page 46 Time Save (Ahorro de tiempo): Presione [Time Save] para disminuir el tiempo de lavado. Delay (Retraso): Presione [Delay] para establecer el tiempo de retraso en que debe comenzar el lavado. • La luz del inicio del retraso parpadeará para indicar el tiempo de retraso. Puede demorar el tiempo de inicio del ciclo entre 1 y 24 horas.
- Page 47 PANTALLA LCD Figura 16 Indicador de ciclo: Indica la etapa del ciclo de lavado/secado. • • : Prelavado : Lavado rápido • • : Lavado : Enjuague adicional • • : Enjuague : Secado • : Centrifugado • : Lavado con aire Reloj: Indica el tiempo restante para el final del ciclo de lavado/secado.
-
Page 48: Antes De Su Uso
ANTES DE SU USO LISTA DE COMPROBACIÓN Y PREPARACIÓN ANTES DE LAVAR ROPA Lea estas instrucciones de funcionamiento con cuidado para evitar cualquier daño o problemas con la lavadora y la ropa. SIEMPRE siga las instrucciones que aparecen en las etiquetas de cuidado de las telas de la ropa para el cuidado apropiado. - Page 49 • Materiales a prueba de agua: No se recomienda lavar telas a prueba de agua ya que pueden dañarse o dañar la lavadora. • Equilibrio y carga: Lavar una sola prenda grande Figura 17 y pesada, como toallas, jeans, chaquetas, etc. puede causar una carga desequilibrada.
-
Page 50: Instrucciones De Funcionamiento
INSTRUCCIONES DE FUNCIONAMIENTO LAVADO DE LA ROPA Antes de lavar ropa por primera vez, la lavadora debe hacerse funcionar con una pequeña cantidad de detergente y sin ropa. Siga las instrucciones siguientes. Conecte fuente de energí a y agua. Coloque una pequeña cantidad de detergente en el dispensador de detergente y cierre. Presione el botón [On/Off] (Encendido/Apagado) Gire el ciclo a [Normal/Algodón] y presione el botón [Temp.] hasta que aparezca la palabra Hot [Caliente]. - Page 51 Ahorro Ahorro de Ciclo Temperatura Centrifugado Suciedad Secado Tiempo tiempo tiempo Caliente+, Máxima Mucha Alta Caliente Media Normal/ Sí Tibia Poca Cotton Baja Frí a Má xima Mucha Caliente Alta Media Tibia Heavy Duty Sí Media Poca Baja Frí a Sin centrifugado Mucha Máxima...
- Page 52 Time Cycle Time Save Temp. Spin Soil Time Save Máxima Mucha Alta Caliente Media Tibia Poca Quick Media Baja Frí a Sin centrifugado Mucha Alta Media Media Delicate Sí Tibia Poca Baja Frí a Sin centrifugado Caliente+ Mucha Media Sanitize Poca Mucha Alta...
-
Page 53: Cuidado Y Mantenimiento
CUIDADO Y MANTENIMIENTO Una limpieza regular y un mantenimiento adecuado asegurarán la eficiencia, rendimiento superior y vida prolongada de este aparato. Desconecte el enchufe de la toma de corriente y cierre (posición cerrada) el grifo de agua antes de realizar la limpieza y mantenimiento de su lavadora/secadora. - Page 54 El grifo debe estar totalmente cerrado antes de la Figura 20 limpieza. Seleccione cualquier procedimiento y, a continuación, pulse el botón [Start/Pause] y deje que funcione durante unos 40 segundos. Después de 40 segundos, detenga el ciclo y extraiga las mangueras de agua caliente y frí...
-
Page 55: Solución De Problemas
SOLUCIÓ N DE PROBLEMAS Problema Posible causa Solución Asegúrese de que la puerta está bien cerrada. Verifique que el enchufe de alimentación está insertado. Asegúrese de que el enchufe eléctrico tiene corriente. La unidad no arranca Verifique que el suministro de agua está activado (posición abierta). - Page 56 DETECCIÓN DE CÓDIGOS DE ALARMA Si aparece un código que no se encuentra en esta lista, comuní quese con el servicio de atención al cliente. Código de Descripción Razón Solución alarma Verificar la puerta y reiniciar con la La puerta no está cerrada correctamente. Cerradura de la puerta cerrada.
- Page 57 No usar cloro No utilizar secadora No planchar Planchar con un paño Secar luego de lavar Tender en sombra...
Need help?
Do you have a question about the PWDC202FM and is the answer not in the manual?
Questions and answers