Table of Contents
Advertisement
Quick Links
Trademark Acknowledgments
• SATIR is trademark of SATIR
• Microsoft, Windows and Windows logo is either registered trademarks or
trademarks of Microsoft Corporation in the United States and/or other countries.
•Other names and products not mentioned above may be registered trademarks
or trademarks of their respective companies.
Copyright © 2017 SATIR. LTD. All rights reserved
Handheld Thermal Tablet
PK Series
Europe (Ireland)
. LTD.
.
User's Manual
Advertisement
Table of Contents

Related Manuals for Satir PK-80

Summary of Contents for Satir PK-80
- Page 1 • Microsoft, Windows and Windows logo is either registered trademarks or trademarks of Microsoft Corporation in the United States and/or other countries. •Other names and products not mentioned above may be registered trademarks or trademarks of their respective companies. Copyright © 2017 SATIR. LTD. All rights reserved...
-
Page 2: Table Of Contents
Table of Contents Read This First ..............................1 Parts Introduction ............................... 3 Back and left side ..................3 Right side and top..................4 Getting Ready ................................ 4 Quick Start Guide ..................5 Charge the battery ..................6 Install the battery ..................7 Turn the power on / off ................ -
Page 3: Read This First
Read This First Please Read The real Android based tablet thermal camera Introduction PK 80/160 integrates tablet and thermal camera technologies, which makes device multifunctional. Integrating infrared imaging technology with telecommunications technology. High quality infrared imaging in combination with a tablet allows the user to communicate in real time, and allows live image and video transmission. - Page 4 Read This First Please Read It is forbidden to disassemble the equipment, and it is only allowed to be maintained by an authorized organization. Before using the camera, please ensure that you read the safety precautions described. Always ensure that the IR camera is operated correctly.
-
Page 5: Parts Introduction
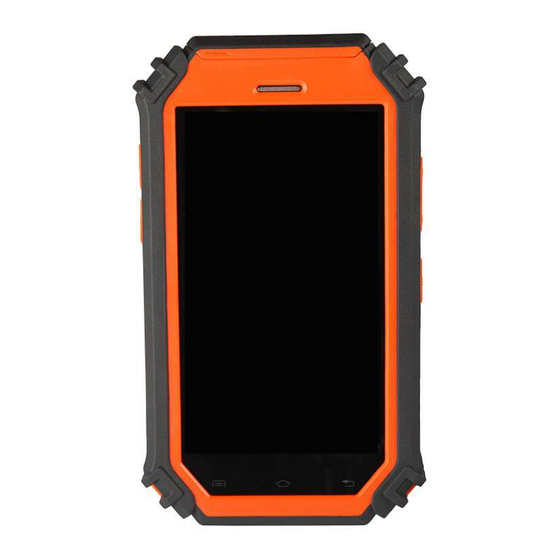
Parts Introduction Back and left side Figure Visual camera Illuminator Infrared camera Shutter (NUC) button Infrared image save button Battery compartment... -
Page 6: Right Side And Top
Parts Introduction Right side and top Figure Volume button Power button Micro USB 3.5 mm Headset jack... -
Page 7: Getting Ready
Getting Ready Quick Start Guide Procedure Insert the battery to the imager's battery compartment. Hold the power key down for 3 seconds until the LCD display is active. Click the infrared App icon After opening the infrared App, please adjust the distance between the camera and target. -
Page 8: Charge The Battery
Getting Ready Charge the battery General Before using the device for the first time or when the battery has been unused for extended periods, you must charge the battery fully. Procedure Plug the small end of the charger into the USB port of the device. -
Page 9: Install The Battery
Getting Ready Install the battery General Charge the battery pack fully before using it for the first time. Follow this procedure to install/take out the battery pack. Procedure Insert the battery pack into the slot and close the back cover, and then push the locker to the right to lock the cover. - Page 10 will result in the loss of the saved parameters. Remove the battery pack when the camera is not in use.
-
Page 11: Turn The Power On / Off
[Power off]. Note You can download the IR Wizard APP installation package from our website www.satir-eu.com or find out the package in the built-in storage directory /file1/file2, then install the APP for editing thermal image and... -
Page 12: Local Setting
Getting Ready Local setting General You need to set the local language and time when the IR camera is turned on for the first time. Procedure Follow this procedure to set your local language. Find out and click Settings icon Slide up to find out Language &... -
Page 13: Checking The Information On The Lcd
Getting Ready Checking the Information on the LCD General The following displays in information view. Main interface Explanation This table explains the figure above. Battery status Main page Main tool Toolbar Auto Shutter Time & Device Info Temperature scale Shortcuts File browser... -
Page 14: Parameter Setting
Basic Settings Parameter setting Parameter Setting Click the icon , the menu will pop up as below. General Figure This table explains the figure above. Explanation Parameters Set up Pseudo-color Select Image quality regulation Modify the parameters according to work field. Procedure Click the main page Click parameter setting icon... -
Page 15: Pseudo-Color Selection & Image Quality Regulation
Basic Settings Pseudo-color selection & Image quality regulation Pseudo-color Select You can select IRON, IRON INV, RAINBOW,FEATHER General GRAY or GRAY INV according to the work field. Follow this procedure to select the pseudo-color. Procedure Click the main page Click pseudo-color setting icon Click the pseudo-color you want to select. -
Page 16: Features
Features Spot Analysis tools Spot analysis tools This topic briefly explains how to set the analysis tools on General the thermal image. Procedure Follow this procedure to set Spot analysis. Click the Analysis button Click the icon to add a spot. Warning Mode Settings Press and hold the spot you want to set for a while, then the warning mode interface will... -
Page 17: Area Analysis
Features Area analysis Area analysis Procedure Follow this procedure to fulfill Area analysis. Click the Analysis button Click the icon to add a rectangle or oval analysis. Setting the analysis area Press and hold the area you want to set for a while, then the area display settings will pop- After you finish the settings, click the Confirm to save your settings. -
Page 18: Line Analysis
Features Line analysis Line analysis Follow this procedure to fulfill line analysis tool. Procedure Click the Analysis button Click the line icon to add a line analysis. Moving the line Drag the line analysis directly to anywhere of the image. Removing the line Drag the line to icon to clear it. -
Page 19: Image Adjustment
Features About Image Image adjustment You can adjust the Level (brightness) and Span (contrast) General of the image captured by IR camera, manually or automatically. The default setting is automatic adjustment. Procedure Follow this procedure to adjust the L/S manually. Click the Image button Click the L/S icon to open Level/Span... -
Page 20: Iso Mode
Features About image ISO mode Procedure Follow this procedure to set the ISO mode. Click the Image button Click the ISO icon Select Between/Above/Below ISO mode. Click ISO Color Picker. Pick up one color from the ring color plate and then click the center of the ring color plate to confirm. -
Page 21: Save Image
Features About image Save image Figure Explanation This table explains the figure above. Freeze the image Freezing the screen, in order to storage and analyze the image. Calibration Click the icon or press shutter button to do temperatures drift and picture quality correction. The switch between infrared and CCD lens. -
Page 22: Record Video
Features About image Record video Follow this procedure to record a video. Procedure Click the Image button Click the video icon to start recording. There will have recording time be displayed on the screen. Click the icon to stop recording. -
Page 23: File Browser
Features File browser File browser Procedure Follow this procedure to browse and manage the files. Click the File button Click the directory to browse the image files. Slide to select and click the image to check. Click and then will pop up Delete and Analysis. -
Page 24: Data Transmission & Update
Features Data transmission & Update Procedure Follow this procedure to do data transmission. Open the cover for USB port on the top of the camera. Connect the camera to computer via USB cable. Slide to pull down notification bar, select and click USB connected and then click Turn on USB storage. -
Page 25: Trouble Shooting
Trouble Shooting Trouble Shooting Problem Solution IR-software stops working Enter the APP again. The shutter be stuck while Click the calibration icon again. doing Calibration Checking whether the Internal memory is full. If required, download the images to a Camera will not record computer and erase them to make some space. -
Page 26: Specification
Specification Technical Parameters Type PK-80 PK-160 Image performance FOV/Min. focus distance 21°x21° 21°x28°/0.5m Spatial resolution 4.6 mrad 4mrad Thermal sensitivity ≤0.01℃@30℃ ≤0.08℃@30℃ Detector resolution 80x80 160X120 Focus Fixed focus Image presentation Image mode IR/CCD Visible pixels High Definition CCD, 8million pixels LCD Display 5.5”... - Page 27 Wireless transmission and positioning Wi-Fi Bluetooth Electronic compass Physical characteristic Weight 415g Additional features Built-in memory Video record Ports USB port, 3.5 mm Headset jack Please download quick user guide, user manual and SatIrReport Software from SATIR website if need be.
Need help?
Do you have a question about the PK-80 and is the answer not in the manual?
Questions and answers