Table of Contents
Advertisement
Quick Links
Download this manual
See also:
User Manual
PREPARATION
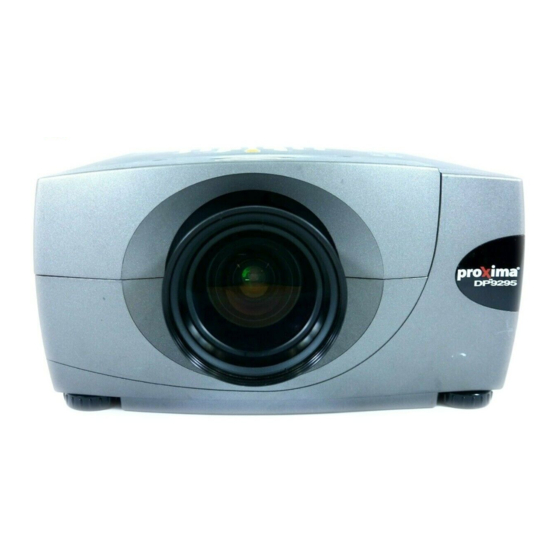
NAME OF EACH PART OF PROJECTOR
FRONT OF CABINET
PROJECTION LENS
LENS COVER
BACK OF CABINET
EXHAUST VENT
HOT AIR EXHAUSTED !
Air blown from exhaust vent is hot. When
using or installing a projector, following
precautions should be taken.
Do not put a flammable object near this vent.
Keep rear grills at least 3'(1 m) away from
any object, especially heat-sensitive object.
Do not touch this area, especially screws
and metallic parts. This area will become
hot while a projector is used.
This projector detects internal temperature
and automatically controls operating power
of Cooling Fans.
BOTTOM OF CABINET
TOP CONTROLS
AND INDICATORS
SPEAKERS
POWER CORD
CONNECTOR
LAMP COVER
ADJUSTABLE FEET
FEET LOCK LATCHES
INFRARED
REMOTE RECEIVER
TERMINALS
AND CONNECTORS
AIR INTAKE VENTS
This projector is equipped with cooling
fans for protection from overheating.
Pay attention to following to ensure
proper ventilation and avoid a possible
risk of fire and malfunction.
Do not cover vent slots.
AND
Keep side clear of any objects.
Obstructions may block cooling air.
AIR INTAKE
VENT
INFRARED
REMOTE RECEIVER
CARRYING
HANDLE
E
7
Advertisement
Table of Contents

Summary of Contents for Proxima DP9295
- Page 1 PREPARATION NAME OF EACH PART OF PROJECTOR FRONT OF CABINET TOP CONTROLS AND INDICATORS PROJECTION LENS AIR INTAKE VENT INFRARED LENS COVER REMOTE RECEIVER SPEAKERS BACK OF CABINET INFRARED POWER CORD REMOTE RECEIVER EXHAUST VENT CONNECTOR HOT AIR EXHAUSTED ! Air blown from exhaust vent is hot.
-
Page 2: Before Operation
BEFORE OPERATION OPERATION OF REMOTE CONTROL Left Side LASER POINTER INDICATOR POWER ON-OFF BUTTON Lights red while laser beam Used to turn projector on or is emitted from Laser Light off. (P19) power Window. zoom focus volume INPUT BUTTON Used to select input source. (P22) d.zoom mute... -
Page 3: Remote Control Batteries Installation
BEFORE OPERATION Operating Range Point Remote Control Unit toward ZOOM BUTTON power projector (Receiver Window) Used to adjust zoom. whenever pressing any button. (P20) VOLUME BUTTON Maximum operating range for zoom focus volume Used to adjust volume. Remote Control Unit is about 16.4’ (P21) (5m) and 60°... -
Page 4: Top Controls And Indicators
BEFORE OPERATION TOP CONTROLS AND INDICATORS This projector has CONTROL BUTTONS (TOP CONTROLS) and INDICATORS on its top. ZOOM BUTTON FOCUS BUTTON MENU BUTTON POWER ON–OFF BUTTON Used to adjust zoom. Used to adjust focus. Used to open or close Used to turn a projector (P20) (P20) -
Page 5: Operating On-Screen Menu
BEFORE OPERATION OPERATING ON-SCREEN MENU HOW TO OPERATE ON-SCREEN MENU You can control and adjust this projector through ON-SCREEN WIRELESS REMOTE CONTROL MENU. Refer to following pages to operate each adjustment on POINT BUTTON ON-SCREEN MENU. Used to move Pointer UP/ DOWN/ RIGHT/ 1 DISPLAY MENU LEFT. -
Page 6: Menu Bar
BEFORE OPERATION MENU BAR FOR PC SOURCE Press MENU BUTTON while connecting to PC input source. IMAGE SELECT MENU SCREEN MENU SETTING MENU Used to select Used to adjust size Used to change GUIDE WINDOW PC SYSTEM MENU image level among of image. -
Page 7: Turning On Projector
BEFORE OPERATION TURNING ON / OFF PROJECTOR TURNING ON PROJECTOR Complete peripheral connections (with Computer, VCR, etc.) Input position and before turning on projector. (Refer to "CONNECTING TO Lamp mode status PROJECTOR" on pages 11~13 for connecting that equipment.) Input 1 Connect a projector's AC Power Cord into an AC outlet. -
Page 8: Basic Operation
BASIC OPERATION ADJUSTING SCREEN ZOOM ADJUSTMENT Press ZOOM button on Top Control or ZOOM button on Remote Control Unit. Message “Zoom” is displayed. Press ZOOM button or POINT UP button to make image Zoom larger, and press ZOOM button or POINT DOWN button to make image smaller. -
Page 9: Sound Adjustment
BASIC OPERATION PICTURE FREEZE FUNCTION Press FREEZE button on Remote Control Unit to freeze picture on-screen. To cancel FREEZE function, press FREEZE button again or press any other button except POINT / SELECT / RIGHT CLICK / LASER button. BLANK FUNCTION Press BLANK button on Remote Control Unit to black out image. -
Page 10: Computer Input
COMPUTER INPUT SELECTING INPUT SOURCE INPUT button DIRECT OPERATION Input 1 Choose Computer by pressing INPUT button on Top Control or on Remote Control Unit. Input 2 If projector cannot reproduce proper image, select correct input source through MENU OPERATION (see below). Input 3 MENU OPERATION Press MENU button and ON-SCREEN MENU will appear. -
Page 11: Maintenance
APPENDIX MAINTENANCE WARNING TEMP. INDICATOR WARNING TEMP. Indicator flashes red when an internal temperature of a projector exceeds normal temperature. This Indicator stops flashing when temperature of a projector returns to normal. When WARNING TEMP. Indicator continues to flash, check items listed below. Ventilation Slots of a projector may be blocked. -
Page 12: Lamp Replacement
Replacement Lamp can be ordered through your dealer. When ordering Projection Lamp, give following information to dealer. Model No. of your projector : LP810/DP9295 Replacement Lamp Type No. : Lamp No.: SP-LAMP-011 LAMP REPLACE COUNTER Be sure to reset Lamp Replace Counter when Lamp Assembly is replaced. When Lamp Replace Counter is reset, LAMP REPLACE Indicator stops lighting. -
Page 13: Troubleshooting
APPENDIX TROUBLESHOOTING Before calling your dealer or service center for assistance, check matters below once again. 1. Make sure you have connected a projector to your computer or video equipment as described in section "CONNECTING PROJECTOR" on pages 11 ~ 13. 2. - Page 14 After you've received this number, send the unit, a copy of your sales receipt, and a description of the problem, freight prepaid, to Proxima. Clearly note the Return Authorization Number on the outside of the shipping box. This symbol on the nameplate means the product is Listed by Underwriters Laboratories Inc.


Need help?
Do you have a question about the DP9295 and is the answer not in the manual?
Questions and answers