Table of Contents
Advertisement
Quick Links
Advertisement
Table of Contents

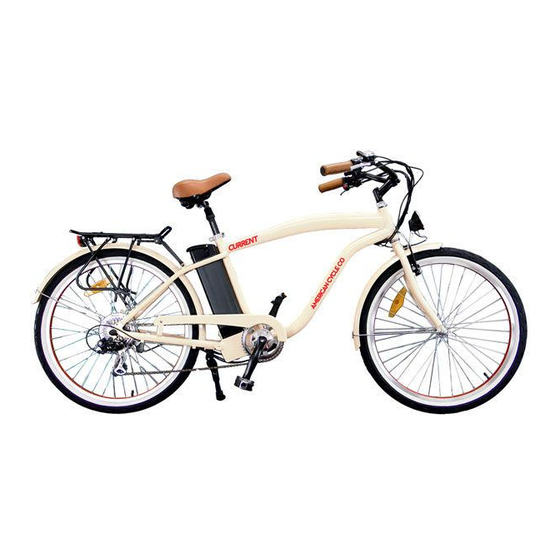
Summary of Contents for American cycle company Current
- Page 1 Electric Bike User Manual...
- Page 2 Li-Ion (Lithium Ion) batteries 4-6 hours With proper care and maintenance your American Cycle Company® "Current" Electric Bicycle will provide ease of use and be fun to ride. Below are points that will help you to maximize the enjoyment you get from your new hybrid electric bicycle.
- Page 3 HELMETS SAVE CORRECT FITTING - MAKE SURE YOUR HELMET COVERS LIVES !!! YOUR FOREHEAD. • ALWAYS WEAR A PROPERLY FITTED HELMET WHEN YOU RIDE YOUR BICYCLE. • DO NOT RIDE AT NIGHT. • CPSC RECORDS SHOW THAT ABOUT 35% OF BICYCLE RELATED DEATHS OCCUR AFTER DARK.
- Page 4 The following manual is only a guide to assist you and is not a complete or comprehensive manual of all aspects of maintaining and repairing your bicycle. The bicycle you have purchased is a complex object. We recommend that you consult a bicycle repair specialist if you have doubts or concerns as to your experience or ability to properly assemble, repair, or maintain your bicycle.
- Page 5 PART 1 Before You Ride.........5-14 PART 2 Tools &...
-
Page 6: Before You Ride
BEFORE YOU RIDE ABOUT THIS MANUAL It is important for you to understand your new bicycle. By reading this manual before you go out on your first ride, you’ll know how to get better performance, comfort, and enjoyment from your new bicycle. It is also important that your first ride on your new bicycle is taken in a controlled environment, away from cars, obstacles, and other cyclists. -
Page 7: Correct Frame Size
CORRECT FRAME SIZE When selecting a new bicycle, the correct choice of frame size is a very important safety consideration. Most full sized bicycles come in a range of frame sizes. These sizes usually refer to the distance between the center of the bottom bracket and the top of the frame seat tube. -
Page 8: Safety Checklist
SAFETY CHECKLIST Before every ride, it is important to carry out the following safety checks: 1. Brakes • Ensure front and rear brakes work properly. • Ensure brake shoe pads are not over worn and are correctly positioned in relation to the rims. •... -
Page 9: Cranks And Pedals
5. Bearings • Ensure all bearings are lubricated, run freely and display no excess movement, grinding or rattling. • Check headset, wheel bearings, pedal bearings and bottom bracket bearings. 6. Cranks and Pedals • Ensure pedals are securely tightened to the cranks. •... -
Page 10: Riding Safely
RIDING SAFELY General Rules When riding obey the same road laws as all other road vehicles, including giving way to pedestrians, and stopping at red lights and stop signs. For further information, contact the Road Traffic Authority, police department or Department of Motor Vehicles in your State. -
Page 11: Wet Weather
Wet Weather IT IS RECOMMENDED TO NOT RIDE IN WET WEATHER This hybrid electric bicycle is not meant for use in the water (damp roads, puddles, rain, streams, etc.). Never immerse this product in water as the electrical system may be damaged. •... -
Page 12: Hill Technique
Hill Technique • Gear down before a climb and continue gearing down as required to maintain pedaling speed. • If you reach the lowest gear and are struggling, stand up on your pedals. You will then obtain more power from each pedal revolution. -
Page 13: Bicycle Care
BICYCLE CARE Basic Maintenance The following procedures will help you maintain your hybrid electric bicycle for years of enjoyable riding. Properly maintain the batteries by keeping them fully charged when not in use. Do not ride your hybrid electrical bicycle in the water (damp roads, puddles, rain, streams, etc.) and never immerse it in water as the electrical system may be damaged. - Page 14 Storage Keep your bicycle in a dry location away from the weather and the sun. Direct sunlight may cause paint to fade or rubber and plastic parts to crack. Before storing your bicycle for a long period of time, clean and lubricate all components and wax the frame.
- Page 15 Helmets It is strongly advised that a properly fitting, ANSI or SNELL approved, bicycle safety helmet be worn at all times when riding your bicycle. In addition, if you are carrying a passenger in a child safety seat, they must also be wearing a helmet. The correct helmet should: - be comfortable - be lightweight...
-
Page 16: Tools Included
Your new bicycle was partially assembled in the factory and then partially disassembled for shipping. You may have purchased the bicycle already fully assembled and ready to ride OR in the shipping carton in the partially disassembled form. The following instructions will enable you to prepare your bicycle for years of enjoyable cycling. -
Page 17: Electronic Components
ELECTRONIC COMPONENTS Pedal Assist Control Unit/Battery Gauge This unit is featured on the Enlightened series of bicycles. Not only does it act like a battery gauge but it also enables the rider to vary the level of support from Low to High (1 LED = least amount of power assistance, 3 LED's = maximum amount of power assistance). - Page 18 Throttles Throttles are equipped on some models of electric bicycles. Throttles operate by rotating the throttle towards the rider much like a motorcycle. They generally are the inner half of the right side handlebar grip. The more you twist the throttle, the faster the motor system will propel the bicycle.
-
Page 19: Taking Care Of Your Batteries
Taking Care of Your Batteries Proper maintenance of the batteries will maximize their lifespan and available ride time. American Cycle Company® warrants your new batteries from the date of purchase but only if properly cared for. Refer to the limited warranty for details. -
Page 20: Battery Faq's
Q: Do I need to "break-in" my batteries? A: Yes, the batteries used in the American Cycle Company Electric Bicycles will need to have a “break-in” cycle consisting of ~ three dis-charge/charge cycles before they will reach optimum performance. This involves three complete discharges and three complete recharges. - Page 21 Q: Will I get more performance from my bike if I leave the batteries to charge longer? A: No, once the batteries are fully charged (as indicated by the light on the charger) it is best to unplug them from the charger. Leaving the batteries charging longer than necessary is called “overcharging”...
- Page 22 Charger The hybrid electric bicycle comes with a charger that connects with an easy-access charger port for recharging the batteries. This charger unit has lights that show the battery charge status. Refer to the instructions that appear on the charger unit and its instructions.
- Page 23 How to use the battery charger Plug the charger into the outlet. The indicator light on the top of the charger will illuminate when the charger is working properly. Refer to the sticker on the charger for actual status light indication. 2.
- Page 24 Main Power Switches KEY LOCK POWER SWITCHES Current is equipped with a key lock power switch. This feature provides added security allowing only the person with the key to remove the battery as well as turn the power on or off. This key lock switch has the same function as a standard power switch.
- Page 25 Fuses All American Cycle Company® Electric Bicycles are equipped with fuses. The fuse is located at the bottom of the battery pack as shown below Fuse Type: Li-Ion, 30A 250V tube fuse • In the event of an overload the fuse will pop and need to be replaced.
-
Page 26: Bicycle Assembly
BICYCLE ASSEMBLY We recommend that you consult a bicycle specialist if you have doubts or concerns assembly is the same for men’s and women’s bikes. as to your experience or ability to properly assembly, repair, or maintain your bicycle. Getting Started Open the carton from the top and remove the bicycle. - Page 27 Standard Stem Bolt System Remove the protective shipping cap from the stem wedge. Remove the Stem Plug from the stem. Loosen the Stem Bolt with a 6mm allen wrench or 13mm box wrench. Insert the stem into the headtube of the bicycle. Ensure that the Minimum Insertion Line is below the top nut of the headset.
-
Page 28: Handlebar Height
Handlebar Height Maximum comfort is usually obtained when the handlebar height is Stem Wedge Bolt equal to the height of the seat. You may wish to try different heights to find the most comfortable position. Handlebar Binder Bolt Maximum Height/ Minimum Insertion Mark Exceeds 2 1/2”... -
Page 29: Pedals & Crank Set
Note: In addition to normal assembly, please be aware that the preload adjusting screw must be flush with the bottom of the post. Some bicycles may come equipped with a shim that should be positioned over the lower half of the seat post and inserted into the seat tube of the frame. Failure to do this may cause irreparable damage. -
Page 30: Seat And Seat Post
Seat and Seat Post Attach the seat to the seat post by loosening the nuts on the seat clamp. Insert the tapered end of the seat post into the seat clamp until it is at the top of the clamp. Partially tighten the nuts on the seat clamp until the seat Seat is snug, but can still be turned. -
Page 31: Riding Position
RIDING POSITION Seat Height In order to obtain the most comfortable riding position and offer the best possible pedaling efficiency, the seat height should be set correctly in relation to the rider’s leg length. The correct saddle height should not allow leg strain from over-extension, and the hips should not rock from side to side when pedaling. - Page 32 Seat Adjust Use Seat Adjust to fine tune your seat to optimal comfort. Use a 6mm Allen wrench to loosen the Seat Fixing Bolt shown to the left, you can then slide the seat forward or backward as well as adjust the tilt to your preference.
-
Page 33: Front Wheel
Front Wheel Retaining Make sure the brakes are loose enough to allow the wheel to Washer Axle Nut pass through the brake pads easily. Axle Place wheel into fork drop outs. Install retaining washers with raised lip pointed towards the fork, and insert into the small hole of the fork blade. - Page 35 Fenders Front Fender The front fender is mounted at the fork crown using a 10mm nut and bolt system. 10mm Nut and Bolt Mounting System Place the fender post into the opening under the fork crown (shown below) making sure the attachment holes and fender bracket holes line up.
- Page 36 Connect the Lighting to Electrical Source Find the two small cables coming from the cabling near the front of the handlbars. Follow the diagram and instructions below to properly connect lighting. The cable with the white stripe along the side is your Positive connection, while the all black cable is the Negative connection.
-
Page 37: V-Style Brakes
Front Brake Determine which type of brake your bike is equipped with and refer to the appropriate assembly instructions. For more information on brake adjustment and maintenance, refer to pages 74-77. V-Style Brakes Brake Outer If not already assembled, take the brake noodle from the parts box and Cable Cable slide the cable through the larger opening. - Page 38 V - Brake While holding the shoe against the rim, adjust the amount of shoe protrusion by interchanging the position of the B washers (i.e. 6 mm and 3 mm) so that If fitted with V-Brakes, insert the brake body into dimension A is kept at 39 mm or more.
- Page 39 While holding the shoe against the Adjust the balance with the spring rim, tighten the shoe fixing nut. tension adjustment screws. shoe fixing nut 5 mm Allen key 1 mm 1 mm Spring tension Spring tension adjustment screw adjustment screw Pass the inner cable through the inner Depress the brake lever about 10 times as cable lead.
-
Page 40: Check Your Brakes
Check your Brakes Press each brake lever to make sure that there is no binding and that the brake pads press hard enough on the rims to stop the bike. The brake pads should be adjusted so they are 1 mm to 2 mm away from the rim when the brakes are not applied. Brake pads should be centered on the rim and “toed-in”... - Page 41 Disc Brakes (if equipped) Brake Cable If fitted with a front disc brake, the components should already be Housing attached. However, please check all connections before attempting Barrel Adjuster to ride the bicycle. Secure tightly the 6 bolts that hold the disc to the Lock Nut front wheel hub and the 2 bolts that hold the brake mechanism to the fork.
- Page 42 Centering Bolt Fork Leg Disc Mounting Bolts Brake Cable Housing Rotating Caliper Body Disc Cable Boot with Spring inside Centering Bolt (inside) Actuating Cable Anchor Bolt Fork Drop Out Caliper Mounting Quick Release Bolts with spacers lever These brakes require breaking in! Ride and use the brakes gently for 13 miles before using the brakes in downhill conditions, for sudden stops, or any other serious braking.
- Page 43 Derailleur Although the front and rear derailleurs are initially adjusted at the Freewheel factory, you will need to inspect and readjust both before riding Pulley Adjustment the bicycle. Screw Rear Derailleur Begin by shifting the rear shifter to largest number indicated, disconnect the cable from the rear derailleur cable anchor bolt, and place the chain on the smallest sprocket.
-
Page 44: Gears - How To Operate
GEARS - HOW TO OPERATE Drivetrain Derailleur Control Cable Derailleur Gears Freewheel Front Derailleur Cogs Most multi-speed bicycles today are equipped with what are known as derailleur gears. They operate using a system of levers and mechanisms to move the drive chain between different sized driving gears or cogs. - Page 45 1) Shifting the Rear Derailleur The rear derailleur is controlled by the right shifter. The function of the rear derailleur is to move the drive chain from one gear to another on the rear gear cluster, thereby changing gear drive ratios. The smaller sprockets on the gear cluster produce higher gear ratios.
- Page 46 Forks Steering Tube There are two different types of forks that vary in styles and dimensions. One type is a rigid fork (Figure 1) consisting of sta- Brake Boss tionary tubing with curved blades. The other type is a suspension fork (Figure 2) consisting of inner stanchion tubes Drop-out riding on elastomers or springs inside of a straight outer fork leg.
-
Page 47: Final Check
Final Check • After all adjustments have been made, shift through every gear several times at varying speeds. This will ensure all your adjustments are correct and will allow you to pinpoint any trouble areas. If you encounter any problems, refer to the appropriate section and make any necessary adjustments. -
Page 48: Schedule 1 - Lubrication
Correct routine maintenance of your new bike will ensure smooth running - Longer lasting components - Safer riding - Lower running costs Every time you ride your bicycle, its condition changes. The more you ride, the more frequently maintenance will be required. We recommend you spend a little time on regular maintenance tasks. -
Page 49: Schedule 2 - Service Checklist
Schedule 2 - Service Checklist Frequency Task Before every ride Be sure batteries are fully charged Check tire pressure Check brake operation Check wheels for loose spokes Perform safety check After every ride Be sure to fully charge batteries Quick wipe down with damp cloth Weekly Lubrication as per schedule 1 Monthly... - Page 50 Frequency Task Check all points as per monthly service Check and replace brake pads, if required Check chain for excess play or wear Yearly Lubrication as per schedule 1...
-
Page 51: Detailed Maintenance
DETAILED MAINTENANCE WHEELS AND TIRES Wheel Inspection It is most important that wheels are kept in top condition. Properly maintaining your bicycle's wheels will help braking performance and stability when riding. Be aware of the following potential problems: •Dirty or greasy rims: Caution: These can render your brakes ineffective. -
Page 52: Tire Inspection
Tire Inspection Tires must be maintained properly to ensure road holding and stability. Check the following areas: Inflation: Ensure tires are inflated to the pressure indicated on the tire sidewalls. It is better to use a tire gauge and a hand pump than a service station pump. Caution: If inflating tires with a service station pump, take care that sudden over inflation does not cause tire to blow out. - Page 53 How To Fix a Flat Tire If you need to repair a tire, follow these steps: Push tire bead into the center Remove the wheel from the bicycle. of the rim. Deflate the tire completely via the valve. Loosen the tire bead by pushing it inward all the way around.
- Page 54 Remove the tire completely and inspect for a nail, glass, etc. and remove if located. Also inspect the inside of the rim to ensure there are no protruding spokes, rust or other potential causes. Replace the rim tape which covers the spoke ends, if damaged.
-
Page 55: Handlebars And Stem
HANDLEBARS AND STEM Handlebar Stem The handlebar stem fits into the steering column and is held firmly by the action of a binder bolt and expander wedge which, when tightened, binds with the inside of the fork steerer tube. When removing the stem, loosen the stem bolt two or three turns, then give it a tap to loosen the wedge inside. - Page 56 When re-fitting the stem, make sure the handlebars are correctly aligned and tightened using the appropriate hex wrench or allen key. Grip Do not over tighten. Test the security of the handlebar within the stem, and the stem within Stem Bolt Handlebar the fork steerer tube, by clamping the front wheel between your knees Handlebar Stem...
-
Page 57: Cables And Cable Housing
Cables and Cable Housing Cables and housing are one of the most overlooked parts on the bicycle. The first indication that your cables and housing need to be replaced is an increased amount of pressure needed to operate the brakes or shifters. Before every ride, check that there are no kinks or frays in the cables and housing. - Page 58 HEADSET Standard Headset Inspection The headset bearing adjustment should be checked every month. This is Lock Nut important as it is the headset which locks the fork into the frame, and if loose, can cause damage or result in an accident. While standing over the frame top tube with both feet on the ground, apply the front brake firmly Lock Washer and rock the bicycle back and forth;...
-
Page 59: Saddle And Seat Post
SADDLE AND SEAT POST Inspection The seat fixing bolt and the seat post binder bolt should be checked for tightness and adjustment every month. On removing the seat post from the frame, you will notice a mark about 65mm up from the bottom with the words “max. - Page 60 Adjustment As mentioned in Part 2, the seat can be adjusted in height, angle and distance from the handlebars to suit the individual rider. Seat angle is a matter of personal preference but the most comfortable position will usually be found when the top of the seat is almost parallel to the ground, or slightly raised at the front.
- Page 61 BRAKES The correct adjustment and operation of your bicycle's brakes is extremely important for safe operation. Brakes should be checked for effective operation before every ride. Frequent checking of adjustment is necessary as the control cables will stretch and the brake pads will become worn with use. Never ride a bicycle unless the brakes are functioning properly.
-
Page 62: Adjustment - Sidepull Calipers
Some brakes have a quick release mechanism to allow easier wheel removal. Whenever you adjust the brakes, make sure the quick release mechanism is in the closed position. Never ride unless the quick release is firmly locked in the closed position. Lubrication Cable Adjusting Barrel The brake lever and brake caliper pivot points should be oiled with 2-3 drops... -
Page 63: Adjustment - V-Style Brakes
Some brakes have a special mechanism which enables you to set the clearance on either side of the rim using a screwdriver. Brake pads should finally be adjusted so that the leading edge of the pad makes first contact with the rim. Some brakes have special curved washers to allow this, but on less complex models it will be necessary to apply a little force to the pad and its mounting. - Page 64 On some brakes, the main brake cable continues through the central cable Tread Tread Worn Off carrier to an anchor bolt on one of the brake arms. Adjustment of the cable length is made after loosening the anchor bolt on the brake arm. Adjust the brake pad position so that it is parallel to the wheel rim and so that the leading edge makes first contact.
-
Page 65: Drive Train
DRIVETRAIN The drivetrain of a bicycle refers to all parts that transmit power to the rear wheel including the pedals, chain, chainwheel, crank set and freewheel. PEDALS Pedals are available in a variety of shapes, sizes and materials, and each are designed with a particular purpose in mind. Some pedals can be fitted with toe clips and straps. -
Page 66: Lubrication And Adjustment
Lubrication and Adjustment Many pedals cannot be disassembled to allow access to the internal bearings and axle. However, it is usually possible to inject a little oil onto the inside bearings, and this should be done every six months. If the pedal is the type that can be fully disassembled, then the bearings should be removed, cleaned and greased every six to twelve months. -
Page 67: Crank Set
CRANK SET The crank set refers to the bottom bracket axle and bearings, the crank arms, and chainrings. Crank Bolt Your bike may be fitted with either a one piece crank, where the crank arms and bottom bracket are a single component, or a standard crank set, where each crank arm bolts onto the bottom bracket axle using nuts or bolts. - Page 68 Lubrication and Adjustment - One Piece Cranks To adjust the free play in a one piece type bottom bracket, loosen the locknut on the left side by turning it clockwise and tighten the adjusting cone counter-clockwise using a screwdriver in the slot. When correctly adjusted, re-tighten the locknut counter- clockwise.
- Page 69 Lubrication and Adjustment - Standard Cranks Bottom Bracket To adjust the free play in a three piece type bottom bracket, loosen the lockring on the left side by turning it counter-clockwise, then turn the adjusting cup as required. Re-tighten the lockring taking care not to alter the cup adjustment.
- Page 70 Standard Crank Replacement: Screw in the removal tool. Replace the crank arm onto the axle. Tap the crank arm lightly with a mallet. Turn the screw bolt Refit the washer and tighten flange nut or bolt securely to a clockwise. torque of 27Nm.
- Page 71 CHAINS Rear Sprocket Front Chainwheel Inspection The chain must be kept clean, rust free and frequently lubricated in Pull up order to extend its life as long as possible. It will require replacement if it stretches, breaks, or causes inefficient gear shifting. Make sure that there are no stiff links, they must all move freely.
-
Page 72: Adjustment And Replacement
Adjustment and Replacement On derailleur geared bicycles the rear derailleur automatically tensions the chain. To adjust the chain on single speed freewheel, coaster hub braked or 3-speed hub geared bicycles: Loosen the rear axle nuts (and coaster brake arm clip if fitted) and move the wheel forward to loosen, or backward to tighten, in the frame. -
Page 73: Coaster Brake Hub
FREEWHEEL Inspection Like the chain, the freewheel must be kept clean and well lubricated. If the chain has become worn and needs replacing, then it is likely that the freewheel will also have become worn and should also be replaced. Take the chain off the freewheel and rotate it with your hand. -
Page 74: Derailleur Systems
DERAILLEUR SYSTEMS The derailleur system includes the font and rear derailleurs, the shift levers, and the derailleur control cables, all of which must function correctly for smooth gear shifting to occur. There are several different types of derailleur systems, but all operate using similar principles. - Page 75 Lubrication Top Gear Freewheel All the pivoting points of the front and rear derailleurs should be Pulley Adjustment lubricated with light oil at least every month. Be sure to wipe off any Screw excess oil to prevent attraction of dirt into the mechanisms. The shifting cables should be cleaned and re-coated with a thin layer of grease every six months, or whenever new cables are being installed.
- Page 76 Problem Possible Cause Remedy Gear shifts not working properly - Derailleur cables - Lubricate/tighten/replace cables sticking/stretched/damaged - Front or rear derailleur not adjusted - Adjust derailleurs properly - Indexed shifting not adjusted properly - Adjust indexing Slipping chain - Excessively worn/chipped chainring - Replace chainring, sprockets and or freewheel sprocket teeth chain...
- Page 77 Problem Possible Cause Remedy Freewheel does not rotate - Freewheel internal pawl pins are - Lubricate. If problem persists, jammed replace freewheel Brakes not working effectively - Brake blocks worn down - Replace brake blocks - Brake blocks/rim greasy, wet or dirty - Clean blocks and rim - Brake cables are binding/stretched/damaged...
- Page 78 Problem Possible Cause Remedy Steering not accurate - Wheels not aligned in frame - Align wheels correctly - Headset loose or binding - Adjust/tighten headset - Front forks or frame bent - Take bike to a bike shop for possible frame realignment Frequent punctures - Inner tube old or faulty...
- Page 79 PROBLEM POSSIBLE CAUSE REMEDY Bicycle has reduced range and/or Low batteries Charge batteries for recommended time speed Faulty batteries Replace batteries Low tire pressure Infl ate tires to recommended pressure Brakes dragging against rim Adjust brakes and/or rim Riding in hilly terrain, headwind, etc. Reduced range to be expected in these types of terrain and/or weather conditions Hub motor (Enlightened Series)
- Page 80 PROBLEM POSSIBLE CAUSE REMEDY Bicycle runs at full speed without Faulty PTS sensor (Enlightened Series) Replace PTS sensor and retest pedaling Faulty TTM sensor (Enlightened Series) Replace TTM sensor and retest Faulty throttle Replace throttle and retest Faulty controller Replace controller and retest Bicycle (RMB or STB Series) Sensor and sensor ring not aligned Realigned so gap between sensor and...
- Page 81 Li-Ion (Lithium Ion) batteries 4-6 hours With proper care and maintenance your American Cycle Company® Electric Bicycle will provide ease of use and be fun to ride. Refer to the inside front cover for points that will help you to maximize the enjoyment you get from your new hybrid electric...
Need help?
Do you have a question about the Current and is the answer not in the manual?
Questions and answers