Table of Contents
Advertisement
Advertisement
Table of Contents

Related Manuals for Ocean star ty-lp200

Summary of Contents for Ocean star ty-lp200
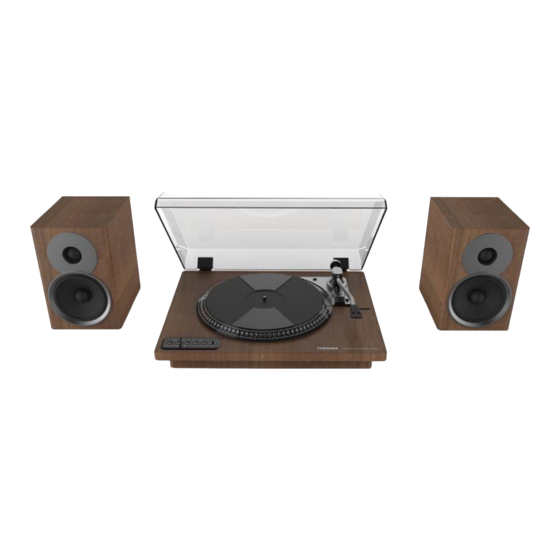
- Page 1 TY‐LP200 USB MP3 DIRECT RECORDING TURNTABLE SYSTEM Instruction Manual ...
-
Page 2: Box Contents
BOX CONTENTS Make sure that the items listed below are included in the box: Main Unit Power Adapter Instruction Manual 45 RPM Adapter READ SAFETY INSTRUCTION BOOK BEFORE USING THE PRODUCT FUNCTION KEY PANEL LED INDICATOR 1 USB 2 PHONO 3 BLUETOOTH 4 AUX 5 REC KEY 6 FUNCTION 7 I<< VR‐ Volume ‐ 8 >>I VR+ Volume + 9 PLAY/PAIR 10 STOP/REC 11 USB SOCKET ... -
Page 3: Back Panel
BACK PANEL 1SPEAKER OUT 2 LINE IN 3LINE OUT 4DC IN 15V 1600mA 5POWERON/OFF TURNTABLE PANEL 1 TURNTABLE 2 FUNCTIONKEY PANEL 3TRANSIT SCREW CROSSING 4 LIFT LEVER 5 SPEED SELECTOR (33/45/78 RPM) 6 TONE ARM LOCK 7 TONE ARM WITH STYLUS ... -
Page 4: Unpacking And Setup
UNPACKING AND SET UP 1. Carefully remove the unit from the display carton and remove all packing material from the unit. 2. Unwind the AC adapter jack and extend it to its full length. 3. Place the unit on a stable, level surface, convenient to an AC outlet and outside of any strong magnetic field. 4. Connect the plug to your AC outlet. 5. Remove the opaque white plastic stylus cover from the phonograph stylus by sliding it in the direction of the arrow. 6. During this operation pay attention to the stylus, because the stylus damage is not covered by guarantee. 7. Remove the twist‐tie that was used to secure the tone arm during the shipment. 8. Release the tone arm lock level. 9. Clip the speaker cable to the speaker output socket. POWERING ON THE UNIT 1. Connect the AC adapter to the AC power socket on the back of the unit. 2. Press the Power ON/OFF switch until the indication LED lights up. This will turn the on the unit. 3. When you have finished using the system, press Power ON/OFF button again to turn off the unit. NOTE When select a certain function, but without further instruction or signal to the unit during 30 minutes, the unit will automatically turn off. LINE IN OPERATION 1. This unit provides aLINE INjack for connecting external audio devices like MP3 players, CD players and older, non‐dock‐able iPod, so you can listen to your external device through the speakers of this system. 2. -
Page 5: Playing Records
3. Press Power ON/OFF switch to turn off the unit when you are done. Don’t forget to turn off the power on your external device as well. PLAYING RECORDS This system includes a full‐size, 3‐speed, belt‐drive turntable that plays 33, 45 and 78 RMP records. 1. To turn the system on, press I<< VR‐button to set the volume to a low level. 2. The phone mode was turn on. Please be sure that you have removed the stylus cover from the stylus and have released the tone arm lock. 3. Set the turntable speed switch to the appropriate speed: 33, 45 and 78 RPM. Set the record onto the turntable. If you are playing 45 RPM singles, place the 45 RPM adapter on the center spindle. 4. When you choose play a certain song, move the tone arm to the record. Pull the LIFT LEVER gently forward to yourself, the tone arm gently lower onto the record. The song will start playing. 5. When finish playing the song, put the LIFT LEVER gently backward to you, the tone arm gently lifter onto the record. The song will stop playing. 6. Press the I<< VR‐ Volume ‐/>>I VR+ Volume +to set the volume as desired. 7. Press Power ON/OFF switch to turn off the system when you are done. 8. During record playing, please open the dust cover. PHONOGRAPH RECORDING OPERATION 1. Place a phone record on the turntable. 2. Plug USB stick into USB socket. Press PHONO‐REC button, the REC LED indication light on. It starts recording the music from the phone record. 3. Press PHONO‐REC button again when you finish recording. 4. Press USB‐MP3 button with USB LED light is on, you can hear the recording track on the USB stick. ... -
Page 6: Bluetooth Operation
5. Press the POWER ON/OFF switch to turn off the unit when you are done. NOTE 1. The USB playing mode has memory function. When inserting the same USB device, it will resume the play the last track. 2. This unit is equipped with a USB socket that can play MP3 files stored on standard USB flash (compatible with USB version 2.0) 3. The USB flash with more than 32GB memory may not be compatible. 4. Although this product is fully compatible with USB 2.0 standard formats, a small percentage of USB flash drivers might not be readable due to those device manufacturers’ non‐compliance with the full (official) USB standards. REMOVING HE USB DRIVE Please be sure to stop playbacks and turn the unit off before removing the USB device to avoid damage to the USB and the system. BLUETOOTH OPERATION 1. Press FUNCTION button on the function panel to activate the BLUETOOTH function, and the light will be flash on. 2. Set up the Bluetooth playback device so it searches for other Bluetooth devices. 3. Select the entry TY‐LP200 from the list of found devices on your Bluetooth playback device. If the pairing is successful, you will hear a signal with ‘Di’ sound. 4. Enjoy your music from your playback device. NOTE 1. The next time you turn on the device, it will automatically connect to the last connected Bluetooth playback device. If your Bluetooth playback does not automatically reconnect to the device, you will have to re‐establish the connection to your Bluetooth device manually. 2. If you use a smart‐phone as your Bluetooth playback device, the audio file will muted when there is an incoming call. Acceptance / termination of the call is carried out via the smart phone. After finishing the call, the playback will be automatically continued. ... -
Page 7: Replacing The Stylus
2. Insert the Audio cable (not included) into the matching “LINE OUT” socket of the unit. 3. Operate the unit as usual. 4. In order to achieve best effect in sound, advise setting the unit volume into minimum level. 5. Through the speakers of external playback devices, we can hear the sound exported from the unit. REPLACING THE STYLUS It’s suggested to replace the stylus after playing more than 400 hours. Please follow below steps to change the stylus: 1. Lift the tone arm off the tone arm lock. 2. At the front end of the tone arm, place the tip of your fingernail between the red stylus holder and the back cartridge housing as shown, press down on the red stylus holder until it separates from the cartridge housing. 3. Completely remove the red stylus holder with worn stylus and discard it. 4. Place the new red stylus holder with stylus under the cartridge housing. First, press upward on the back side of the stylus holder, and then press up on the front edge of the stylus holder until it snaps into place on the cartridge housing. 5. Through the speakers of external playback devices, we can hear the sound exported from the unit. IMPORTANT! TRANSPORTING THE SYSTEM 1. To protect the turntable from the damage during transportation, a silver transit screw is located at the upper right the turntable platform. 2. Before playing, please use a screwdriver to turn the transit screw in clockwise direction (screw going down) completely to unlock the turntable. 3. To lock the turntable again for transportation, please turn screw in counter‐clockwise direction. ... -
Page 8: Care And Maintenance
CARE OF THE WOOD PANEL AND DUST COVER 1. Care of the unit is the same as any piece of the furniture. 2. When the dust cover is dusty, you may wipe it using soft, non‐abrasive dust cloth. 3. If the wood panel becomes smudged with fingerprints, you may use any good quality commercial dusting and polishing spray cleaner. 4. We recommend spraying the cleaner on the cloth, not directly on the wooden panel. CARE AND MAINTENANCE To replace the cartridge from the tone arm, please follow the procedure below. 1. Gently lift off the tone arm from the tone arm lock. 2. By using your left hand to hold the tone arm and using your right hand to hold the rear portion of the cartridge. Then push the cartridge backwards and downwards according to the direction as shown to the left to separate the cartridge from the tone arm. 3. Using either a tweezer or your fingers, carefully unplug the terminals to the new cartridge. 4. Carefully connect the terminals to the new cartridge (not included). 5. To re‐install the new cartridge to the tone arm. First please lock the front end of the new cartridge on the hook of the tone arm. 6. Press the rear s=ide of the new cartridge upwards to lock it on the tone arm. ... -
Page 9: Specifications
CAUTION Please don’t damage the stylus when installing the new cartridge. SPECIFICATIONS Operating voltage DC15V 1600mA Bluetooth Specification Version 3.0 Supported Storage USB Output Power 2 x 10W RMS Dimensions(L*W*H) 343 x 426 x 58 Specifications and functions are subject to change without notice. It is connected with continual improvement of the device. FCC Compliance Statement Changes or modifications not expressly approved by the party responsible for compliance could void the user's authority to operate the equipment. This equipment has been tested and found to comply with the limits for a Class B digital device, pursuant to Part 15 of the FCC Rules. These limits are designed to provide reasonable protection against harmful interference in a residential installation. This equipment generates uses and can radiate radio frequency energy and, if not installed and used in accordance with theinstructions, may cause harmful interference to radio communications. However, there is no guarantee that interference will not occur in a particular installation. If this equipment does cause harmful interference to radio or television reception, which can be determined by turning the equipment off and on, the user is encouraged to try to correct the interference by one or more of the following measures: ‐‐ Reorient or relocate the receiving antenna. ... - Page 10 ‐‐ Increase the separation between the equipment and receiver. ‐‐ Connect the equipment into an outlet on a circuit different from that to which the receiver is connected. ‐‐ Consult the dealer or an experienced radio/TV technician for help This device complies with part 15 of the FCC rules. Operation is subject to the following two conditions (1)this device may not cause harmful interference, and (2) this device must accept any interference received, including interference that may cause undesired operation. This device has been evaluated to meet general RF exposure requirement. The device can be used in Portable exposure condition without restriction. This device complies with Industry Canada’s licence-exempt RSSs. Operation is subject to the following two conditions: (1) This device may not cause interference; and (2) This device must accept any interference, including interference that may cause undesired operation of the device.
Need help?
Do you have a question about the ty-lp200 and is the answer not in the manual?
Questions and answers