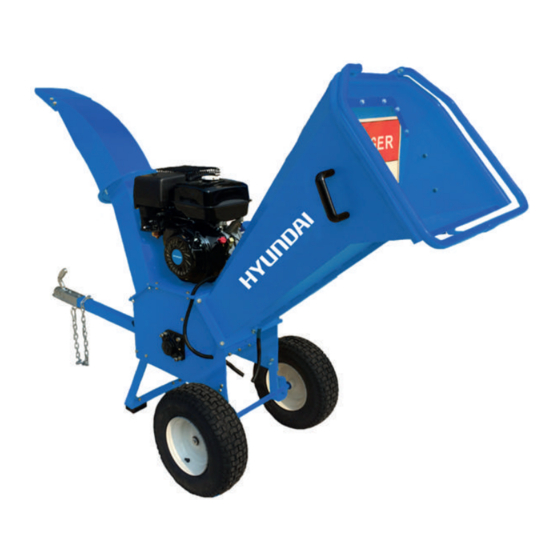
Hyundai HYCH7070-2 User Manual

Hyundai HYCH7070-2 User Manual

Petrol wood chipper

Advertisement

Petrol Wood Chipper
HYCH7070[E]-2
HYCH1500E-2
User manual
FOR YOUR SAFETY
FOR YOUR SAFETY
You must read and understand
You must Read and understand
this manual before use.
Keep this manual for future
reference.
reference.
1
Licenced by Hyundai Corporation, Korea

Advertisement

Table of Contents
loading

Summary of Contents for Hyundai HYCH7070-2

  • Page 1 FOR YOUR SAFETY FOR YOUR SAFETY You must read and understand You must Read and understand this manual before use. this manual before use. Keep this manual for future Keep this manual for future reference. reference. Licenced by Hyundai Corporation, Korea...
  • Page 2: Table Of Contents

    INDEX CONTENTS PAGE NO.S 3 - 9 SAFETY 10 - 15 ASSEMBLY 16 - 17 QUICK START 18 - 22 STARTING PROCEDURE STOPPING PROCEDURE 24 - 30 USING THE MACHINE 31 - 37 MAINTENANCE 38 - 39 TROUBLESHOOTING SPECIFICATION DECLARATIONS OF CONFORMITY RECYCLING AND PRODUCT DISPOSAL CONTACT DETAILS WARRANTY...
  • Page 3: Safety

    SAFETY General safety notes. 1.01 1.02 The operator of the machine is responsible for, and has a duty of care in making sure that the machine is operated safely and in accordance with the instructions in this user manual. Keep the manual safe and pass it on if the machine is loaned or sold to another user.
  • Page 4 Carbon monoxide (where applicable). 1.10 1.11 Carbon monoxide is a colourless and odourless gas. Inhaling this gas can cause death as well as serious long term health problems such as brain damage. 1.12 The symptoms of carbon monoxide poisoning can include but are not limited to the following;...
  • Page 5 1.30 Fueling/De-fueling (where applicable). CAUTION ALL FUELS ARE FLAMMABLE 1.31 ALWAYS fuel and defuel in a well-ventilated area outside of buildings. 1.32 ALWAYS wear correct, suitable and fit for purpose Personal Protective Equipment (PPE), suggested items are but not limited to safety gloves and overalls. 1.33 When fueling/de-fueling ALWAYS avoid inhaling fumes.
  • Page 6 1.50 Batteries (where present). 1.51 Batteries present a risk if they become damaged by the possible leaking of electrolyte. This electrolyte is an acid and can cause serious burn injuries. Care should be taken when working on or near them. NOTE the electrolyte may be in liquid or gel form.
  • Page 7 1.70 Noise (where applicable). 1.71 The operating noise of the machine can damage your hearing. Wear hearing protection such as earplugs or ear defenders to protect your hearing. Long- term and regular users are advised to have hearing checked regularly. Be especially vigilant and cautious when wearing hearing protection because your ability to hear alarm warnings will be reduced.
  • Page 8 Safety notes. 1.B1 The user of this machine MUST be over 18 years of age. 1.B2 The machine should be positioned on a firm and level surface. 1.B3 The user MUST wear safety gloves, ear-protection and safety goggles - not supplied with machine.
  • Page 9 This series of highly efficient wood chippers have been designed with safety protection, reliability and long operating life in mind. Main body parts are all made from high quality steel, blades are made from high speed steel HSS, sharp cutting edges from hardened steel for durability and effi- ciency.
  • Page 10: Assembly

    Assembly. ASSEMBLY During assembly, to avoid injury, do not touch the rotary cutting wheel or blades. As the machine is heavy, it is recommended that the assembly is a two person operation. Illustration 1. Frame assembly HYCH1500E-2 Part No. Description Main Wheel Axle...
  • Page 11 Illustration 2. Feed hopper and Discharge chute assembly HYCH1500E-2 Part No. Description Safety Lever Feed Hopper Lower section Upper section discharge chute discharge chute Installation procedure: Fix safety lever (8) with bolts and shaft sleeve into the corresponding position on feed hopper (9), ensure the long shaft passes through the duct and spring on the lower side of the feed hopper.
  • Page 12 Illustration 3. Installation of 12v Battery and Toolkit HYCH1500E-2 Part No. Description Battery Cover Battery tray Toolkit Toolkit strap Installation procedure: Using the bolts supplied, fix the battery tray (13) to the corresponding place on the main body (1), and connect the battery terminals with starter motor positive and negative cables, taking care not to short the positive to earth, and then place the battery on the battery tray (13), place the battery cover over the battery and secure with the bolts provided.
  • Page 13 Illustration 4. Frame assembly HYCH7070[E]-2 Part No. Description Main Body Wheel Axle bracket Front Leg Hand bar Installation procedure: Lay the main body (1) on a support or platform that is about 30cm above the ground, and leave some space at the sides of the main body for the installation of the wheels (2) and front leg (4), as shown in the picture above, fix the wheels (2) with suitable fasteners to axle bracket (3), then fix the finished structure to main body (1).
  • Page 14 Illustration 5 Hopper and Discharge port Installation HYCH7070[E]-2 Part No. Description Safety lever Feed hopper Lower section Upper section safety cut-out discharge discharge switch chute chute Installation procedure: Fix safety lever (8) with pivot bolts and shaft sleeve into the corresponding position on feed hopper (9), ensure the long shaft passes through the duct and spring on the lower side of the feed hopper, adjust the spring to correct height.
  • Page 15 Illustration 6. Installation of 12v Battery and the Toolkit HYCH7070[E]-2 N.B. HYCH7070-2 does not have electric start, so no battery to be fitted* Part No. Description Battery cover Battery holder Toolkit Safety switch Electric start switch* Installment steps: Fix the battery tray (13) to the corresponding place on the main body (1) with the bolts provided...
  • Page 16: Quick Start

    You can also check out our online video at www.youtube.com/hyundaipowerequip.co.uk 3.01 This guide is meant to serve as a quick reference for operating your Hyundai Wood chipper it is for convenience and the user should read the safety section first.
  • Page 17 Adding oil. 3.03 Unscrew the oil filler cap (dipstick) and fill with 1100ml for 420cc engine and 600mb for 210cc engine of SAE15W40 oil fill to the top thread of the filler neck. N.B. There may be residual oil in crankcase so be careful not to overfill when filling with oil. If you overfill with oil just pour excess oil into a suitable container.
  • Page 18: Starting Procedure

    STARTING PROCEDURE Before starting make sure machine is clear of materials and all non-essential persons. NOTE: The machine is shipped without oil, therefore you MUST fill the engine with oil before starting the engine. Failure to do so will result in engine damage which will not be covered by warranty.
  • Page 19 4.10 (cont) For COLD start move choke lever left to START position (LEFT) Move the fuel tap right to the ON position (RIGHT). Move the throttle lever right to the MIDDLE position. N.B. For a WARM/HOT start you will not need to use full choke. If the engine is warm, use half choke.
  • Page 20 4.01 (cont) Once the engine has been started and allowed to warm up you can move the throttle lever to left accelerate the engine speed. Electric start procedure (Where fitted) 4.02 Set the ignition key switch on the key start module to the ON position.
  • Page 21 4.02 (Cont) For COLD start move choke lever left to START position. Move the fuel tap right to the ON position (RIGHT). Move the throttle lever right to the MIDDLE position. N.B. For a WARM/HOT start you will not need to use full choke. If the engine is warm, use half choke.
  • Page 22 4.02 (cont) Once the engine has been started, release key to run position. When engine has warmed up you can move the throttle lever to left to run the engine at FAST speed.
  • Page 23: Stopping Procedure

    STOPPING PROCEDURE 5.01 Before stopping the machine allow the engine to cool down for a few minutes, by allowing it to run with throttle in slow position. 5.02 You MUST allow the cutting head to come to a full stop and switch engine OFF before carrying out any maintenance on the machine.
  • Page 24: Using The Machine

    USING THE MACHINE WARNING You MUST STOP using the machine if any of the following occur. • The engine speed changes with no control. • In case of misfire or unusual noise. • In case of high vibration. • If bels are slipping. •...
  • Page 25 DANGER 6.70 This machine has two rotating cutting knives capable of amputating hands and feet and throwing objects. AT ALL TIMES you MUST keep hands and feet clear of all openings while machine is running. Failure to observe these safety instructions could result in serious injury or death.
  • Page 26 Work area. 6.80 6.81 Thoroughly inspect the area to be worked, keep the working area clean and free of debris to prevent tripping. Operate on flat level ground. 6.82 NEVER place any part of your body where it would be in danger if movement should occur during assembly, installation, operation, maintenance, repairing or moving.
  • Page 27 Feed only clean materials into the machine. Foreign matter like soil, sand, grit, stones, pieces of metal, etc. will damage the sharp edge of the cutting knives. Root balls and dead wood will also blunt the blades quickly. Avoid feeding any flax or roots into the machine as these stringy materials can wrap around the rotor shaft and work their way into the bearings.
  • Page 28 Operating the machine. 6.90 6.91 After engine warms up, move the throttle lever left to the FAST position to accelerate engine. 6.92 The wood chipper can process a wide variety of dry or green organic materials such as branch, pruning, stalks, vines, leaves, roots, and vegetable matter. The maximum capacity is 100 mm for HYCH1500E-2 or 70mm for HYCH7070[E]-2 diameter branches, depending on the type and hardness of wood.
  • Page 29 6.94 It is always advisable to process freshly cut materials, as wooden branches get very hard and springy when dried out and become more awkward to handle by making the knives blunt more quickly. 6.95 While operating the machine keep a wooden stick handy, approximately 30mm diameter x 600mm long.
  • Page 30 Blockage removal - To remove blockages DO NOT under any circumstances use your hands. STOP and disable the machine then undo chutes. Remove the main shaft cover by undoing the two cover securing bolts, using a spanner (or adjustable wrench as shown) rotate blades in both directions until machine if free of materials which have become stuck.
  • Page 31: Maintenance

    MAINTENANCE WARNING Always stop the engine and unplug the spark plug before doing any repairs or maintenance. Never touch the rotating blade. Check and maintain fuel level regularly, and check engine oil daily. Frequently check the Wood chipper and make sure that all deposits are removed from the feed hopper and discharge chute.
  • Page 32 7.10 Air filter. CAUTION Never let the engine run without the air filter being fitted. A dirty air filter element affects the engine performance, increases fuel consumption and makes it difficult to start. If you notice a loss of engine power, check the air filter. You MUST make sure that the housing is free of dust and debris DO NOT allow any dust or debris to enter the carburetor.
  • Page 33 7.20 Spark plug. WARNING The spark plug MUST be fully tightened otherwise the engine will overheat causing damage. Always complete the following steps after the engine has been turned off and allowed to cool down. 7.21 To make sure the engine runs correctly a spark plug gap of 0.6 - 0.7 mm must be maintained and the spark plug must be free of carbon deposits.
  • Page 34 7.30 Engine oil. CAUTION Risk of burn injury from HOT engine and HOT oil – allow engine and engine oil to cool down before topping up or replacing oil. 7.31 Drain the used oil while the engine is warm. Warm oil drains quickly. 7.32 Remove the filler cap/dipstick and the drain plug, then place a suitable container under the oil drain plug and tilt the machine to catch the used oil.
  • Page 35 7.40 Battery maintenance. 7.41 The battery is maintenance free and as such requires no special treatment other than keeping it clean. If the machine has not been used for a while it may run need discharging 7.42 The battery can be charged by starting the machine manually. Once running the battery will charge.
  • Page 36 7.5. Storage. CAUTION If you do not follow these steps, deposits may arise in the carburetor. This will cause starting difficulties and may cause permanent damage. 7.51 Perform all the general maintenance that the maintenance section of your ‘User Manual’ is recommended. 7.52 Clean the outside of the machine.
  • Page 37 7.70 Belt tensioning 7.71 Ensure belts are kept correctly tensioned. Tighten the adjusting nut arrowed in image to keep belts tight. Do not over-tighten. 7.72 Grease main shaft bearings every 50 hours use. There is a grease nipple on each bearing, see images below:...
  • Page 38: Troubleshooting

    TROUBLESHOOTING CAUTION If troubleshooting does not solve the problem, contact your dealer or the manufacturer directly. Use only original parts approved by the manufacturer, otherwise a hazard risk arises. Common faults Elimination method Read the engine users’ manual, check the fuel level, ensure the fuel is fresh, ON-OFF switch is The engine will not start ON, lubrication oil level and the emergency stop...
  • Page 39 Issue Possible causes Possible corrective actions STARTING DIFFICULTY Poor fuel supply. Poor fuel supply. NORMAL SPARK 1. No fuel in fuel system, fuel tap 1. Fill with fuel – open fuel tap. ISSUE WITH FUEL SYSTEM closed. 2. Clear blocked air vent. 2.
  • Page 40: Specification

    SPECIFICATION MODEL HYCH7070[E]-2 HYCH1500E-2 Engine type 4 stroke OHV single cylinder 4 stroke OHV single cylinder Engine size – cc Oil capacity – ml 1100 Noise level – dB (A) Power @ 3600 rpm – hp 15.0 Start methods Recoil/(optional)Electric Recoil/Electric Battery - V Fuel type...
  • Page 41: Declarations Of Conformity

    10. DECLARATIONS OF CONFORMITY 10.10 Genpower Ltd confirms that these Hyundai products conform to the following CE Directives; 2006/42/EC Machinery Directive 2004/108/EC EMC Directive 2000/14/EC, Amended by 2005/88/EC Noise Emissions Directive 97/68/EC_2010/26/EC NRMM Emissions Directive 11. RECYCLING & PRODUCT DISPOSAL 11.10...
  • Page 42: Contact Details

    12. CONTACT DETAILS 12.10 POSTAL ADDRESS Genpower Ltd, Isaac Way, London Road, Pembroke Dock, Pembrokeshire, SA72 4RW. UK. 12.20 TELEPHONE +44 (0) 1646 687880 12.30 +44 (0) 1646 686198 12.40 TECHNICAL E-MAIL service@genpower.co.uk 12.50 WEBSITE www.hyundaipowerequipment.co.uk 13. MANUAL UPDATES 13.10 Our manuals are constantly being reviewed and updated.
  • Page 43 NOTES...

This manual is also suitable for:

Hych7070e-2Hych1500e-2

Table of Contents