Table of Contents
Advertisement
Advertisement
Table of Contents

Related Manuals for GVA GVA4KG

Summary of Contents for GVA GVA4KG
- Page 1 4KG Tumble Dryer GVA4KG Instruction Manual...
- Page 2 Important Safety Instructions When using electrical appliances, in order to reduce the risk of fire, electric shock, and/or injury to persons, basic safety precautions should always be followed. Read all instructions carefully, even if you are quite familiar with the appliance. - The appliance is not intended for use by persons (including children) with reduced physical, sensory or mental capabilities, or lack of experience and knowledge, unless they have been given supervision or instruction concerning the use of the appliance by a person who is...
- Page 3 Important Safety Instructions - If the supply cord is damaged, it must be replaced by service agent or similarly qualified persons in order to avoid a hazard. - Avoid fabrics that contain vegetable or cooking oil or have been contaminated by hair care products be placed in a tumble dryer they should be washed in hot water with extra detergent, this will reduce, but not eliminate the hazard.
- Page 4 Important Safety Instructions WARNING: Never stop a tumble dryer before the end of the drying cycle unless all items Important Safety Instructions quickly removed and spread out so that the heat is dissipated. CAUTION: If this appliance is supplied from a cord extension set or an electrical portable outlet device, the cord extension set or electrical portable outlet device must be positioned so that it is not subject to splashing or ingress of moisture.
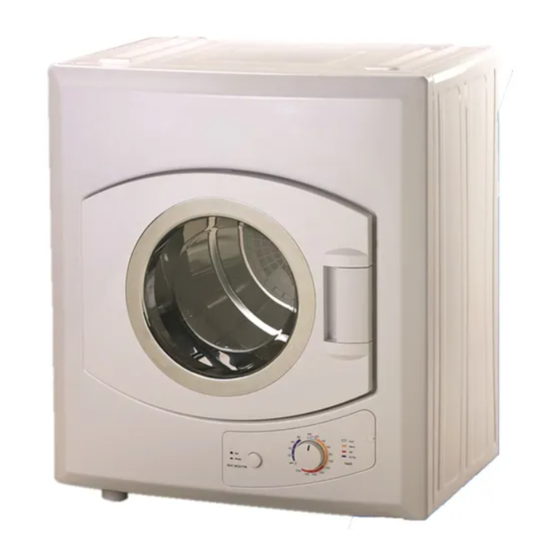
- Page 5 Parts...
- Page 6 Operating Instructions Electrical Requirements The unit is required to be plugged into a three pin socket that is reliably grounded. The power supply must be 240V. Plug the power cord into the socket. Loading the dryer It is recommended that items are placed into the dryer one at a time. This ensures they are not tangled which results in uneven drying.
- Page 7 Operating Instruction Drying time reference table Drying times can be affected by many factors, such as material, bulkiness, how full the dryer is, etc. The above list is only a guide.
- Page 8 Control Panel Functions Heat Selector button Select ‘Strong Dry’ for items that are particularly bulky or large quantities. Select ‘Soft Dry’ for delicate items such as silk, nylon, linen, etc. Drying Program Selector There are several drying combinations available: Cool, Anti- wrinkle, Warm, Hot and Air dry.
- Page 9 Operating Precautions - Delicate items should be placed into a nylon net bag prior to drying. It is not recommended to dry under wire bras in this suit. - Ensure that foreign objects do not find their way into the dryer. All pockets should be emptied, buttons, buckles and zips fastened.
- Page 10 Operating Precautions - Items that have been previously cleaned in, washed in, soaked in or spotted with petrol/ gasoline, dry-cleaning solvents or other flammable or explosive substances should not be placed in tumble dryer. - Highly flammable substances commonly used in domestic environments include acetone, denatured alcohol, petrol/gasoline, kerosene, spot removers (some brands), turpentine, waxes and wax removers.
- Page 11 Installation Instructions - Exhaust air must not be discharged into a flue which is used for exhausting fumes from appliances burning gas or other fuels. - If the dryer is rack mounted. A secure bracket is required to ensure stability and prevent vibration.
- Page 12 Installation Instructions Wall Mounting Instructions Determine dryer position on the wall and mark the required bracket position. This dryer is not suitable to be directly placed on top of a washing machine. A minimum 50mm is needed between the top of the dryer and the ceiling for ease of installation. If mounting above a washing machine, allow sufficient room to open the lid of the washer.
- Page 13 Installation Instructions...
- Page 14 Maintenance Maintenance Cleaning the lint filter Please unplug the power cord prior for any cleaning. The lint filter must be in place whenever drying. It must be cleaned before each use. Removing the filters Remove by pulling outwards with fingers, inserted into the four holes around the exhaust vent shroud.
- Page 15 Maintenance NOTE: Regularly clean the lint filter. Maintenance Recycling At the end of its working life, do not throw this appliance out with your household rubbish. Observe any local regulations regarding the disposal of electrical consumer goods and dispose of it appropriately for recycling. Contact your local authorities for advice on recycling facilities in your area.
- Page 16 FAQs FAQs PROBLEM POSSIBLE CAUSE WHAT TO DO Timer knob does not • Is the power cord inserted firmly? • Insert the power cord firmly. turn Drum does not turn • Is the door closed? • Close the door. • Is the power cord inserted? • Insert the power cord firmly.
Need help?
Do you have a question about the GVA4KG and is the answer not in the manual?
Questions and answers