Table of Contents

Summary of Contents for Sparx Skate Sharpener
- Page 1 ATTENTION Please review this Operating Manual Addendum and the Operating Manual. You do not need to read Sections 1, 4, and 6 of the Operating Manual as this Addendum supersedes those sections. OPERATING MANUAL ADDENDUM 11058B.2 - 2/15/2017...
-
Page 2: Safety Precautions
1. Before operating the Sparx™ Skate Sharpener, you should 16. Store the Sparx™ Skate Sharpener in a dry place, out of the reach familiarize yourself with the product and read and understand all of children. - Page 3 FCC NOTICE (FOR U.S. CUSTOMERS) This device complies with Part 15 of the FCC Rules: Operation is subject to the following conditions: 1. This device may not cause harmful interference, and 2. This device must accept any interference received, Including interference that may cause undesired operation Changes and Modifications not expressly approved by Velasa Sports, Inc.
-
Page 4: Consignes De Sécurité
19. L’affûteuse ne comporte aucune pièce réparable par l’utilisateur. l’utilisation de l’affûteuse par un adulte compétent. Elle ne doit être réparée que par un technicien professionnel Sparx 6. Les enfants doivent être surveillés pour s’assurer qu’ils ne jouent Hockey, exclusivement avec des pièces de rechange d’origine. -
Page 5: Conformité Aux Normes D'industrie Canada
CONFORMITÉ AUX NORMES D’INDUSTRIE CANADA Le présent appareil est conforme aux CNR d’Industrie Canada applicables aux appareils radio exempts de licence. L’exploitation est autorisée aux deux conditions suivantes : (1) l’appareil ne doit pas produire de brouillage, et (2) l’utilisateur de l’appareil doit accepter tout brouillage radioélectrique subi, même si le brouillage est susceptible d’en compromettre le fonctionnement. -
Page 6: Operation
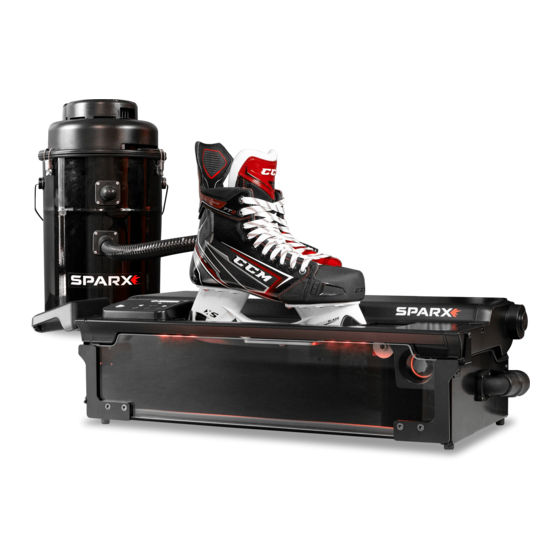
OPERATION LOADING A SKATE *For loading goalie skates and youth skates, see the end of this section. To watch the How-To video, visit sparxhockey.com/loadskate. LOAD THE SKATE Press and hold down the Clamp Lever to open the Skate Clamp. With the skate toe pointing right and the laces tucked into the skate, set the skate into the Skate Clamp slot letting the plastic... - Page 7 ADJUSTING THE GRINDING INITIATE MOVE MODE RING HEIGHT Press the Move Button on the Keypad. This will set the Grinding Ring into Move Mode and allow you to control its movement. To watch the How-To video, visit sparxhockey.com/ringheight. INSPECT THE CONTACT POINT Left Right Buttons Grinding...
- Page 8 Grinding Ring out and back over the skate blade once, it is called a cycle. The Sparx™ Sharpener comes set automatically to a standard four cycles with all standard Radius Ring™ and FIRE Ring™ Grinding Rings. We recommend trying four cycles to start and moving higher or lower as needed.
-
Page 9: Additional Cycles
SHARPENING SKATES UNLOADING A SKATE To watch the How-To video, visit sparxhockey.com/sharpening. To watch the How-To video, visit sparxhockey.com/unloadskate. DISENGAGE PROTECTIVE SLOT COVERS Once you have loaded the skate, closed the Protective Slot Covers, and adjusted the height of the Grinding Ring, you are ready to begin Move both... -
Page 10: Powering Off
EDGE DEBURRING REPEAT ON THE OPPOSITE SIDE Turn the skate over. Repeat step 3 on the opposite edge of the blade. To watch the How-To video, visit sparxhockey.com/deburr. POWERING OFF We recommend using protective gloves when deburring the skate blade. LOCATE THE POWER INPUT PORT DEBURR THE BLADE WITH THE STONE On the back of the sharpener, locate the... - Page 11 YOUTH SKATES INSTALL THE GOALIE RISERS Align the Anchor Pins of the Goalie Risers to the Anchor Slots of the Skate Clamp. Once aligned, press down firmly until you To watch the How-To video, visit sparxhockey.com/loadyouth. feel the Goalie Risers snap into place.
- Page 12 SHARPENING NEW STEEL Below is how an installed Youth Skate Adapter will look. To watch the How-To video, visit sparxhockey.com/newsteel. Before loading new steel, try taking a dark colored marker and running it down the bottom surface of the skate blade. To ensure you have sharpened the entire blade, inspect the blade after running the cycles and if the sharpening is complete, all of the marker on the skating surface will be removed.
-
Page 13: Maintenance
MAINTENANCE REPLACE THE DUST TRAY Slide the Dust Tray back into the machine. Close the There are no user-repairable parts in the Sparx™ Glass Door. Sharpener. Refer to “Exclusions” in the Warranty section for more information. Maintenance of the Sparx™ Sharpener is limited to the procedures outlined in this section. - Page 14 Open the Glass Door and remove the Dust Tray. To empty Dust Tray—wipe completely clean with a damp cloth (water). Do not use any solvents or cleaning chemicals in and around the Skate Sharpener. INSTALL NEW AIR FILTER Insert the new Air Filter into the filter housing. The Air Filter label will indicate installation direction which side to install up.
- Page 15 Clamp Lever (A) off of the Lever Dock. When setting up the Sparx Sharpener after travel, wipe down the Grinding Ring Shaft’s face and threaded arbor to remove any unwanted steel shavings that may have gathered during transit. This will ensure a proper fit between the Grinding Ring...
- Page 16 OPERATING MANUAL...
- Page 17 FCC Notice (for U.S. Customers) Industry Canada Compliance SÉCURITÉ Consignes de sécurité Conformité aux normes d’Industrie Canada INTRODUCTION Technical Specifications Getting to Know Your Sparx Sharpener What’s In the Box? Grinding Ring Life Indicator Behavior SETUP Assembling the Sharpener Alignment OPERATION...
- Page 18 1. Before operating the Sparx™ Skate Sharpener, you should 16. Store the Sparx™ Skate Sharpener in a dry place, out of the reach familiarize yourself with the product and read and understand all of children.
-
Page 19: Fcc Notice
19. L’affûteuse ne comporte aucune pièce réparable par l’utilisateur. manque d’expérience et de connaissances, à moins qu’elles Elle ne doit être réparée que par un technicien professionnel Sparx soient surveillées ou qu’elles aient reçu une bonne formation sur Hockey, exclusivement avec des pièces de rechange d’origine. -
Page 20: Technical Specifications
CONfORMITÉ AUX NORMES D’INDUSTRIE CANADA Le présent appareil est conforme aux CNR d’Industrie Canada applicables aux appareils radio exempts de licence. L’exploitation est autorisée aux deux conditions suivantes : (1) l’appareil ne doit INTRODUCTION pas produire de brouillage, et (2) l’utilisateur de l’appareil doit accepter tout brouillage radioélectrique subi, même si le brouillage est susceptible d’en compromettre le fonctionnement. - Page 21 GETTING TO KNOW yOUR SPARX SHARPENER WHAT’S IN THE BOX? PART DESCRIPTION Keypad Clamp Lever Protective Slot Covers PART DESCRIPTION Dust Tray Travel Guard Glass Door Power Cord Lever Dock Goalie Risers (2) Carriage Leather Strop Alignment Adjustment Knob Youth Skate Adapters (2)
- Page 22 GRINDING RING LIfE INDICATOR BEHAVIOR In normal operation, each part of the Grinding Ring Life Indicator corresponds to 10% of the Grinding Ring’s life. These parts are the one circle and the nine bars to the right (10 parts total or 100%). The circle represents the final 10% of Grinding Ring life and each bar to the right is an additional 10%.
- Page 23 SETUP REMOVE THE TRAVEL GUARD Open the Skate Clamp by pressing and holding down the Clamp Lever. Remove the Travel Guard. Release the Clamp Lever. Do not discard the Travel Guard. This guard is used to keep the components of the sharpener safe during travel.
- Page 24 Optical Alignment Tool The Alignment process is required when you first receive locate the indicator tab (A) of the Optical Alignment Tool your Sparx™ Sharpener and also after every time the the groove (B) on the Alignment Ring. sharpener is moved and/or travels.
-
Page 25: Operation
OPERATION LOADING A SKATE *For loading goalie skates and youth skates, see the end of this section. To watch the How-To video, visit sparxhockey.com/loadskate. LOAD THE SKATE Press and hold down the Clamp Lever to open the Skate Clamp. With the skate toe pointing left and the laces tucked into the skate, set the skate into the Skate Clamp slot letting the plastic... - Page 26 In the graphic below you will see an The Sparx™ Sharpener comes set automatically to a standard For every pair of skates sharpened, you must assess example of a contact point that is too high (B) and too low (C).
- Page 27 SHARPENING SKATES UNLOADING A SKATE EDGE DEBURRING REPEAT ON THE OPPOSITE SIDE Turn the skate over. Repeat step 3 on the opposite edge of the blade. To watch the How-To video, visit sparxhockey.com/sharpening. To watch the How-To video, visit sparxhockey.com/unloadskate. To watch the How-To video, visit sparxhockey.com/deburr.
- Page 28 yOUTH SKATES SHARPENING NEW STEEL INSTALL THE GOALIE RISERS Below is how an installed Youth Skate Adapter will look. Align the Anchor Pins of the Goalie Risers to the Anchor Slots of the Skate Clamp. Once aligned, press down firmly until you To watch the How-To video, visit sparxhockey.com/loadyouth.
-
Page 29: Troubleshooting
TROUBLESHOOTING ERROR TyPES There are two types of errors encountered by the Sparx™ Sharpener that can interrupt operation. These types are: Function Entry errors and System Stop errors. Each error type is described in the table below along with information about how the user is informed of the error. -
Page 30: Error Codes
Run 2 - 4 - 6 selected sharpening operation. sharpener with the new value or lower. In the event that an error cannot be resolved, please contact customer support at Sparx Hockey. 2 - 4 - 10 Grinding Ring empty. -
Page 31: Maintenance
MAINTENANCE CHANGING THE AIR fILTER There are no user-repairable parts in the Sparx™ To watch the How-To video, visit sparxhockey.com/airfilter. Sharpener. Refer to “Exclusions” in the Warranty section for more information. Maintenance of the Sparx™ Air Filter will last 200 sharpenings. After that, we can no longer Sharpener is limited to the procedures outlined ensure that your filtering quality will remain at our high standards. -
Page 32: Warranty
(“RMA”). At your risk Your use of Sparx™ Products, the Sparx™ Hockey website, and other and expense, you must deliver the nonconforming Product (with Sparx™ Hockey services are governed by our Terms of Service, prominent indication of the RMA) to Velasa Sports or its designated which are available at https://www.sparxhockey.com/pages/terms-... - Page 33 VELASA SPORTS, INC. 30 SUDBURY RD. ACTON, MA 01720 USA COPYRIGHT © 2016 VELASA SPORTS INC. ALL RIGHTS RESERVED 11058B - 06.6.2016...
Need help?
Do you have a question about the Skate Sharpener and is the answer not in the manual?
Questions and answers