NEUTRIK XIRIUM PRO User Manual
Applies to xirium pro european devices
Hide thumbs
Also See for XIRIUM PRO:
- Mounting manual (14 pages) ,
- Quick start manual (2 pages) ,
- User manual (56 pages)
Table of Contents
Advertisement
Quick Links
Advertisement
Table of Contents

Related Manuals for NEUTRIK XIRIUM PRO


Summary of Contents for NEUTRIK XIRIUM PRO
- Page 1 User Manual Applies to XIRIUM PRO European devices...
- Page 2 This user manual is protected by copyright. The user manual must not be duplicated, reproduced, microfilmed or translated, or converted to be saved and processed in EDP systems, neither as excerpts nor in full, without the express written authorization of Neutrik. Copyright by: © Neutrik® AG...
-
Page 3: Table Of Contents
5.7.1 System Reset ..........41 tion .................7 5.7.2 Advanced Mode ...........42 2.3.2 Declaration of conformity .......7 5.8 Setting up and mounting the XIRIUM PRO 2.4 Important safety instructions .........8 system ..............43 2.5 Proper use ............9 5.8.1 Positioning the devices ........43 2.6 Foreseeable improper use ........9... -
Page 4: About This Document
Extreme Ruggedized One Channel mode for a secure connection in extreme situations. Peripheral devices All devices which can be connected with each other via the XIRIUM PRO devices: audio sources (transmitters) and audio sinks (receivers) Audio source All devices which emit a signal Audio sink All devices which receive the audio signals, e.g., loudspeakers, audio... -
Page 5: Explanation Of Symbols
This user manual is directed to sound engineers and professional personnel who have detailed expe- rience in the sound and event technology. Personnel who are in training must only work with this device under the supervision of experienced persons. User Manual – XIRIUM PRO BDA 494E 2017/07 ®... -
Page 6: Safety
This type of warning points out a situation which could result in damage to the device and its components. If this warning is not heeded, property damage may result. 2.2 Warning symbols Symbol Warning General warning Warning of hearing impairment Danger of electric shock User Manual – XIRIUM PRO BDA 494E 2017/07 ®... -
Page 7: Important Regulatory Notes
This transmitter must not be co-located or operating in conjunction with any other antenna or trans- mitter. 2.3.2 Declaration of conformity Hereby, Neutrik AG declares that this XIRIUM PRO device is in compliance with the essential require- ments and other relevant provisions of Directive 1999/5/EC. The Declaration of Conformity may be consulted at www.neutrik.com/en/approvals-and-certificates. -
Page 8: Important Safety Instructions
Danger of injury or electric shock and property damage due to improper repair! The XIRIUM PRO devices do not contain any parts which you can repair yourself. Opening or re- pairing the devices on your own can lead to severe damage to the devices and electrical shock or injuries to the operator. -
Page 9: Proper Use
Ensure that the ambient conditions specified for XIRIUM PRO are observed during operation. Do not use the XIRIUM PRO devices if they are not functioning properly, have fallen or been damaged, have become wet or if parts of the devices have been immersed in water. -
Page 10: Components And Accessories
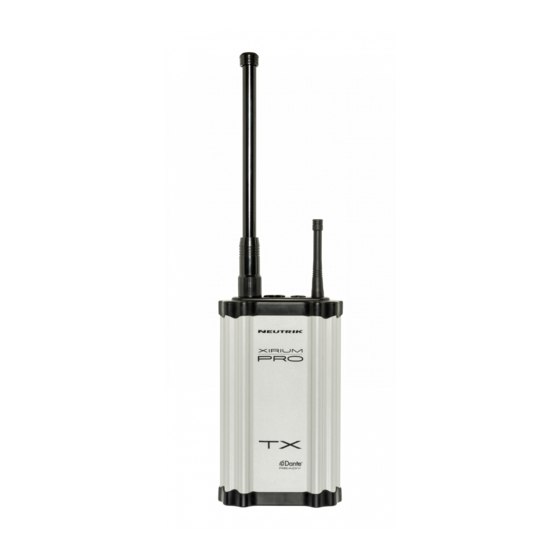
Components and accessories 3 Components and accessories 3.1 XIRIUM PRO components The components and accessories are ordered individually. 14 15 16 User Manual – XIRIUM PRO BDA 494E 2017/07 ®... - Page 11 Components and accessories Pos. Description Article no. TX base station* NXP2TX-E (TX base station, XIRIUM PRO USB data cable, Manfrotto universal mounting clamp, 5 GHz antenna, 2.4 GHz antenna) RX base station* NXP2RX-E (RX base station, XIRIUM PRO USB data cable, Manfrotto universal mounting clamp, 2.4 GHz antenna)
-
Page 12: Description Of Product
Description of product 4 Description of product ON/OFF LINK push 1s XROC push 4s 4.1 XIRIUM PRO base station PUSH PUSH LIECHTENSTEIN IN 1 (XROC) IN 2 ON/OFF LINK push 1s ON/OFF LINK push 1s XROC push 4s DELAY push 4s... -
Page 13: Modules
OUT 2 interface between base station and module (different connections depending on module) Module with integrated battery powerCON TRUE1 chassis LIECHTENSTEIN LIECHTENSTEIN for XIRIUM PRO power cable LIECHTENSTEIN IN 1 (XROC) IN 2 Locking bolt OUT 2 LIECHTENSTEIN LED charging indicator •... -
Page 14: Xirium Pro App
Description of product 4.3 XIRIUM PRO app The XIRIUM PRO app enables convenient operation and control of the devices from a tablet. 4.3.1 Overview of operation elements Pos. Description Page title Operation and display area Navigation bar Navigation bar Pos. Description Pos. - Page 15 Delay indicator: Indicates in the Links / Overview window if the delay on a RX is switched on. RF attenuation indicator: Indicates in the Links / Overview window if the RF attenuation on a RX is switched on. User Manual – XIRIUM PRO BDA 494E 2017/07 ®...
-
Page 16: Links/Overview Page
The display is highlighted in red when there is a • Displays all available devices which have not yet poor connection to the TX, or none at all. been assigned to a transmission path. Tapping OPEN/CLOSE opens/closes the display. User Manual – XIRIUM PRO BDA 494E 2017/07 ®... -
Page 17: Edit Page
10 seconds. Edit Device Opens the Edit Device page so all properties of the device can be edited. Reset Device Reset device properties to factory state 4.3.3 Edit page Edit TX User Manual – XIRIUM PRO BDA 494E 2017/07 ®... - Page 18 XROC: Indicates whether the XROC mode is ON/OFF. In standalone mode the Allow link button is shown on the Edit page. Tapping the Allow link button starts the connection process of the TX. User Manual – XIRIUM PRO BDA 494E 2017/07 ®...
- Page 19 In standalone mode the Link button is shown on page Edit. Tapping the Link button links this RX to the TX. User Manual – XIRIUM PRO BDA 494E 2017/07 ®...
-
Page 20: Settings Page
Tap the button to activate / deactivate Advanded Tapping this button opens a window with reset Mode (page 40) options. Enter service code button Opens entry field for service code (only for service personnel) User Manual – XIRIUM PRO BDA 494E 2017/07 ®... -
Page 21: Help Page
Description of product 4.3.5 Help page Pos. Description Help Useful information for a proper XIRIUM PRO setup. Information about the software Software Version: Version of the installed app. Version Date: Date app was issued User Manual – XIRIUM PRO BDA 494E 2017/07... -
Page 22: Getting Started
With just 2 devices, the transmitter (TX) and the receiver (RX), an audio signal can be transmitted quickly and cost-efficiently. The XIRIUM PRO system transfers audio signals (LINE level) as well as digital audio signals (AES or DANTE) in studio quality with an extremely low latency time. -
Page 23: App
Description of product 4.4.1 App The app is the central control interface of the XIRIUM PRO system. Using the app, transmission paths and networks can be created and managed. The app provides information about the current status of the connected devices and transmission paths. The XIRIUM PRO devices can be connected to the... - Page 24 If the packet loss is high, the position of the devices have to be modified. Double-check if there are other devices operating or the some channel and change the RF channel. User Manual – XIRIUM PRO BDA 494E 2017/07 ®...
-
Page 25: Xroc Mode
RF channel. The connection between the devices is much more stable in XROC mode, because external influences do not interfere with the RF signal between the XIRIUM PRO devices as much. External influences include strong reflections of the RF signal in a room or from buildings, or external signals. - Page 26 Description of product Not correct positioning Correct positioning User Manual – XIRIUM PRO BDA 494E 2017/07 ®...
-
Page 27: Remote Antennas
If the 5 GHz antenna and the 2,4 GHz antenna need to be aligned differently in terms of angle, it’s advisable to remote the 5 GHz link. For that purpose Neutrik offers an antenna cable (NKXPA-5) with a length of 5 meters and an attenuation of 4 dB. There is also an additional directional anten- na available for such applications having a gain of 18 dBi. - Page 28 (< 0°C / > 50°C) • remote setup on TX + RX • point-to-multipoint • Contact your local Neutrik distributor for correct transmission power settings — NKXPA-5 — NKXPA-5 For a remote setup of the TX antenna — NXPA-N-FF —...
-
Page 29: Line-Of-Sight And Redundant Rf Path
Description of product 4.4.8 Line-of-sight and redundant RF path For a reliable wireless audio link, make sure all XIRIUM PRO devices have a line-of-sight connection. If a line-of-sight connection cannot be established, the receiver may be in a drop-out zone. A drop- out zone is a point where phase cancellation occurs between the direct signal and the deflected one. -
Page 30: Selecting Transmission Channels
The transmission channel can be changed on the Edit page. More information in Section "Changing the transmission channel" on page 39. User Manual – XIRIUM PRO BDA 494E 2017/07 ®... -
Page 31: Operation
Secure the module in the base station: Using a straight screwdriver, turn the locking pin 1/4 rotation. The XIRIUM PRO system can be used as a signal converter. Depending on the module used, an analog signal can be converted to a digital signal, for example. -
Page 32: Setting Up The Transmission Path
End the linking process on the TX manually: Briefly push the link button. The TX link LED lights solid blue. If the linking process is not ended manually on the TX, it is automatically ended after 10 minutes. User Manual – XIRIUM PRO BDA 494E 2017/07 ®... -
Page 33: Installing And Starting The App
Operation 5.3 Installing and starting the app The XIRIUM PRO app is available at no cost from the Apple App Store and the Google Play Store. Start the app: Tap the XIRIUM PRO icon. In the beginning the app user, will be asked in which country-zone XIRIUM PRO will be used. -
Page 34: Connecting Devices In Network Mode
The app connects itself with the selected device. 5.4.2 Connecting devices in network mode In network mode, the XIRIUM PRO devices are connected to the app via a WLAN access point. The transmission paths are set up and configured with the app. - Page 35 Operation Exit the app. Select the XIRIUM PRO device from the selections. On the iPad, open Settings > WLAN. Tap the Connect button. Connect the iPad with the XIRIUM PRO device. The app connects itself with the selected device. Wait for the tick after a selecting device before returning to the app.
- Page 36 Operation Exit the app. Select the XIRIUM PRO device from the available On the iPad, open Settings > WLAN. devices. Connect the iPad with the XIRIUM PRO device. Tap the Connect button. The app connects itself with Switch back to the app.
-
Page 37: Arranging The Radio Transmission Path
Add a device to a different transmission path: Under Available Devices, use drag&drop to add the Tap the device and drag it to the desired transmission device to the transmission path. path. User Manual – XIRIUM PRO BDA 494E 2017/07 ®... -
Page 38: Configuring The Device Parameters
The power LED on the selected device flashes slowly for a few seconds. Option 2: On the Links/Overview page, tap at the device. In the options menu, tap Identify device. User Manual – XIRIUM PRO BDA 494E 2017/07 ®... - Page 39 Activating XROC mode via the app: On the Edit page, tap the XROC ON/OFF button. Whether XROC mode is active in the transmission path is displayed in the device properties of an RX. User Manual – XIRIUM PRO BDA 494E 2017/07 ®...
- Page 40 Mute audio signal On the Edit page, tap the Mute Audio button. A mute icon will be displayed in the Links / Overview window next to the device. User Manual – XIRIUM PRO BDA 494E 2017/07 ®...
-
Page 41: Editing System Settings
Activate option: Tap the checkbox. Confirm selection with OK. The app is reset. If the XIRIUM PRO devices have been removed from the accespoint a restart of the devices is necessary! User Manual – XIRIUM PRO BDA 494E 2017/07 ®... -
Page 42: Advanced Mode
The advanced mode is provided for RF specialists. Activating the Advanced mode will allow the user to edit an additional parameter on each RX, called “RF attenuator”. The Advanced mode also allows to hide the SSIDs of the XIRIUM PRO devices. -
Page 43: Setting Up And Mounting The Xirium Pro System
Operation 5.8 Setting up and mounting the XIRIUM PRO system 5.8.1 Positioning the devices When positioning and setting the devices, observe the information in Section "4.4 Getting started" on page 22. For a setup with a single transmitter and a number of re- ceivers the minimum distance between the TX and any RX should be 10 meter. -
Page 44: Positioning The Repeater
TX. Increase the recommended minimum distance between TX and RX to 30 m. min. 0.3 m The ideal RSSI level is between -60 to -50 dB. min. 30 m User Manual – XIRIUM PRO BDA 494E 2017/07 ®... -
Page 45: Fastening And Securing Xirium Pro Devices
Operation 5.8.4 Fastening and securing XIRIUM PRO devices † WARNING Danger of falling due to incorrectly or incompletely fastened devices! Always mount and secure the devices according to the instructions. Always mount the devices in an upright position. Always mount the devices to the rig with the delivered Manfrotto universal mounting clamp. -
Page 46: Updating Firmware
5.9 Upgrading firmware The software "XIRIUM PRO Firmware Upgrade Manager" executes a firmware upgrade on the XIR- IUM PRO base stations. The XIRIUM PRO USB data cable (NKXPRO-DATA), supplied with each base station, is used for connection to a computer. -
Page 47: Executing A Firmware Upgrade
Operation Follow the subsequent installation steps. 5.9.2 Executing a firmware upgrade Download the ZIP file with the current firmware from the NEUTRIK website and save it. Start the software: Double-click the program icon on the Desktop. The program window appears: User Manual –... - Page 48 Operation Connect the XIRIUM PRO base station to the computer. Click the Refresh button to update all the displays. Select the firmware file from the file selection field Firmware File. The version number of the new firmware is displayed in Selected Firmware Version.
-
Page 49: Uninstalling The Xirium Pro Firmware Upgrade Manager
Operation As soon as the upgrade has completed, the software displays a message window. Disconnect the XIRIUM PRO base station from the computer. 5.9.3 Uninstalling the XIRIUM PRO Firmware Upgrade Manager Uninstall the software through the add/remove function of the operating system. -
Page 50: Troubleshooting
Deactivate flight mode on tablet. tablet. Access point changed Tablet connected with a Tablet out of range of Position device or access point different access point. access point. at a different location. User Manual – XIRIUM PRO BDA 494E 2017/07 ®... -
Page 51: After Operation
Never use rough materials (e.g., cleaning cloths or sponges with a rough coating). 7.5 Maintenance and repair The XIRIUM PRO devices do not contain any parts which can be maintained or repaired by the user. These devices may only be repaired by a authorized XIRIUM PRO repair center. -
Page 52: Disposal
After operation 7.6 Disposal Dispose of XIRIUM PRO devices and accessories in accordance with the applicable local regulations. Never dispose of electrical devices or electrical accessories such as cables, plug, batteries or components with household wastes under any circumstances. Dispose of packaging and packaging elements in accordance with the applicable local regulations. -
Page 53: Appendix
Run the Dante Controller software. In the routing menu, click on the + symbols of the devices. Establish the desired link. The XIRIUM PRO TX devices appear as DANTE receivers, and vice versa! User Manual – XIRIUM PRO BDA 494E 2017/07... -
Page 54: Access Point Settings
Using an access point makes it possible to operate the app in network mode. This way, the entire XIRIUM PRO system can be configured and monitored via the app. 8.2.1 Recommended settings Any conventional access point can be used to set up a XIRIUM PRO network. Neutrik recommends the following settings for the access point: •... - Page 55 Comisión Nacional de los Mercados y la Competencia Sweden Post- och telestyrelsen Switzerland Commission fédérale de la communication ComCom United Arab Emirates Telecommunications Regulatory Authority United Kingdom Ofcom United States Federal Communications Commission User Manual – XIRIUM PRO BDA 494E 2017/07 ®...
-
Page 56: Technical Specifications
-4 °F to +176 °F / -20 °C to +80 °C Additional digital audio interfaces AES/EBU 24 bit / 48 kHz according to AES3-2003 Dante AoE (Audio over Ethernet) Proprietary protocol by Audinate ® User Manual – XIRIUM PRO BDA 494E 2017/07 ®... - Page 57 * maximum input level before signal overflow, 0 dBu = 0.775 V rms ** typical battery runtime 10 hours, depending on type of module, transmission power settings, XROC mode, number of charging cycles and operating temperature User Manual – XIRIUM PRO BDA 494E 2017/07 ®...
- Page 58 10.63 in / 270 mm 101 x 81 x 36 mm Weight 0.75 lbs / 0.34 kg 0.11 kg Operating temperature 0 °C to +50 °C -40 °C to +85 °C User Manual – XIRIUM PRO BDA 494E 2017/07 ®...
- Page 59 Appendix User Manual – XIRIUM PRO BDA 494E 2017/07 ®...
- Page 60 Liechtenstein (Headquarters) NEUTRIK AG, Im alten Riet 143, 9494 Schaan T +423 237 24 24, F +423 232 53 93, neutrik neutrik.com Germany / Netherlands / Denmark / Austria Neutrik Vertriebs GmbH, Felix-Wankel-Strasse 1, 85221 Dachau, Germany T +49 8131 28 08 90, neutrik neutrik.de...
Need help?
Do you have a question about the XIRIUM PRO and is the answer not in the manual?
Questions and answers