Subscribe to Our Youtube Channel
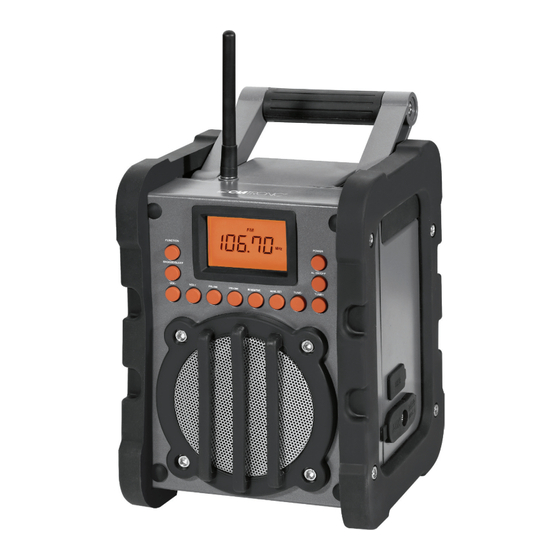
Summary of Contents for Clatronic BR 834
- Page 1 Bedienungsanleitung/Garantie Instruction Manual Outdoor-/Baustellenradio Outdoor Construction Site Radio BR 834...
-
Page 2: Table Of Contents
DEUTSCH Inhalt Übersicht der Bedienelemente ........Seite Bedienungsanleitung .............Seite Technische Daten ............Seite Garantie .................Seite Entsorgung ..............Seite ENGLISH Contents Overview of the Components ........Page Instruction Manual ............Page Technical Specifications ..........Page 12 Disposal ................ Page 12... -
Page 3: Übersicht Der Bedienelemente
Übersicht der Bedienelemente Overview of the Components... -
Page 4: Bedienungsanleitung
Bedienungsanleitung • Das Gerät so aufstellen, dass vorhandene Lüftungsöffnun- gen nicht verdeckt werden. Vielen Dank, dass Sie sich für unser Produkt entschieden • Niemals das Gehäuse des Gerätes öffnen. Durch unsach- haben. Wir wünschen Ihnen viel Freude mit dem Gerät. gemäße Reparaturen können erhebliche Gefahren für den Benutzer entstehen. - Page 5 11 VOL+/VOL- Tasten (Lautstärke) HINWEIS: 12 SNOOZE/SLEEP Taste • Haben Sie ein Netzteil angeschlossen, werden die 13 FUNCTION Taste Batterien automatisch abgeschaltet. 14 Batteriefach • Verringert sich die Helligkeit des Displays (3), müssen die 15 7.5 V DC IN Buchse Batterien ausgetauscht werden.
- Page 6 4. Mit den PR-/ / PR+/ Tasten nehmen Sie die Einstellung HINWEIS: vor. • Der Suchlauf stoppt erst, wenn alle 20 Speicherplätze 5. Speichern Sie die Uhrzeit ab, indem Sie erneut auf die belegt sind. Wollen Sie den Suchlauf vorzeitig abbre- /MEM/TIME Taste drücken.
-
Page 7: Technische Daten
Anzeige „AL1“ und „AL2“ erscheint im Display. Hiermit erklärt die Firma Clatronic International GmbH, dass 4x drücken = die Weckfunktion ist deaktiviert. sich das Gerät BR 834 in Übereinstimmung mit den grund- legenden Anforderungen, der europäischen Richtlinie für elektromagnetische Verträglichkeit (2004/108/EG) und der... -
Page 8: Garantie
Nichtbeachtung der Gebrauchsanweisung, Garantieleistungen. unsachgemäßer Behandlung oder normaler Abnutzung des Geräts beruhen. Garantieansprüche sind ferner ausge- Clatronic International GmbH schlossen für leicht zerbrechliche Teile, wie zum Beispiel Industriering Ost 40 Glas oder Kunststoff. Schließlich sind Garantieansprüche D-47906 Kempen ausgeschlossen, wenn nicht von uns autorisierte Stellen Arbeiten an dem Gerät vornehmen. -
Page 9: Overview Of The Components
Instruction Manual • For safety reasons a broken or damaged mains lead may only be replaced by an equivalent lead from the manu- Thank you for choosing our product. We hope you will enjoy facturer, our customer service department or a similary using the appliance. -
Page 10: General Operation
Installation CAUTION: • Do not dispose of batteries with the household waste. • Read the manual thoroughly before operating the device! Return exhausted batteries to collection points or your • Choose a suitable location for the device. Suitable loca- dealer. tions are dry, even and antislip surfaces on which you may operate the device easily. -
Page 11: Alarm Function
2. You have two options for tuning a station: 5. For further functions please refer to the user manual of the Press the TUNE+/TUNE- buttons (6). external audio device. Keep the TUNE+/TUNE- button (6) pressed. The device scans to the next and the previous radio station Always keep the flap closed when not in use. -
Page 12: Technical Specifications
Technical Specifications 3. Press the /AL.SET button once again. The message “AL1” and the minutes will flash. Model: ................BR 834 4. You make the adjustment with the PR-/ / PR+/ buttons. Battery operation: ..........4x 1.5 V UM2/R14 5. Press the /AL.SET button to start setting the second...


Need help?
Do you have a question about the BR 834 and is the answer not in the manual?
Questions and answers