
Summary of Contents for Ezytrail STIRLING GT
- Page 1 K-Series Stirling Gt Set-up Guide Scan this qr code with your smart phone to see the SET-UP Video ON YOUTUBE!
-
Page 3: Table Of Contents
INDEX Maintenance Guide Safety Tips Set-Up Guide K-Series Power Control Panel Troubleshooting Guide Periodic Maintenance Schedule Camping Tips Pre-Journey Checklist Camping Checklist Pole Diagram Fridge Chart... -
Page 4: Maintenance Guide
Maintenance Guide Maintenance Recommendations: Depending on the amount of kilometres travelled and the type of road surface encountered during a trip, maintenance of your trailer and tent is a must on your return to ensure your long term enjoyment of your trailer. When planning a trip you will no doubt spend much time making sure the tow vehicle is prepared for the road ahead, so it follows that the trailer should also be checked out as well. - Page 5 Pre-Use & Maintenance Instructions Weathering: All products must be assembled prior to use and inspected for accuracy and parts. This also gives you an opportunity to familiarise yourself with your tent set-up and to make sure you have all necessary components. At this time the product should be hosed with water to allow seam take up.
- Page 6 Zipper Care: All zippers on your canvas product will give you years of service. However, care must be taken when using your zips. Never force a zipper - reduce tension so all zippers run smoothly without straining. Have zips closed when pegging out the tent. ...
- Page 7 Caring for your Galvanised Steel Poles, Pole Joiners and Zips: Buckland & Stirling Z customers Your steel poles have been hot dip galvanised to provide long life with minimum corrosion. Salt, sand, dirt and water are the enemy of any steel product and zip. Make sure the poles and zips are always clean and dry before storage.
- Page 8 6. Now test your trailer’s electric braking system. Connect your 7 pin plug to your tow vehicle. 7. Ensure your vehicle’s control unit is switched on. Have someone engage the brakes on the tow vehicle – whilst the car is stationery. 8.
-
Page 9: Safety Tips
joiners. Age, over-stretching and mishandling may cause failure. Pole joiners are not covered by warranty. Always carry a roll of heavy duty tape for simple repairs to small rips, cuts and ash burns. The tape not only blocks the hole, it will minimise any further tearing. When removing pegs do not use the webbing attached to your Camper Trailer Tent as a handle. - Page 10 STAGE ONE: PRESET The first thing to do when you come to camp is to pick a nice piece of flat ground and unhitch your trailer. Set the handbrake Lower the jockey wheel to take the Ensure that the pin in your Treg hitch weight of the trailer has no pressure on it Disconnect your trailer plug &...
- Page 11 Unlatch the boat loader rack & with the help of a mate push it up and away from the trailer, it can lock either horizontally or vertically depending what you have attached to it and how much space you have. Remove the locking bolts Unlock the locking pin Release the over-centre catches...
- Page 12 STAGE two: POLE LA YOUT Before you get stuck into setting up the inside of your trailer, take the time to get your poles out and organise them into groups. There are a couple of pole types that you will need to be aware of. E3: A C-clip upright pole C2: A ridge pole D3:A C-clip spreader bar...
- Page 13 A2 & A3: A flat spreader bar F2: A window stay E1: Corner Stays: Spreader Bars: These come with ei- Window Stays: These have a hook in Corner Stays: These have a rubber ther c clips or flat ends and these are one end and spigot on the other and foot and a c clip and are generally used between two ridge poles or tent...
- Page 14 Now, before we get into the tent there are two other types of pole you need to know about. The Roof Bow The Tent Bow Other end of the roof bow Example of a tent bow One end of your roof bow STAGE three: inside Now it’s time to setup your tent, this stage can take as little as 10 minutes once you become well practiced, but be prepared for your first time to take a little longer...
- Page 15 Start by putting in two of your spreader bars between the living area bow and the centre bow then climb up onto the bed Raise the bed bow and extend out until side walls are firm but not tight Then put in your corner stays and the other 2 spreader bars, extend the corner stays and lock in place Attach the longer c-clip spreader bar Take care to extend both sides of the Pop in your corner stays at the front...
- Page 16 Once all the perimeter uprights and spreader bars are up, put in the c clip uprights and spreader bars. C-clip spreader bars stop water from pooling in bad weather All Ezytrail annexes are free standing, but always best and we suggest that you always use guy ropes, especially if there is a chance of wind.
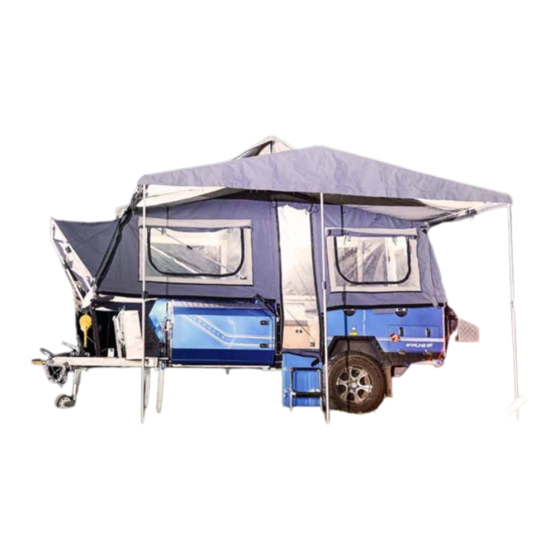
- Page 17 And there you have it, the Stirling GT setup, and ready for anything! If you have any questions, feel free to give your local Ezytrail dealer a call. If you have a tip or hint that you would like to share with other Ezytrail owners...
-
Page 22: Camping Tips
Camping Tips Involve the whole family at set up and pack up. Make your first family camping trip a short one so as you can get to know you camper and find where everything goes. Rechargeable solar lights are better with small children than gas lights. ... - Page 23 Tent Tips: Mark your poles with electrical tape or permanent marker pen at the best adjustable height for future set ups. At the start of each season, air out your tent, and seal each seam with water proofing spray. Always check that the ground is level and check for sharp objects such as rocks, glass etc.
-
Page 24: Pre-Journey Checklist
Camper Trailer Pre-Journey Checklist Before attaching to vehicle Internal main tent items- ensure secure Security locks- remove all Hitch unit- check for smooth movement and grease if needed Chains – all in good order – shackles good and reach to tow vehicle ... -
Page 25: Camping Checklist
Hammock, rope, stand Camping Checklist Camera charger/ film DVD’s Necessities Set off spare keys Gas light & mantles, torch & batteries Personal Items 12V compressor for car tires Clothing, rain coat, swimmers etc ... - Page 26 Stirling GT Tent Setup Main Tent Ensuite (Optional on SE) Kids Room (Optional) Annexe Main Tent - Bow poles not shown NO# 4 Tropical Roof pole NO# D3 NO# E1 Awning One NO# C2 NO# B2 NO# D3 NO# E3...
- Page 28 Kilsyth, VIC , 3137 Hampstead Gardens, SA , 5086 Campbellfield, VIC , 3061 PH: (03) 9728 3147 PH: (03) 9357 9603 PH: (07) 3808 5378 E: sales.kilsyth@ezytrail.com.au E: sales.campbellfield@ezytrail.com.au E: sales.adelaide@ezytrail.com.au NEW SOUTH WALES BRANCH OFFICE: SYDNEY 152-154 Hume Hwy,...
Need help?
Do you have a question about the STIRLING GT and is the answer not in the manual?
Questions and answers