
Related Manuals for Amulet Hotkey DXP4

Summary of Contents for Amulet Hotkey DXP4
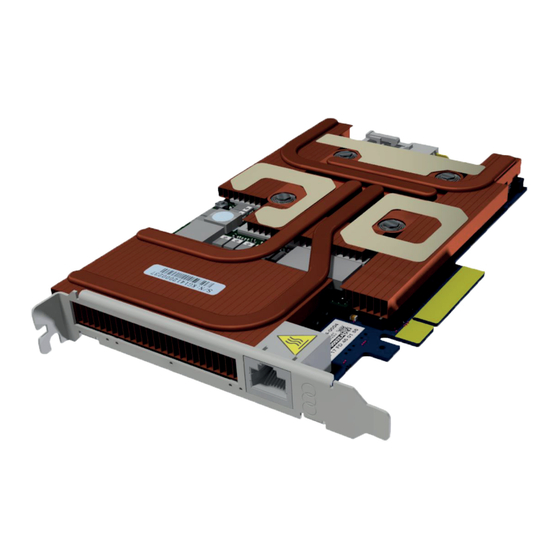
- Page 1 ® emote oRkstation Raphics Passive and Active Thermal Solutions ser manUal DXP4 and DXP4-M HB-DXP4-0002 Revision 3.1 July 2017...
- Page 2 The information contained in this document represents the current view of Amulet Hotkey® as of the date of publication. Because Amulet Hotkey must respond to changing market conditions, it should not be interpreted to be a commitment on the part of Amulet Hotkey, and Amulet Hotkey cannot guarantee the accuracy of any information presented after the date of publication.
- Page 3 FCC logo or FCC ID on the label. The DXP4 has been tested and found to comply with the limits for a Class A digital device, as defined by Part 15 of the FCC Rules. These limits are designed to provide reasonable protection against harmful interference when the equipment is operated in a commercial environment.
-
Page 4: Table Of Contents
............... 16 1.1.2 Thermal solutions ..........STEP 5: Complete the installation ..16 1.1.3 Terminology ............STEP 6: Connect a zero client to the DXP4 Auxiliary power requirements ....9 ............... 17 SFP modules ..........9 3.6.1 Connect to a DXP4 using SLP Discovery .. - Page 5 PCoIP management tools ....... 25 9. Additional information ....... 33 6.5.1 PCoIP Management Console ......Make sure the DXP4 firmware is up to 6.5.2 Administrative Web Interface (AWI) ....date ............33 6.5.3 On Screen Display (OSD) ......... 9.1.1 Check the BSM firmware on an individual host 7.
- Page 6 Figure 7:. R PC.cable.connection ������������������������������������������������������������������������������������������������������������������������ �16 Figure 8:. E xample.SFP.modules ������������������������������������������������������������������������������������������������������������������������ �16 Figure 9:. T he.zero.client.OSD.discovers.and.lists.the.first.10.available.PCoIP.hosts.discovered ������������������������17 Figure 10:. D ual.DXP4.network.solutions ���������������������������������������������������������������������������������������������������������� �19 Figure 11:. P CIe.slot.examples��������������������������������������������������������������������������������������������������������������������������� �19 Figure 12:. C onnect.the.PCIe.and.Interlink.cables ��������������������������������������������������������������������������������������������� .20 Figure 13:. C heck.the.status.LEDs ��������������������������������������������������������������������������������������������������������������������� .20 Figure 14:.
- Page 7 21:. V iew.Connection.Server.selection ����������������������������������������������������������������������������������������������������28 Figure 22:. C onnection.Management.Interface.selection ����������������������������������������������������������������������������������28 Figure 23:. O SD.Automatic.connection.screen ���������������������������������������������������������������������������������������������������29 Figure 24:. D isconnect.option.on.the.OSD ����������������������������������������������������������������������������������������������������������29 Figure 25:. S tatus.LEDs.on.the.DXP4 �����������������������������������������������������������������������������������������������������������������.34 Figure List of tables 1:. S TATUS.PCoIP.LED.activity �������������������������������������������������������������������������������������������������������������������12 Table 2:. A CTIVITY.status.LED.indication ������������������������������������������������������������������������������������������������������������13 Table 3:. S PEED.status.LED.indication ����������������������������������������������������������������������������������������������������������������13 Table 4:.
- Page 8 Remote Workstation Graphics Card Page 8...
-
Page 9: Before You Start
SFP modules with RJ45 connectors. See the Amulet Hotkey SFP Modules Datasheet for details of The DXP4 is a PCI express (PCIe) card available with the following currently available modules. variations: Be aware that SFP modules have differing specifications, and 1.1.1 Network solutions... -
Page 10: Wake On Lan And Remote Power Cycling
PC (for example, if it has blue-screened). After connecting the RPC cable assembly: • users of Amulet Hotkey DXR zero clients can press the RPC switch to power cycle the host computer; • users of Amulet Hotkey DXZ zero clients can use the On Screen Display (OSD) to power cycle the host computer. -
Page 11: Your Dxp4
2.2.3 I/O bracket features for details. The I/O bracket for the DXP4 includes four LEDs, a network port, 6. Network ACTIVITY LED: In normal operation, this LED shows a DisplayPort connector (Active Solution), and a recessed button. network activity. It can also show progress for firmware... -
Page 12: I/O Bracket Status Leds
Remote Workstation Graphics Card I/O bracket status LEDs 2.2.2 STATUS LED The status LEDs on the I/O bracket (see Figure 1) show the status The host card has a STATUS (link) LED to indicate the type and of the network connection including: status of the network connection. -
Page 13: Bsm Status Indication
Recessed button operations NORMAL MODE 2.4.1 While the DXP4 is starting up Status Meaning • press the button to restore the DXP4 factory settings. No network connection 2.4.2 When the DXP4 is powered up Green Network connection full duplex; no traffic •... -
Page 14: Internal Card Connections
1. Factory default reset jumper pin: (Jumper is not fitted) As 3. RPC socket: If required, this socket connects the DXP4 to the an alternative to using the recessed button (see 2.1), you can motherboard using a suitable Remote Power Control (RPC) use this jumper to restore the DXP4 factory settings. -
Page 15: Set Up The Host Card
PCIe.auxiliary.power.socket Figure 6: 1. Make a note of the MAC address on the label of the DXP4. You may need this when pairing the DXP4 to a zero client. 2. Carefully install the DXP4 into a free ×8 or ×16 PCIe socket. -
Page 16: Connect Remote Power Cable (Optional)
DXP4 cards on page 7. (Optional) If you need to install a network extender card see 5. Install a DXP4 with a network expansion card (DXEC) on page Note: You may not install dual DXP4s and a network extender card in the same installation. -
Page 17: Step 6: Connect A Zero Client To The Dxp4
After powering up the zero client, you are ready to establish a pre-set password for all Amulet Hotkey host cards and zero new PCoIP session. clients is ahkdante. The zero client connects to the DXP4 via the network port. Set up is complete Note: We recommend reading 6. Introduction to PCoIP... - Page 18 Remote Workstation Graphics Card Page 18...
-
Page 19: How To Install Dual Dxp4 Cards
DXP4. 2. Connect one of the two available PCIe power connectors to the connector on the first DXP4. Dual.DXP4.network.solutions 3. Install the first DXP4 into any free x8 or x16 PCIe slot in the Figure 10: host PC. See Figure... -
Page 20: Install The Second Dxp4
1. (For network solution B only) Connect the free end of the interlink cable to the second DXP4. 2. Connect the second PCIe power connector to the second DXP4. 3. Install the second DXP4 into any free x8 or x16 PCIe slot in the host PC. Interlink cable... -
Page 21: Install A Dxp4 With A Network Expansion Card (Dxec)
5. Install a DXP4 with a network expansion 3. Install the DXP4 into a free x8 or x16 PCIe slot in the host PC or workstation. card (DXEC) Install the network expansion card The network expansion card can allow you to present an Ethernet connection to the back of a PC or workstation: 1. - Page 22 Remote Workstation Graphics Card Page 22...
-
Page 23: Introduction To Pcoip
ntroDuctIon to 6. Introduction to PCoIP There are three essential features of PCoIP: • Host rendering; What is PCoIP? • Multi-codec display processing; The PCoIP (PC-over-IP) protocol compresses, encrypts and • Dynamically adapts to network conditions. encodes the entire computing experience on a host PC. In a PCoIP system, a PCoIP host transmits the computing experience 6.1.1 Host rendering from a host PC (pixels only) across a standard IP network to a... -
Page 24: Multi-Codec Display Processing
• Cost savings. 6.2.2 Host types The DXP4 is a PCoIP host card that installs into a PCIe slot. 6.4.1 Increased security Other Amulet Hotkey PCoIP hosts are available in various form As PCoIP zero clients have a stateless architecture and no local factors. -
Page 25: Low Maintenance
For more Console define configuration profiles, and apply information on the PCoIP Management Console, contact configuration profiles to groups. Amulet Hotkey Technical Support. A web application that you can use Administrative Web to remotely configure individual zero Interface (AWI) clients and PCoIP hosts. -
Page 26: On Screen Display (Osd)
Remote Workstation Graphics Card 6.5.2 Administrative Web Interface (AWI) 6.5.3 On Screen Display (OSD) The AWI is an embedded HTTPS web interface for PCoIP devices. The OSD appears when the zero client is powered on and It enables you to remotely configure individual PCoIP hosts and a PCoIP session is not in progress. -
Page 27: Set Up A Pcoip Session
et connecteD 7. Set up a PCoIP session The following connection methods are available: • Auto Detect This section describes how to connect a zero client to a remote PCoIP host or virtual desktop. • Connect directly to a specified host Power up the zero client •... -
Page 28: Pcoip Connection Manager
Remote Workstation Graphics Card advanced settings to remember the last connected PCoIP host. 7.2.6 Connect using VMware View You can configure zero clients to use PCoIP to connect to a 7.2.3 Connect to a choice of hosts using SLP Discovery virtual desktop in a VMware View environment. -
Page 29: Set An Automatic Connection
Get connected 2. Enter the IP address (or DNS name) for the third party connection broker. 3. Click OK. See section for more information about third party connection brokers. Set an automatic connection You can set up zero clients to automatically connect to a remote PCoIP host or virtual desktop when the end-user logs on. - Page 30 Remote Workstation Graphics Card Page 30...
-
Page 31: Manage The Network
• settings made by the user. linked via an additional cable so that traffic can be routed Exact bandwidth requirements for PCoIP are difficult to predict, through either DXP4. The network ports are connected to use the values in Table 5 as a guide only: an internal, unmanaged network switch. -
Page 32: Choose A Connection Broker If Required
Remote Workstation Graphics Card Choose a connection broker if required All Amulet Hotkey zero clients can be configured to use a third party connection broker (also known as a connection management server). For example, the following connection broker products include PCoIP support: •... -
Page 33: Additional Information
3. Unplug the power cable. Wait for at least 60 seconds. 4. Remove any covers to provide access to the PCIe sockets. 5. Wait for the DXP4 to cool down before you remove it from the PCIe socket. 6. Re-assemble the host computer and reconnect the power cable. -
Page 34: Check The Function Of The Ethernet Connection In An Octal Configuration
For the DXP4 with Ethernet cable connected, the ACTIVITY LED is flashing and the SPEED LED is ON and AMBER (or GREEN). The ACTIVITY and SPEED LEDs are OFF on the other DXP4. 6. Remove the Ethernet connector, and re-connect to the first DXP4 card. -
Page 35: Technical Specifications
Via PCIe bus. Switch-able to RPC cable option Wake-On-LAN Note: Because of the SFP module power requirements, the DXP4-M does not support Wake-on-LAN on some PCs. Contact Amulet Hotkey Technical Support for details Remote power control of... -
Page 36: Environment
Up to 65W NVIDIA M2000M Up to 40W Note: The K2200M and S4000X GPUs may also need to use the DXP4 PCIe power socket to draw sufficient 3.3.1 Connect auxiliary power (Optional) on page 15 current, depending on your system (see...
Need help?
Do you have a question about the DXP4 and is the answer not in the manual?
Questions and answers