NEFF D96IKW1S0B Manual
Hide thumbs
Also See for D96IKW1S0B:
- User manual and installation instructions (20 pages) ,
- User manual and installation instructiions (20 pages) ,
- User manual and installation instructions (20 pages)
Table of Contents
Advertisement
Advertisement
Table of Contents

Related Manuals for NEFF D96IKW1S0B


Summary of Contents for NEFF D96IKW1S0B
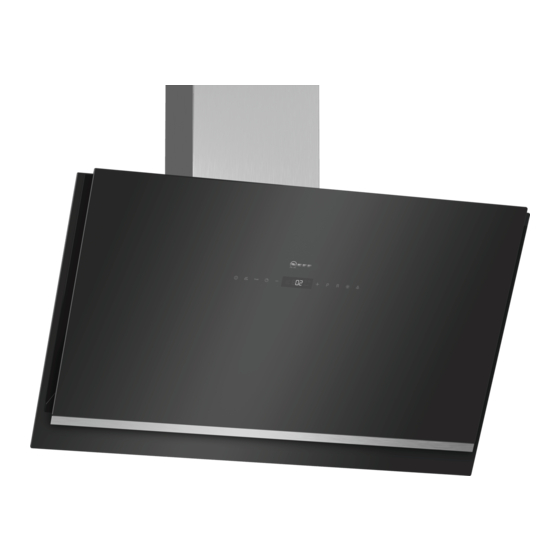
- Page 1 Extractor hood [en] Instructions for installation and use...
-
Page 2: Table Of Contents
Additional information on products, accessories, replacement parts and services can be found at reduced physical, sensory or mental capacity www.neff-international.com and in the online shop or by persons with a lack of experience or www.neff-eshop.com knowledge if they are supervised by someone... -
Page 3: Important Safety Information
Important safety information en (Important safety information Warning i n f o r m a t i o n I m p o r t a n t s a f e t y Danger of suffocation! Packaging material is dangerous to children. In any case, consult your responsible Master Never allow children to play with packaging Chimney Sweep. - Page 4 Important safety information Causes of damage Warning Risk of burns! Caution! The accessible parts become very hot when in Risk of damage due to corrosion. Always operation. Never touch hot parts. Keep switch on the appliance while cooking to avoid children at a safe distance.
-
Page 5: Environmental Protection
Environmental protection en 7Environmental protection ÇOperating modes Exhaust air mode Your new appliance is particularly energy-efficient. Here t e c t i o n E n v i r o n m e n t a l p r o O p e r a t i n g m o d e s you can find tips on how to save even more energy The air which is drawn in is cleaned... - Page 6 Operating the appliance Note: Switch on the extractor hood when you start 1Operating the appliance cooking and switch it off again several minutes after you have finished cooking. This is the most effective way of removing the kitchen fumes. These instructions apply to several appliance variants. It p l i a n c e O p e r a t i n g t h e a p is possible that individual features are described which...
-
Page 7: Operating The Appliance
Operating the appliance en Intermediate position for the glass front Saturation display On some appliances, the glass front can be adjusted to If the metal grease filters or activated charcoal filter are/ an intermediate position. The intermediate position can is saturated, the corresponding symbols will flash once be used for eliminating particularly strong cooking the appliance has been switched off: smells and large amounts of steam. - Page 8 Operating the appliance Control panel model 2 AirFresh function Symbol Explanation Fan on/off Switching on Noise reduction function Touch the symbol. AirFresh function will be shown on the display panel.The fan runs for approximately 5 minutes per hour at fan setting 1. Fan run-on Decrease fan setting Switching off...
- Page 9 Operating the appliance en Automatic mode Setting the brightness Press and hold the symbol until the required Switching on brightness is reached. Touch the symbol. The fan will start at setting ƒ Saturation display Touch the ‘ symbol. If the metal grease filters or activated charcoal filter are/ The optimum fan setting is set using an automatic air is saturated, the corresponding symbols will flash once sensor.
-
Page 10: Connecting To A Hob
Connecting to a hob Connecting directly eConnecting to a hob Press and hold the symbols at the same ˜ time until the indicators start flashing. Ù You can connect this appliance to a hob and then Confirm the connection on the hob within the next h o b C o n n e c t i n g t o a control the functions of the hood via your hob. -
Page 11: Cleaning And Maintenance
Cleaning and maintenance en Note: Follow all instructions and warnings included with 2Cleaning and maintenance the cleaning products. Warning Area Cleaning products t e n a n c e C l e a n i n g a n d m a i n Risk of burns! Stainless steel Hot soapy water:... - Page 12 Cleaning and maintenance Cleaning the metal mesh grease filters Installing the metal mesh grease filter These instructions apply to several appliance variants. It Warning is possible that individual features are described which Risk of injury! do not apply to your appliance. Components inside the appliance may have sharp edges.
-
Page 13: Trouble Shooting
Trouble shooting en 3Trouble shooting 4Customer service Malfunctions often have simple explanations. Please When calling us, please quote the product number (E T r o u b l e s h o o t i n g C u s t o m e r s e r v i c e read the following notes before calling the after-sales no.) and the production number (FD no.) so that we can service. - Page 14 Customer service Accessories (not included in the scope of delivery) Note: These instructions apply to several appliance models. It may be the case that an optional accessory that is listed does not apply for your appliance. Note: Observe the installation instructions in the accessory.
-
Page 15: Customer Service
Customer service en INSTALLATION INSTRUCTIONS Installation instructions This appliance is installed on the wall. ■ If the extractor hood is to be operated in exhaust-air ■ mode, a flue duct must be fitted. If the extractor hood is to be operated in air- recirculation mode, an optional accessory must be fitted. - Page 16 Important safety information Note: We recommend fitting the appliance such that the (Important safety lower edge of the glass screen is in line with the lower edges of the adjacent wall-hung cabinets. Make sure information that the specified safety clearances from the hob are complied with.
-
Page 17: Important Safety Information
Important safety information en Safe operation is possible only when the Warning partial vacuum in the place where the heat- Risk of death! producing appliance is installed does not Risk of poisoning from flue gases that are exceed 4 Pa (0.04 mbar). This can be drawn back in. -
Page 18: General Information
General information Warning KGeneral information Hazard due to magnetism! Permanent magnets are inserted in the Checking the wall appliance front. They may affect electronic i o n G e n e r a l i n f o r m a t implants, e.g. -
Page 19: Installation
Installation en 5Installation Preparing for installation I n s t a l l a t i o n Caution! Ensure that there are no electrical wires, gas pipes or water pipes in the area where holes are to be drilled. If the extractor hood is to be operated in exhaust-air mode, a flue duct must be fitted. - Page 20 Installation Fitting with a flue duct Fitting without a flue duct Installation Screw in the mounting supports for the extractor hood until they are hand-tight, use a spirit level to level the appliance and then screw the mounting supports in fully.
-
Page 21: Attaching The Flue Duct
Installation en Wall-mounting the appliance and levelling it Warning Risk of electric shock! First remove the protective film from the back of the Components inside the appliance may have sharp appliance and, following installation, remove the rest edges. These may damage the connecting cable. Do of the film. - Page 24 Constructa Neff Vertriebs-GmbH Carl-Wery-Straße 34 D-81739 München *9001160012* Register your product online www.neff-international.com 9001160012 961115...
Need help?
Do you have a question about the D96IKW1S0B and is the answer not in the manual?
Questions and answers