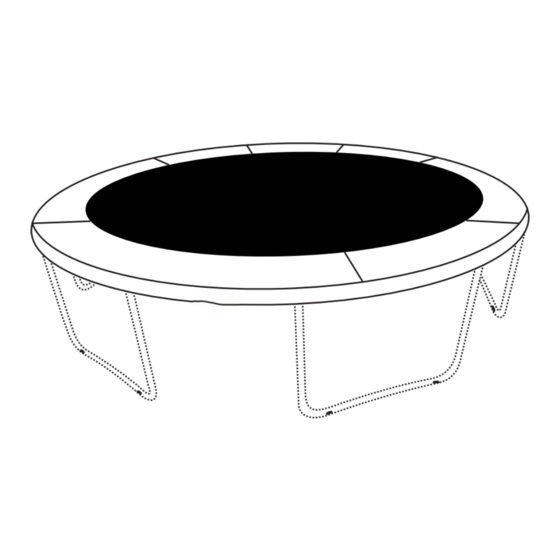
Kahuna Pro 8FT Assembly, Installation, Care, Maintenance, And Use Instructions

Kahuna Pro 8FT Assembly, Installation, Care, Maintenance, And Use Instructions

Advertisement

TRAMPOLINE MANUAL
ASSEMBLY, INSTALLATION, CARE,
MAINTENANCE, AND USE INSTRUCTIONS.
6FT, 8FT, 10FT, 12FT, 14FT & 16FT
WARNING!
Read these materials prior to assembling and using this trampoline and trampoline
enclosure. Keep this manual so you can refer to it later.
Not recommended for children under six years of age.

Advertisement

Table of Contents
loading

Summary of Contents for Kahuna Pro 8FT

  • Page 1 TRAMPOLINE MANUAL ASSEMBLY, INSTALLATION, CARE, MAINTENANCE, AND USE INSTRUCTIONS. 6FT, 8FT, 10FT, 12FT, 14FT & 16FT WARNING! Read these materials prior to assembling and using this trampoline and trampoline enclosure. Keep this manual so you can refer to it later.
  • Page 2: Table Of Contents

    3.10. Assembling the Safety Net ....................................19-22 3.11. Assembling the Anchor Kit (If available) ..............................3.12. Assembling the Basketball Kit (If available) .............................. 24-25 27-28 4.0 Troubleshooting Guide 5.0 Warranty Kahuna Pro Assembly, Installation, Care, Maintenance & Useage Instruction Manual...
  • Page 3: Disclaimer & Liability

    Replace trampoline toward the perimeter. This will help control any worn, defective or missing parts. bounce. 19. Avoid bouncing when tired. Keep turns short. Kahuna Pro Assembly, Installation, Care, Maintenance & Useage Instruction Manual...
  • Page 4: Trampoline Safety And Accident Prevention

    Be sure of overhead wires, objects onto the trampoline. Small children may need free limbs, etc. assistance to get on or off the trampoline. Do not step onto the suspension system. Kahuna Pro Assembly, Installation, Care, Maintenance & Useage Instruction Manual...
  • Page 5: Owner's & Supervisor's Role In Preventing Injuries & Responsibilities

    Contact a certified trampoline instructor for more information. 1.5 Weight Limit Do not exceed the weight limit for the tramploine 10ft 12ft 14ft 16ft 60kg 80kg 100kg 125kg 150kg 150kg Kahuna Pro Assembly, Installation, Care, Maintenance & Useage Instruction Manual...
  • Page 6: Care & Maintenance

    1 month. Prolonged cleaning. The mat may discolour or form spots, if left to exposure to UV sunlight can shorten the lifespan of the dry in the sun. safety net. Kahuna Pro Assembly, Installation, Care, Maintenance & Useage Instruction Manual...
  • Page 7: Weather Care

    Avoid tilting the trampoline or resting it on its side; the frame may bend under its own weight. Disassemble the trampoline, and return it to its original packaging, to transport it over long distances. COMPONENTS WILL DETERIORATE OVER TIME. Kahuna Pro Assembly, Installation, Care, Maintenance & Useage Instruction Manual...
  • Page 8: Installation

    Loose studs Safety Net Net Pole Holes Holes Cracks around the holes Burn marks Elongation of the holes Frayed yarn Broken sewing threads Stretched mesh Torn edges Stretched seams Faded materials Kahuna Pro Assembly, Installation, Care, Maintenance & Useage Instruction Manual...
  • Page 9: Location & Area Placement

    Place the trampoline away from walls, structures, electric wires, tree limbs and clotheslines. fences and other play areas. Place the trampoline in a well-lit area. Correct Installation Incorrect Installation Kahuna Pro Assembly, Installation, Care, Maintenance & Useage Instruction Manual...
  • Page 10: Parts Checklist

    10ft 12ft 14ft 16ft T Section Lower net pole Upper net pole Type A 10ft 12ft 14ft 16ft 10ft 12ft 14ft 16ft 10ft 12ft 14ft 16ft Pole & Foam included Kahuna Pro Assembly, Installation, Care, Maintenance & Useage Instruction Manual...
  • Page 11: Optional Parts Checklist (If Included)

    Storage Compartment Fibre Glass Rods 10ft 12ft 14ft 16ft 10ft 12ft 14ft 16ft 3.4a. Optional Part Checklist (If Available) Anchor kit Basketball Set 10ft 12ft 14ft 16ft 10ft 12ft 14ft 16ft Kahuna Pro Assembly, Installation, Care, Maintenance & Useage Instruction Manual...
  • Page 12: Assembling The Frame

    Align the screws holes and using a phillip’s head screw driver to install the ??mm screw (Parts B) into the top rail (Parts D) (Please do not use a electric or battery powered screw driver/drill) Kahuna Pro Assembly, Installation, Care, Maintenance & Useage Instruction Manual...
  • Page 13 Attached the u shape legs (Parts F) (with extension (Parts E) where required) to the upper rim (Parts D) of the trampoline with the screw holes facing into the centre of the trampoline. Kahuna Pro Assembly, Installation, Care, Maintenance & Useage Instruction Manual...
  • Page 14 (Part E) where required) to the top rail (Part D) using a phillips head screw driver. (Please do not use a electric or battery powered screw driver/ drill) To disassemble. Repeat steps in reverse Kahuna Pro Assembly, Installation, Care, Maintenance & Useage Instruction Manual...
  • Page 15: Assembling The Jumping Mat

    Rail Side and the Rail side of the spring is attached to the rail. Step 2 Count the loop half away around the mat and attach other spring Kahuna Pro Assembly, Installation, Care, Maintenance & Useage Instruction Manual...
  • Page 16 Be careful not to pinch fingers or slip. Please make sure there is clear space behind you when installing the spring’s serious injury may occur! Kahuna Pro Assembly, Installation, Care, Maintenance & Useage Instruction Manual...
  • Page 17: Assembling The Ladder

    (Part S) facing up. Tie the top strap to the top rail Step 2 Tie the side strap to the storage compartment (Part S) to each side of the U legs (Part F) Kahuna Pro Assembly, Installation, Care, Maintenance & Useage Instruction Manual...
  • Page 18: Assembling The Safety Pads

    Step 2 Tie the black straps to the Frame. Do not tie the springs Step 3 Pull the side cover over the edge. To disassemble. Repeat steps in reverse Kahuna Pro Assembly, Installation, Care, Maintenance & Useage Instruction Manual...
  • Page 19: Assembling The Safety Net

    (Part R) Step 2 Install upper net pole type B (Part P) with basketball attachment where you would like the basketball ring on top for the lower net poles (Part N) Kahuna Pro Assembly, Installation, Care, Maintenance & Useage Instruction Manual...
  • Page 20 Step 4 Slide the net pole sleeve (Part Q) onto the net poles Step 5 Thread the fibre glass Rods (Part T) through the top of the net sleeve (Part K) Kahuna Pro Assembly, Installation, Care, Maintenance & Useage Instruction Manual...
  • Page 21 Be careful not to pinch fingers or slip. Please make sure there is clear space behind you when installing the spring’s serious injury may occur! Kahuna Pro Assembly, Installation, Care, Maintenance & Useage Instruction Manual...
  • Page 22 3rd spring loop and reattach the spring. Repeat this for every 3 spring, (Last spring may be only one or two spring loop away from the start) To disassemble. Repeat steps in reverse Kahuna Pro Assembly, Installation, Care, Maintenance & Useage Instruction Manual...
  • Page 23: Assembling The Anchor Kit (If Available)

    Step 2 Anchor stake “eye” approximately 2.5cm above the ground Long strap with metal buckle at end Step 3 Step 4 Open end of “eye” should be away from horizontal leg Kahuna Pro Assembly, Installation, Care, Maintenance & Useage Instruction Manual...
  • Page 24: Assembling The Basketball Kit (If Available)

    Place the bracket (Part V63) over the lower part of the ring and screw in the 4 bolts (Part V10). Step 3 Wrap the Net (Part V5) around the ring (Part V3) Kahuna Pro Assembly, Installation, Care, Maintenance & Useage Instruction Manual...
  • Page 25 Then tighten the bolts to secure the basketball set to the trampoline Basketball Pole for Basketball Step 7 using the basketball air pump (Part V1) pump up the basketball (Part V7) Kahuna Pro Assembly, Installation, Care, Maintenance & Useage Instruction Manual...
  • Page 26 CONGRATULATIONS On completing the assembling of your new Kahuna Pro trampoline. Kahuna Pro Assembly, Installation, Care, Maintenance & Useage Instruction Manual...
  • Page 27 Make sure the rope around the bottom of the trampoline String around to many springs is around every 3rd spring and not every spring Kahuna Pro Assembly, Installation, Care, Maintenance & Useage Instruction Manual...
  • Page 28 Leg extension for a 6ft and 8 ft The 6ft and 8ft trampoline do not include the leg trampoline extensions T section coming out of poles When connecting the T sections need to make sure the fiberglass rods are all the way in.
  • Page 29 Kahuna Pro Assembly, Installation, Care, Maintenance & Useage Instruction Manual...

This manual is also suitable for:

10ft6ft12ft14ft16ft

Table of Contents