Advertisement
Quick Links
Advertisement

Related Manuals for RACEceiver LapCeiver

Summary of Contents for RACEceiver LapCeiver
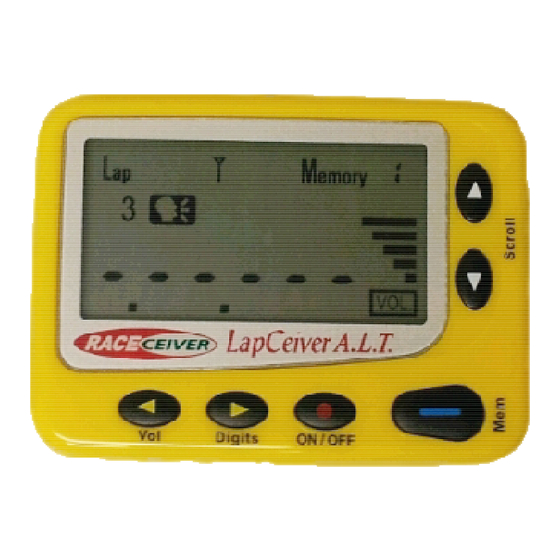
- Page 1 Drivers! - Your Electronic Spotter! Get your lap times as they happen, Anyway you want them!
- Page 2 LCD display and hear it audibly using a separate earpiece (sold seperately). You can even choose to have the LapCeiver A.L.T tell you if the current lap is faster than the previous laps The LapCeiver A.L.T has 2 Modes of Operation.
- Page 3 The LapCeiver A.L.T. in Transponder mode works with the RACEceiver, Westhold & MyLaps Timing & Scoring Systems. If your track doesn’t have a LapCeiver Transmitter, we will provide one for them. The LapCeiver A.L.T in the Infra-Red Mode is compatible with the RACEceiver, AIM and InterComp Infra-Red Transmitters &...
- Page 4 18 hours of continual use. To extend the life of your battery and prevent battery corrosion, remove the battery when not in use. The Battery cover is located on the back of the LapCeiver A.L.T. To install the AA battery, 1.
- Page 5 The LapCeiver A.L.T has 6 multi-function buttons. They must be used in the correct combination to work properly according to the mode of operation. We refer to them by color for ease of use. Common operation These functions work the same in both the Infra-Red or Transponder modes.
- Page 6 4. Volume test – Plug the earpiece into the “Ear” jack Press and hold button. △ ( u p w h i t e ) You can test the volume. (It announces zero.) 5. Data scroll – Press △ ( u p w h i t e ) ▽...
- Page 7 7. Fastest voicing - This function will allow you to hear an audible indication comparing the current lap to previous laps. Press red button to use this function. The " " icon on the LCD appears. If the lap time is faster than the former lap time, a man's voice says “fast”.
- Page 8 10. Data save/Memory Lock – This function allows you to Save your laptimes so you can compare them at a later time. You save the data in one memory bank at a time Change to the Memory Bank where the data you want saved is located, then Press the blue and ◁...
- Page 9 2 connectors that will be plugged into the USB & Ear jacks. Software is available soon for you to download when you complete your warranty registration. Note: You must use the correct jack for the LapCeiver A.L.T to work correctly.
- Page 10 Plug the IR Detector into the USB jack located on the right side of the LapCeiver A.L.T., the antenna icon on the LCD will disappear. Mount the IR Detector on the car. Make sure the detector faces in the direction of the IR Transmitter.
- Page 11 Press red and blue buttons at the same time. " SEn" and the number on the display will be blinking. Adjust the sensitivity by using (up or down ▽ △ white) buttons. Press red and blue button at the same time again to lock.
- Page 12 3 seconds for saving. If you press and hold the blue button for too long (3 seconds after the seconds are saved and LapCeiver A.L.T goes back to Infra-Red operation without displaying the minutes. You must unlock this function again by holding the blue button for 3 seconds.
- Page 13 Infrared Lap Timer Beacon Transmitter (Applies if package includes the IR Transmitter) The IR Transmitter operates using a 9volt battery (not included) or the optional power supply. It may be mounted on the track wall directly or mounted using a mini tripod. Ensure that the Beacon side of the IR Transmitter is pointed towards the track.
- Page 14 & Scoring System being used at your track. The Lap Transmitter resends this information for use by the LapCeiver A.L.T. This requires the track to have a Timing & Scoring System with Lap Transmitter in use and there must be a Transponder mounted on the vehicle to be monitored (yours or someone else’s).
- Page 15 Add/Change Transponder ID code LapCeiver A.L.T. has 5 memory banks and each memory bank can have its own Transponder ID code respectively. The Transponder ID Code is the Serial Number of the Transponder. You will only need to put the last 6 digits of the Serial Number (drop the first numbers if there are more) Move to the memory bank you want to use by pressing blue button.
- Page 16 Your LapCeiver A.L.T may be used with a RACEceiver or 2- way radio. Connect one male end of a Reverse Splitter to the “EAR” jack on the side of the LapCeiver A.L.T and the other male end to the audio jack of the RACEceiver. Plug an earpiece into the female side of the Reverse Splitter.
- Page 17 IR transmitter beacon. Check that the lens of the IR Detector is clean. Check the IR Detector is plugged into the “USB” port on the side of the LapCeiver A.L.T. You must complete 2 full laps for the laptime to display.
- Page 18 Check the battery life indicator and Replace Battery If needed. The LapCeiver A.L.T is telling me that my lap time is 1 minute and I know that my lap times should be over 2 minutes.
Need help?
Do you have a question about the LapCeiver and is the answer not in the manual?
Questions and answers