Advertisement
Advertisement
Table of Contents

Related Manuals for Inateck FE2004


Summary of Contents for Inateck FE2004
- Page 1 FE2004 w w w . i n a t e c k . c om...
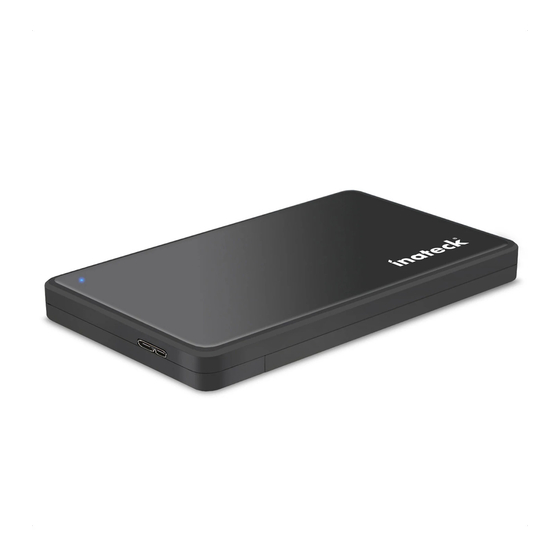
- Page 2 To accommodate these factors, Inateck developed and introduced a new enclosure named FE2004, supporting 2.5” HDD/SSD with a height of up to 9.5 mm in a USB3.0 environment. The casing is casted using highly robust and stable ABS plastics, featuring a precise and high class workmanship.
- Page 3 Front Side LED indicator for power USB3.0 interface and transfer status Technical data Product name Portable 2.5” HDD/SSD Enclosure Product type Inateck FE2004 Weight Colour Black Supported drives 2.5” SATA I/II/III HDD/ SSD Interface USB3.0 Maximum height of drives Height of up to 9.5mm supported Hot Plug, Plug &...
- Page 4 III. Hard drive installation steps Push it according to the arrow direction, take off the cover According to the direction of the arrow as shown below, carefully put into 2.5inch HDD enclosure to make it connect the connector. Push the cover according to the arrow direction, finish installation. - 4 -...
- Page 5 Insert the one port of USB data cable to connect HDD enclosure, the other port connect to the computer. After find the devices, lower right corner of computer will have a mobile hardware prompt, disk management will also have one. Instruction for the removal of drives Please note: Before the removal of the data storage device, please stop all data access and transfer to the device, so that the storage can be normally removed.
- Page 6 Another way to remove the data storage is through the device manager (“Computer” -> “Device Manager” -> “Drives” -> Click on “Remove” for the drive to be removed, so that the drive can be detached safely. Removal from Macintosh systems: Please choose the symbol for “Portable drives / devices”, choose the menu function “Remove”...
- Page 7 - 7 -...
Need help?
Do you have a question about the FE2004 and is the answer not in the manual?
Questions and answers