Table of Contents
Advertisement
Quick Links
Advertisement
Table of Contents

Summary of Contents for ORPHEUS VANGUARD SERIES
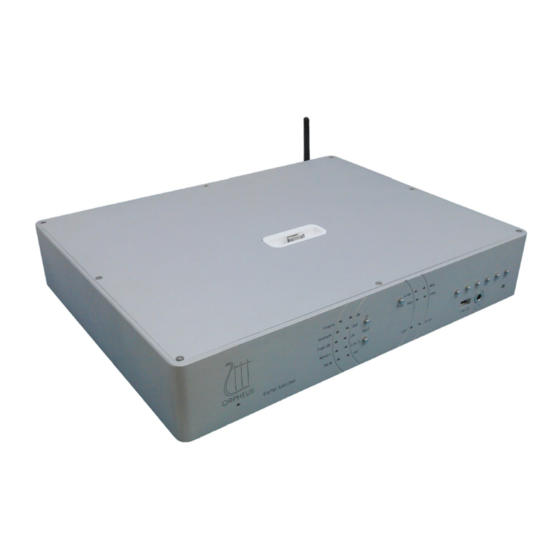
- Page 1 VANGUARD SERIES Digital Audio Dock User manual 1/17...
-
Page 2: Table Of Contents
Table des matières Introduction............................3 Contact.............................3 Document overview.........................3 FRONT PANEL............................5 REAR PANEL............................6 CONNECTIONS..........................7 Operation and settings..........................8 Standby............................8 Volume control..........................8 Output sampling frequency......................9 World clock system...........................9 Source selection..........................10 Firewire............................10 USB............................11 Connection to Windows / PC....................11 Connecting to OSX / MAC....................11 Bluetooth...........................12 iPod............................12 Connecting the iPod or iPhone....................12 Connecting the iPad.......................12 Flash USB –... -
Page 3: Introduction
Avenue des Sciences 3 1400 Yverdon-les-Bains Phone : +41 24 423 9088 Fax : +41 24 424 9089 E-mail: info@orpheuslab.com Web: www.orpheuslab.com Document overview This document is the user manual for the Orpheus Media Vanguard series Digital Audio Dock. 3/17... -
Page 4: Read This Before Operating Your Unit
Unpacking First check and identify the contents of your D.A.D. package, as listed below: ● Digital Audio Dock ● CD User manual Read this before operating your unit ● Please read this manual carefully, to assure proper operation and the possible performance. ●... -
Page 5: Front Panel
FRONT PANEL MAIN POWER INDICATOR The light is red when the unit is in standby. When the unit is turned on, one input LED must light blue. INPUT LEDs The input LED shows which input is streaming to the output. INPUT BUTTONS There is two buttons for the input selection. -
Page 6: Rear Panel
REAR PANEL 1. DIGITAL INPUT 3 . ANALOG PRE OUTPUT Bluetooth Balanced output (channel 1-2) Webradio 4. ANALOG OUTPUT iPod Line out unbalanced output (Channel 1-2) S/PDIF Firewire 5. ANALOG INPUT ADAT TOSLINK Line in unbalanced input AES/EBU 6. -
Page 7: Connections
CONNECTIONS The Digital Audio Dock is a complete device able to be connected in several ways. It has an internal DAC as well as an internal preamplifier. Nevertheless, the connectivity capability also allows the user to use other external devices to manage the digital to analog conversion and the volume control. -
Page 8: Operation And Settings
Operation and settings The DAD offers a large number of digital inputs which are easy to use. All the settings are accessible on the front panel in order to be easy to change the configuration of the device. Standby The settings are stored in the internal memory when the STBY button is pressed. It will automatically save it streaming input, the analog volume, the output frequency used, etc... -
Page 9: Output Sampling Frequency
Output sampling frequency The DAD can process digital data on four different sample rates (frequencies) 44.1kHz, 48kHz, 96kHz and 192kHz. The selected sample rate has influence on the distortion performance and aliasing in the analogue domain. These technical facts have a slight influence on the sound character of your DAD and can therefore be modified to suit your preference. -
Page 10: Source Selection
Source selection The DAD has twelve digital input sources available. By pressing the buttons up or down, the sources change in a circular way. Firewire The drivers ASIO are provided on the CD of the User’s Manual with the path: Drivers\Firewire. According the computer you have, you will have to select the correct folder in order to install the correct driver for your machine. -
Page 11: Usb
Connection to Windows / PC • connect the DAD to your PC with a USB cable. • Turn on the machine • If this is the first time that you connect the DAD to your PC, please install the driver from the CD. The path of the drivers is: driver\USB\HDAudioSetup.exe •... -
Page 12: Bluetooth
Bluetooth Referring to your Bluetooth A2DP device instructions, search for new paired devices. The DAD will be identified as DAD then a number. Select your DAD and enter the password 1234 when prompted. Confirm that you wish to connect to the DAD device. The DAD should now be locked to your Bluetooth enabled phone or computer and be able to receive high quality digital audio. -
Page 13: Flash Usb - Lan - Webradio
Flash USB – LAN – Webradio With a RJ45 cable, connect the DAD (LAN plug) to your internet cable. Turn on the DAD and select the LAN, Webradio or Flash USB. You should hear the dynamic IP address of the DAD. Once you got the IP address, open an internet page and type the IP address of the module in order to be able to reconfigure it. -
Page 14: Line In
LINE IN The input voltage should not exceed 2Vrms. This input can be used to integrate all the devices having a analog output (such as phones, computers, mp3 players etc…) This mode is selected when the Line In input LED is lighted in blue. TOSLINK It is an optical connection to the DAD. -
Page 15: Specifications
SPECIFICATIONS Technical data Specifications Size : 320mm x 410mm x 85mm Weight : 8.1 Kg Electrical voltage : 100 / 115 / 230 VAC Power consumption : 19W Features Full control with remote control Digital inputs Firewire multichannel: 8 Channels 24Bits @ 192kHz ... - Page 16 Media sàrl. IMPORTANT NOTICE ORPHEUS Media Sàrl reserve the right to make changes to their products or discontinue any product or service without notice. Adequate operating safeguards must be used to minimize hazards. Reproduction of user manual information is permissible only if it is without alteration and is accompanied by all relevant conditions, limitations and notices.
- Page 17 LIMITED WARRANTY CERTIFICATE ORPHEUS Media guarantees that the product described below is free of defective material and workmanship. The warranty extends for a period of one year form original purchase date, but at maximum two years form manufacturing date. ORPHEUS Media agrees to repair or replace defective parts or the complete unit at its option, provided that the equipment is returned exclusively to the original dealer.
Need help?
Do you have a question about the VANGUARD SERIES and is the answer not in the manual?
Questions and answers