Table of Contents
Advertisement
Advertisement
Table of Contents

Summary of Contents for Taga Taga 2.0
-
Page 2: Table Of Contents
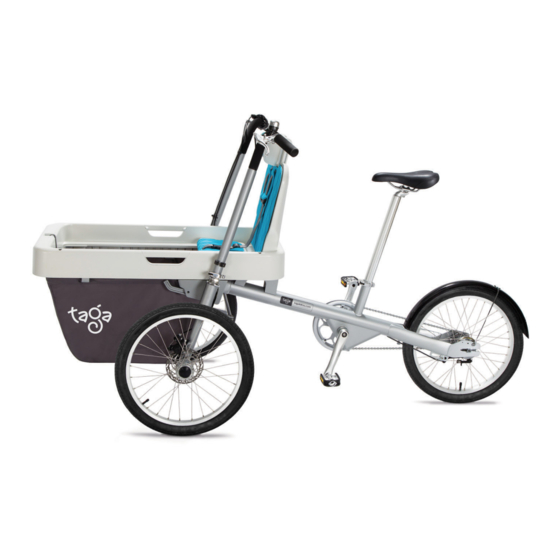
Contents: Introduction Warnings Applications and Features Package Content Chassis Assembly Cargo Compartment Assembly Child Seat Assembly Child Seat Usage Two Child Seats Assembly Storage Using a Car Bike Rack Riding Taga 2.0 Preventive Maintenance Taga 2.0 Specifications Accessories Warranty Service... -
Page 3: Introduction
We wish you and your loved ones much fun and pleasure with your new Taga. If you have any concerns, questions or comments about your Taga or how to use it, please don’t hesitate to contact us. -
Page 4: Safety First
Î Î Taga is intended for use with children from 6 months old and up to a weight of 35kg / 77lbs (approx 8 years old) in the rear seat and 22Kg / 48lbs in the front seat. Using the Taga car seat adapter enables you to carry children ages 3-12 months. -
Page 5: Warnings
Î Î Please notice that Taga is a tricycle and thus behaves differently when riding, in comparison to a two-wheel bicycle. Always ride it carefully, especially on turns. To improve stability, slow down before turning and lean your body into the direction of the turn. - Page 6 Î Î The Taga Child Seat is not approved to be a car seat. Transport your child only with an approved car seat. Approved car seats may be connected to Taga’s frame using special Taga adapters. See accessories section or check our website Î...
-
Page 7: Applications And Features
The child seats can be positioned facing forwards, backwards or towards each other (first two options require purchasing the bar separately). The Taga 2.0 seat can recline up to 160 degrees for a sleeping position and can fold down so it doesn’t get dirty when left outside. -
Page 8: Package Content
Electric assist Taga 2.0 can be purchased as a regular or an E-bike version (pedal assist in Europe and Asia, pedal assist and/or throttle in the USA), or you can buy the regular version and upgrade it to an E-bike at any point using the Electric Kit. -
Page 9: Chassis Assembly
Your reseller may assemble your Taga 2.0 for you. Î The following instructions are provided in the event that you purchased Taga on the Internet or that your reseller has not assembled your Taga 2.0 for you. NOTE This section will describe how to assemble Taga 2.0. Follow these instructions, step-by-step. - Page 10 WARNING Keep plastic bags and small parts away from children or infants to prevent choking, suffocation or serious injuries. Step 1: Connecting the Steering rod FIG 04 The steering rod can be found inside the seat post. Position the steering rod between and below the two arms, which extend out the forks.
- Page 11 the cam lever with the other hand to adjust the mechanism. Rotating the cam lever clockwise increases clamping force; rotating it counterclockwise reduces clamping force. Make sure that you rotate the lever clockwise until the washers are fixed to the dropout firmly. Less than half a turn of the lever can make the difference between safe clamping force and unsafe clamping force FIG 06...
- Page 12 you tightened it as much as possible) and close the quick release levers so the lever is pointing downwards . Some force should be required FIG 08 when closing the lever. If closing is easy, open the lever, tighten the nut more by rotating it clockwise and close the lever again.
-
Page 13: Cargo Compartment Assembly
Step 9: Assembling the Cargo Compartment holders Position the holders on the front frame as shown and make sure the holes in the holder are aligned with the hole in the frame FIG 13 Insert the screw through the holes. Make sure the washer is close to the screw head FIG 13 Insert the nut onto the screw in the other side of the hole and hold it with... - Page 14 If it disconnects, contact our customer support. Your Taga 2.0 is now assembled as shown in and you can attach to it the FIG 18 child seats and/or the different accessories that you have ordered.
-
Page 15: Child Seat Assembly
Child Seat Assembly NOTE Î If you did not order a child seat, you may skip forward to the next section. Î If you received your child seat pre-assembled, you may skip forward to step 3. Î On the underside of the seat bottom there are two latches which you need to pull, either separately or together, to complete certain actions. -
Page 16: Child Seat Usage
Pull out the headrest poles FIG 25 Insert the shoulder anchors into the shoulder slots on the backrest. Note that you have two slot height options – low position for infants and high position for toddlers FIG 25 Re-insert the headrest poles to secure the harness in place FIG 25 Connect the two ends of the crotch buckle FIG 25... -
Page 17: Two Child Seats Assembly
CAUTION When returning the Child Seat back to its upright position, there is a stopper on the rail which prevents the seat from folding unintentionally. Do not attempt to push the seat beyond the stopper as it may damage the seat mechanism. Child Seat Folding To fold the seat, pull the internal latch located on the underside of the Child Seat bottom, push the backrest forwards and simultaneously push the seat backwards... - Page 18 Test the Child Seat to ensure it is firmly fixed to the Cargo Compartment Storing cargo in Taga 2.0 Î Taga 2.0 offers you the option of storing and locking your items inside the Cargo Compartment Î To close the Cargo Compartment, simply fold the two Child Seats as described in the section labelled “Child Seat Folding”...
-
Page 19: Storage
Storage In order to store your Taga 2.0 in a car trunk or at home, you can disassemble it into 4-5 main parts (depending on the storage space). To disassemble and store Taga, please follow the next steps: Step 1: Removing the Cargo Compartment... -
Page 20: Using A Car Bike Rack
Using a Car Bike Rack To transport the Taga 2.0 on a car bike rack, use a high mount rack with arms that are positioned at least 150cm/ 59” from the ground. FIG 42... - Page 21 Î Î Apply the parking brake and push Taga forward - Does either one of the front wheels rotate? If yes, it is time to adjust the front brakes or level them. For this you can contact us directly, contact your local reseller or make the adjustment yourself by following the guide in the maintenance section.
-
Page 22: First Ride
FIG 43 In order to get used to riding on your Taga, we recommend riding without a child on the first few rides and instead place a heavy bag in the Cargo Compartment. Load your child onto the Taga only after you feel safe and comfortable with the ride. -
Page 23: Preventive Maintenance
But even if everything seems fine to you, it’s best to take your Taga back to the reseller or any bike shop in your area for a 30 day checkup. Another way to judge when it’s time for the first checkup is to bring Taga in after several days of hard use. - Page 24 Taga 2.0 is using a high-end disc brake system. However, due to several reasons mentioned below, the brakes might need to be adjusted. It is normal and can happen with any bike that uses disc brakes.
- Page 25 Adjust the screw to tighten or slacken both front wheels brakes. Refasten the nut. This is the fastest way and it deals with both wheels at once. It can also be used to eliminate noises in case the brakes are too tight. However –...
-
Page 26: Adjusting The Rear Brake
between the two pads: Release the screws that hold the caliper to the fork FIG 54 Move the brake Caliper until you see that the rotor is aligned with the pads and is located between them FIG 54 Tight again the screws which connect the caliper to the fork FIG 54 Method E: Aligning the rotor itself In some cases, the rotor was hit during the ride and it was slightly bended. - Page 27 If your gear makes noises or changes gears unexpectedly (while the shifter remains on the same gear), it means that it needs adjustment. Adjusting the Taga gear is easy and takes few seconds. However - It is recommended that you take your Taga to your local reseller for gear adjustment.
- Page 28 Checking nuts, screws and other fasteners Please use the correct torque (tightening force) for the fasteners on your Taga: Saddle screw: 17Nm Front wheel nut: 21Nm Rear Wheel nut: 21Nm To correctly torque a fastener, a torque wrench must be used. A professional bicycle mechanic with a torque wrench should torque the fasteners on your Taga.
-
Page 29: Taga 2.0 Specifications
The plastic parts should be cleaned with a piece of fabric and a plastic cleaner spray or gel. Plastic cleaners can usually be found in DIY stores, car wash stores or gasoline stations Taga 2.0 Specifications Frame & Forks High tensile steel... -
Page 30: Accessories
3 kg / 6.5 lbs Accessories Taga 2.0 can be equipped with a wide variety of accessories and add-ons. For more information about the updated list of accessories, log on to our web site www.tagabikes.com or ask your local reseller. Below are the specifications of... - Page 31 25 kg / 55 lbs Water Gun Arrives with a special adapter to attach it to the bar In a Tag-Along bike or a rear seat. Taga's Rear Rack is Third Child option compatible with standard child seats. We plan more accessories in the future. For more Future accessories info write to info@tagabikes.com...
-
Page 32: Warranty
Warranty As the manufacturer, Taga Bikes (hereinafter: “Taga”) supplies the Taga 2.0 vehicle (hereinafter: “product”) under warranty, subject to the following conditions: Î Î The warranty automatically applies to every Taga purchase. Î Î The warranty is valid in the continent of purchase only Î... -
Page 33: Service
If the product is not reparable, or if the cost of repairing the item exceeds the cost of a new one, it will be replaced by another Taga part of the same model, or if not available, by the closest model and available color.
Need help?
Do you have a question about the Taga 2.0 and is the answer not in the manual?
Questions and answers