Advertisement
Table of Contents
Advertisement
Table of Contents

Subscribe to Our Youtube Channel
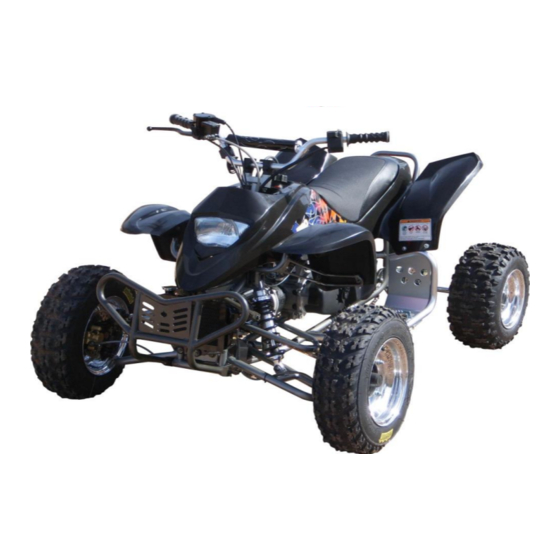
Summary of Contents for Apex Digital Pro MXR 70
- Page 1 70/90/100 Owners Manual...
- Page 2 Contact Information Disclaimer of Warranty This Apex Pro MXR ATV is sold as is with all faults, obvious or not. There are no warranties expressed or implied, including any warranty of merchantability or warranty of fitness for any particular purpose. Warning Read and understand warnings and owner’s manual before operation.
-
Page 3: Table Of Contents
Table of Contents Specifications…………………………………………….………………..4 Recommended Set Up Procedure..…….……………..…….….………..5 Break In Procedure………………………………………………………….5 Starting Procedure………………………………….………………………..6 General Riding Tips………………………………………………………….7 Maintenance……………..……………………………………………………8 Clutch Tuning Procedure…………………………………………………….9 Clutch Tuning Procedure ….………………………………………………10 Drive Belt……………………………………………………………………...11 Carburetor Tuning………………………………………………….………..11 Reeds………………………………………………………………………..11 Exhaust…………………………………………………...……………………11 Camber Angle…………………………………………......13 Shock Preload……………………………………………………………….13 Wiring Diagram……..……………………………………………...……….14 Troubleshooting……………………………………….….………………….15 - - 2... -
Page 4: Specifications
Specifications Dimensions Length…………………….....................64.0 Width…………………………………………………………………………………….………..44.0 Height……………………………………………………………………………………………..37.0 Wheel Base..........................41.5 Ground clearance........................5.3 Dry Weight................... ……………………………248 lb Drivetrain Engine Type...............Single cylinder, reed valve, 2-stroke Cooling System………………………..…………………………………………….Liquid-cooled Displacement......................69/89/99cc Bore x Stroke...................39X47 / 42X52 / 45X53 Carburetion......................21/24mm Keihin Start..........................Primary Kick Transmission........................Auto Drive............................Chain Fuel Capacity........................1.5 Fuel Type………………………………………..………………………………..Min. Octane Recommended type…………………………………………………Maxima... -
Page 5: Recommended Set Up Procedure
Recommended Set-Up Procedure Due to the lack of warranty and race design of the Pro MXR model, Apex Motor USA Inc. recommends the following pre-ride/race procedures. Secure all exterior nuts and bolts holding items such as bumpers, nerf-bars, swing arm pivot, axle securing nuts, and motor mount nuts using blue Lock-tite Thread locker. -
Page 6: Starting Procedure
Starting Procedure Before starting the machine, inspect the following: Ensure that the fuel tank contains an adequate volume of fuel/oil mixture to complete the distance required. Check all 4 tires for proper tire pressure. Check chain tension and adjust if necessary. ... -
Page 7: General Riding Tips
General Riding Tips Always wear a helmet and other protective gear while riding. Apex recommends the rider “takes it easy” the first couple minutes in practice until the engine comes up to full operating temperature. Apex recommends the rider releases the throttle while landing from a jump and then continue on the throttle to ensure the rider’s safety and longevity of the transmission. -
Page 8: Maintenance
Maintenance Schedule & Tips It is important that you adhere to this maintenance schedule so as to promote the longevity of your ATV. Between each ride: o Inspect the fuel filter for contaminates. o Check the air filter (clean and re-oil as necessary). o Ensure the smooth operation of the throttle cable (throttle soundly ‘clacks’... - Page 9 1. Pull CVT cover off and remove the Damper O-ring from Rear Trans Input Shaft assembly and secure it so it will not be lost (Be careful not to damage the cover gasket on disassembly). A Low Power Impact gun is required for the following steps. Air or Electric will work. 2.
-
Page 10: Drive Belt
Make sure the CVT Gasket is installed at this time. Place the Belt inside the rear Drive Pulley by spreading the pulley with your fingers and pushing the belt down to the bottom of the pulley. Place the Belt onto the Variator collar and place the Fixed Plate onto the Splined Shaft. Remember to install the Star Washer on the Fixed Plate;... -
Page 11: Carburetor Tuning
1mm Variator Shim Put 1mm shim inside Variator to increase 1st gear ratio. This will reduce top speed but get off the corners quicker. Run this mode on short quick tracks. Put 1mm shim outside the Variator half’s to decrease 1st gear ratio and increase max speed by allowing for a lower final gear ratio across the CVT. -
Page 12: Exhaust
The reeds must have a tight seal on the reed cage. If the reed is damaged in any way, replace it. This means cracks, chips, and ruptures. Exhaust The pipe is a crucial element to a two-stroke engine. Any kinks, dents, or damage done to the pipe will result in a performance loss. -
Page 13: Shock Preload
It is generally known that 0 degrees of camber is not a preferred setting. Most riders will want inward (negative) of at least 4-8 degrees. This will give good cornering traction with free steering feel. More camber angle may be required as track conditions dictate. - Page 14 - - 13...
-
Page 15: Troubleshooting
Troubleshooting Engine does not start No fuel flow to carburetor No fuel in fuel tank Clogged float valve Clogged fuel tank cap breather hole Clogged fuel tube Weak or no spark Engine stop switch in OFF position Ignition switch in OFF position Safety tether switch disengaged Faulty spark plug Fouled spark plug... - Page 16 Engine starts but runs poorly Exhaust system Exhaust system clogged Fuel petcock not fully opened Fuel system Fuel filter clogged or dirty Air filter clogged or dirty Carburetor vacuum leak Carburetor main jet, pilot jet, or needle valve dirty Ignition primary circuit Poor connection of primary contact Faulty ignition coil Faulty CDI module...
- Page 17 Bad ignition timing Faulty CDI unit Restricted fuel flow Lack of fuel in tank Clogged fuel line Clogged fuel valve Clogged fuel tank breather hose Dirty air filter Clean with high pressure air gun Clogged carburetor jets Clean the filter No power when throttle applied Belt worn Transmission Worn...
- Page 18 Radiator cap fouled Engine knocking at high speed Worn piston and cylinder Fuel/air mixture ratio is lean Wrong type of fuel Ignition timing too advanced Excessive carbon deposited in combustion chamber Poor handling Steering is heavy Damaged steering bearing Damaged steering shaft bushing One wheel is wobbling Damaged Tire Bent rim...
Need help?
Do you have a question about the Pro MXR 70 and is the answer not in the manual?
Questions and answers