Table of Contents
Advertisement
Advertisement
Table of Contents

Related Manuals for Karmann Colorado

Summary of Contents for Karmann Colorado
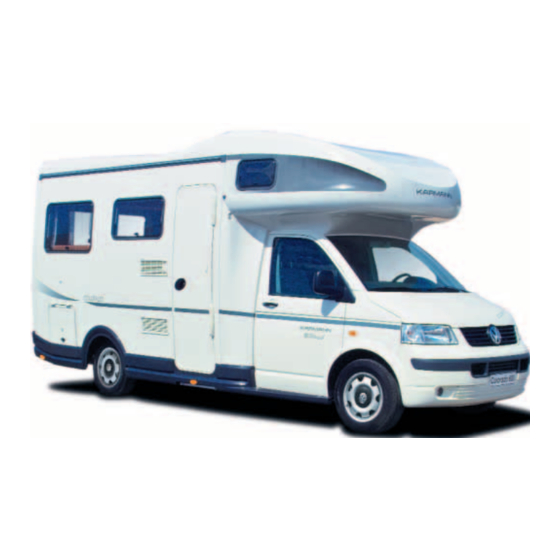
- Page 1 Operating Instructions Colorado...
- Page 2 Congratulations on your new Karmann Mobile Home You have made the right decision, for Karmann has been building mobile homes for more than 100 years. That means quality and reliability. And that is why Karmann is mentioned in the same breath as the best automobile manufacturers.
-
Page 3: Of Your Mobile Home
Karmann mobile home in the best way Detailed assembly and operation instructions possible, safely and in an environmentally- are of course included with these friendly way. -
Page 4: Table Of Contents
Exterior 1-3 Interior 1-4 Child safety device in the alcove Exterior 10-2 Colorado 650 Exterior 1-5 Interior 1-6 Round seating group Colorado 650 Notes on operation Colorado 660 Exterior 1-7 Interior 1-8 Rotating drivers cab seats Winter 11-1 Colorado 625 TI Exterior 1-9... -
Page 5: Exterior
EQUIPMENT OVERVIEW Colorado 550 Exterior Fuel filler cap Outside flap for gas cylinder box Page 5-1 Discharge 230 V flap for connector sewage tank Page 6-2 Page 7-6 Refrigerator Waste water air vent discharge tap/ Page 5-8, 10-2 Discharge fitting... -
Page 6: Interior
EQUIPMENT OVERVIEW Colorado 550 Interior Electrical equipment Page Living area Page Automatic charger 13 Seating group 1a Body battery 14 Table Bord-Control Panel 15 Sleeping quarters Netzmatik (automatic 16 Wardrobe circuit breaker 230 V) 17 Kitchen with Fuses 6-1, 6-2... - Page 7 EQUIPMENT OVERVIEW Colorado 600 Exterior Fuel filler cap Outside flap for gas cylinder box Page 5-1 Discharge 230 V flap for connector sewage tank Page 6-2 Page 7-6 Refrigerator Waste water air vent discharge tap/ Page 5-8, 10-2 Discharge fitting...
- Page 8 EQUIPMENT OVERVIEW Colorado 600 Interior Electrical equipment Page Living area Page Automatic charger 13 Seating group 1a Body battery 14 Table Bord-Control Panel 15 Sleeping quarters Netzmatik (automatic 16 Wardrobe circuit breaker 230 V) 17 Kitchen with Fuses 6-1, 6-2...
- Page 9 EQUIPMENT OVERVIEW Colorado 650 Exterior Fuel filler cap Outside flap for gas cylinder box Page 5-1 Discharge 230 V flap for connector sewage tank Page 6-2 Page 7-6 Refrigerator Waste water air vent discharge tap/ Page 5-8, 10-2 Discharge fitting...
- Page 10 EQUIPMENT OVERVIEW Colorado 650 Interior Electrical equipment Page Living area Page Automatic charger 13 Seating group 1a Body battery 14 Table Bord-Control Panel 15 Sleeping quarters Netzmatik (automatic 16 Wardrobe circuit breaker 230 V) 17 Kitchen with Fuses 6-1, 6-2...
- Page 11 EQUIPMENT OVERVIEW Colorado 660 Exterior Fuel filler cap Outside flap for gas cylinder box Page 5-1 Discharge 230 V flap for connector sewage tank Page 6-2 Page 7-6 Refrigerator Waste water air vent discharge tap/ Page 5-8, 10-2 Discharge fitting...
- Page 12 EQUIPMENT OVERVIEW Colorado 660 Interior Electrical equipment Page Living area Page Automatic charger 13 Seating group 1a Body battery 14 Table Bord-Control Panel 15 Sleeping quarters Netzmatik (automatic 16 Wardrobe circuit breaker 230 V) 17 Kitchen with Fuses 6-1, 6-2...
- Page 13 EQUIPMENT OVERVIEW Colorado 625 TI Exterior Fuel filler cap Outside flap for gas cylinder box Page 5-1 Discharge 230 V flap for connector sewage tank Page 6-2 Page 7-6 Air outlet for Refrigerator heating air vent system Page 5-8, 10-2...
- Page 14 EQUIPMENT OVERVIEW Colorado 625 TI 1-10 Interior Electrical equipment Page Living area Page Automatic charger 13 Seating group 1a Body battery 14 Table Bord-Control Panel 15 Sleeping quarters Netzmatik (automatic 16 Wardrobe circuit breaker 230 V) 17 Kitchen with Fuses...
- Page 15 EQUIPMENT OVERVIEW Colorado 655 TI 1-11 Exterior Fuel filler cap Outside flap for gas cylinder box Page 5-1 Discharge 230 V flap for connector sewage tank Page 6-2 Page 7-6 Air outlet for Refrigerator heating air vent system Page 5-8, 10-2...
- Page 16 EQUIPMENT OVERVIEW Colorado 655 TI 1-12 Interior Electrical equipment Page Living area Page Automatic charger 13 Seating group 1a Body battery 14 Table Bord-Control Panel 15 Sleeping quarters Netzmatik (automatic 16 Wardrobe circuit breaker 230 V) 17 Kitchen with Fuses...
- Page 17 EQUIPMENT OVERVIEW Colorado 665 TI 1-13 Exterior Fuel filler cap Outside flap for gas cylinder box Page 5-1 Discharge 230 V flap for connector sewage tank Page 6-2 Page 7-6 Air outlet for Refrigerator heating air vent system Page 5-8, 10-2...
- Page 18 EQUIPMENT OVERVIEW Colorado 665 TI 1-14 Interior Electrical equipment Page Living area Page Automatic charger 13 Seating group 1a Body battery 14 Table Bord-Control Panel 15 Sleeping quarters Netzmatik (automatic 16 Wardrobe circuit breaker 230 V) 17 Kitchen with Fuses...
- Page 19 EQUIPMENT OVERVIEW Colorado 675 TI 1-15 Exterior Fuel filler cap Outside flap for gas cylinder box Page 5-1 Discharge 230 V flap for connector sewage tank Page 6-2 Page 7-6 Air outlet for Refrigerator heating air vent system Page 5-8, 10-2...
- Page 20 EQUIPMENT OVERVIEW Colorado 675 TI 1-16 Interior Electrical equipment Page Living area Page Automatic charger 13 Seating group 1a Body battery 14 Table Bord-Control Panel 15 Sleeping quarters Netzmatik (automatic 16 Wardrobe circuit breaker 230 V) 17 Kitchen with Fuses...
- Page 21 BEFORE STARTING OFF Tips on commissioning Do not use your new mobile home Although the function of all the equipment in immediately for a long holiday trip. A your mobile home were certainly weekend trip of maximum 100 kilometres is demonstrated to you when you bought it, you enough for the first time.
- Page 22 BEFORE STARTING OFF Tips on commissioning Correct loading of your mobile home Wing mirrors Find out about the following before starting As a basic principle, the heaviest items You will find large wing mirrors on both sides your journey: should be as near the floor as possible. of your vehicle.
-
Page 23: Safety Checklist
BEFORE STARTING YOUR JOURNEY Safety checklist To make sure that your Karmann mobile Check the following on the basis vehicle in the seat provided with seatbelts. home is always safe, you should check according to the T 5 operating instructions:... - Page 24 Note pulling back the handle and pressing against Depending on equipment, your Karmann the door at the same time. Then open the Doorstop mechanisms for living and storage mobile home may also be supplied with other door.
- Page 25 DOORS, WINDOWS, STORAGE SPACE Locks for outside storage boxes Entry The outside storage boxes are all supplied Electrically-operated entry step Caution with identical locks. The step can be extended or retracted by means of the switch in the entrance area. Before starting your journey check Unlocking the flap that all outside flaps are closed...
- Page 26 DOORS, WINDOWS, STORAGE SPACE Opening windows Sliding window Open and close windows Note To open the sliding window, first push locking In order to open the window, unlock the hook In order to avoid damage, windows must not rod A upwards. Push the two halves of by pushing the locking button.
- Page 27 DOORS, WINDOWS, STORAGE SPACE Shade and insect blinds All windows are provided with a shade and Insect blind Caution insect blind. The illustration shows both Pull the insect blind from the top to the blinds in half-open position. Both blinds can bottom.
- Page 28 DOORS, WINDOWS, STORAGE SPACE Roof hatch (not in all models) Before opening the roof hatch, first open the Shade blind Free the roof hatch of snow in winter in insect grille. In order to push up (and close) To darken the room, hook blind B into the order to prevent water entering though the hatch, handle lock A must be pressed in.
- Page 29 DOORS, WINDOWS, STORAGE SPACE Heki 3 lift and tilt hatch Opening and closing pane Adjustment: Push joined finishing bars into Caution When winding the handle to open, only wind the desired position. until resistance can be felt. The angle of In strong sunlight the shade blind may opening is max.
- Page 30 DOORS, WINDOWS, STORAGE SPACE Mini lift and tilt roof hatch Opening and closing To open, push the joined bars in the shade Caution To open the mini hatch, first press button A, direction. Separate the bars by pushing rocker in order to free the bar. Pushing bar B allows D with one hand and pushing the blind back In strong sunlight the shade blind may the hatch to be opened in three positions.
- Page 32 LIVING ACCOMMODATION Table in seating group (Colorado 550, 650, 660, 625 TI, 655 TI, 675 TI) Lower tabletop Extending tabletop Lift the table slightly at the front edge. Pull The Colorado 650 and the 655TI has an the table leg downwards and hinge it extending tabletop in the found seating backwards.
- Page 33 LIVING ACCOMMODATION Safety belts in the rear Table in the rear seating group Seat belts in the body seating group Adjusting the table height Body seating group The safety belts in the rear seating group are To adjust the height, push the lever under the The seating group is equipped with two fixed to a rail on the side walls under the table surface to the left.
- Page 34 In order to make a bed from the seating groups in the Colorado models, first lower seat cushions the tabletop as described on pages 4-1 and 4-2. The bed surface is formed of the backrests and seat cushions.
- Page 35 FURNITURE Alcove Child safety in the alcove In order to make access to the driver's cab The child safety anti-fall barriers, to be used easier, the bed in the alcove can be hinged for example while children are asleep, is up.
- Page 36 Side seating group and lenghtways bench of located under the matress in the alcove or in the Colorado 650 can be extended to form a the wardrobe. Click the lower rod into the round seating unit. Remove the seat cushion provided clips.
- Page 37 FURNITURE Cupboards Rotating driver's cab seats Models Colorado 660, 625 TI, 655 TI and 665 TI All top and bottom cupboards are provided Caution are provided with a seating group which is with pushlocks which prevent the cupboards completed by the seats in the driver's cab. In...
- Page 38 GAS INSTALLATION Gas Supply Duomatic L Plus (optional) The Duomatic L Plus automatically switches to a reserve cylinder as soon as the operating cylinder is empty. The Duomatic Caution consists of a central controller and a switchover controller on the gas cylinders In the case of accidents or malfunctions and a control element in the body.
- Page 39 GAS INSTALLATION Gas Supply Gas distributor block If you do not use your mobile home for butane does not become gaseous below The gas distributor block is located in the several days, you should always close your 0° C! kitchen block. Each consumer has its own gas cylinders.
- Page 40 The Trumatic heating system in your In winter mode the unit determines pilot light (B) of the knob must light up. If Karmann Mobile Home is equipped in automatically through the thermostat which the light does not light up, check the fuse addition with an integrated 12 ltr.
- Page 41 GAS INSTALLATION Heating and Hot Water Supply E = Yellow pilot light "Boiler heat-up phase" At temperatures below 3°C the antifreeze Lights up during the heating-up phase of safeguard will drain the boiler automatically the boiler. When the water or air tempera at the drain valve to prevent any frost ture set has been reached the light goes damage to the unit.
- Page 42 GAS INSTALLATION Heating and Hot Water Supply Draining the boiler Safety instructions Caution 1. Switch off the water pump (p. 6-1). Do not modify the heating system in any 2. Open the hot water taps in the way. Repairs and maintenance must be The waste gas flue may not be sealed off kitchen and bathroom.
- Page 43 GAS INSTALLATION Gas cooker The gas cooker is equipped with a cover Keep the knob pressed for about 10 seconds General instructions plate of safety glass. To prevent any damage when the flame at the cooking ring is burning Place saucepans in the middle of the to the glass plate never operate the gas in order to override the ignition safeguard cooking ring.
- Page 44 GAS INSTALLATION Gas cooker Caution Do not keep any inflammable objects near the cooker when it is in use. While the cooker is in use, open the roof flap to prevent oxygen deficiency. Do not overheat oil or fat – fire hazard! Do not allow the handles of sauce pans and frying pans beyond the edge of the work-plate to ensure that no...
- Page 45 GAS INSTALLATION Refrigerator The refrigerator is designed for operation Ignition is automatic. When the "Gas" 12 V mode with 230 V, 12 V or gas. indicator lights up and there is a ticking Set the energy selector switch A to 12 V Selection of the mode of operation and noise, this shows that ignition sparks are mode.
- Page 46 GAS INSTALLATION Refrigerator Temperature control interlock (C). The picture shows the door You can prevent any knocking noises The refrigerator needs a few hours to when locked. To open, slide the lock to the during travel by stuffing screwed-up achieve its normal operating temperature. left.
- Page 48 ELECTRICAL INSTALLATION Bord-Control Panel The monitoring panel is located in the interior 4 - Standby operation switch with 8 - Indicator lamp for low battery above the body door. It controls all control indicator lamp The low battery indicator lamp comes on if and monitoring elements of the 12 V power In standby mode, all consumers are switched the body battery charge sinks below 10.8...
- Page 49 ELECTRICAL INSTALLATION Fuses in body Automatic fuse 230 V Automatic charger & battery The fuses are in the technical space behind Safeguards the supply of 230 V (see The Automatic charger (suitable for gel-type the driver's seat equipment overview). battery) is located under or behind the 1 = Entry step It is located under the seat bench.
- Page 50 ELECTRICAL INSTALLATION A 12 V supply to the refrigerator is therefore Caution only possible when the vehicle is travelling. This prevents the body battery from being A single exhaustion of the body battery discharged by the refrigerator during may damage it. standstills.
- Page 51 ELECTRICAL INSTALLATION Halogen lamps Built-in halogen spots Alcove light Shower light The halogen spots are fitted with halogen To change the bulb, switch off the power Changing the bulb: press together the bulbs of different power ratings. supply. transparent cover at Points A and remove. To change the bulb, first switch the power Pull the head off the swan-neck and the Push the bulb into the holder and turn by 90...
-
Page 52: Rear Lights
ELECTRICAL INSTALLATION Rear lights Rear lights Release the lamp holders to change the bulbs in the rear lights by removing the plugs on the left and right of the holders with a blunt knife. LEDs are used for the reversing light (white) and have to be replaced by an original part. - Page 54 (Page 6-1). In order to clean the tank, empty the tank and The water supply of your Karmann mobile rotate the cleaning lid under the bench to home is by means of the built-in water tank.
- Page 55 In the the pipe system from the inlet and outlet of Notes Colorado 600 and 660 it is on the passenger the pump (inlet connection: double wing Only use clean water to fill the fresh water...
- Page 56 The sink of your Karmann mobile home is commissioning. supplied with a mixer tap and a cover, which In order to do this, open the taps in the then extends the working and storage area in bathroom and kitchen.
- Page 57 WATER SUPPLY AND DISPOSAL Washbasin with shower Toilet The washbasin of your Karmann mobile home In order to gain more room in the bathroom, recommended by the manufacturer and add is supplied with a mixer tap for regulation of the toilet can be rotated.
- Page 58 WATER SUPPLY AND DISPOSAL Toilet Water flush with fill level indicator Notes Activate the flush by pushing button A. Water Use original Thetford toilet paper or only flows for as long as the button remains another fast-dissolving paper. Other pressed. papers may damage the mechanism of the Before using the toilet, activate the flush sewage tank.
- Page 59 WATER SUPPLY AND DISPOSAL Sewage tank In the Colorado 550 and 650 the septic tank Press air intake button G until the tank is The sewage tank may only be emptied at can be accessed from the function flap at the empty.
- Page 60 The Colorado 665 TI and 675 TI have a flap to the technical area in the body at the rear. In the Colorado 625TI and 655TI the flap to the technical area is behind the bed.
- Page 61 Carrier rails for a load carrying system are let The bicycle rack is mounted on the bumper and fix them with the knurled screws. into the roof of your Karmann mobile home. extendible bumper with the help of four The cable and plug of the repeaters are safety bolts A.
- Page 62 CHASSIS Low-frame chassis Your vehicle is built on an amc chassis The following components are original parts Your AL-KO service partner: manufactured by Alois Kober GmbH. Certain from the Volkswagen Transporter T5 series. Alois Kober GmbH changes to the basic vehicle naturally result Brake discs AL-KO Maschinenfabrik from this.
-
Page 64: Care Of The Vehicle
CARE OF THE VEHICLE 10-1 Exterior Washing At least once a year the glass fibre The vehicle can be washed with special composite walls of the body should be vehicle shampoo. treated with a polish suitable for gel coat Chemical cleaners, alcohol, glass cleaner or (marine sector) and should then be sealed. - Page 65 CARE OF THE VEHICLE 10-2 Interior Floor covering Refrigerator The floor covering of your Karmann mobile In order to avoid buildup of ice, the home can be cleaned with a normal refrigerator should be defrosted regularly in household cleaner. accordance with the manufacturer's instructions.
-
Page 66: Operating Instructions
OPERATING INSTRUCTIONS 11-1 Winter operation Your Karmann mobile home can be used in Note Free the roof hatch regularly of snow in winter. In order to avoid disturbances to As the fall in pressure in the fresh water order to free penetration of melting water... - Page 67 OPERATING INSTRUCTIONS 11-2 Immobilisation of the vehicle in winter Fill the fuel tank completely with fuel. Note Check the state of the battery regularly Lay a cloth under the pump area. (must not be below 10 volts). Charge the body battery and disconnect •...
-
Page 68: Gas Equipment
FAULT IDENTIFICATION AND ELIMINATION 12-1 Gas installation The following table shows a list of common faults. If any optional items of equipment show defects (e.g. air conditioning etc.), please consult the operating instructions of the equipment in question. Fault Possible cause Remedy Smell of gas, usually high gas consumption Gas system leaking... -
Page 69: Heating/Hot Water
FAULT IDENTIFICATION AND ELIMINATION 12-2 Gas installation Fault Possible cause Remedy Lack of correct flame formation. e.g. at gas Gas pressure controller defective Consult specialist repair shop cooker When controller set at "small flame", flame Ignition protection sensor incorrectly Consult specialist repair shop extinguishes adjusted Refrigerator fails to work with gas mode... - Page 70 FAULT IDENTIFICATION AND ELIMINATION 12-3 Heating/hot water Fault Possible cause Remedy "Operating" (green) lamp at the Trumatic Fuse triggered Contact specialist repair shop device is not illuminated "Operating" (green) lamp at the Trumatic Body battery too weak or faulty Charge or change battery device is not illuminated Frost protection valve has opened and Body battery is too weak or faulty...
-
Page 71: Power Supply
FAULT IDENTIFICATION AND ELIMINATION 12-4 Power supply Fault Possible cause Remedy Body battery does not supply any voltage Body battery discharged to low level If the battery if discharged to low level it is irreparably damaged and must be replaced. When the vehicle is temporarily laid up for the winter, charge the body battery and disconnect the terminals, pay attention to... - Page 72 FAULT IDENTIFICATION AND ELIMINATION 12-5 Power supply Fault Possible cause Remedy Body battery does not charge when Battery voltage too low Charge body battery, start motor and allow connected to 230 V network to run for approx. 30 seconds. Battery voltage rises over 12 V and charging starts.
-
Page 73: Water Supply
FAULT IDENTIFICATION AND ELIMINATION 12-6 Water supply Fault Possible cause Remedy No fresh water Fresh water tank empty Fill fresh water tank Water pump fuse has triggered Push in fuse (Page 6-2) Water pump faulty Contact specialist workshop Water in interior Pipeline system leaks Find fault and seal Fresh water / discharge display on Bord-... -
Page 74: Weights
4,900/ 5,200 kg bis 2,000 kg 3,500 kg 2,995 kg / 3,070 kg 505 kg / 430 kg 150 kg Colorado 625 TI 4,900/ 5,200 kg bis 2,000 kg 3,500 kg 2,875 kg / 2,950 kg 625 kg / 550 kg... -
Page 75: Dimensions
TECHNICAL DATA 13-2 Dimensions Values in mm Colorado 550 Colorado 600 Colorado 650 Colorado 660 Colorado 625TI Colorado 655TI Colorado 665TI Colorado 675TI Wheelbase 3,580 mm 3,680 mm 3,900 mm 4,100 mm 4,100 mm 4,000 mm 4,100 mm 4,100 mm... -
Page 76: Technical Data
Toilet Consumption Additional fresh water tank (special Sewage tank ........17 Liter - Refrigerator......125 Watt equipment) Colorado 550, 650, electric flush - Charge current EVS charging device..... 660, 675 TI .......... 50 Liter ..............max. 12 A body battery (gel battery)....80 AH (20 h) This table gives examples of daily consumption of some consumers.*... - Page 77 TECHNICAL DATA 13-4 Gas consumption/day Summer Winter (2 gas cylinders, 11 kg each) Consumer Consumption Operating hours Gas consumption/day Operating hours Gas consumption/day Refrigerator 11 kg/h 260g combi boiler 170 g/h at 2000 W 1360g 2720g nominal output Hot water/heating 285 g/h at 3400 W 2280g 4560g...
- Page 78 Chemical …………………………………7-5 -Colorado 650 ……………………………1-5 Hot water …………………………………5-3 Child safety, Alcove ………………………4-4 -Colorado 660 ……………………………1-7 Cleaning lid, -Colorado 625 TI …………………………1-9 Consumption ……………………………13-3 -Colorado 655 TI ………………………...1-11 Immobilisation of the vehicle in winter …10-2 Control panel ……………………………6-1 -Colorado 665 TI …………………………1-13 Insect blind ………………………………3-4...
- Page 79 -Colorado 600 ……………………………1-4 Table …………………………………4-1, 4-2 -Colorado 650 ……………………………1-6 Technical data ……………………13-1 -13-4 -Colorado 660 ……………………………1-8 Thermostat, Heating ……………………5-3 -Colorado 625 TI …………………………1-10 Toilet ……………………………………7-4 -Colorado 655 TI …………………………1-12 -Sewage tank ……………………………7-6 -Colorado 665 TI …………………………1-14 -Fill level indicator ………………………7-5 -Colorado 675 TI …………………………1-16...
- Page 80 Reprinting, copying or translation of these instructions, even in part, requires the express written permission of Karmann-Mobil Vertriebs GmbH. All rights according to the law or copyright law are retained by Karmann-Mobil Vertriebs GmbH. We reserve the right to make changes.
Need help?
Do you have a question about the Colorado and is the answer not in the manual?
Questions and answers
What does fuse 10 cover ?