Table of Contents
Advertisement
Quick Links
CAUTION:
Before servicing this chassis, it is important that the service technician read the "Safety
Precautions" and "Product Safety Notices" in this service manual.
ATTENTION:
Avant d'effectuer l'entretien du châassis, le technicien doit lire les «Précautions de sécurité»
et les «Notices de sécurité du produit» présentés dans le présent manuel.
VORSICHT:
Vor Öffnen des Gehäuses hat der Service-Ingenieur die „Sicherheitshinweise" und „Hinweise
zur Produktsicherheit" in diesem Wartungshandbuch zu lesen.
SPECIFICATIONS AND PARTS ARE SUBJECT TO CHANGE FOR IMPROVEMENT
SERVICE MANUAL
MANUEL D'ENTRETIEN
WARTUNGSHANDBUCH
Plasma TV
August 2007
SM015
P42A01
Data contained within this Service
manual is subject to alteration for
improvement.
Les données fournies dans le présent
manuel d'entretien peuvent faire l'objet
de modifications en vue de perfectionner
le produit.
Die in diesem Wartungshandbuch
enthaltenen Spezifikationen können sich
zwecks Verbesserungen ändern.
Advertisement
Table of Contents

Related Manuals for Hitachi P42A01


Summary of Contents for Hitachi P42A01
- Page 1 SM015 P42A01 SERVICE MANUAL MANUEL D'ENTRETIEN WARTUNGSHANDBUCH CAUTION: Before servicing this chassis, it is important that the service technician read the “Safety Precautions” and “Product Safety Notices” in this service manual. Data contained within this Service manual is subject to alteration for improvement.
-
Page 2: Table Of Contents
CONTENTS SERVICING NOTICES ON CHECKING ....................... A1-1 HOW TO ORDER PARTS ..........................A1-2 IMPORTANT ..............................A1-2 A2-1, A2-2 COMPONENT NAMES ..........................GENERAL SPECIFICATIONS ........................A3-1~A3-6 DISASSEMBLY INSTRUCTIONS 1.EXCHANGE METHOD OF PDP MODULE ................... B1-1~B1-9 2.REMOVAL AND INSTALLATION OF FLAT PACKAGE IC ..............B2-1, B2-2 SERVICE MODE LIST .......................... -
Page 3: Servicing Notices On Checking
SERVICING NOTICES ON CHECKING When you remove the cover, do not scratch the 1. KEEP THE NOTICES FPC on both ends of PDP Module. As for the places which need special attentions, Hold the four ends holder and be careful not to they are indicated with the labels or seals on the touch the glass area. -
Page 4: How To Order Parts
HOW TO ORDER PARTS Please include the following informations when you order parts. (Particularly the VERSION LETTER.) 1. MODEL NUMBER and VERSION LETTER The MODEL NUMBER can be found on the back of each product and the VERSION LETTER can be found at the end of the SERIAL NUMBER. -
Page 5: Component Names
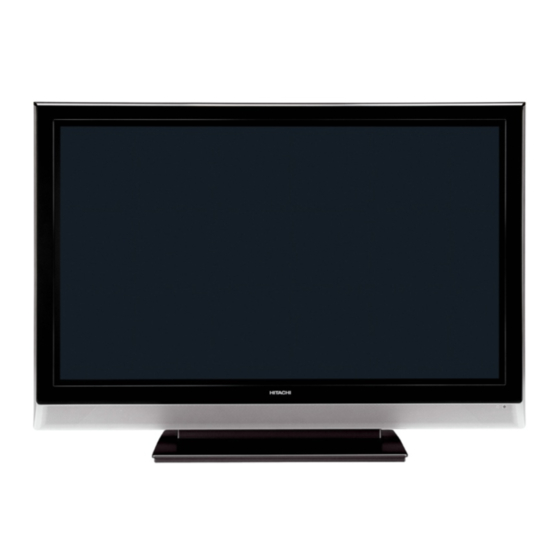
COMPONENT NAMES Main Unit Front Panel ① Panel ② Remote Control Receiver ③ Indicating Lamp ④ Speaker ⑤ Desktop Stand ① Handgrips ② Side Input ③ Rear Input ④ Control Panel (see below for details) ⑤ Cable Clampers ⑤ ① Main Power Switch ( ) ②... - Page 6 COMPONENT NAMES (Continued) Remote Control Sub Power Recall Pressing this button shows the input signal status. Source access buttons (TV, DVD, SAT) Changes the mode of the Universal Remote Control to control the device selected. Normally select TV. Please ignore “/DTT”. DTT is not related to this model.
-
Page 7: General Specifications
GENERAL SPECIFICATIONS PDP Size / Visual Size 42.32 inch / 1074.9 mmV Number of Pixels(H x V) 1024(H) x 1,080(V) System Color System PAL/SECAM Speaker 4 Speaker Position Front Main Size 2.2 x 5.0 inch Impedance 4 ohm Tweeter Size 2.0 inch Impedance 8 ohm... - Page 8 GENERAL SPECIFICATIONS Unit RC-NX Remote Glow in Dark Remocon Control Remocon Format HITACHI Format HITACHI Custom Code 50-AF h Power Source Voltage(D.C) UM size x pcs UM-3 x 2 pcs Total Keys Keys POWER RECALL DTT/TV INPUT FREEZE VOLUME+ AUDIO/RESET...
- Page 9 GENERAL SPECIFICATIONS Power On Memory G-10 Features Contrast Enhancer Auto Shut Off Auto Search Just Clock Function Game Position Comb Filter CH Label Auto Set Up (Fast installation) Auto tuning (Analog tuner) CH sort Auto clock (Analog tuner) Plug in start (Analog tuner) Picture(TV) Picture Preference Brightness , Contrast , Colour...
- Page 10 GENERAL SPECIFICATIONS T'Text Text type Fastext/Toptext Text Language English , French, Swedish, Hungarian Finnish, Turkish, German, Dutch Portuguese, Spanish, Italian, Greek Polish, Russian, Bulgarian, Danish, Norwegian, Croatian, Czech Slovene, Slovakian, Rumanian, Serbian Wide Mode Picture Scroll (Vertical Position) PFC(Power Factor circuit) Hotel Mode Freeze frame PIP/POP...
- Page 11 GENERAL SPECIFICATIONS Component Input 720×480i (4:3) Yes (60Hz) 720×480i (16:9) Yes (60Hz) 720×480p (4:3) Yes (60Hz) 720×480p (16:9) Yes (60Hz) 720×576i (4:3) Yes (50Hz) 720×576i (16:9) Yes (50Hz) 720×576p (4:3) Yes (50Hz) 720×576p (16:9) Yes (50Hz) 1280×720p Yes (50/60Hz) 1920×1080i Yes (50/60Hz) Owner's Manual Language...
- Page 12 4 Edges / 5 Surfaces Height (cm) Container Stuffing Sets/40' container w/Pallet w/Wrapping Cabinet Cabinet Front ABS 94HB G-16 Material Cabinet Rear Steel Non-Halogen Eyelet G-17 Environment Environmental standard requirement Green procurement of HITACHI Pb-free Phase3(Phase3A) Measures for Whisker WEEE A3-6...
-
Page 13: Disassembly Instructions
DISASSEMBLY INSTRUCTIONS 1. EXCHANGE METHOD OF PDP MODULE NOTE Do handling with the PDP Module by 2 persons. REMOVAL METHOD OF PDP MODULE 1-1: CABINET BACK/COVER BACK Remove the 13 screws (1). Remove the Cover Back. Remove the 24 screws (2). Remove the 2 screws (3). - Page 14 DISASSEMBLY INSTRUCTIONS 1-2: STAND ASS'Y Spread a sheet on the plane table and place the PDP Module carefully with the panel face down. Remove the 4 screws (1). Remove the Stand Ass'y. Stand Ass'y B1-2...
- Page 15 DISASSEMBLY INSTRUCTIONS 1-3: CHASSIS BLOCK Disconnect the following connectors. AV PCB: CP300, CP301, CP3801, CP3802, CP3808, CP3809, CP4400 Scaler PCB: CP3906, CP3909, CP7200. Filter PCB: CP501, CD510. Remove the 4 screws (1). Remove the 9 screws (2). Remove the 4 screws (3). Remove the Chassis Ass'y.
- Page 16 DISASSEMBLY INSTRUCTIONS 1-4: PDP MODULE Remove the 8 screws (1). Remove the 4 screws (2). Remove the Side Jack. Hold the Frame Main carefully and remove the PDP Module. (1) (1) (1) (1) PDP Module Frame Main Frame Main Side Jack (1) (1) (1) (1) B1-4...
- Page 17 DISASSEMBLY INSTRUCTIONS 1-5: PDP FILTER Remove the 22 screws 1. Remove the Shield Main. Remove the PDP Filter. Shield Main Top PDP Filter Shield Main L Shield Main R Shield Main Bottom B1-5...
- Page 18 DISASSEMBLY INSTRUCTIONS INSTALLATION METHOD OF PDP MODULE NOTES FOR NEW PDP FILTER HANDLING When you handle the PDP Filter, you must wear gloves to avoid soiling it with sweat and dust. When you lift the PDP Filter, use the palm of your hand. Don’t pick it up with your fingers. The back side of the PDP Filter tends to get damaged, since there is no coating.
- Page 19 DISASSEMBLY INSTRUCTIONS NOTES FOR NEW PDP MODULE HANDLING Handle the PDP Module with 2 people. There is a step difference between the cover and the PDP Module, so when you remove the screws, place a cushion on it to keep the PDP Module from being scratched. Then remove the 4 screws (1) carefully. When you remove the cover, do not scratch the FPC on both ends of PDP Module.
- Page 20 DISASSEMBLY INSTRUCTIONS 1-7: PDP MODULE Install the PDP Filter on the set. (Refer to 1-6: PDP FILTER PREPARATION) Install the Shield Main on the set. (Refer to 1-5: PDP FILTER) Assemble the Frame Main to the PDP Module. Hold the Frame Main carefully and install the New PDP Module on the set. Install the Side Jack Ass'y and Button Frame Ass'y on the set.
- Page 21 DISASSEMBLY INSTRUCTIONS 1-8: CHASSIS BLOCK9 Before install the Cabinet Back, check if the Bond (PART NO.: Y118011000), Flame Retadant Tape and UL Tape as shown in the photo. PDP Module Tape Tape Bond Bond Bond Bond Tape Bond Bond STANDARD LINE Bond Bond STANDARD LINE...
-
Page 22: Removal And Installation Of Flat Package Ic
DISASSEMBLY INSTRUCTIONS When IC starts moving back and forth easily after REMOVAL AND INSTALLATION OF desoldering completely, pickup the corner of the IC using FLAT PACKAGE IC tweezers and remove the IC by moving with the IC desoldering machine. (Refer to Fig. 2-3.) REMOVAL NOTE Put Masking Tape (cotton tape) around the Flat Package... - Page 23 DISASSEMBLY INSTRUCTIONS When bridge-soldering between terminals and/or the INSTALLATION soldering amount are not enough, resolder using a Thin- Take care of the polarity of new IC and then install the tip Soldering Iron. (Refer to Fig. 2-8.) new IC fitting on the printed circuit pattern. Then solder each lead on the diagonal positions of IC temporarily.
-
Page 24: Service Mode List
SERVICE MODE LIST This unit is provided with the following SERVICE MODES so you can repair, examine and adjust easily. To enter to the SERVICE MODE function, press and hold both buttons simultaneously on the main unit and on the remote control for more than the standard time in the appropriate condition. -
Page 25: When Replacing Eeprom (Memory) Ic
WHEN REPLACING EEPROM (MEMORY) IC CONFIRMATION OF CHECK SUM, POWER ON TOTAL HOURS AND MICON VERSION. Initial total of MEMORY IC, POWER ON total hours and MICON VERSION can be checked on the screen. Total hours are displayed in 16 system of notation. NOTE: If you set a factory initialization, the total hours is reset to "0". -
Page 26: Electrical Adjustments
ELECTRICAL ADJUSTMENTS 1. ADJUSTMENT PROCEDURE FUNCTION FUNCTION H POSI CENTRE H POSI OSD Read and perform these adjustments when repairing the V POSI OSD V POSI CENTRE circuits or replacing electrical parts or PCB assemblies. R DRIVE (N) BRIGHT CENT CAUTION R CUT OFF (N) BRIGHT MAX... - Page 27 ELECTRICAL ADJUSTMENTS 2-2: Confirmation of Fixed Value (Step No.) Please check if the fixed values of each of the adjustment item is set correctly referring below. (TV/AV/YUV/HDMI/PC) HD-MI CVBS Y/C1 CVBS Y/C2 60Hz 50Hz 60Hz 50Hz VGA 60 VGA 70 VGA 75 WVGA 60 SVGA 60 SVGA 75 XGA 60 XGA 75 WXGA 60 WXGA 60 WXGA 60 FUNCTION NTSC...
- Page 28 ELECTRICAL ADJUSTMENTS 3. ELECTRICAL ADJUSTMENT PARTS LOCATION GUIDE (WIRING CONNECTION) PART NO. Item Item Wire Part No. HITACHI Part No. Item REF.NO. DESCRIPTION HITACHI PART NO. Board PART NO. HITACHI PART NO. CORD,CONNECTOR CORD,CONNECTOR CD3906 CD802 06CU255502 06CU192201 SCALER PCB ASS'Y(PCBDS0)
- Page 29 TROUBLESHOOTING GUIDE POWER DOES NOT TUNER ON Is F500 broken? Change F500. Check CP3802 and peripheral circuit. Is there voltage at pin Or change PSU.(Power 3 of CP3802 5V? Suply Unit) Check IC3800 and peripheral Is there voltage at pin circuit.
-
Page 30: Troubleshooting Guide
TROUBLESHOOTING GUIDE THE PICTURE DOES NOT APPEAR (1) Connect CD3809. Is CD3809 connected? Is there signal at Change IC3901. IC3901? Is CP3904, CP3905 Connect CP3904, CP3905. connected? Check IC4400 and Is there signal at peripheral circuit. IC4400? Connect CP3904, CP3905. Is CP3904, CP3905 Caeck IC4400 and peripheral connected and is there... - Page 31 TROUBLESHOOTING GUIDE THE PICTURE APPEARS, BUT THE AUDIO DOES NOT APPEAR Is CD3802 connected? Connect CD3802. Is CD301 connected? Connect CD301. Change SP301, SP302, Is there signal CD301? SP305 and SP306. Is there signal at pins Check IC302 and peripheral 21 and 34 of IC302? circuit.
- Page 32 TROUBLESHOOTING GUIDE THE STOP PICTURE "PLEASE WAIT" Is there signal at pins Change IC100. 14 and 20 of IC100? Is there signal at pins Change IC3901. C16 and A17 of IC3901? Is there signal at pins 6 Change DIGITAL PCB. and 8 of CP2800? Change SCALER PCB.
- Page 33 TROUBLESHOOTING GUIDE THE COLOUR DOES NOT APPEAR Is setting of colour Change the setting of colour. normal? Is the colour signal Receive the colour signal. received? Is CD7200 connected? Connect CD7200. Check IC3901 and Is there signal at peripheral circuit. IC3901? Change SCALER PCB.
- Page 34 TU2800 TAFV-W623D MICON_DATA 5 11 9 CP3903 A2001WV2-10P SW_TUNER_CVBS TCLK SCL1 SDA1 SW_VIDEO_C TRST SW_VIDEO_Y SW_CVBS CP3901 SW_YUV_Y_Y1 A2001WV2-12P SW_YUV_PB ADJT_MODE SW_YUV_PR CHIP_SELECT TUNER/MONI_SW 4SI_SCL AV4/TUNER_SW 4SI_SDA_OUT SCALER IC SCART1_DET 4SI_SDA_IN IC3901 SCART2_DET R8J01047A71BG IIC_OFF YUV_PB-SC_R EEPROM_SDA Q3900 YUV_PB-SC_G EEPROM_SCL Q3901 SCART1_B Q102...
-
Page 35: Scaler
HDMI MICON IC IC3604 SST89E58RD2-40-C-TQJE CP3602 P3.1/TXD P3.0/RXD X3601 P1.0/PROGRAM 11.0592MHz P1.6/CSCL UC_SCL P1.7/CSDA UC_SDA 32K EEP ROM IC IC3603 BR24L32F-WE2 Q3617 V-SYNC LEVEL SHIFT DDVS P2.5/RXT0-RST RXT0-RST 3 CSDA P2.5/RXT1-RST RXT1-RST 2 CSCL RX1_RST RXT_RST# INTERFACE /SCALER RX1_INT H_INT CSDA CSCL Q3606... - Page 36 HDMI I/F IC3600 SII9025CTU AUDIO MINI PIN JACK HDMI AUDIO Lch SW J3900 IC7302 MM1501XNRE L3602 SW_HDMI_A_IN_L ACM2012D-900-2P R0XC- R0XC+ HDMI AUDIO Rch SW L3604 HDMI CONNECTOR ACM2012D-900-2P IC7301 MM1501XNRE CP3600 R0X0- SW_HDMI_A_IN_R 1 D2+ R0X0+ 3 D2- L3603 ACM2012D-900-2P 4 D1+ R0X1- D-SUB...
-
Page 37: Av Switch2/Av Jack/Av Jack2/Stereo/21-Pin
VIDEO IN J4400 HDMI I2SSCK AV3-13P2-31S1 21-C IN AV SW IC INTERFACE COMPONENT_IN_1 HDMI I2SSWS IC4400 HDMI I2SSDO AN15853AAE1V J4404 VIDEO IN MRC-021V-27_PC Pb 3 TUNER A MONO 21-R IN DVI/HDMI A IN L INTERFACE DVI/HDMI A IN R 21-G IN J4401 AV2-57A03-01 SIDE Y IN... - Page 38 CP3809 D3811 D3810 5.4V P.CON +5V 5.4V D3803 5.4V D3800 D3807 P.CON +8V P.CON +9V P.CONT+3.3V REC IC3802 LA5774-E P.CON +3.3V D3806 D3812 R3814 P.CON 12V CP3802 1 POWER OFF POWER_FAIL STBY 5V AT +5V IC3800 SCALER/LVDS/ KIA78D33F MICON/ AT +3.3V ADC/JACK/ CP3808 AV SWITCH1/...
- Page 39 SOUND AMP IC IC302 LV4900HR-TLM-E SP_AUDIO_OUT_L SP301 SP302 SP_AUDIO_OUT_R EAS12D175B FR050S1-B1 SOUND +B SP306 SP305 EAS12D175B FR050S1-B1 HEADPHON AMP IC IC300 NJM2151AV(TE1) CP300 HP_L HP_R P.CON +5V SM015 SOUND AMP BLOCK DIAGRAM...
- Page 40 TOP (COMPONENT) SIDE BOTTOM (SOLDER) SIDE W830 CP301 Q3813 CP3808 CP3802_1 CP3809 CP3801 R3828 R3805 R3801 L3804 C3830 HS3805 IC3805 CMF110A R4337 R4342 C4334 IC3802 CP300 Q4301 D3804 Q4303 HS302 W001 L3808 R3829 W856 C347 C348 C346 C349 IC300 Q3816 R306 CMF110A W854...
- Page 41 BOTTOM (SOLDER) SIDE TOP (COMPONENT) SIDE C3412 C3411 C3410 CP3400 CP3905 CP3904 C3400 C3404 C3426 R3445 IC3400 R3442 C3432 Q3402 POWER X3600 L3601 R3439 C3423 C3686 C3683 IC3403 C3421 L3607 C3687 C3684 D3413 R3411 C3435 L3600 R3423 C3680 L3606 R3453 C3668 R3450 C3431...
-
Page 42: Power
CHASSIS CHASSIS CD510 CD504 OS2251 BOTTOM (SOLDER) SIDE C2252 J501 R2252 D2251 CEF298A CEF296A REMOCON BOARD BOTTOM (SOLDER) SIDE C504 W862 CEF210A W856 W855 CP4200 CP4205 L500 R4200 CP502 R2201 L4200 R2202 L4227 R6500 CP503 CEF299A J4206 J4200 W858 J4207 J4208 J4209 W857... -
Page 43: Scaler
4 OHM 10W ! !.4 OHM 10W SP306 SP301 SPEAKER SPEAKER TWEETER 8 OHM 10W ! !.TWEETER 8 OHM 10W SP305 SP302 SPEAKER SPEAKER TR302 TR301 CD301 H1 H2 CP4401 CP3904 CP7200 CP4200 CD4400 CP4400 SWITCH_VIDEO_C SWITCH_VIDEO_C SIDE_A_IN_R SIDE_A_IN_R SIDE RXIN0- AUDIO L AUDIO_OUT... - Page 44 106B PCBD00 (FILTER BOARD) 102C 102C 106B 102A 102C 102C 102B 102C 106A 102C 102C V801 102C 103C PSU801 103B 103D PCB320 205 205 (POWER SW BOARD) 103A PCBD90 V802 107B 105B 107A 101I 101I 105A 101F 101F PCBD20 (AV BOARD) 101I 101I 101H...
- Page 45 THE UPDATED PARTS LIST FOR THIS MODEL IS AVAILABLE ON ESTA...
- Page 46 Fax: +46 (0) 8 562 711 13 Tel: +39 02 38073415 Servizio Clienti Email: csgswe@hitachi-eu.com Fax: +39 02 48786381/2 Email: customerservice.italy@hitachi-eu.com HITACHI EUROPE S.A.S HITACHI EUROPE LTD (Norway) AB Lyon Office STRANDVEIEN 18 B.P. 45, 69671 BRON CEDEX 1366 Lysaker FRANCE...
Need help?
Do you have a question about the P42A01 and is the answer not in the manual?
Questions and answers