
Summary of Contents for Skymaster NVR BOX
-
Page 1: User Manual
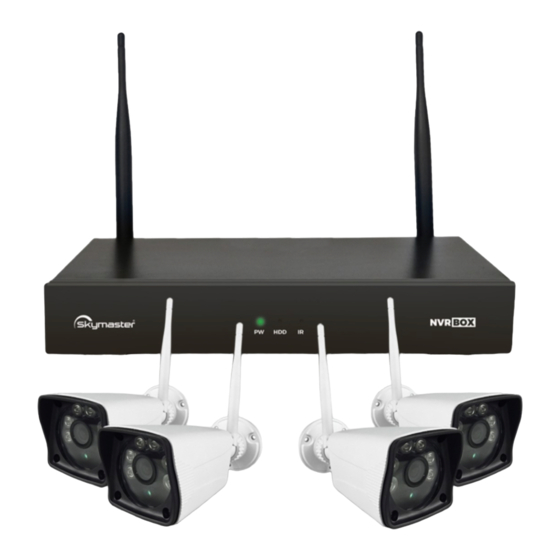
Skymaster NVR BOX User Manual H.264 WIRELESS 720P NVR BOX USER MANUAL 4 channel wireless NVR BOX Page 1 of 32... -
Page 2: Table Of Contents
Skymaster NVR BOX User Manual Contents catalog Chapter one: Product Description ..........................3 General Description ........................... 3 Technical Parameters ......................... 3 Hard Drive Installation ........................5 Chapter Two: Structure Appearance Description ....................... 6 2.1 Panel Description ............................6 2.2 Product Interface Description ........................7 2.3 Mouse Description ............................ -
Page 3: Chapter One: Product Description
Skymaster NVR BOX User Manual 3.14.2 Channel OSD .................... 24 3.14.3 Video Detection ................... 25 3.15 System Admin ......................27 3.15.1 System version ..................... 27 3.15.2 HDD info ....................28 3.15.3 System log ....................28 3.15.4 User management ..................29 3.15.6 System maintenance ................. - Page 4 Skymaster NVR BOX User Manual Video/Capture mode Maual、Time、Motion、Alarm Playback mode Real time、Routine、Event Backup USB backup Alarm Input 4ch (optional) Alarm Output 1ch (optional) Type 1*SATA interface Max Capacity 4 TB at most for each Network Interface 1 adaptable RJ45 10M/100M, 1 WIFI interface USB Interface 1 USB 2.0...
-
Page 5: Hard Drive Installation
Skymaster NVR BOX User Manual Interface RJ45 / WIFI 802.11b/g/n Anti-thunder Level Standard IEC61000-4-5 Working -10℃ to +50℃ / 30% to 80% RH Temperature/Humidity Working -20℃ to +60℃ / 20% to 90% RH General Temperature/Humidity Specification Power Input DC12V/ 1A Power consumption ≤15W... -
Page 6: Chapter Two: Structure Appearance Description
Skymaster NVR BOX User Manual Chapter Two: Structure Appearance Description 2.1 Panel Description 4 channel NVR Front Panel Description: Page 6 of 32... -
Page 7: Product Interface Description
Skymaster NVR BOX User Manual Pic 2.1 1.POW:Power States LED 2.HDD:HDD State LED 2.2 Product Interface Description 4 channel NVR Rear Panel Description: Page 7 of 32... -
Page 8: Mouse Description
Skymaster NVR BOX User Manual Pic 2.2 1、VGA:Video Output Connector 2、HDMI: Video Output Connector 3、NET: RJ-45 Standard Network Connector 4、USB:Standard USB Connector 5、DC12V:12V(DC) Power Connector 2.3 Mouse Description Operation Function Double click one item in the file list to playback the video. -
Page 9: Chapter Three: Description Of Operation System
Skymaster NVR BOX User Manual Pic 2.3 Pic 2.4 Name Description Function Number Input 0~9 Character - / . _ * # @ Input characters Cap/Small caps switch Back ← delete Chapter Three: Description of Operation System 3.1 Turn on / off Confirm that AC voltage accessible matches with NVR. -
Page 10: Main Menu Introduction
Skymaster NVR BOX User Manual 3.3 Main Menu Introduction 3.3.1 main menu list Right click mouse, it will pop-up the main menu. Main menu consists of the following column: Pic 3.2 Split Screen (split the screen by 1 or 4 channel),... -
Page 11: Video Manage (Add Extra Ip Camera If Needed)
Skymaster NVR BOX User Manual Pic 3.4 3.5 Video Manage (add extra IP camera if needed) The 4pcs IP camera has already being matched into the NVR when you buy the product, but if you lost 1 camera video, you need to add it by yourself: Right click mouse in main menu—→... -
Page 12: Video Playback
Skymaster NVR BOX User Manual 3.6 Video Playback Right click mouse in main menu----Video playback----choose channel No.----choose Record mode----In search time, input beginning time and end time----click search, recording will come out, drag time bar----click playback to start Pic 3.6 Channel:to choose the target channel by clicking the check box. -
Page 13: Color Adjust
Skymaster NVR BOX User Manual Pic 3.7 3.8 Color adjust Right click the mouse, then turn in to the “Color adjust”. Pic 3.8 3.9 Volume Right click the mouse, then turn in to the “Volume”. Page 13 of 32... -
Page 14: Manual Record
Skymaster NVR BOX User Manual Pic 3.9 3.10 Manual record Pic 3.10 In the shortcut menu, click manual record to enter the setup the manual record interface. Manual record menu illustration Manual record menu include several parts: Channel:☑”means open;“□”means close。... -
Page 15: Time Setup
Skymaster NVR BOX User Manual Pic 3.11.1 Right click mouse, Choose the "General setup" and turn into it's setup interface. Time:The real time when preview, click ”refresh” after setting, make sure saving when it shows” the recording will stop once you modify the time”... -
Page 16: Screen Setup
Skymaster NVR BOX User Manual Pic 3.11.2 Right click mouse, Choose the "General setup"--→“Time Setup” System Date:chose the right Date as needed by clicking select box System Time: click and enter the local time. Date Format: Y/M/D”、“D/M/Y”、“M/D/Y” 3.11.3 Screen Setup Right click mouse, Choose the "General setup"--→“Time Setup”... -
Page 17: Hdd Setup
Skymaster NVR BOX User Manual Pic 3.11.3 3.11.4 HDD Setup Right click mouse, Choose the "General setup"--→“HDD Setup” Pic 3.11.4 Page 17 of 32... -
Page 18: Record Setup
Skymaster NVR BOX User Manual Overwrite: “☑” earliest recording files will be covered when the disk is full, “□"shows not cover. Format: “☑” stands selected, “□” stands not selected, when click "format" a confirm interface will pop up, then click confirm to format, click cancel to return the main interface 3.12 Record Setup... -
Page 19: Sensor Setup
Skymaster NVR BOX User Manual 3.12.2 Sensor Setup Pic 3.12.2 Right click mouse, Choose the "General setup"--→“Record Setup”--→“Sensor Setup” Channel: choose the right channel, click the select box to choose Work mode: setting to start alarm or not Alarm duration: set up alarm duration time Recording channel: When alarm is triggered, channel needed to be recorded Alarm: “☑”... -
Page 20: Network Setup
Skymaster NVR BOX User Manual 3.13 Network Setup 3.13.1 Network Setup Pic 3.13.1 Right click mouse, Choose the "General setup"--→“Network Setup” automatically obtain IP DHCP:select whether to start up DHCP to 。“☑”means works ;“□” means non-work Could ID: after connecting internet ,the cloud ID will show on line with a number ,it can be used in IP remote monitoring in ESeenet network server IP address :the IP address must be unique and can not be in conflict with the host or workstation on the same... -
Page 21: Ftp
Skymaster NVR BOX User Manual Select the right network server and input user name, password and domain name Pic 3.13.2 3.13.3 FTP Right click mouse, Choose the "General setup"--→“Network Setup”--→“FTP” Pic 3.13.3 Page 21 of 32... -
Page 22: Pppoe
Skymaster NVR BOX User Manual 3.13.4 PPPOE Right click mouse, Choose the "General setup"--→“Network Setup”--→“PPPOE” Pic 3.13.4 PPPOE configuration : Enable :“☑ PPPOE”means to start up PPPOE dial-up. “□” means not to start up PPPOE user: input the user name of ISP into edit box PPPOE password :input the password of ISP into edit box... - Page 23 Skymaster NVR BOX User Manual Sender Full email address, for example: 123456@126.com Sendee (receiver) Full email address,can also use sender’s email address interval Time gap for each two email Health Mail Interval Time gap for email sending when NVR is normal working If email can not be sent, make sure the email system has SMTP server.
-
Page 24: Channel Setup
Skymaster NVR BOX User Manual 3.14 Channel Setup 3.14.1 Encode Setup Pic 3.14.1 Right click mouse, Choose the "General setup"--→“Channel Setup”--→“Encode Setup” 3.14.2 Channel OSD Right click mouse, Choose the "General setup"--→“Channel Setup”--→“Channel OSD” You can name each channel and adjust the color of each channel. -
Page 25: Video Detection
Skymaster NVR BOX User Manual Pic 3.14.2 3.14.3 Video Detection Right click mouse, Choose the "General setup"--→“Channel Setup”--→“Video Detection” Pic 3.14.3 Sensitivity : chose the trigger video detection sensitivity Page 25 of 32... - Page 26 Skymaster NVR BOX User Manual Detection type:select detection type --motion, video loss ,“keep out" alarm Alarm duration: after chose the trigger video detection, the time alarm last Area edit : set motion detection area ;move by choosing left of mouse.
-
Page 27: System Admin
Skymaster NVR BOX User Manual Pic 3.14.5 3.15 System Admin Right click mouse, Choose the "General setup"--→“System Admin” 3.15.1 System version Right click mouse, Choose the "General setup"--→“System Admin”--→“System Version” Page 27 of 32... -
Page 28: Hdd Info
Skymaster NVR BOX User Manual Pic 3.15.1 3.15.2 HDD info Right click mouse, Choose the "General setup"--→“System Admin” --→”HDD info” Pic 3.15.2 3.15.3 System log Right click mouse, Choose the "General setup"--→“System Admin” --→”System Log” Page 28 of 32... -
Page 29: User Management
Skymaster NVR BOX User Manual Choose the log type which need to check from list box, and input the time period in the edit box, then click" search", the related log information will showed below, you can turn the page by click " previous" and "next", or input target page to turn Pic 3.15.3... -
Page 30: System Maintenance
Skymaster NVR BOX User Manual In the management tool, click" user management ". Add user: input a new user name in the edit box and set up the operational authority. Choosing in the right check box, “☑” users can use it, “□” users can not use it. Click the "password setup" to set the new password, or it can be the default password. - Page 31 Skymaster NVR BOX User Manual Pic 3.15.6 In the " management tool", click "HD management",enter setting interface Auto reboot: setting automatic reboot time, it can set" Saturday to Sunday" . "Never" means do not reboot automatically. Firmware upgrade: copy firmware to the root directory of USB drive,insert USB,select the USB storage device, then click "start"...
-
Page 32: Exit System
Skymaster NVR BOX User Manual 3.15.7 Factory setting Right click mouse, Choose the "General setup"--→“System Admin” --→”Factory Setting” Pic 3.15.7 Select the terms which need factory setting, click "OK"to save and exit or click "cancle" to exit without saving. Remarks: after factory setting, all the settings will be the initial one, please use carefully.
Need help?
Do you have a question about the NVR BOX and is the answer not in the manual?
Questions and answers