Advertisement

SOLO

Quick Start Guide

Quick Start Guide
Quick Start Guide
Quick Start Guide
Quick Start Guide
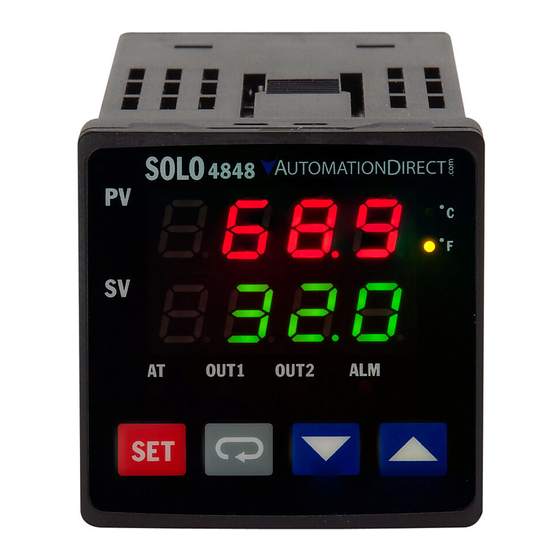
SOLO Temperature Controller
SL4848 Series
2015-04-20
5011654407-S447
This Quick Start Guide provides basic information on setting up the SOLO temperature controller. For
advanced setup and communication control as well as free configuration software visit the
AutomationDirect web site at www.AutomationDirect.com.
Product Support and Configuration Software
• For product support, specifications, and installation troubleshooting, a complete
User Manual can be downloaded from the On-line Documentation area of the
AutomationDirect web site.
• For additional technical support and questions, call our Technical Support team
@ 1-800-633-0405 or 770-844-4200.
• Configuration software for the SOLO controller is available for free download
at www.AutomationDirect.com. The software allows communication and
programming for up to four controllers at the same time. Parameters, process
values, set points and temperature changes can be monitored with the soft-
ware. The setup data can be uploaded to the user's PC via RS-485 communi-
cation. The user can monitor the temperature changes of the
controllers from the "PV Monitor" Display.
3505 HUTCHINSON ROAD
CUMMING, GA 30040-5860

Advertisement

Table of Contents
loading
Need help?

Need help?

Do you have a question about the SL4848-RR and is the answer not in the manual?

Questions and answers

Subscribe to Our Youtube Channel

Summary of Contents for Solo SL4848-RR

  • Page 1: Quick Start Guide

    SL4848 Series 2015-04-20 5011654407-S447 This Quick Start Guide provides basic information on setting up the SOLO temperature controller. For advanced setup and communication control as well as free configuration software visit the AutomationDirect web site at www.AutomationDirect.com. Product Support and Configuration Software •...
  • Page 2: Safety Information

    Safety Information WARNING: To minimize the risk of potential safety problems, you should follow all applicable local and national codes that regulate the installation and operation of your equipment. These codes vary from area to area and it is your responsibility to determine which codes should be followed, and to verify that the equipment, installation, and operation are in compliance with the latest revision of these codes.
  • Page 3: General Description

    There are up to three alarm outputs available to allow seventeen alarm types in the initial setting mode. SOLO can accept various types of thermocouple, RTD, or analog inputs, and has a built in RS-485 inter- face using Modbus slave (ASCII or RTU) communication protocol.
  • Page 4: Specifications

    7 for current input operation. Output Specifications Part Number Input Voltage Output #1 Output #2 / Alarm #3* Alarm #1** Alarm #2** SL4848-RR 100 - 240 VAC Relay - SPST Relay - SPST Relay - SPST Relay - SPST SL4848-VR 100 - 240 VAC...
  • Page 5: Controller And Panel Cutout Dimensions

    Box Contents and Unpacking Instructions • Unpack the SOLO temperature controller from its shipping carton. Included in the carton is the temperature controller, mounting brackets plus hardware and this Quick Start Guide. • Inspect all equipment for completeness. If anything is missing or damaged, immediately call the Automa- tionDirect returns department @ 1-800-633-0405.
  • Page 6: Mounting Instructions

    Mounting Instructions SOLO temperature controllers can be mounted through a cutout in an enclosure or panel by using the dimen- sions shown in Section 5. The directions for mounting the controller through a cutout are: 1. Insert the temperature controller through the panel cutout.
  • Page 7: Terminal Identification

    Terminal Identification WARNING! Electric shock danger To prevent electric shock, do not connect AC power to your device until all input and output connections are completed. SL4848-RR SL4848-LR SL4848-LV SL4848-VR SL4848-VV SL4848-CR SL4848-CV Sensor Input Power Input AC Powered 0 – 10 VDC 4 –...
  • Page 8: Keypad Operation

    Parameters Parameters The SOLO temperature controller has three function modes: Initial Setting mode, Operation mode and Regulation mode. When power is first applied to the temperature controller, the module information splash screen appears. This screen shows the firmware version on the PV display and the two output types for that particular model on the SV display.
  • Page 9 11-1 Thermocouple or RTD Input 1. Access the Initial Setup mode by pressing and holding the button for three seconds. In the parameter inpt , use the buttons to select the value that corresponds to the thermocouple or RTD type that will be attached to the controller.
  • Page 10: Voltage Input

    11-2 Voltage Input 1. Access the Initial Setup mode by pressing and holding the button for three seconds. In the parameter inpt , use the buttons to select the value that corresponds to the voltage input that will be applied to the controller. See the table for voltage specifications. Press the button to save the selected value.
  • Page 11: Current Input

    11-3 Current Input 1. Install the supplied 249 ohm resistor between terminal #4 and #5. 2. Access the Initial Setup mode by pressing and holding the button for three seconds. In the parameter inpt , use the buttons to select the value that corresponds to the current input that will be applied to the controller.
  • Page 12 PID Control Setup 12-1 Note: Select the desired control mode before beginning PID Control Setup. pid0 pid3 There are four groups for storing PID parameters, (PID0) - (PID3). Press the button for pid0 less than three seconds and press the button repeatedly until the parameter appears.
  • Page 13 12-4 Cooling Loop with PID Control 1. Access the Initial Setup mode by pressing and holding the button for three seconds. Press the Ctrl button repeatedly until the parameter appears. Confirm the default value is selected for PID s-hC Cool control.
  • Page 14 12-6 Dual Heating / Cooling Loop with PID Control 1. Access the Initial Setup mode by pressing and holding the button for three seconds. Press the Ctrl button repeatedly until the parameter appears. Confirm the default value is selected for PID s-hC h1C2 control.
  • Page 15 12-7 Dual Heating / Cooling Loop with ON / OFF Control 1. Access the Initial Setup mode by pressing and holding the button for three seconds. Press the Ctrl onof button repeatedly until the parameter appears. Use the buttons to select for ON / OFF control and press the button to save the selected value.
  • Page 16 12-8 Dual Cooling / Heating Loop with PID Control 1. Access the Initial Setup mode by pressing and holding the button for three seconds. Press the Ctrl button repeatedly until the parameter appears. Confirm the default value is selected for PID s-hC h2C1 control.
  • Page 17 12-9 Dual Cooling / Heating Loop with ON / OFF Control 1. Access the Initial Setup mode by pressing and holding the button for three seconds. Press the Ctrl onof button repeatedly until the parameter appears. Use the buttons to select for ON / OFF control and press the button to save the selected value.
  • Page 18: Ramp / Soak Control

    Press the button to access the Patn parameter . Eight different Ramp / Soak patterns are possible with the Solo Temperature Controller. Use buttons to select pattern number 0 through 7 for programming. Press the button to save the selected value.
  • Page 19: Alarm Outputs

    Alarm Outputs There are up to three groups of alarm outputs (ALA1, ALA2, ALA3*). Each alarm group can be programmed for one of seven- teen different alarm types. To set up the first alarm output, press the button for three seconds. Press the button ALA1 repeatedly until the parameter...
  • Page 20: Error Display Information

    Error Display Information The chart below shows the possible error displays on the Solo temperature controller. Controller Error Display Display Position Display Meaning Cause Corrective Action The Solo controller displays this information for a few sec- Initialization The controller is in b160 onds after power up.

Table of Contents

Save PDF