Advertisement
Quick Links
Advertisement

Summary of Contents for DiDiT DAC212
- Page 1 DiDiT DAC212 Manual...
- Page 3 We are convinced you will enjoy many pleasurable hours listening to our design. This guide provides the steps needed for installing and using the DAC212, please follow this manual and when in doubt always consult your DiDiT specialist for support.
-
Page 5: Introduction: Before Use
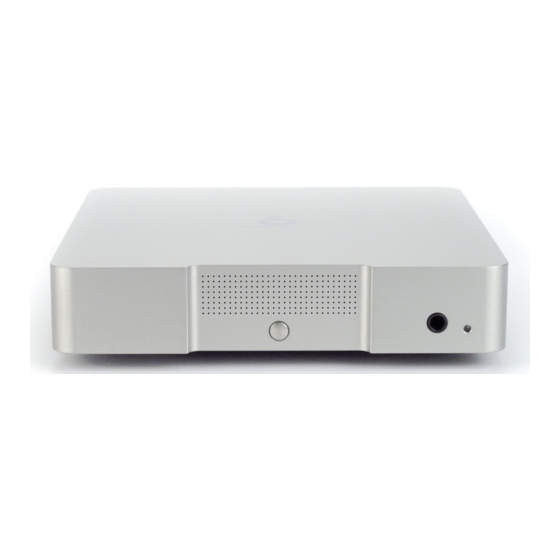
• Place the DAC212 on a solid and flat surface • Place the DAC212 close to the associated equipment • Place the DAC212 close to a power outlet • Place the DAC212 out of direct sunlight We strongly advice you to keep the original packaging, to protect the DAC212 in the future when moving or transporting the DAC212 to other locations. - Page 6 INTRODUCTION: FRONT PANEL LAYOUT Display On/off input select switch The pin hole display located at The on/off select switch is the front of the device shows located at the front center information of the selected of the device. The switch is inputs.
- Page 7 6,3mm headphone output IR & daylight sensor The headphone output is DAC212 senses the daylight located at the front of the intensity and automatically device. DAC212 by default adjusts the display intensity automatically switches setting accordingly. between outputs once a...
- Page 8 Only use type E23A 12V and exit the setup menu. Find out more Alkaline replacement about these advanced features on our bateries. Placement as website: www.didit-highend.com illustrated above. Input select Press the S button multiple times to cycle through the available inputs.
- Page 9 NOW: CONNECT PLAY ENJOY...
- Page 10 CONNECTING: REAR PANEL IN AND OUTPUTS IMPORTANT: First make all the audio Output connections before you connect the XLR outputs can be mains power cord. Check twice if found on the back of the all connections are made correctly device. (please refer to the illustrations below) When connected to the mains power, a red illuminated ring will appear...
- Page 11 Digital Inputs (6x) Input 1: AES ( AES) Display: Inputs are numbered 44.1 KHz - 192KHz from 1 to 5 on the back Input 2: Coaxial 1 ( Coax1) Display: panel. Select inputs 44.1 KHz - 192KHz using the S button Input 3: Coaxial 2 ( Coax2) Display:...
- Page 12 CONNECTING: POWER INPUT + DATA CONNECTIONS DIGITAL INPUTS...
- Page 13 DiDiT link The DiDiT link is a device data connection between DiDiT devices. The DiDiT link can be used for home automation purposes as well. Power input (90 - 260 VAC) Use the supplied AC power cord to power the device.
-
Page 14: Important Usage Information
IMPORTANT USAGE INFORMATION Avoid any contact with liquids. The Caution! Your ears are fragile DAC212 is not waterproof and is and once damaged, the effect is designed to function in a total dry irreversible. Be aware that (long environment. term) high listening levels can cause damage to your ears. - Page 15 DAC212 and your other equipment. When connected to a power amplifier, check the volume setting before you start playing music. By default the DAC212 is set to be on Proudly made by: the safe side, start at a setting of DiDiT High-End -40dB or lower and slowly turn the Reeweg 12-6 volume up.
- Page 16 CONNECT PLAY ENJOY v 1.14...
Need help?
Do you have a question about the DAC212 and is the answer not in the manual?
Questions and answers