Advertisement
Quick Links
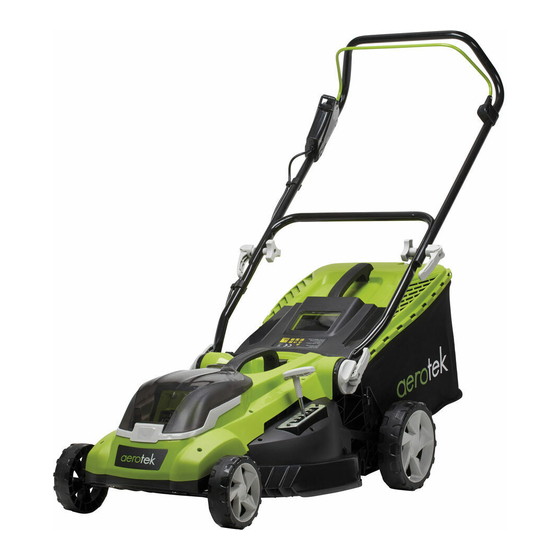
40V Lawn Mower
After Sales Support
Call 0871 911 7027
Email customerservice@aero-tek.co.uk
Product Code: G0663
Thank you for purchasing this product,
which has been made to demanding
high quality standards and is
guaranteed for domestic use against
manufacturing faults for a period of
24 months from date of purchase
For correct usage, read these instructions carefully and keep in
aerotek
aerotek
Instruction Manual
a safe place for future reference
Advertisement

Summary of Contents for Aerotek G0663
-
Page 1: Instruction Manual
Instruction Manual After Sales Support Call 0871 911 7027 Email customerservice@aero-tek.co.uk Product Code: G0663 Thank you for purchasing this product, which has been made to demanding high quality standards and is guaranteed for domestic use against manufacturing faults for a period of... - Page 2 We want you to be completely satisfied with your purchase so this aerotek is backed by our full 24 month manufacturers guarantee and an outstanding after sales service through our dedicated Helpline.
- Page 3 2. Introduction 3. Safety information and general warnings 5. Safety symbols and their meaning 6. Battery use and care 7. Description of parts 8. Assembly 9. Usage 12. Care and maintenance 14. Troubleshooting 15. Specifications 16. Plug wiring 17. Declaration of Conformity 18.
- Page 4 Do not use the mower where flammable materials such as gases liquids or dry dusty environments, the operation of the tools create sparks which ignite these elements. Check the area before commencing. Do not use the mower if the switch fails to turn it on and off. Any machine that cannot be controlled with its switch is potentially dangerous and must be checked by a qualified electrician and repaired if necessary.
- Page 5 Safety symbols and their meaning SYMBOL MEANING Precautions required that involve your safety. To reduce the risk of injury, users must read and understand user’s manual before using this product. Wear gloves, eye and head protection when operating this equipment. Do not expose machine to rain or wet conditions.
- Page 6 Wait for all components of machine to have completely stopped before touching them. The charger is intended for indoor use only. The following signal words and meanings are intended to explain the levels of risk associated with this product. SYMBOL SIGNAL MEANING DANGER...
- Page 7 When on the last green light, the battery should be fully charged before continuing to use the mower. See images below. A low battery pack requires a maximum charging period of 2 hours. The temperature of the battery may rise slightly during the charging operation. This is normal. Charge / reserve level Power reserve button LED charge indicator light...
- Page 8 Assembly Carefully remove the product and any accessories from the box. Make sure that all items listed in the packing list are included. Inspect the product carefully to make sure no breakage or damage occurred during shipping. Do not discard the packing material until you have carefully inspected and satisfactorily operated the product.
- Page 9 Installing the grass catcher bag Lift the cover (1). Lift the grass catcher by its handle (2) and place under the chute cover so that the hooks on the grass catcher frame are seated into the slots in the handle bracket. Release the cover.
- Page 10 To start the mower Open the battery door and insert the key into the slot. Press and hold the safety lock-out button see (1). Pull the handle on / off switch see (2) upwards to the handle to start the mower and release the lock-out button see (3).
- Page 11 Emptying the grass collection bag Stop the mower, allow blades to completely stop, and remove key. Lift the cover. Lift the grass catcher bag by its handle to remove from mower. Empty grass clippings. Lift the cover and reinstall the grass catcher bag. Mowing tips Note : A sharp blade will greatly enhance the performance of the mower, especially when cutting high grass.
- Page 12 Note: Release the switch to turn the mower off when crossing any gravelled area (stones can be thrown by the blade). For effective mulching, do not cut wet grass, because it tends to stick to the underside of the deck, preventing proper mulching of grass clippings.
- Page 13 Cleaning the mower WARNING: In order to reduce the risk of electric shock, do not expose the mower to water. The underside of the mower deck should be cleaned using a stiff brush after each use, because grass clippings, leaves, dirt, and other debris will accumulate, which will cause rust and corrosion. Remove any build-up of grass and leaves on or around the motor cover using a stiff brush (do not use water).
-
Page 14: Troubleshooting
Troubleshooting PROBLEM POSSIBLE CAUSE POSSIBLE SOLUTION The mower does not start. The battery is not charged. Charge the battery. The switch is defective. Call the Customer Service team if still under guarantee. Alternatively seek professional support of a qualified repairer. Grass jammed at blade. - Page 15 Specification Voltage 40V DC Battery capacity Li-ion 4,0Ah No Load Speed 3600 rpm Cutting width 400 mm Height adjustments 25-75cm (6 central) Charge time 150 minutes...
- Page 16 Plug Wiring These safety instructions should be read carefully and kept in safe place for future reference. This appliance is fitted with a plug that complies with BS 1363. Only high quality 13A (square pin) plugs that comply with this standard should be fitted. Wires are coloured as follows: Brown –...
-
Page 17: Declaration Of Conformity
The Low Voltage Directive hereby declare that: Equipment Battery Operated Lawnmower Model number G0663 / LMA36 is in conformity with the applicable requirements of the following documents Ref. No. EN 55014-1:2006+A1:2009+A2:2011; EN 55022:2010+A1:2008+A2:2011; EN 55014-2:1997+A1:2001+A2:2008; EN 61000-4-2:2009; EN 61000-4-3:2006+A1:2008+A2:2010; EN 60335-1:2012+A11:2014, EN 60335-2-77:2010,... - Page 18 GUARANTEE IMPORTANT Please do not return this product without first calling the Customer Service number below: 0871 911 7027 Thank you for purchasing this product, which has been made to demanding high quality standards and is guaranteed for domestic use against manufacturing faults for a period of 24 months from the date of purchase.
Need help?
Do you have a question about the G0663 and is the answer not in the manual?
Questions and answers
I am an Ikea type nerd . Can not fit anything together. I can not seem to attach the mulching thingy . The instruction manual diagramme is just not clear enough. Have tried every point of the compass to no avail. Is there video available please ??? Regards T. Kirby