Table of Contents
Advertisement
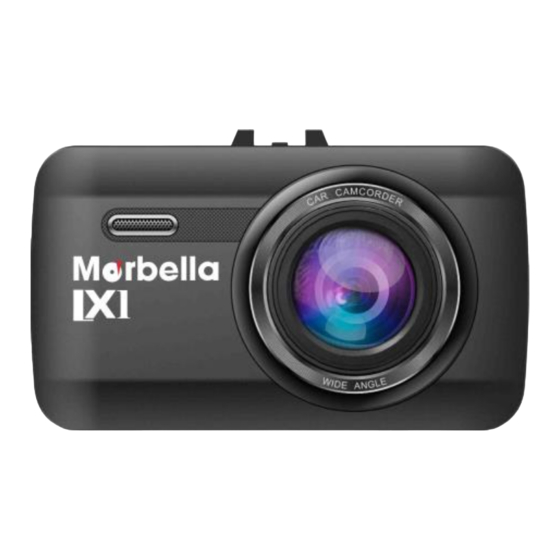
USER MANUAL
Trademarks
All brand and product names are trademarks or registered trademarks of
Maka GPS Technologies Group. In association with Maka GPS
Technologies Private Limited (Singapore), Maka GPS Technologies
Sdn. Bhd. (Malaysia), Maka Technologies Group (H.K.) Limited. and
Maka Corporation USA
Inc.
The information in this manual is subject to change without notice
.
www.makagps.com
8/2016. R1.1
1
© 2016 Maka Technologies Group. All Rights Reserved
Advertisement
Table of Contents

Related Manuals for Maka Technologies Marbella LX1

Summary of Contents for Maka Technologies Marbella LX1
- Page 1 All brand and product names are trademarks or registered trademarks of Maka GPS Technologies Group. In association with Maka GPS Technologies Private Limited (Singapore), Maka GPS Technologies Sdn. Bhd. (Malaysia), Maka Technologies Group (H.K.) Limited. and Maka Corporation USA Inc.
-
Page 2: Safety Information
Do not use your device while it is charging or touch your device with wet hands Doing so may cause electric shock. Do not short-circuit the charger or the device Doing so may cause electric shock or fire, or the battery may malfunction or explode. © 2016 Maka Technologies Group. All Rights Reserved... - Page 3 Avoid exposing the device to high external pressure, which can lead to an internal short circuit and overheating. Protect the device, battery and charger from damage Avoid exposing your device and battery to very cold or very hot temperatures. © 2016 Maka Technologies Group. All Rights Reserved...
- Page 4 If children use the device, make sure that they use the device properly. Do not handle a damaged or leaking Lithium Ion (Li-Ion) battery For safe disposal of your Li-Ion battery, contact your nearest authorised service centre © 2016 Maka Technologies Group. All Rights Reserved...
- Page 5 Make sure that no object is blocking the camera lens and no reflective material appears near the lens. Please keep the lens clean. If the car’s windscreen is tinted with a dark solar film coating, it may affect the recording quality. © 2016 Maka Technologies Group. All Rights Reserved...
- Page 6 Avoid charging your device for more than a week, as overcharging may shorten battery life. Over time, unused device will discharge and must be recharged before use. Disconnect the charger from power sources when not in use. © 2016 Maka Technologies Group. All Rights Reserved...
- Page 7 Do not distribute copyright-protected material without the permission of the content owners. Doing this may violate copyright laws. The manufacturer is not liable for any legal issues caused by the user’s illegal use of copyrighted material. © 2016 Maka Technologies Group. All Rights Reserved...
- Page 8 Business users should contact their supplier and check the terms and conditions of the purchase contract. This product and its electronic accessories should not be mixed with other commercial wastes for disposal. © 2016 Maka Technologies Group. All Rights Reserved...
- Page 9 DAMAGES ARISING OUT OF, OR IN CONNECTION WITH, ANY INFORMATION CONTAINED IN, OR AS A RESULT OF THE USE OF ANY CONTENT OR SERVICE BY YOU OR ANY THIRD PARTY, EVEN IF ADVISED OF THE POSSIBILITY OF SUCH DAMAGES.” © 2016 Maka Technologies Group. All Rights Reserved...
- Page 10 Maka GPS Technologies Group is neither responsible nor liable for customer service related to the content and services. Any question or request for service relating to the content or services should be made directly to the respective content and service providers. © 2016 Maka Technologies Group. All Rights Reserved...
-
Page 11: About This Manual
Default applications that come with the device are subject to updates and may no longer be supported without prior notice. If you have questions about an application provided with the device, contact Maka Service Centre. © 2016 Maka Technologies Group. All Rights Reserved... -
Page 12: Table Of Contents
Formatting Memory Card Turning the device on and off Operation of your LX1 FHD Digital Roadcorder VIDEO SETTING Video Resolution Loop Recording 25-26 White Balance Exposure Auto Record Date/Time Watermark Motion Detector Plate Number © 2016 Maka Technologies Group. All Rights Reserved... - Page 13 Card Info Formatting Language Date/ Time Setup Screen Switch (Saver) Restore Factory Setting Playback Mode Delete Files PHOTO SETTING Photo Resolution Photo Compression Quality White Balance Exposure Photo Watermark General Troubleshooting 39-40 © 2016 Maka Technologies Group. All Rights Reserved...
-
Page 14: Product Specifications
English, Traditional/Simplified Chinese, France, Spanish, Portuguese, Deutsch, Italian, Russian Japan USB 2.0 Loop recording Close /1min /3 min/5 min Auto screen off Close/10 sec/20 sec/ 30 sec PC Camera Microphone mute ON/OFF © 2016 Maka Technologies Group. All Rights Reserved... -
Page 15: Getting Started
USB Charging Port Menu Button SD Card Slot Up Navigation Button Soft Reset pin hole Hotkey : Motion/Normal record) Down Navigation Button Suction Slot ((Hotey : Mute/Unmute Button) Speaker Enter/Recording Button Mode Switch Button © 2016 Maka Technologies Group. All Rights Reserved... -
Page 16: Understanding Of Your Lx1 Fhd Digital Roadcorder
DOWN – Press to mute/ unmute the microphone during recording. Press to enter in to Video/System Setting Press and release using a fine pin to reset the device if it has RESET fatal errors or hang-ups, or freezes. © 2016 Maka Technologies Group. All Rights Reserved... -
Page 17: Status Icons
Getting Started Understanding your LX1 FHD Digital Roadcorder and Buttons Status Icons © 2016 Maka Technologies Group. All Rights Reserved... -
Page 18: Standard Packaging Of Your Lx1 Fhd Digital Roadcorder
Malfunctions caused by using unapproved accessories are not covered by the warranty service. Availability of all accessories is subject to change depending entirely on manufacturing companies. For more information about available accessories, refer to the Maka GPS Technologies Group website. © 2016 Maka Technologies Group. All Rights Reserved... -
Page 19: Installation Of Your Lx1 Fhd Digital Roadcorder
The recorder supports Micro SD cards with up to 32GB capacity. You are advised to use a Class 10 memory card with at least 8GB capacity. DO NOT insert or remove the memory card when operating the device. © 2016 Maka Technologies Group. All Rights Reserved... -
Page 20: Charging The Battery
While charging, the device may heat up. This is normal and should not affect the device’s lifespan or performance. If the device is not charging properly, take the device and the charger to a Maka Service Centre. © 2016 Maka Technologies Group. All Rights Reserved... -
Page 21: Inserting A Memory Card
Push the memory card into the slot until it locks in place. It is recommended to reformat a memory card every time images are transferred from it to a computer, or at least once a month. © 2016 Maka Technologies Group. All Rights Reserved... -
Page 22: Removing Memory Card
Doing so can cause data to be lost or corrupted or damage to the memory card or device. Maka GPS Technologies Group is not responsible for losses that result from the misuse of damaged memory cards, including the loss of data. © 2016 Maka Technologies Group. All Rights Reserved... -
Page 23: Formatting Memory Card
Before formatting the memory card, remember to make backup copies of all important data stored on the device. The manufacturer’s warranty does not cover loss of data resulting from user actions. © 2016 Maka Technologies Group. All Rights Reserved... -
Page 24: Turning The Device On And Off
A goodbye message will be displayed on screen as shown in the image below. LX1 FHD Digital Roadcorder will be switch on and off automatically if you have permanently connected it to the car charger. © 2016 Maka Technologies Group. All Rights Reserved... -
Page 25: Video Setting
It is important to make backup copies of all important data stored on the device. The manufacturer’s warranty does not cover loss of data resulting from user actions. © 2016 Maka Technologies Group. All Rights Reserved... -
Page 26: White Balance
5 Press on the UP or DOWN button to make your selection 6 Press on to confirm your entry and exit to setting 7 Press on twice to exit Setting and back to recording mode © 2016 Maka Technologies Group. All Rights Reserved... -
Page 27: Exposure
2 Press on UP or DOWN button to navigate to the function that shows Auto Record 3 Press on to trigger: OFF / ON 4 Press on twice to exit Setting and back to recording mode © 2016 Maka Technologies Group. All Rights Reserved... -
Page 28: Date/Time Watermark
Alternatively, you can choose using the hot keys for shortcuts Hot Keys during recording mode: Press on UP button – Press and hold to change and once activate will see the icon on the screen © 2016 Maka Technologies Group. All Rights Reserved... -
Page 29: Plate Number
7. Repeat point 6 till the last entry and exit to Setting (Empty Slot could use selection between letter 0 and A) 8 Press on twice to exit Setting and back to recording mode © 2016 Maka Technologies Group. All Rights Reserved... -
Page 30: Gravity Sensing (G Sensor)
You may choose to turn off the microphone so that all the recorded videos will be muted. 1 Press on twice to enter system setting( 2 Press on UP or DOWN button to navigate to the function that shows Recording Sound © 2016 Maka Technologies Group. All Rights Reserved... -
Page 31: Volume
4 Press on the UP or DOWN button to make your selection 5 Press on to confirm your entry and exit to setting 6 Press on once to exit Setting and back to recording mode © 2016 Maka Technologies Group. All Rights Reserved... -
Page 32: Keytone
4 Press on the UP or DOWN button to make your selection 5 Press on to confirm your entry and exit to setting 6 Press on once to exit Setting and back to recording mode © 2016 Maka Technologies Group. All Rights Reserved... -
Page 33: Card Info
4 Press on the UP or DOWN button to make your selection 5 Press on to confirm your entry and exit to setting 6 Press on once to exit Setting and back to recording mode © 2016 Maka Technologies Group. All Rights Reserved... -
Page 34: Date/ Time Setup
Setting and back to recording mode Alternatively, you can choose using the hot keys for shortcuts Hot Keys during recording mode: • Press once to turn off/on the LCD screen with continuous recording © 2016 Maka Technologies Group. All Rights Reserved... -
Page 35: Restore Factory Setting
7 REWIND : Press the UP button to roll back your video play by 2sec with each press Note : Manual lock of the video footage by pressing the manual lock icon once to lock or unlock the footage. © 2016 Maka Technologies Group. All Rights Reserved... -
Page 36: Delete Files
5 Press on the UP or DOWN button to make your selection 6 Press on to confirm your entry and exit to setting 7 Press on twice to exit Setting and back to photo mode © 2016 Maka Technologies Group. All Rights Reserved... -
Page 37: Photo Compression Quality
5 Press on the UP or DOWN button to make your selection 6 Press on to confirm your entry and exit to setting 7 Press on twice to exit Setting and back to photo mode © 2016 Maka Technologies Group. All Rights Reserved... -
Page 38: Exposure
3 Press on UP or DOWN button to navigate to the function that shows Date/Time Watermark 4 Press on to trigger: OFF / ON 5 Press on twice to exit Setting and back to photo mode © 2016 Maka Technologies Group. All Rights Reserved... -
Page 39: General Troubleshooting
HD video minimum 8GB Class 10 recording. speed. Encounter “file MicroSD card might be Reformat the memory card. error” when trying to corrupted. There bad sectors in playback pictures the card. or videos © 2016 Maka Technologies Group. All Rights Reserved... -
Page 40: General Troubleshooting
TV properly. screen 2 Wrong TV Input mode 2 Refer to the back panel of your TV to track the correct TV input. Make sure you have selected the correct input. © 2016 Maka Technologies Group. All Rights Reserved...
Need help?
Do you have a question about the Marbella LX1 and is the answer not in the manual?
Questions and answers