Table of Contents
Advertisement
Quick Links
www.RainmakerSprayers.com
ASSEMBLY AND OPERATING
INSTRUCTION MANUAL
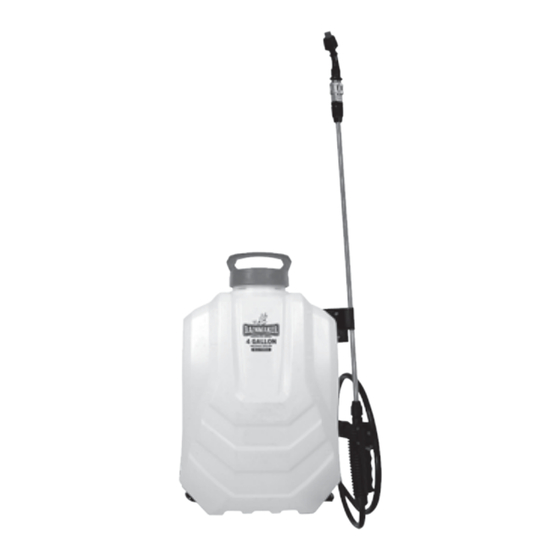
18 VOLT LITHIUM ION BACKPACK SPRAYER-4 GALLON
Product# 708910
Front
Back
View
View
Please read this manual for instructions and precautions
before using this product. Keep this manual and the
receipt in a safe place for future reference!
Advertisement
Table of Contents

Subscribe to Our Youtube Channel
Summary of Contents for RainMaker 708910
- Page 1 ASSEMBLY AND OPERATING INSTRUCTION MANUAL 18 VOLT LITHIUM ION BACKPACK SPRAYER-4 GALLON Product# 708910 Front Back View View Please read this manual for instructions and precautions before using this product. Keep this manual and the receipt in a safe place for future reference!
-
Page 2: Safety Information
SAFETY INFORMATION For your safety, follow these precautions when using your Rainmaker 18 Volt Lithium Ion Backpack Sprayer - 4 Gallon (Part # 708910) Important Safety Guidelines: PLEASE READ THIS MANUAL COMPLETELY AND FULLY UNDERSTAND ALL INSTRUCTIONS AND WARNINGS BEFORE OPERATING THIS UNIT. -
Page 3: Parts List
13. Keep away from children, bystanders and animals. PARTS LIST PART DESCRIPTION QUANTITY Rainmaker lithium ion battery backpack sprayer - 4 gallon (a) Shoulder straps (b) Rainmaker lithium ion charging station (c) Rainmaker lithium ion battery pack (d) Adjustable conical spray nozzle (e) - Page 4 LANCE AND HANDLE ASSEMBLY 1. Locate the lance, handle and end of sprayer tubing. 2. Insert tubing into bottom end of handle. 3. Thread plastic nut onto the bottom end of the handle. 4. Insert lance into top end of handle. 5.
-
Page 5: Charging Instructions
CHARGING INSTRUCTIONS *Please charge the battery completely prior to use. * 1. Ensure the sprayer battery charger complies with AC on the main power supply if you are unsure contact your local dealer or qualified electrician. 2. Charge your sprayer indoors ONLY. 3. -
Page 6: Operation
2. It is recommended to test the sprayer, using clean water, for leaks in any of the connections prior to adding any solution mix to your sprayer. 3. The Rainmaker Sprayer includes 3 sprayer nozzles. Choose the ® spray nozzle which best suits your needs. See page 10 for spray patterns. -
Page 7: Cleaning And Maintenance
SPRAYING 1. To turn on the sprayer simply choose one of two flow rate settings. “I” for low or “II” for high. When sprayer is in the “O” position the sprayer is off. (See Figure 6) 2. Check bottom indicator light. Green light indicates a charged battery. -
Page 8: Battery Maintenance And Storage
STORAGE 1. Ensure that all liquids are removed from the sprayer. 2. Store sprayer in an indoor area such as a workshop or a storage shed. 3. Follow all storage requirements for lithium ion battery. (See Battery Maintenance And Storage) BATTERY MAINTENANCE AND STORAGE Please follow all operating requirements. -
Page 9: Technical Specifications
WARNINGS, CONTINUED • DO NOT use battery for any other products. • DO NOT let battery get wet. Keep dry. • Please follow all Federal and State Laws when disposing of lithium ion batteries. DO NOT throw in trash or landfills. TECHNICAL SPECIFICATIONS Rated voltage: DC 18 V... - Page 10 SAFETY INFORMATION For your safety, follow these precautions when using your Rainmaker 18 Volt Lithium Ion Backpack Sprayer - 4 Gallon (Part # 708910) Important Safety Guidelines: Fan Style Spray Nozzle Attachment PLEASE READ THIS MANUAL COMPLETELY AND FULLY UNDERSTAND ALL INSTRUCTIONS AND WARNINGS BEFORE OPERATING THIS UNIT.
- Page 11 LIQUID VOLUME CONVERSION CHART OUNCES CUPS PINTS QUARTS GALLONS LITERS ( APX ) 1/32 1/16...
- Page 12 RAINMAKER SPRAYER PRODUCTS ® In addition to the Pressure Pump Sprayers, Rainmaker multi-pur- ® pose sprayers are available in a variety of other sizes for home and garden use: 4 GALLON AND 5 GALLON BACKPACK SPRAYERS AND 64 HAND SPRAYERS...


Need help?
Do you have a question about the 708910 and is the answer not in the manual?
Questions and answers