Table of Contents
Advertisement
®
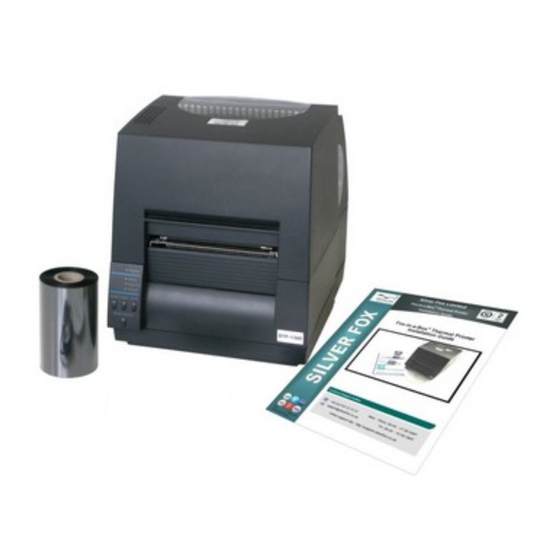
Fox-in-a-Box
Thermal Printer
Installation Guide
For latest information always visit:
www.silverfox.co.uk
Support Hotline:
Tel: +44 (0)1707 37 37 27
Mon - Thurs: 08:45 - 17:30 GMT
Email: support@silverfox.co.uk
Fri: 08:45 - 16:30 GMT
Online Support Site: http://support.silverfox.co.uk
Silver Fox Limited, Swallow Court, Swallowfields, Welwyn Garden City, AL7 1SA, UK
Tel: +44 (0)1707 37 37 27 Fax: +44 (0)1707 37 21 93 Email:
sales@silverfox.co.uk
R4.0
Copyright © 2015 Silver Fox Limited
www.silverfox.co.uk
Advertisement
Table of Contents

Summary of Contents for Silver Fox Fox-in-a-Box
- Page 1 Mon - Thurs: 08:45 - 17:30 GMT Email: support@silverfox.co.uk Fri: 08:45 - 16:30 GMT Online Support Site: http://support.silverfox.co.uk Silver Fox Limited, Swallow Court, Swallowfields, Welwyn Garden City, AL7 1SA, UK Tel: +44 (0)1707 37 37 27 Fax: +44 (0)1707 37 21 93 Email: sales@silverfox.co.uk R4.0 Copyright ©...
-
Page 2: Table Of Contents
Fox-in-a-Box® Thermal Printer Installation Guide Contents Introduction Page 2 Carton Contents Page 3 Loading Thermal Ribbons Page 4 - 5 Connecting The Printer Page 6 Software Installation Page 7 ® Loading Label Rolls - Fox Flo Tie-on Labels Page 8 - 10... - Page 3 Fox-in-a-Box® Thermal Printer Installation Guide ® ® Thank you for choosing Fox-in-a-Box from Silver Fox ® Fox-in-a-Box is the result of many years working with engineers across the globe enabling us to combine a printer that offers the benefits of being easy to: set up, run, change labels, change ribbons and is a printer that has proved to be very reliable and is suitably quiet enabling you to use it in normal office conditions.
-
Page 4: Carton Contents
Fox-in-a-Box® Thermal Printer Installation Guide Carton Contents The printer carton should contain the items below: * Guides included depending on label type ordered. If any item is not present then please contact our sales department: Tel: +44 (0) 1707 37 37 27 Email: sales@silverfox.co.uk... -
Page 5: Loading Thermal Ribbons
* Please note the images show a half width ribbon. There are 2 widths of ribbon available. Your Fox-in-a-Box has been supplied with either the full or half width ribbon depending on the labels you advised you will be using. If we are not sure, then you will automatically receive the full width. - Page 6 Fox-in-a-Box® Thermal Printer Installation Guide Loading Thermal Ribbons 4. Slide the empty card core onto the ribbon Place the empty card core on the ribbon holder holder as shown: onto the front ribbon mountings and peal off the top strip from the double-sided tape : 6.
-
Page 7: Connecting The Printer
3. Insert the plug of the power cord to an AC outlet. This product has a USB interface that can be used to receive printing data. Please note that the serial port (RS232C) is not used with the Silver Fox Labacus® software. To connect the USB cable, proceed as follows: 1. -
Page 8: Software Installation
Your PC will generate a unique activation code, then together with the Setup Key, you will be prompted to return this information to Silver Fox. We will then issue your Full License key. We recommend you do this as soon as possible. - Page 9 Fox-in-a-Box® Thermal Printer Installation Guide ® Loading Label Rolls - Fox-Flo Tie-on Labels 1. Open the printer lid and push the large blue 2. Slide the top sensor bar all the way over to the head-open lever to release the head unit.
-
Page 10: Loading Label Rolls - Fox Flo ® Tie-On Labels
Fox-in-a-Box® Thermal Printer Installation Guide ® Loading Label Rolls - Fox-Flo Tie-on Labels 5. Push down the front of the guidance system so that is securely held (you should hear a 'click'). Note: If the guidance system is not seated correctly in the printer then this will cause printing problems. - Page 11 Fox-in-a-Box® Thermal Printer Installation Guide ® Loading Label Rolls - Fox-Flo Tie-on Labels 8. Manually feed the label roll through the printer. 9. Align the moveable guide so that it rests against the right hand side of the label roll.
-
Page 12: Loading Label Rolls - Fox Tie-On Labels
Fox-in-a-Box® Thermal Printer Installation Guide Loading Label Rolls - Fox Tie-on Labels 1. Open the printer lid and push the large blue 2. Slide the top sensor bar all the way over to the head-open lever to release the head unit. - Page 13 Fox-in-a-Box® Thermal Printer Installation Guide Loading Label Rolls - Fox Tie-on Labels 5. Push down the front of the guidance system so that is securely held (you should hear a 'click'). Note: If the guidance system is not seated correctly in the printer then this will cause printing problems.
- Page 14 Fox-in-a-Box® Thermal Printer Installation Guide Loading Label Rolls - Fox Tie-on Labels 8. Manually feed the label roll through the printer. 9. Align the moveable guide so that it rests against the right hand side of the label roll. 10. Close the head unit by pushing down the 11.
-
Page 15: Loading Label Rolls - Legend™ Tie-On Labels
Fox-in-a-Box® Thermal Printer Installation Guide Loading Label Rolls - Legend™ Tie-on Labels 1. Open the printer lid and push the large blue 2. Fit the label roll onto the media holder bar and head-open lever to re-lease the head unit. - Page 16 Fox-in-a-Box® Thermal Printer Installation Guide Loading Label Rolls - Legend™ Tie-on Labels 7. Close the head unit by pushing down the head 8. Ensure that the Horizontal and Vertical dials close knob until the head unit locks into position have been set to the correct setting for the labels (you will hear a "click").
-
Page 17: Loading Label Rolls - Legend™ Heatshrink & Non-Shrink
Fox-in-a-Box® Thermal Printer Installation Guide Loading Label Rolls - Legend™ Heatshrink & Non-Shrink 1. Open the printer lid and push the large blue 2. Slide the top sensor bar all the way over to the head open lever to release the head unit. - Page 18 Fox-in-a-Box® Thermal Printer Installation Guide Loading Label Rolls - Legend™ Heatshrink & Non-Shrink 5. Push down the front of the guidance system so that is securely held (you should hear a 'click'). Note: If the guidance system is not seated correctly in the printer then this will cause printing problems.
- Page 19 Fox-in-a-Box® Thermal Printer Installation Guide Loading Label Rolls - Legend™ Heatshrink & Non-Shrink 8. Close the head unit by pushing down the head 9. Ensure that the Horizontal and Vertical dials close knob until the head unit locks into position have been set to the correct setting for the labels (you will hear a "click").
-
Page 20: Loading Label Rolls - Legend™ 2-Part Labels
Fox-in-a-Box® Thermal Printer Installation Guide Loading Label Rolls - Legend™ 2-Part Labels 1. Open the printer lid and push the large blue 2. Fit the label roll onto the media holder bar and head-open lever to release the head unit. - Page 21 Fox-in-a-Box® Thermal Printer Installation Guide Loading Label Rolls - Legend™ 2-Part Labels 7. Close the head unit by pushing down the head 8. Ensure that the Horizontal and Vertical dials close knob until the head unit locks into position have been set to the correct setting for the labels (you will hear a "click").
-
Page 22: Loading Label Rolls - Endurance ® Valve Tags
Fox-in-a-Box® Thermal Printer Installation Guide ® Loading Label Rolls - Endurance Valve Tags 1. Open the printer lid and push the large blue head-open lever to release the head unit. 2. Lift up the top sensor bar then slide the bottom sensor over so that the white mark is central in the sensor hole in the labels. - Page 23 Fox-in-a-Box® Thermal Printer Installation Guide ® Loading Label Rolls - Endurance Valve Tags 5. Lift up the top sensor bar. Feed through the 6. Close the head unit by pushing down the head labels then close the top sensor bar.
-
Page 24: Loading Label Rolls - Prolab ® Asset Labels
Fox-in-a-Box® Thermal Printer Installation Guide ® Loading Label Rolls - Prolab Asset Labels 1. Open the printer lid and push the large blue 2. Slide the top sensor bar all the way over to the head open lever to release the head unit. - Page 25 Fox-in-a-Box® Thermal Printer Installation Guide ® Loading Label Rolls - Prolab Wrap-around Labels 1. Open the printer lid and push the large blue 2. Fit the label roll onto the media holder bar and head-open lever to re-lease the head unit.
-
Page 26: Loading Label Rolls - Prolab ® Wrap-Around Labels
Fox-in-a-Box® Thermal Printer Installation Guide ® Loading Label Rolls - Prolab Wrap-around Labels 7. Close the head unit by pushing down the head 8. Ensure that the Horizontal and Vertical dials close knob until the head unit locks into position have been set to the correct setting for the labels (you will hear a "click"). -
Page 27: Thermal Ribbon Usage Guide
Fox-in-a-Box® Thermal Printer Installation Guide Thermal Ribbon Usage Guide Thermal Ribbon Usage Guide TSR3/300/60 TSR3/300/110 Product Type 1 Roll 2 Rolls 1 Roll 2 Rolls Legend™ LM9013T 23,000 Legend™ L6/20T 100,000 Legend™ L6/30T 50,000 Legend™ L6/50T 50,000 Prolab® Wrap-around Labels PSA1/07/2512T 30,000 Prolab®... -
Page 28: Printer Settings
Fox-in-a-Box® Thermal Printer Installation Guide Printer Settings Below are the recommended settings for your printer. Refer to the chart included with your printer if these differ. Please contact our Support Team if you have any questions. ® Fox-Flo Tie-on Labels... - Page 29 Fox-in-a-Box® Thermal Printer Installation Guide Printer Settings Below are the recommended settings for your printer. Refer to the chart included with your printer if these differ. Please contact our Support Team if you have any questions. Legend™ Zero-Halogen Heatshrink Recommended Printer Settings...
- Page 30 Fox-in-a-Box® Thermal Printer Installation Guide Printer Settings Below are the recommended settings for your printer. Refer to the chart included with your printer if these differ. Please contact our Support Team if you have any questions. ® Endurance Valve Tags...
-
Page 31: Trouble-Shooting
Is there a job stuck in the printer queue? To check this go to File > Show Printers and Devices Window. Right-click on the 'Silver Fox DTP-1' printer then select 'See what's printing'. This will open the print queue for the printer. If there are jobs there then go to 'Printer >... - Page 32 Fox-in-a-Box® Thermal Printer Installation Guide Trouble-Shooting The printer should then be detected and the identified port displayed, you can now proceed to print: The printer lights are flashing The chart below shows the alarm and error indications and shows the usual causes for these:...
-
Page 33: Laser Printable Options
Fox-in-a-Box® Thermal Printer Installation Guide Laser Printable Options ® ® Prolab Optical Fibre Flag Labels Prolab Wrap-around Cable Labels Legend™ 2-Part Labels Legend™ Tie-on Cable Labels ® ® Prolab Wiring Block Labels Prolab General / Faceplate Labels ® Prolab Patch Panel Labels... -
Page 34: Important Information
Fox-in-a-Box® Thermal Printer Installation Guide Important Information Important Safety Instructions Read all of these instructions and save them for later reference. Follow all warnings and instructions marked on the product. Unplug this product from the wall outlet before cleaning. Do not use liquid or aerosol cleaners. Use a damp cloth for cleaning. - Page 35 Fox-in-a-Box® Thermal Printer Installation Guide Important Information Compliance Statement for European Users CE marking shows conformity to the following criteria and provisions: Low Voltage Directive (2006/95/EC, formerly 73./23/EEC)/EN60950-1 EMC Directive (2004/108/EC, formerly 89/336/EEC)/EN55022, EN55024, EN61000-3-2 & EN61000-3-3 GS Mark Statement This product has been tested under EN ISO 7779 and has an acoustic level output no higher than 55db(A).
-
Page 36: Copyright © 2015 Silver Fox Limited
Fox-in-a-Box® Thermal Printer Installation Guide Important Information WEEE MARK If you want to dispose this product, do not mix with general household waste. There is a seperate collection systems for used electronics products in accordance with legislation under the WEEE Directive (Directive 2002/96/EC) and is effective only within European Union.
Need help?
Do you have a question about the Fox-in-a-Box and is the answer not in the manual?
Questions and answers